


Managing a growing inventory can make it difficult to quickly find the assets or software you need. Desk365’s Custom Views option help you organize assets and software by grouping them into lists based on a defined set of criteria.
For example, you can create a view for hardware assets at a specific location, assets managed by a particular group, software with a specific status, and many more.
Using custom views can help your IT and support teams quickly access the assets or software they need and focus on the information that matters to them.
You can create custom views on both the Assets List and Software List based on your requirements.
Creating a custom view
The Assets List and Software List lets you filter and view the assets or software you want to work with. You can filter records using criteria such as asset/software type, status, location, vendor, managing group, and other available parameters.
You can create filtered views that suit your requirements, save them as Custom Views, and access them from the Custom Views section in the left navigation panel.
The columns selected for a custom view are also saved with the view and displayed whenever you access it.
These are the steps you need to follow to create a custom view in Desk365:
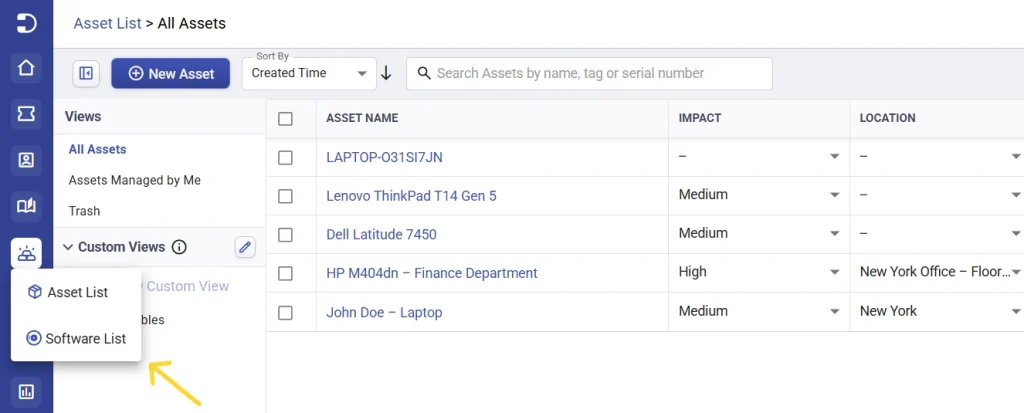
1. Select the Assets List or Software List: Go to Assets > Assets List or Assets > Software List from the agent portal.
2. Select and set filters: Apply the filters based on the criteria you want to use for the custom view. You can filter assets or software by parameters such as Asset/Software Type, Status, Location, Vendor, Managed By Group, and other available fields.
The list is updated to display the assets or software that match the selected filter criteria.
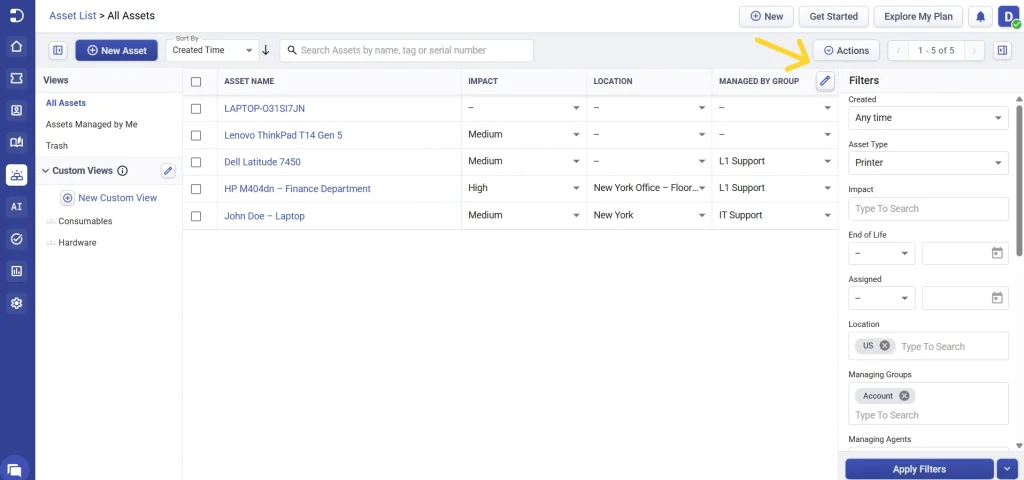
Note: Once the Asset/Software Type filter is applied and the custom view is saved, the selected type cannot be changed. This ensures that the custom view consistently displays the relevant fields for the selected type.
3. Select the columns: Click Select Columns to choose the asset or software fields you want to display in the list.
The available fields are organized according to their respective asset or software types, making it easier to find and select the fields you need.
You can select and arrange the columns in your preferred order.
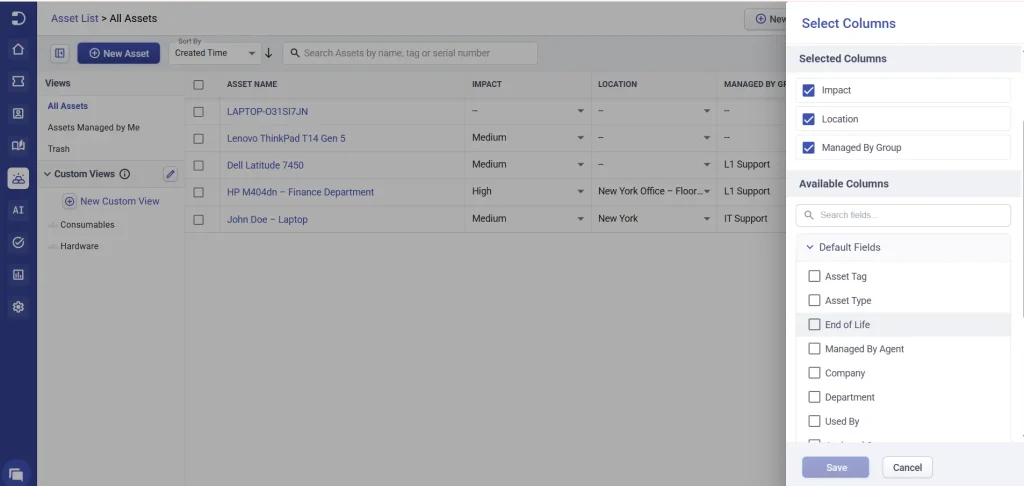
Note: You can select up to 20 fields as columns in the Assets List and Software List.
4. Save as a custom view: Under Custom Views in the left panel, click New Custom View and provide a name for the view.
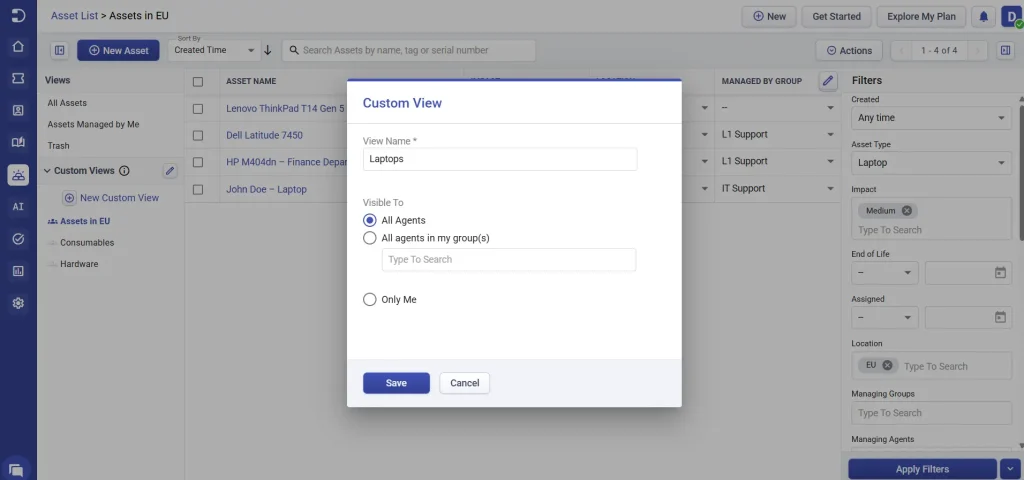
The custom view is saved with the selected filter criteria, columns and appears under the Custom Views section.
Learn more about creating and managing assets.
Updating an existing custom view
If you’re already inside a custom view and want to change the filter criteria or columns, you don’t need to create a new view.
You can edit the filter criteria and selected columns of an existing custom view and choose whether to save the changes as a new view or update the existing view.
After making the required changes, you have the option to:
- Create a New Custom View to save the changes as a separate view.
- Save in this Custom View to update the existing view with the latest filter criteria and selected columns.
This allows you to refine an existing view or create a separate view based on the same configuration.
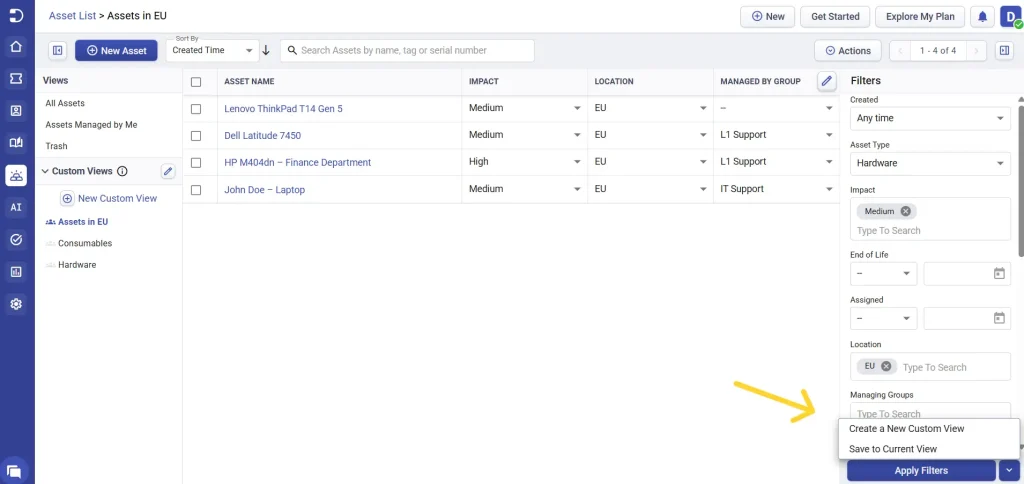
Note: The Asset Type or Software Type selected when creating the custom view cannot be changed. This ensures that the view consistently displays the relevant fields associated with the selected type.
Sort custom views
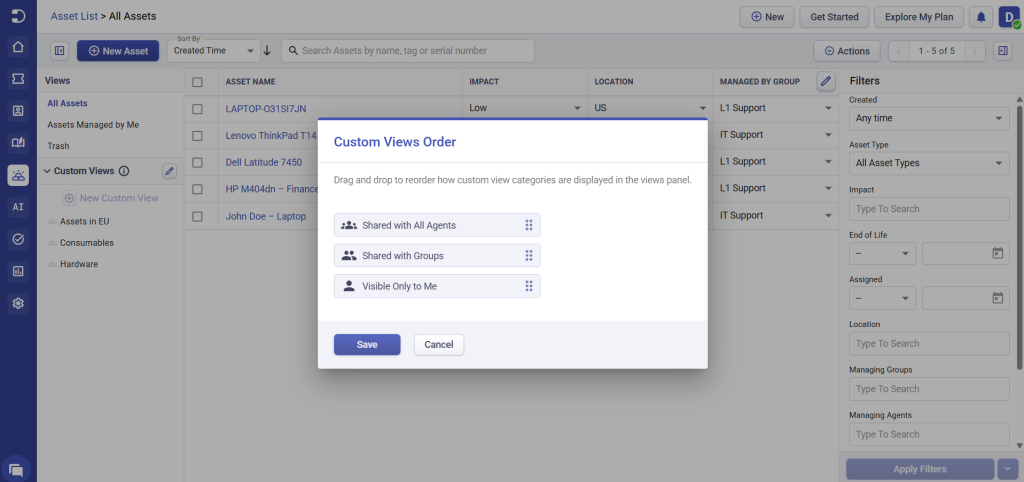
Custom views are generally displayed based on their visibility criteria. When needed, you can change the order in which these categories appear by selecting the category you want to display first.
To change the order, click the Edit icon next to Custom Views and arrange the visibility categories in your preferred order. You can choose the order in which Shared with All Agents, Shared with Groups, and Visible Only to Me custom views are displayed.
Click Save to apply the selected order.
Delete custom views
You can delete a custom view that you no longer need.
To delete a custom view:
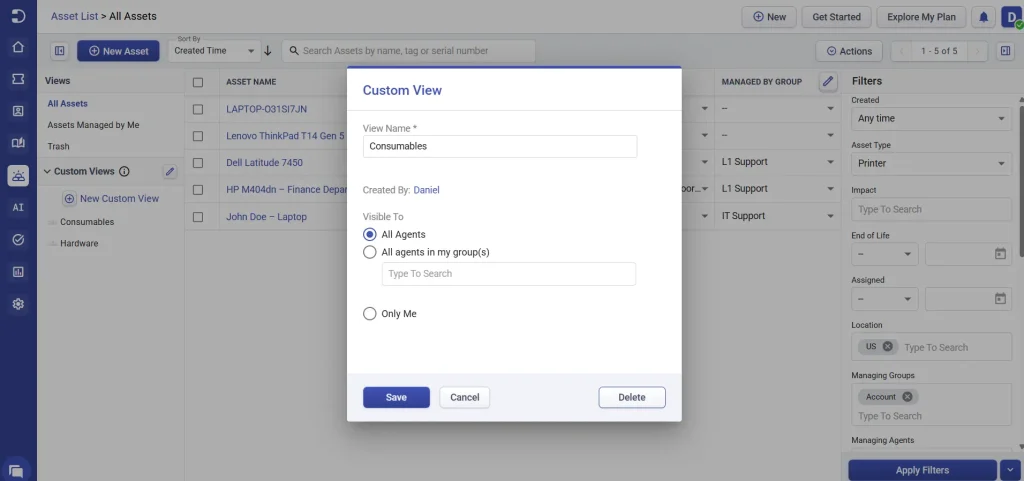
- Click the Edit Custom View icon next to the custom view you want to delete.
- In the custom view window, click Delete.
- Confirm the deletion.
The custom view is removed from the Custom Views section.
Role-based access for custom views
Custom views support role-based access to control who can create shared custom views.
By default:
- Admins and Managers have permission to create shared custom views.
- Agents do not have permission to create shared custom views by default.
If you want to allow Agents or users with custom roles to create shared custom views, you can enable the ‘can create shared custom asset views’ permission for the required custom role.
This permission specifically controls the creation of shared custom views and does not restrict users from accessing custom views.
This allows you to control custom view access based on the responsibilities of different users in your organization.
You can learn more about setting up custom roles.
Custom Views make it easier to organize and access relevant assets and software based on your specific requirements. With flexible filtering, column customization, and role-based access, you can efficiently manage and view the information that matters to your team.