Roles are used to configure how your support team members can access Desk365. For example, you may want new members of your team to just have access to view the tickets and maybe add notes to them, but not respond to support requests.
Roles can be configured for different scope levels (global, department, or individual) and feature levels.
Default roles in Desk365
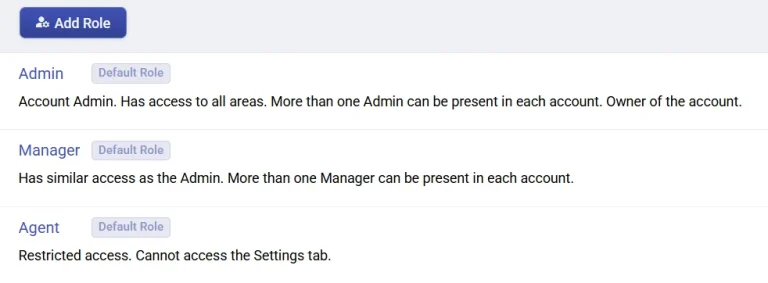
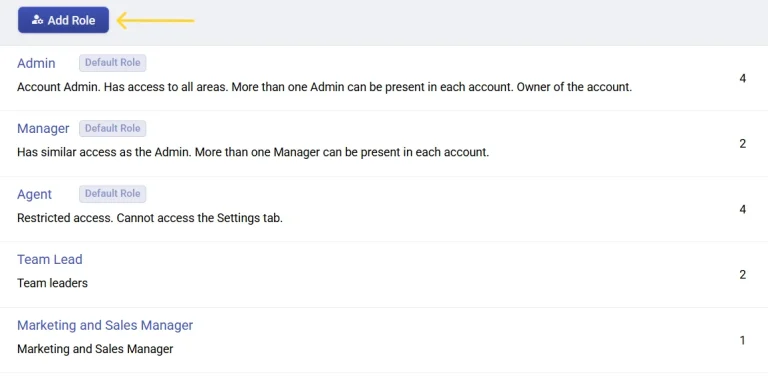
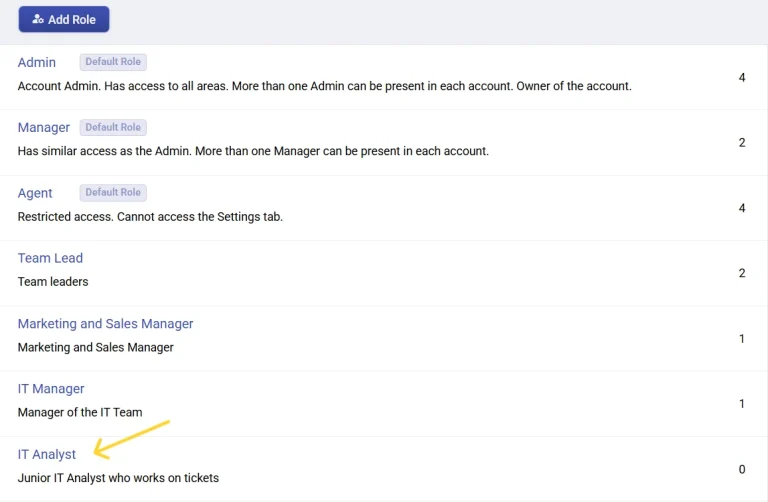
Desk365 comes with three default roles: Admin, Manager, and Agent.
Admin: Admin has access to all areas in the help desk. Admin can make changes to global settings, invite new users, customize home tab panels, create reports, cancel any approval request, and view all the data of the other team members. By default, the person who first signs up for a Desk365 account is the admin on that account.
Manager: Manager has similar access as the Admin, except for a few system wide features that only an Admin has access to, like the ability to view and update group level custom views from groups that they may not be a part of. More than one Manager can be present in each account.
Agent: Agents have only restricted access. They cannot access the Settings tab and do many operations in the help desk.
These roles cannot be changed as these are system generated default roles. These default roles have ‘Global Ticket Access’ and they can access all tickets across all groups and agents.
However, you can create new custom roles based on the specific requirements of your team.
Custom roles
You can decide how your support team members can access Desk365. For example, let’s say you want junior support representatives to just have access to view the tickets, assign tickets, and maybe add notes to them, but not respond to support requests.
Similarly, you wouldn’t want your IT Support Team (who are working on technical tickets) to take a look at other department tickets (say HR-related tickets or Invoice-related tickets).
You can achieve all these easily with the help of Custom Roles.
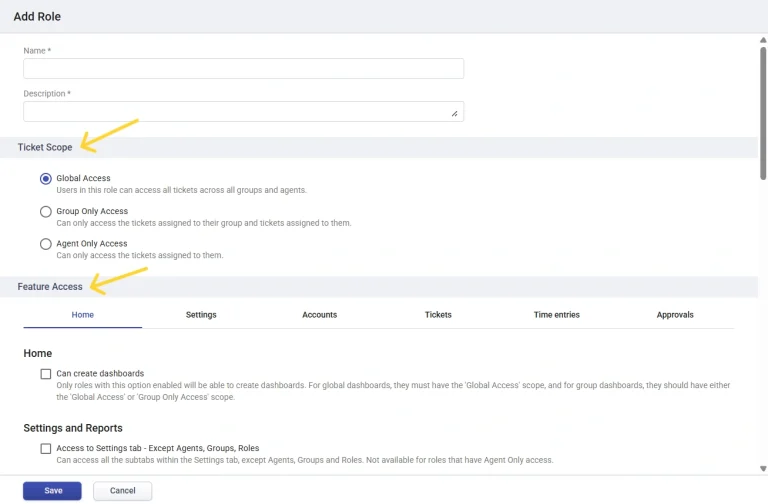
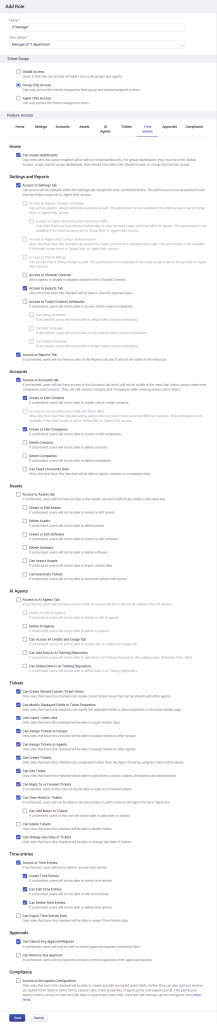
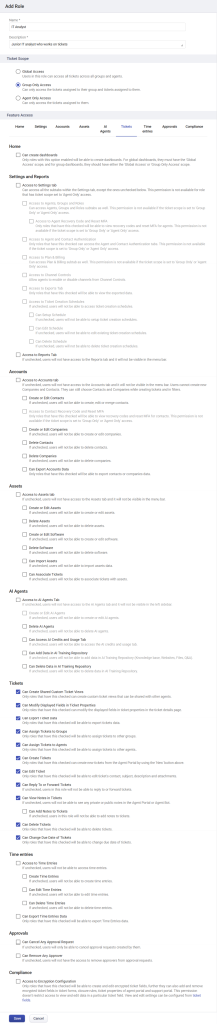
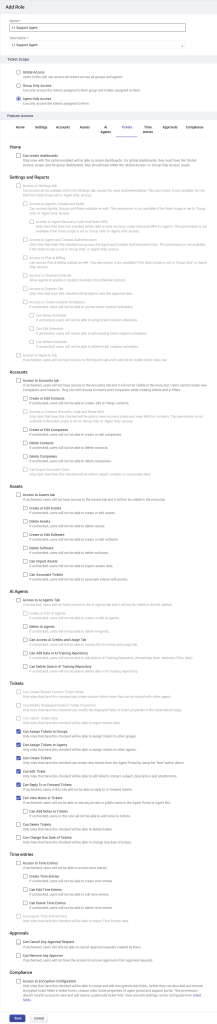
You can decide the ‘Ticket Scope’ and ‘Feature Access‘ which you want to provide for the Custom Role which you’re going to create.
Ticket Scope: Three types of Ticket Scope options are available:
Global Access: Users in this role can access all tickets across all groups and agents.
Group Only Access: Users in this role can only access the tickets assigned to their group and tickets assigned to them.
Agent Only Access: Users in the role can only access the tickets assigned to them.
Feature Access: Desk365 offers a premium set of features like changing home tab panels, customizing the Support Portal, creating custom views, and more. You can pick and choose the features you want to allow in your custom role.
Let’s take a look at a few examples of Custom Roles and how to create them in detail below.
Creating a new custom role in Desk365
Creating a custom role in Desk365 is very simple. You can create as many new custom roles as required. Let’s cover some use-cases of how custom roles can be used in a given organization.
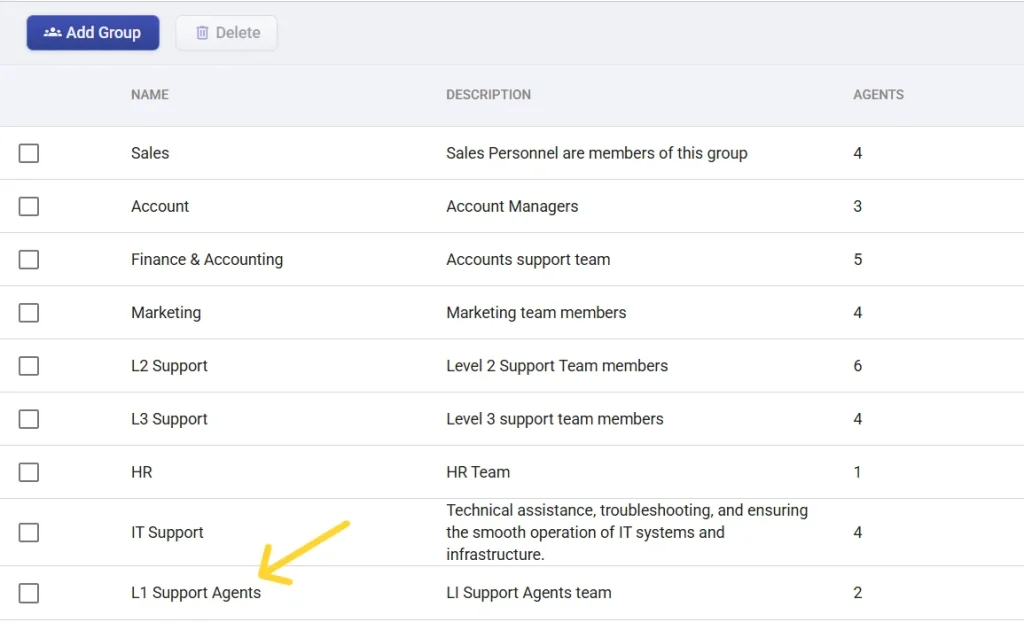
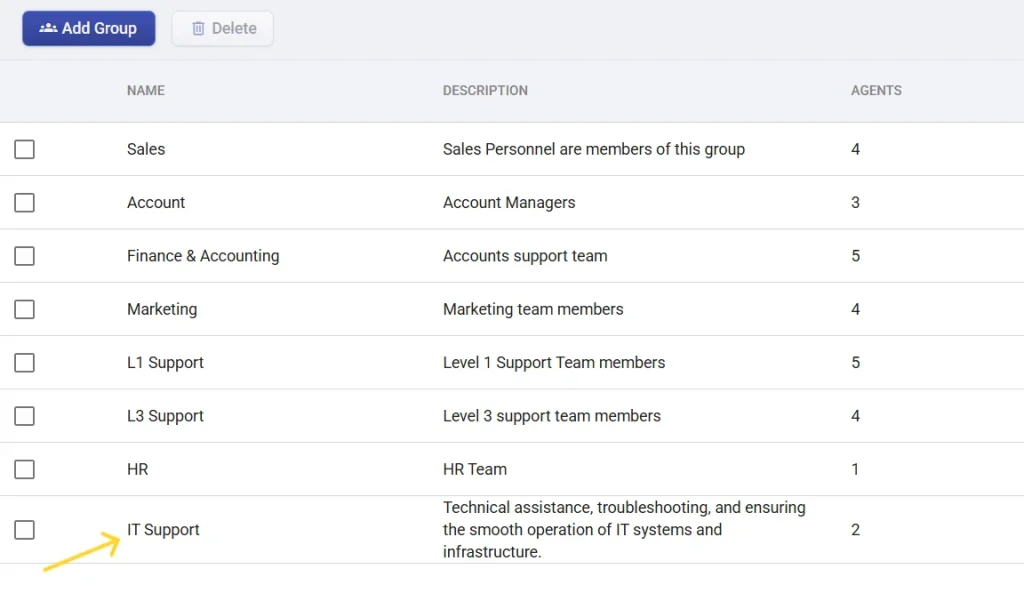
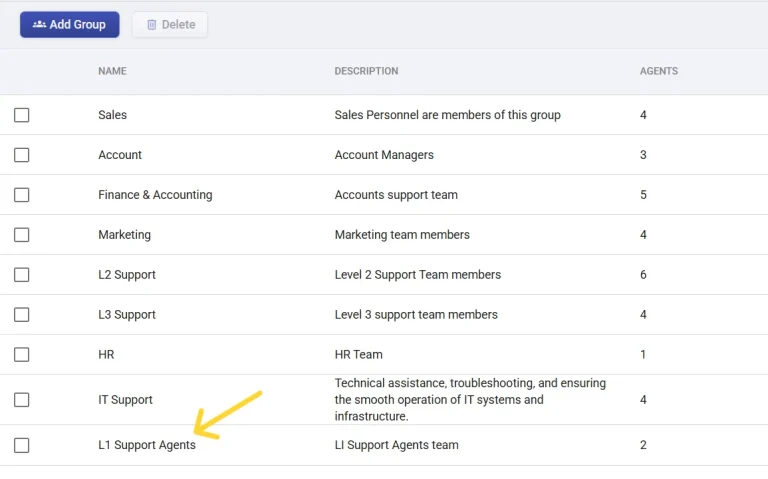
Let’s say you want to create two new custom roles: ‘IT Manager’ and ‘IT Analyst’. Before creating a Custom Role, we recommend you to create a group called ‘IT Support’ in Desk365.
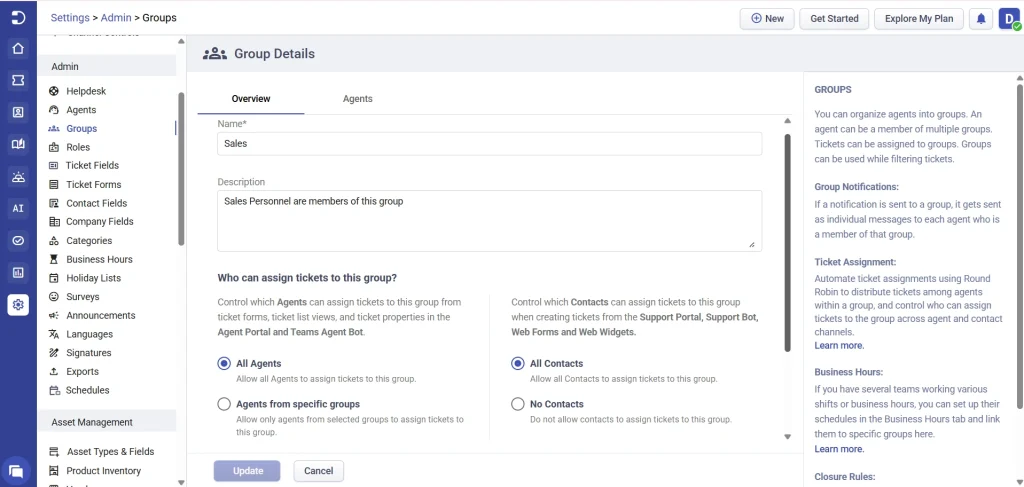
You can create a group by going to Settings > Admin > Groups in Desk365.
Click on the ‘Add Group’ button at the top, add all the agents you want to be part of it, select the business hour and create a new group called ‘IT Support’.
IT Support Group is now successfully created and it appears in the help desk.
Now, let’s go ahead and create two new custom roles: ‘IT Manager’ and ‘IT Analyst’.
Custom role: 'IT Manager' and 'IT Analyst' [Group Only Access]
You can create a new custom role by going to Settings > Admin > Roles.
Click on the ‘Add Role’ button at the top.
Here, you can create a new custom role called ‘IT Manager’ and choose the ‘Ticket Scope’ and ‘Feature Access’ which you want to provide for this role.
In this example, you can provide ‘IT Manager’ a ‘Group Only Access’ instead of ‘Global Access’ as you don’t want to burden and waste the precious time of your IT Managers by allowing them to view all the tickets of different departments coming to their help desk which might affect their productivity.
Choosing ‘Group Only Access’ helps you create roles that allow access only to tickets associated with specific departments/groups. This makes the IT support team receive only IT-related tickets in their help desk which will help them focus better on the incoming tickets assigned to them.
Similarly, you can choose the features you want to allow in your custom role. For example, you can provide all the important features for the IT Manager so that he/she can keep a track of the support team performance easily at a quick glance, create reports and dashboards, and do more important functions easily.
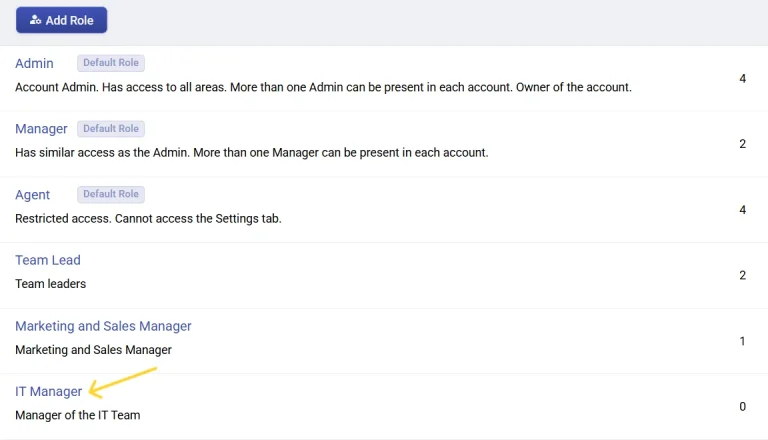
Click on the ‘Save button’ to create this new Custom Role ‘IT Manager’ in your helpdesk.
Now, you can add all the corresponding agents who should be a part of this newly created Custom Role – ‘IT Manager’
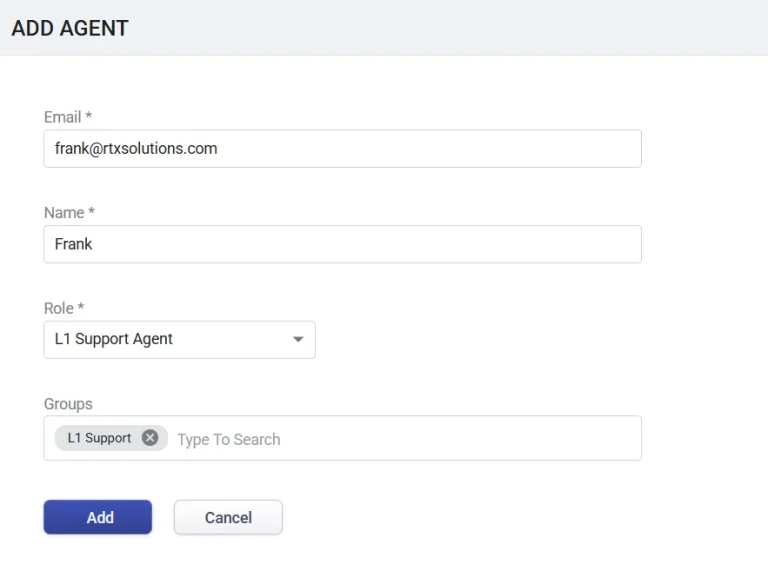
To do this, go to Settings > Admin > Agents and Click on ‘Add Agent’ button at the top.
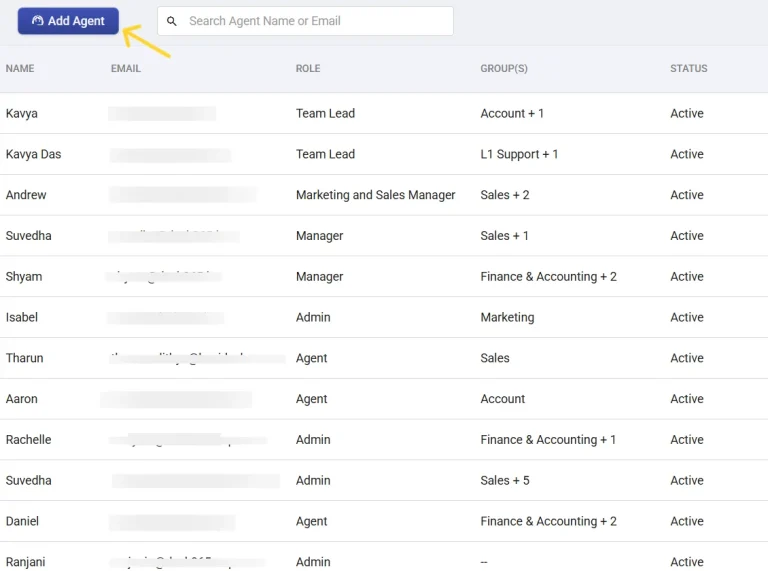
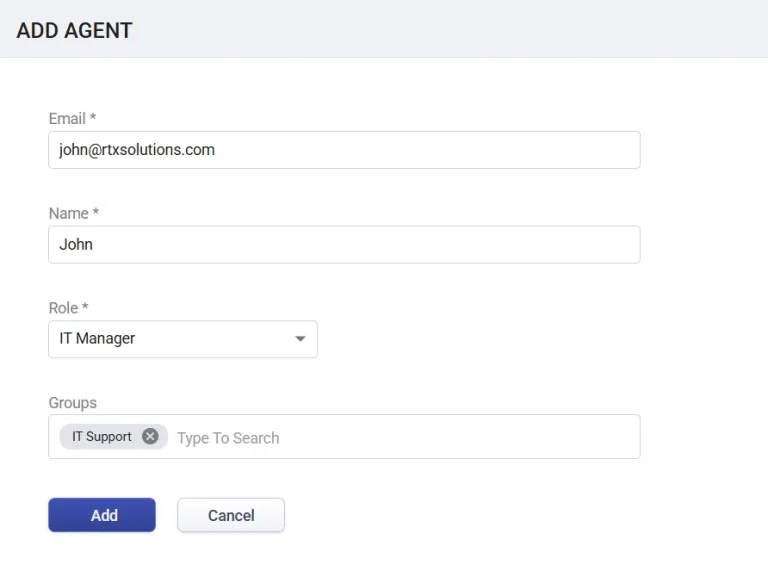
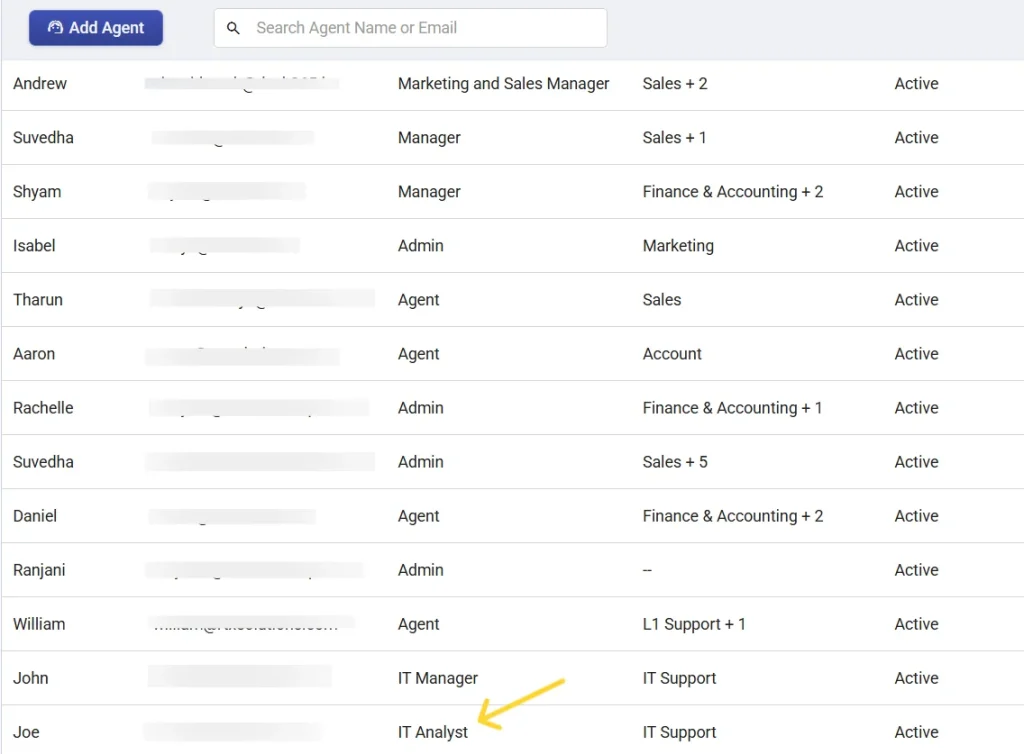
Here, you can add all the corresponding agents and provide them with the ‘Custom Role’ access that we have created just now. You’ll notice that the newly created Custom Role ‘IT Manager’ appears along with the other default roles (Manager and Agent).
Choose the correct Role and Group and Click on the ‘Add’ button to add the agent to the Custom Role and Group where they must belong to.
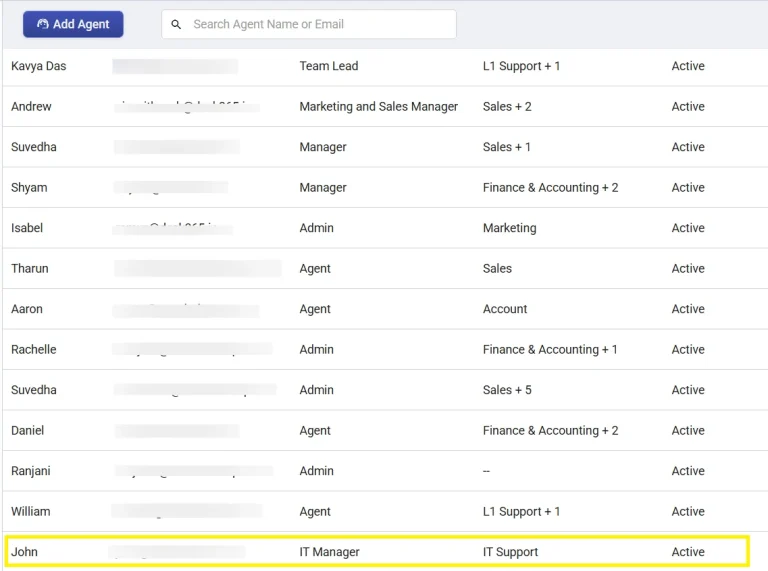
That’s it, you’ve successfully created a new Custom Role: ‘IT Manager’ and have added the agents who should be a part of this Custom Role.
Now, let’s create one more new custom role: ‘IT Analyst’. You can easily create a new custom role by going to Settings > Admin > Roles.
Click on the ‘Add Role’ button at the top.
Here, you can create a new Custom Role called ‘IT Analyst’ and choose the ‘Ticket Scope’ and ‘Feature Access’ which you want to have for this role.
You can provide ‘IT Analyst’ a ‘Group Only Access’ as you want the analysts to view only the IT-related tickets in their help desk.
Similarly, you can choose the features you want to allow in the custom role. For example, you can choose to provide just the basic features for the IT Analyst and restrict certain functions like access to Settings tab, reports, and more if needed.
Click on the ‘Save button’ to create this new Custom Role ‘IT Analyst’ in the helpdesk.
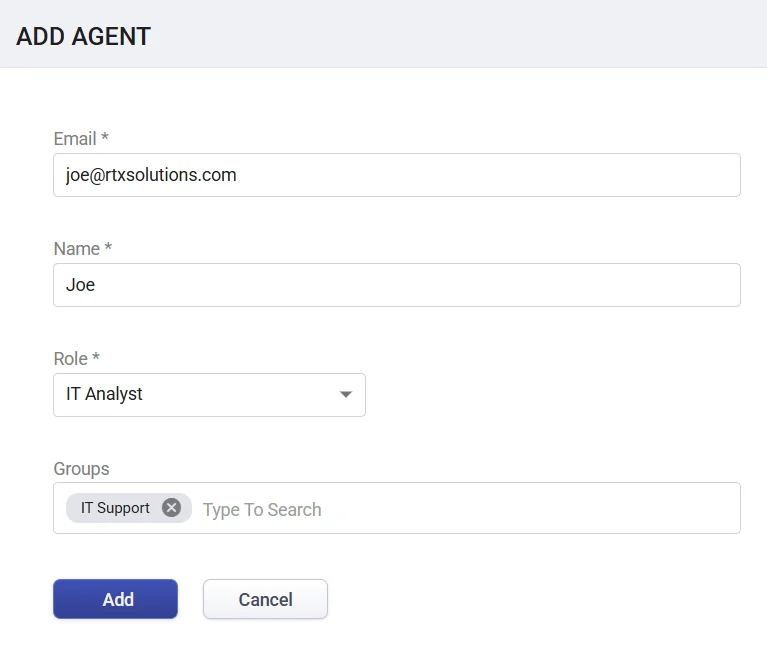
Now, you can add all the corresponding agents who should be a part of this newly created Custom Role – ‘IT Analyst’
To do this, go to Settings > Admin > Agents and Click on the ‘Add Agent’ button at the top.
Here, you can add all the corresponding agents and provide them with the ‘Custom Role’ access that we have created just now. You’ll notice that the newly created Custom Role ‘IT Analyst’ appears along with the other default roles (Manager and Agent).
Choose the correct Role and Group and Click on the ‘Add’ button to add the agent to the Custom Role and Group where they must belong to.
That’s it, you’ve successfully created a new Custom Role: ‘IT Analyst’ and have added the agents who should be a part of this Custom Role.
Similarly, you can create separate Custom Roles for different departments in your organization. For example, you can create similar custom roles for HR Team, Invoice Team, Sales Team etc.
Creating custom roles and allowing them only ‘Group Only Access’ Scope restrictions help you create roles that allow access only to tickets associated with specific departments/groups.
Custom role: 'L1 Support Agents' [Agent Only Access]
Let’s say you want to create a new Custom Role for your L1 Support Agents. Before creating this Custom Role, we recommend you to create a group called ‘L1 Support’ in your helpdesk.
You can easily create a group by going to Settings > Admin > Groups in Desk365.
Click on the ‘Add Group’ button at the top and create a new group called ‘L1 Support’.
Now, let’s create a custom role: ‘L1 Support Agents’. You can easily create a new custom role by going to Settings > Admin > Roles.
Click on the ‘Add Role’ button at the top.
Here, you can create a new Custom Role called ‘L1 Support Agents’ and choose the ‘Ticket Scope’ and ‘Feature Access’ which you want to provide for this role.
Since the agents working on the Level 1 Tier tickets have only basic knowledge and they do only limited functions like assigning tickets, adding notes to tickets, and forwarding the tickets to the higher levels of support, you want the agents to view only their tickets in their help desk so that they can quickly start working on these important customer issues without wasting any time.
You can create a new Custom Role called ‘L1 Support Agents’ and provide them only with ‘Agent Only Access’ as you want the agents to only view their own tickets and perform basic operations in their help desk.
Click on the ‘Save button’ to create this new Custom Role ‘L1 Support Agents’ in the helpdesk
Now, you can add the corresponding L1 agents and map them to this newly created Custom Role.
To do this, go to Settings > Admin > Agents and Click on the ‘Add Agent’ button at the top.
Here, you can add all the corresponding agents and provide them with the ‘Custom Role’ access that we have created just now.
Choose the correct Role and Group and Click on the ‘Add’ button to add the agent to the Custom Role and Group where they must belong to.
That’s it, you’ve successfully created a new Custom Role: ‘L1 Support Agents’ and have added the agents who should be a part of this Custom Role.