Desk365’s AI Agent helps you deliver instant, accurate, and consistent support by answering customer questions using your existing knowledge. You can train it using your knowledge base, website content, files, Q&A and then deploy one or more AI Agents across multiple channels like your website and Desk365 support portal.
This article walks you through setting up the AI Agent from start to finish — beginning with role-based access control, and then covering configuration, deployment, and performance tracking.
Role-based access for AI Agents
Desk365 supports role-based access control for AI Agents, allowing administrators to manage who can view and configure AI-related settings.
Navigate to Settings > Admin > Roles > AI Agents.
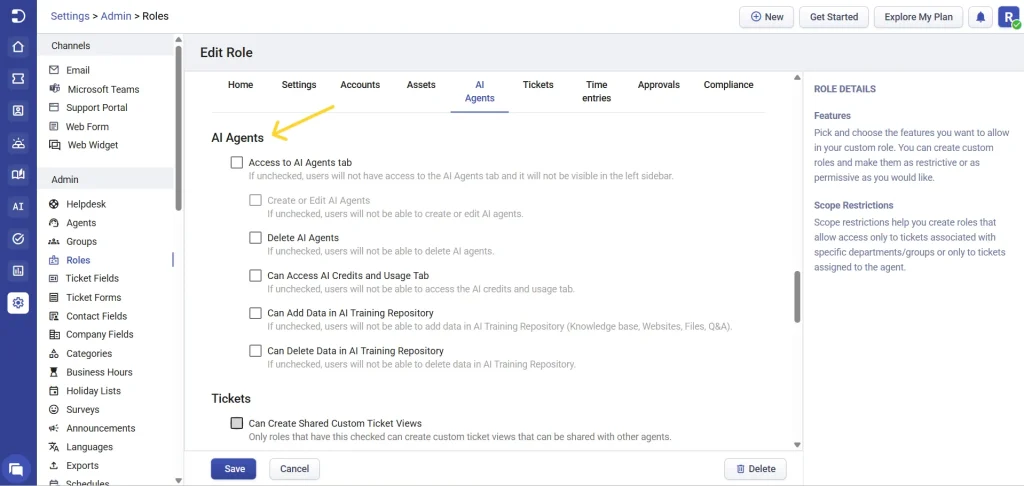
Depending on the permissions granted, users can be allowed or restricted from performing specific AI-related actions. Available AI permissions include:
- Access to the AI Agents tab
- Create or edit AI Agents
- Delete AI Agents
- Access AI Credits & Usage
- Add data to the AI Training Repository (Knowledge Base, Websites, Files, Q&A)
- Delete data from the AI Training Repository
Important note – “Access to the AI Agents tab” and “Create or edit AI Agents” are coupled permissions. If Access to the AI Agents tab is enabled, Create or edit AI Agents will be automatically selected. This ensures users with access to the module can configure AI Agents without partial or broken permissions.
If a permission is unchecked, the corresponding feature will not be visible or accessible to that role.
This ensures better governance and prevents unauthorized users from modifying AI configurations or consuming credits unintentionally. We recommend granting full AI permissions only to admins or designated AI managers.
Accessing the AI settings
- Log in to the Agent Portal in Desk365.
- From the menu bar, navigate to AI Agents.
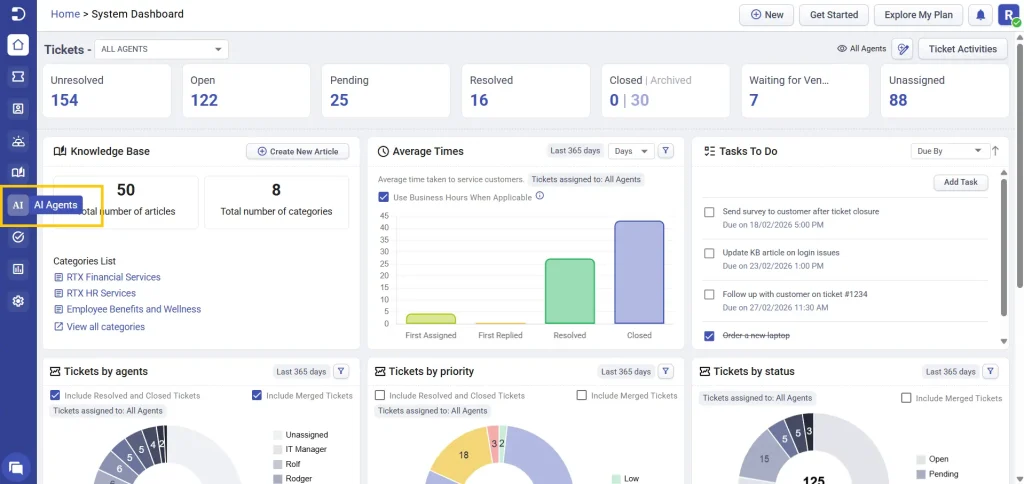
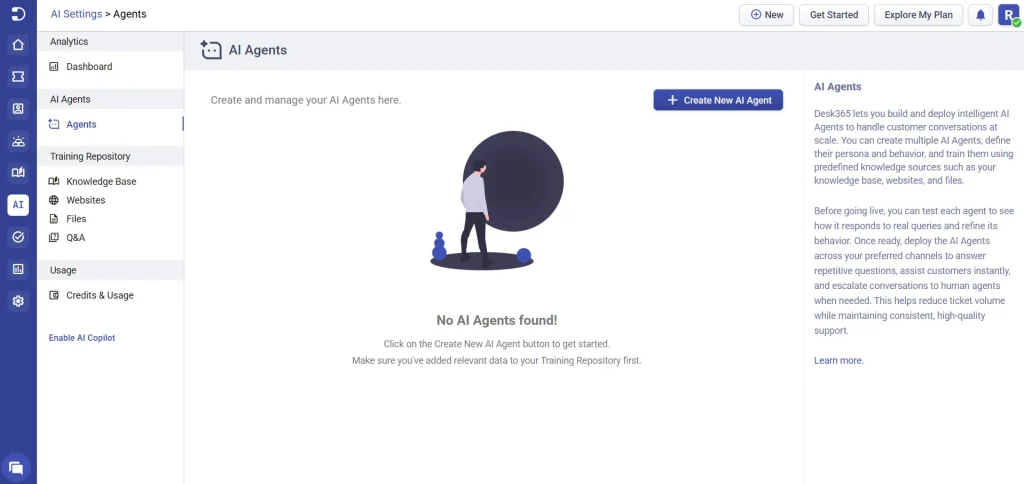
This opens the AI Configuration area, where you’ll find everything related to AI Agents, knowledge sources, usage, and analytics.
Creating an AI Agent
Creating an AI Agent in Desk365 involves a few simple steps. You’ll start by defining the knowledge sources the AI Agent can use, then create and customize the agent’s persona and behavior. After that, you’ll assign the relevant knowledge, test how the AI Agent responds to different scenarios, and finally deploy it to the channels where your customers interact with you. The following sections walk through each step in detail.
Step 1: Configuring training repository
Knowledge sources define what your AI Agent knows. Desk365 supports four types of knowledge sources:
- Knowledge base already configured within your Desk365 helpdesk
- Website
- Files
- Questions & Answers
You can use one, two, or four depending on your needs.
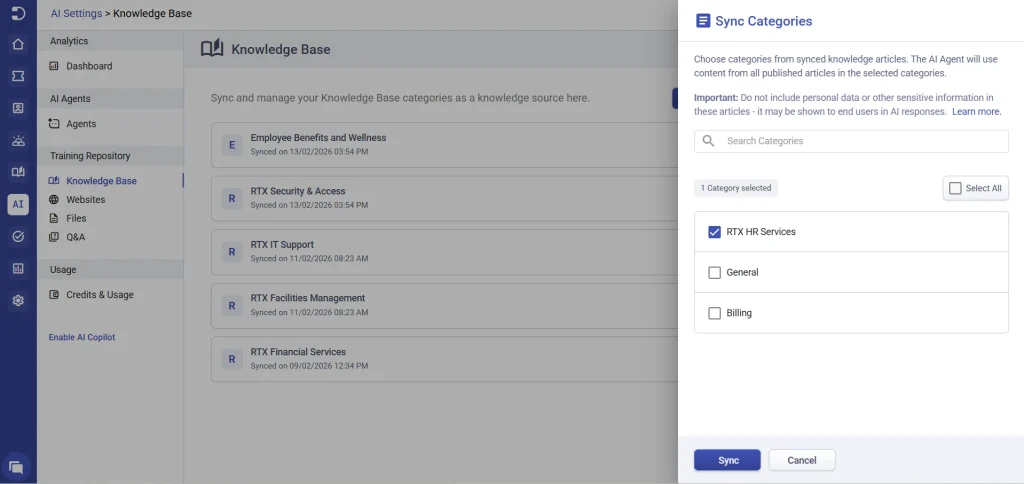
1. Knowledge base
Use your existing Desk365 knowledge base articles as a primary source of truth for the AI Agent.
How to configure:
- Open the knowledge base section.
- Click ‘Add Sync Categories’
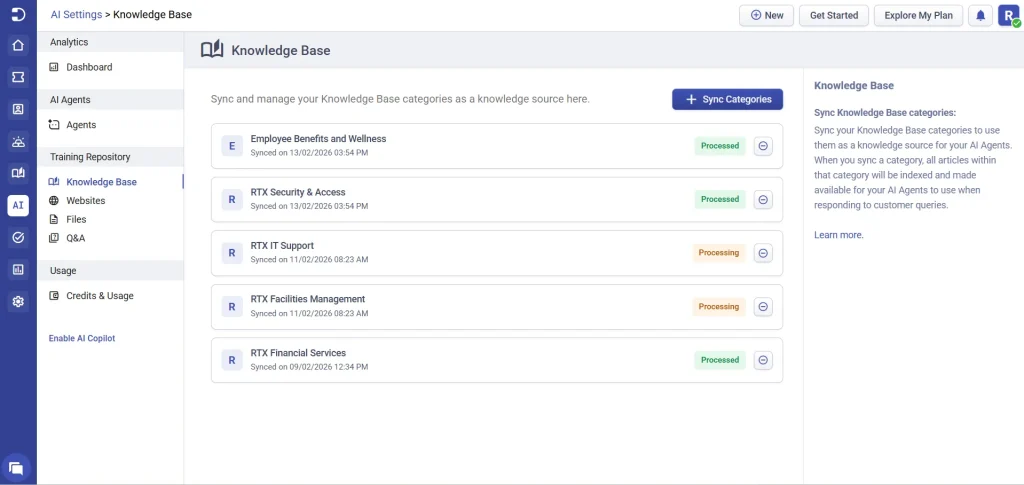
3. You’ll see all your existing categories listed.
4. Select all categories, or only the specific categories relevant to the AI Agent.
5. Click sync.
2. Websites
You can allow the AI Agent to crawl into your company website or help center and use that content to answer questions. This is especially useful if important information already exists on your public site or help center.
How to configure:
- Open the websites section
- Click ‘Add Website’ button
- Fill in basic website information to crawl:
- Website name: Enter a clear name for the website configuration. This is useful when managing multiple website configurations.
- Crawling settings control how Desk365 indexes your website content:
- Provide the URL where the crawler should begin indexing.
- Set a limit on the total number of pages to be crawled.
- Include / exclude patterns: Use regular expression (regex) patterns to fine-tune which pages are indexed.
– Include patterns: Specify pages that should always be crawled.
– Exclude patterns: Prevent certain pages from being indexed (for example, login pages, pricing pages, or irrelevant content).
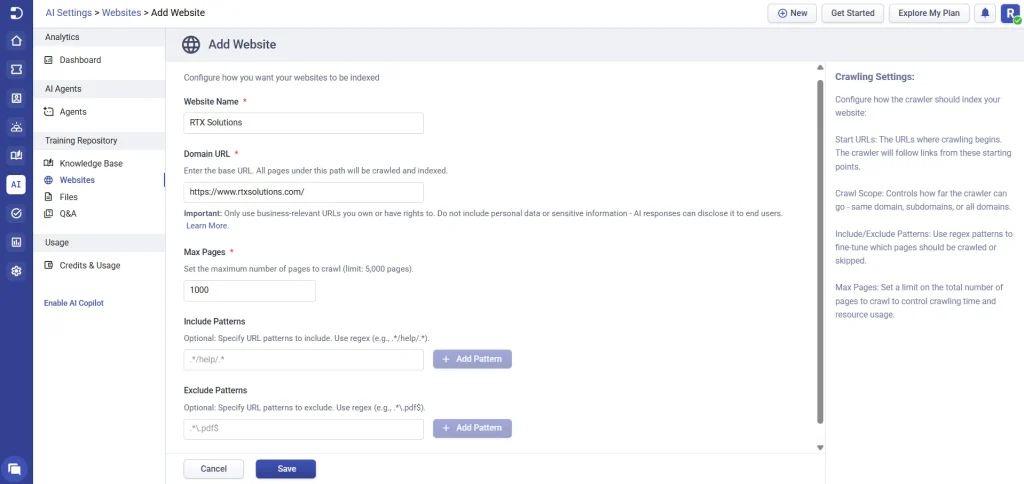
- Once all settings are configured, save the website configuration.
After processing is complete, you can:
- View all pages that have been indexed for the website
- Manually add a new webpage if it isn’t picked up during crawling
- Use the Sync option to re-crawl the website and update indexed content whenever changes are made
Indexed content is automatically available as a knowledge source for the AI Agent.
Important note: Make sure the website content you add is either owned by your organization or publicly accessible and permitted for use. Desk365 recommends only indexing content you have the right to use.
3. Files
Upload documents that contain valuable information for customer support. Simply click ‘Add Files’ to upload.
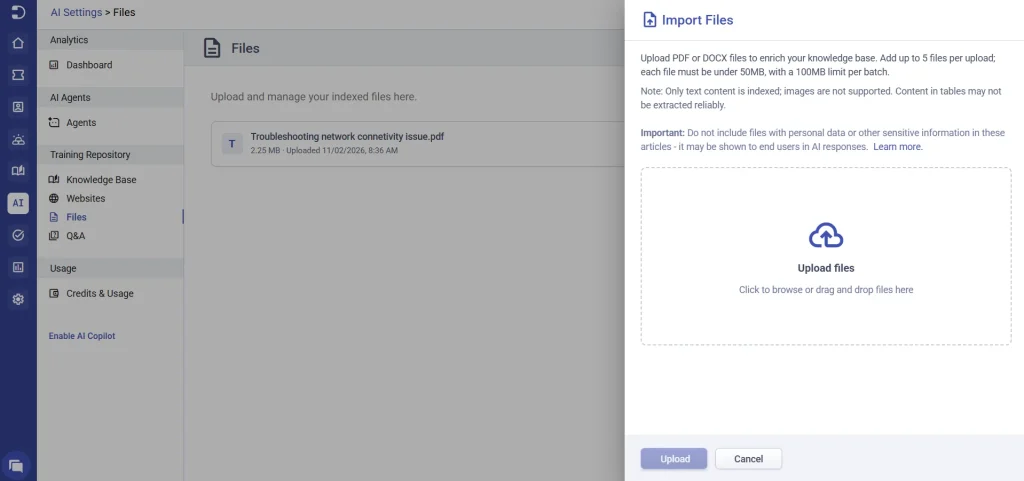
Supported file types include:
- Word documents
- Text files
Supported file formats include – TXT, MD, DOC, and DOCX, with a maximum file size of 50 MB.
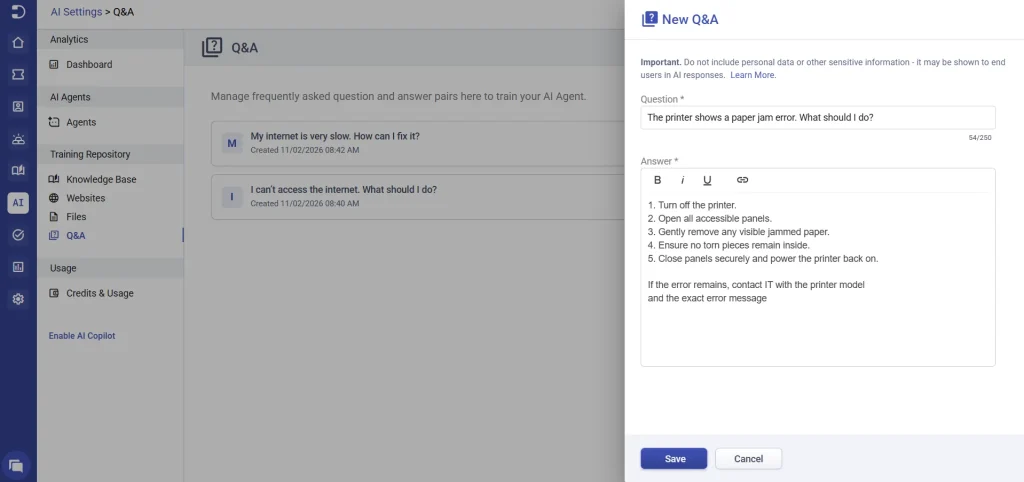
4. Q&A
Create and manage question-and-answer pairs to help train your AI agent. These Q&As enable the AI Agent to deliver more accurate, consistent, and relevant responses to user inquiries.
Step 2: Creating an AI Agent
After configuring knowledge sources, you can start creating your AI Agent. You can create one or multiple AI Agents, each with its own persona and behavior.
- Navigate to AI Agents > Agents > Create New AI Agent
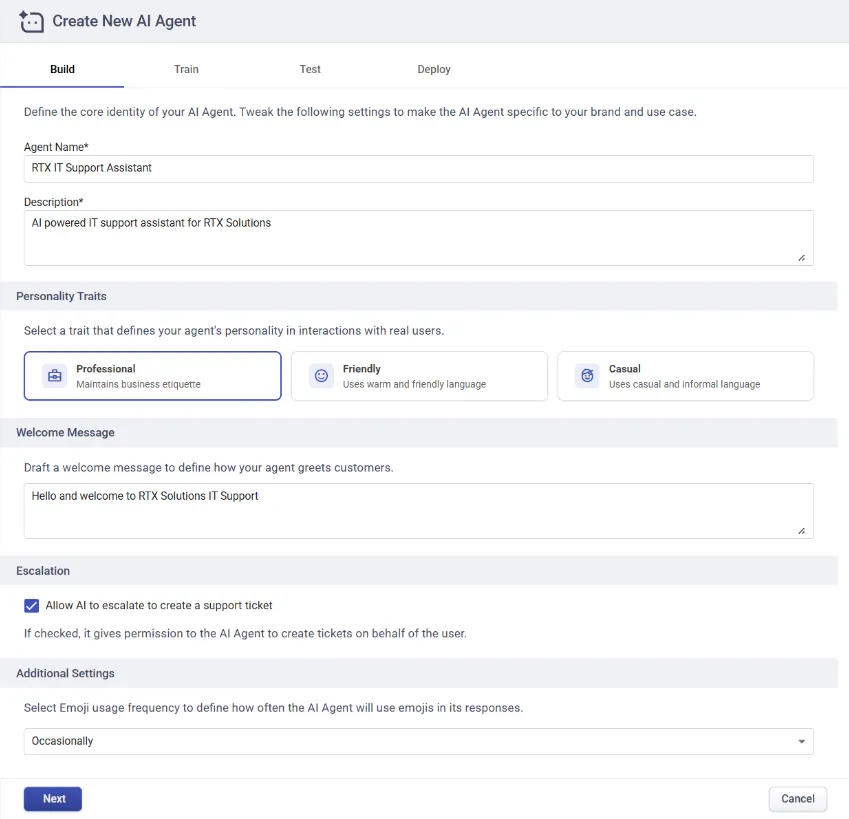
Build your AI Agent
Define the following:
- Agent name – Give your AI agent a recognizable name
- Description – Describe what this agent is responsible for
- Personality & traits – Choose a tone, whether it has to be professional, friendly or casual
- Welcome message – Customize how the AI agent greets customers when a conversation starts.
- Escalation rules – Enable “Allow AI to escalate and create a support ticket” when the conversation requires further handling, allowing the AI agent to automatically create a support ticket for follow-up by a support agent.
- Additional preferences – You can define how your AI Agent should use emoji. You can choose from options like never, occasionally, or frequently.
Once completed, click Next.
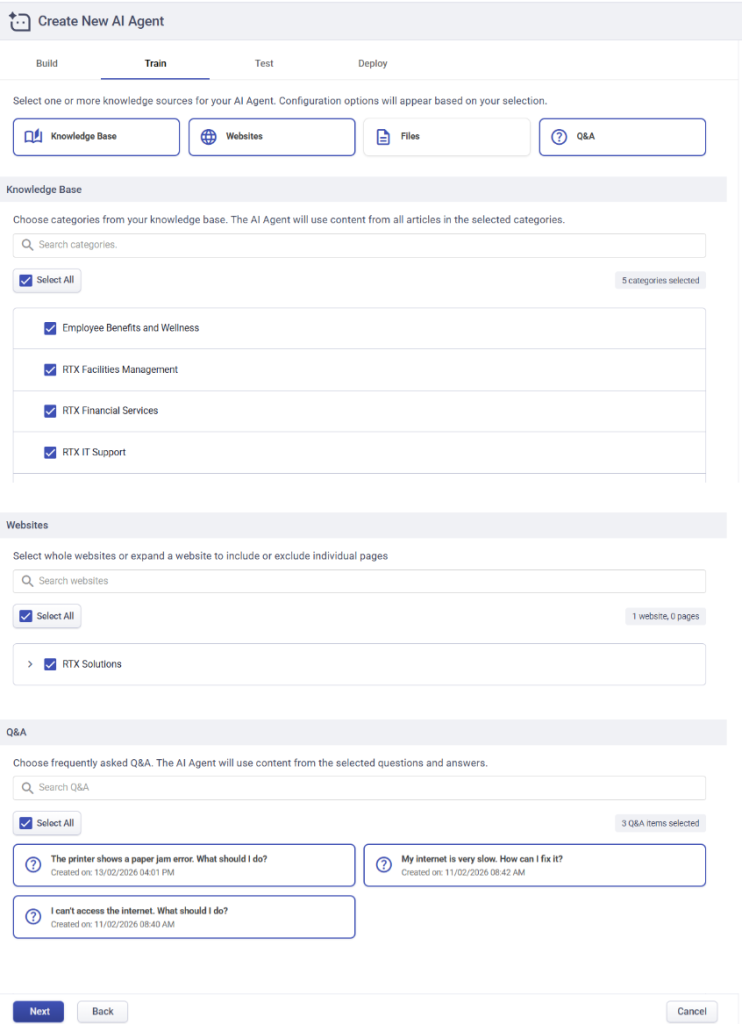
Assign knowledge to the AI Agent
In the knowledge section of the AI Agent setup, select the knowledge sources you want this agent to use – choose from the knowledge base, website, files or Q&A. Choose all the sources or just select one and click save and proceed.
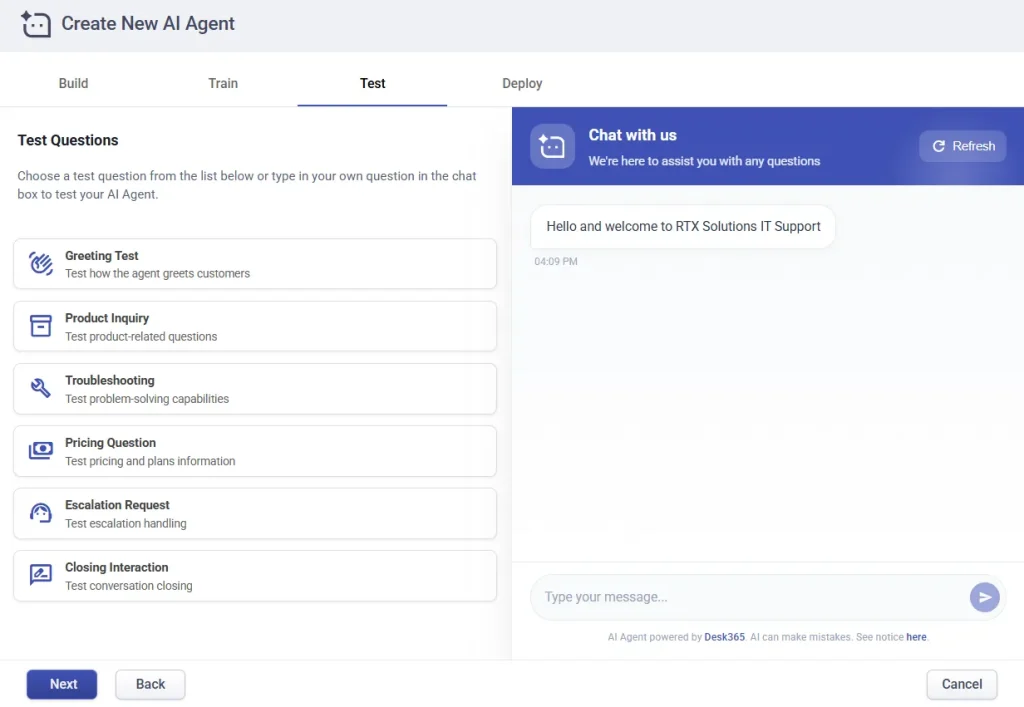
Test your AI Agent
Test how your AI Agent responds. You can either click on the predefined test scenarios to see how the agent handles common situations or type custom questions to test specific use cases.
Review the responses carefully and refine the agent configuration if needed.
Deploy your AI Agent
Once you’ve finished testing your AI Agent and are happy with its responses, the next step is to deploy it so customers can start using it. Desk365 lets you deploy an AI Agent to one or more channels, depending on where you want customers to interact with it.
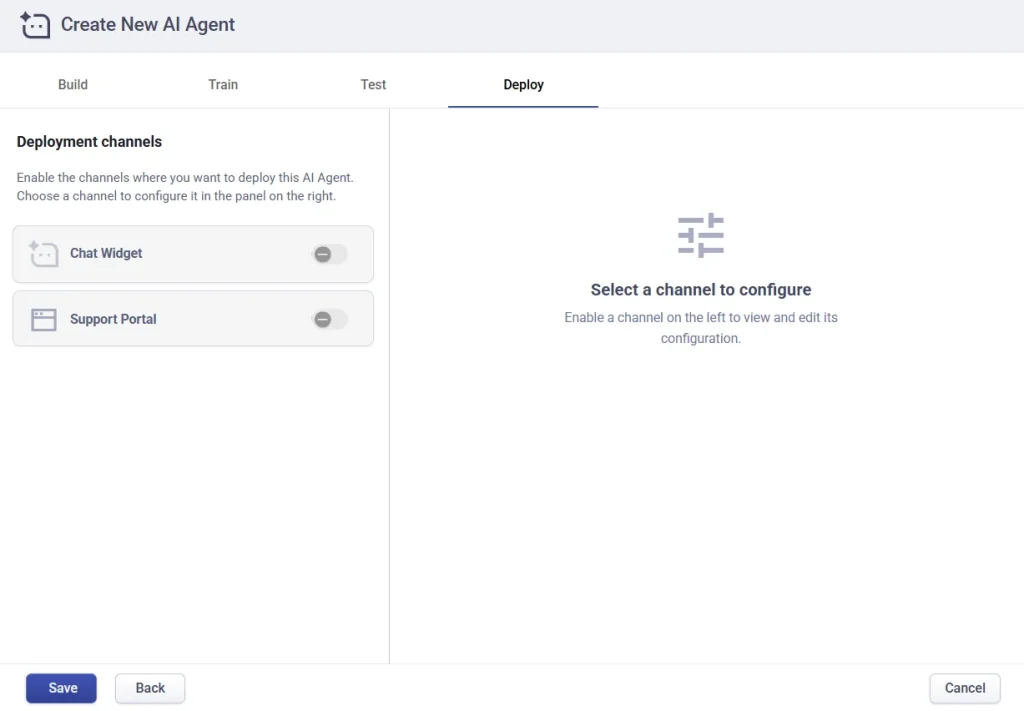
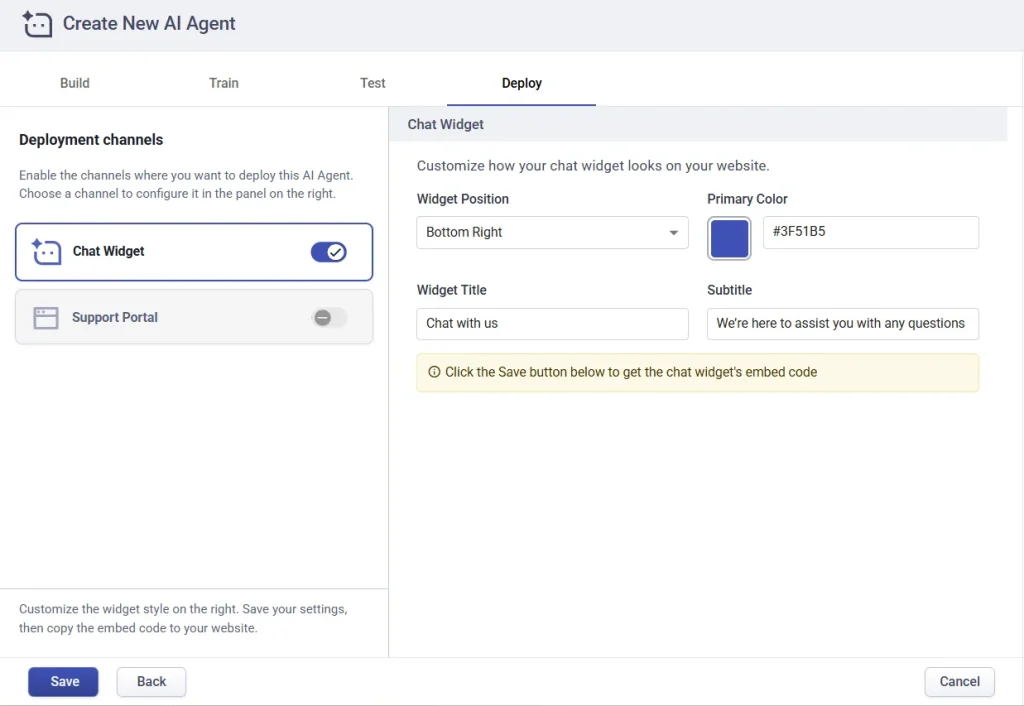
Deployment options:
One option is the chat widget, which allows you to embed the AI Agent directly on your website. This enables visitors to get instant, AI-powered support without leaving the page they’re on. While setting up the chat widget, you can customize how it appears to match your brand and user experience. You can choose whether the widget appears in the bottom-right or bottom-left corner of your website, set a primary color that aligns with your brand, and define the widget title and subtitle.
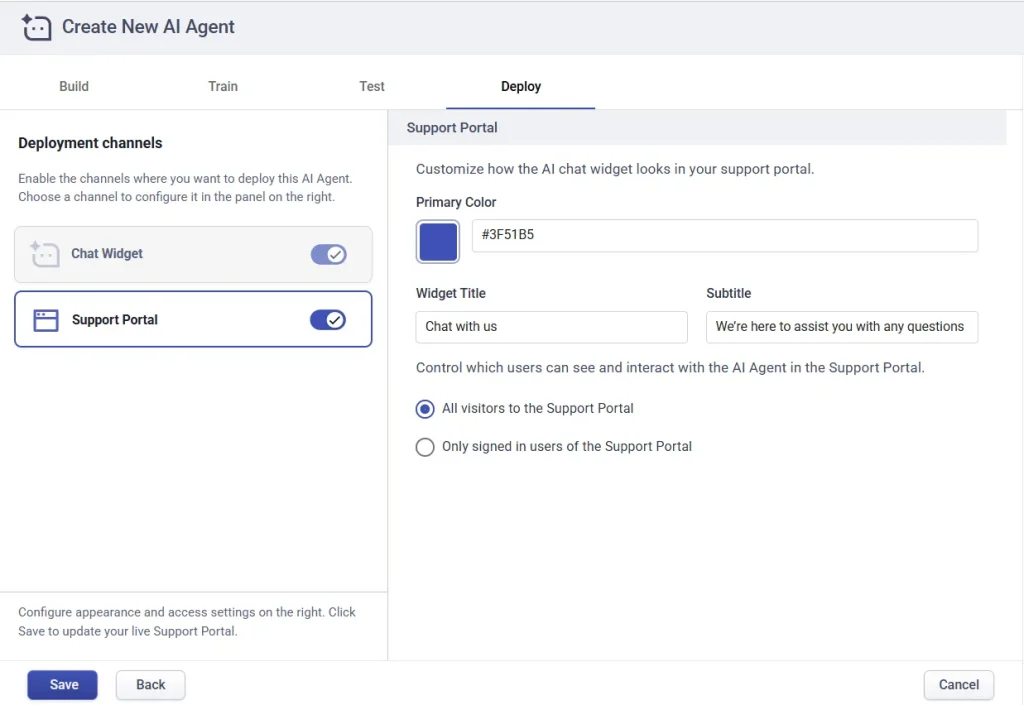
Another deployment option is the support portal, where you can add AI assistance directly within your customer support portal. This allows users to get help while browsing knowledge base articles or submitting support requests. When deploying the AI Agent to the support portal, you have full control over who can access it. You can make the AI Agent available to all visitors, restrict it to only users who are signed in, or limit access further to signed-in users from specific companies. This flexibility helps ensure the AI Agent is available to the right audience based on your support and security requirements.
Once you’ve selected your preferred deployment channels and completed the configuration, simply save your changes. Your AI Agent will then be live and ready to assist users across the chosen platforms..
That’s it! Your AI Agent is now live and ready to assist customers with fast, accurate, and AI-powered support.
Monitoring AI Agent performance
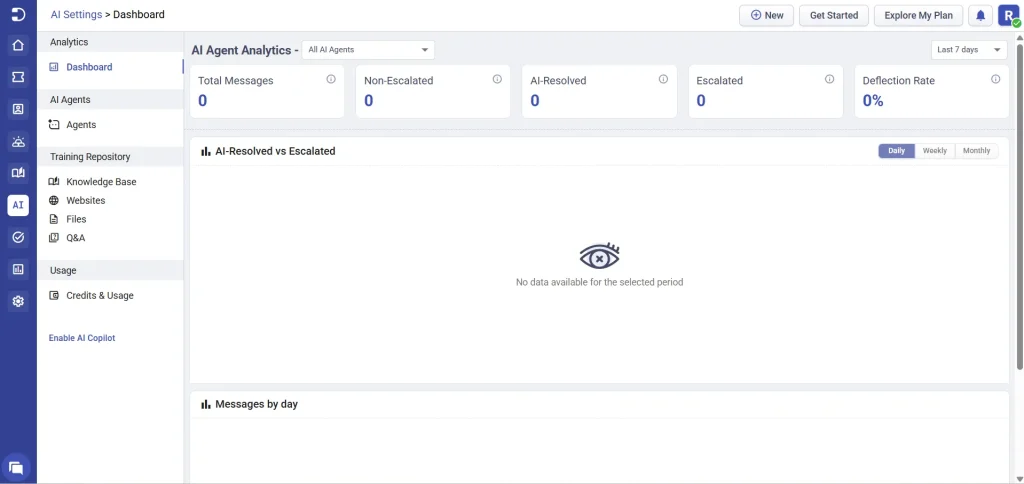
Once your AI Agent is live, you can track how it’s performing from Analytics > Dashboard. This section gives you visibility into how effectively your AI Agent is handling conversations and where it may need refinement. You can filter analytics by Last 7, 30, 90, or 365 days, Month-to-date, Quarter-to-date, Year-to-date, or even apply a custom date range. Reports can be viewed across all AI Agents or narrowed down to a specific agent, making it easy to compare performance or troubleshoot individual setups.
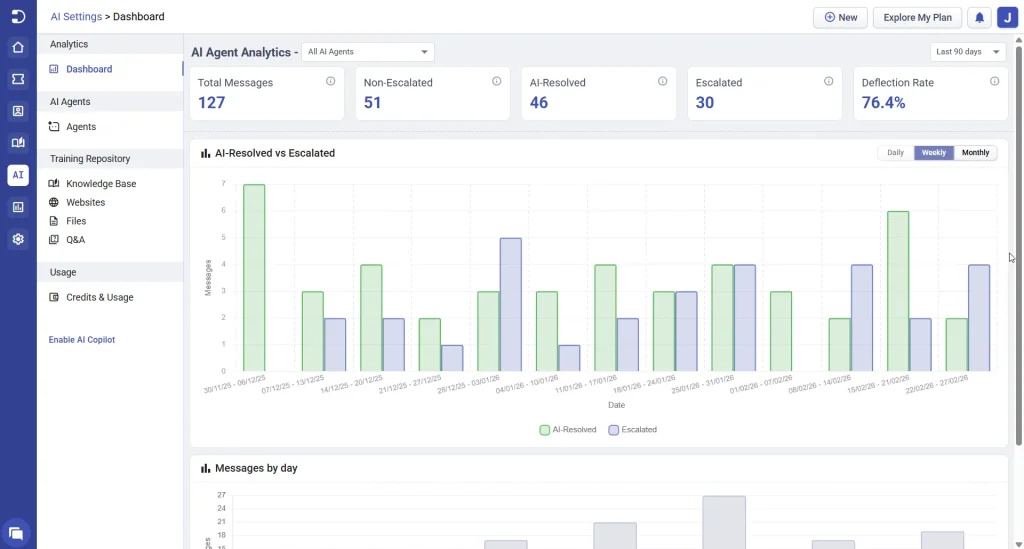
The dashboard shows key metrics such as:
Total messages, which represents the total number of AI responses generated
- Resolved messages indicate responses where the AI was highly confident (confidence score > 0.4)
- Unresolved / Non-escalated messages reflect less confident answers (confidence score ≤ 0.4)
- Escalated messages show how many conversations triggered ticket creation
- Resolution rate, which is the percentage of conversations handled without escalation
Visual reports include an AI Resolved vs Escalated trend graph and a Usage by Week graph, helping you quickly understand adoption and performance over time.
Understanding AI usage with credits & usage
The Usage > Credits & Usage section opens in a new tab and provides an overview of how AI credits are consumed across your account. This helps you understand usage patterns, monitor remaining credits, and plan capacity as AI adoption grows. A more detailed walkthrough of this section is covered in a separate article, so this section focuses on the basics.

Desk365 AI usage is credit-based. During the trial, you get 100 credits. On paid plans, Plus includes 100 credits per month, and Premium includes 200 credits per month, both recharged monthly. Credits are consumed based on AI responses, with a maximum of 5 credits per message. If you need more, you can purchase additional credits — $100 for 2,000 credits, with no expiration. This flexible model lets you scale AI usage without committing to higher plans prematurely.
AI moderation and guardrails
Desk365 includes built-in AI moderation and safety guardrails to ensure your AI Agent is used responsibly and aligns with acceptable use standards.
When you create an AI Agent, the agent’s name, description, and configuration are automatically checked using Desk365’s moderation system. This system evaluates the content for unsafe or restricted terms, including violent language.
If the AI Agent description contains violent or harmful terms, Desk365 will block the creation of the AI Agent.
This prevents unsafe or inappropriate AI behavior from being deployed to customer-facing channels.
The moderation check happens during setup, so issues are caught early, before the agent is live.
With Desk365’s AI Agent, you can scale support, reduce ticket volume, and deliver better customer experiences, effortlessly.