Vendors represent the suppliers, manufacturers, or service providers from whom you procure hardware, consumables, or services. Maintaining accurate vendor records helps you track procurement details, manage warranties, and quickly reach the right contact when issues arise.
By associating vendors with products and assets, your support and IT teams gain better visibility into costs, coverage, and accountability throughout the asset lifecycle.
Associating vendors with products allows you to:
- Track unit costs for accurate budgeting and reporting
- Monitor warranty periods to avoid unnecessary repair or replacement expenses
- Identify the right contact for escalations, replacements, or maintenance
- Speed up incident resolution by knowing exactly who supports a product
This becomes especially valuable as your inventory grows and multiple vendors supply similar items.
Creating a new vendor
To add a vendor to Desk365:
- Go to Settings > Asset Management > Vendors
- Click Add New Vendor
- Fill in the vendor details, such as:
– Name (mandatory)
– Email
– Phone number
– Contact name
– Address details (city, state, country, zip code)
– Description or notes for internal reference - Click Save
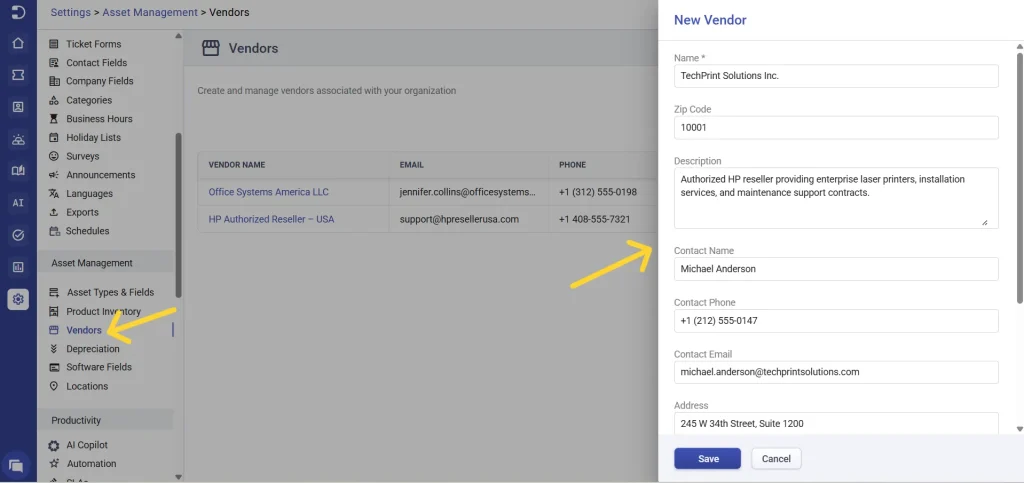
Once saved, the vendor will be available as a selectable option when associating vendors with products or assets.
Tip: Even if you don’t have all the details upfront, adding at least the vendor name early ensures consistency when associating products later.
Associating vendors and products
In Desk365, vendor–product associations are bi-directional. This means you can link vendors and products from either side, depending on your workflow.
This flexibility helps teams manage procurement data efficiently, whether they start from the vendor or from the product.
Option 1: Associate products from the vendor
Use this approach when you want to see everything a vendor supplies in one place.
- Go to Settings > Asset Management > Vendors
- Open the vendor you want to manage
- Switch to the products tab
- Click associate products
- Select the product and enter:
– Unit price
– Warranty period
– Quantity supplied - Save the association
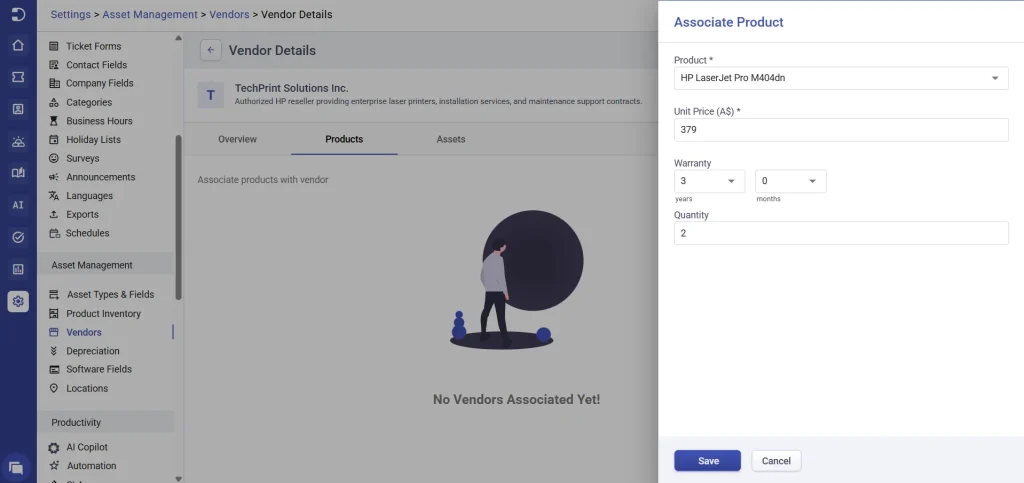
Once added, the product appears in the vendor’s product list along with pricing, warranty, and quantity details
Option 2: Associate vendors from the product inventory
Use this approach when you’re setting up or reviewing a specific product.
- Go to Settings > Asset Management > Product Inventory
- Open the required product
- Navigate to the vendors tab
- Click associate vendor
- Select the vendor and enter the Unit price, Warranty period and Quantity
- Save the association
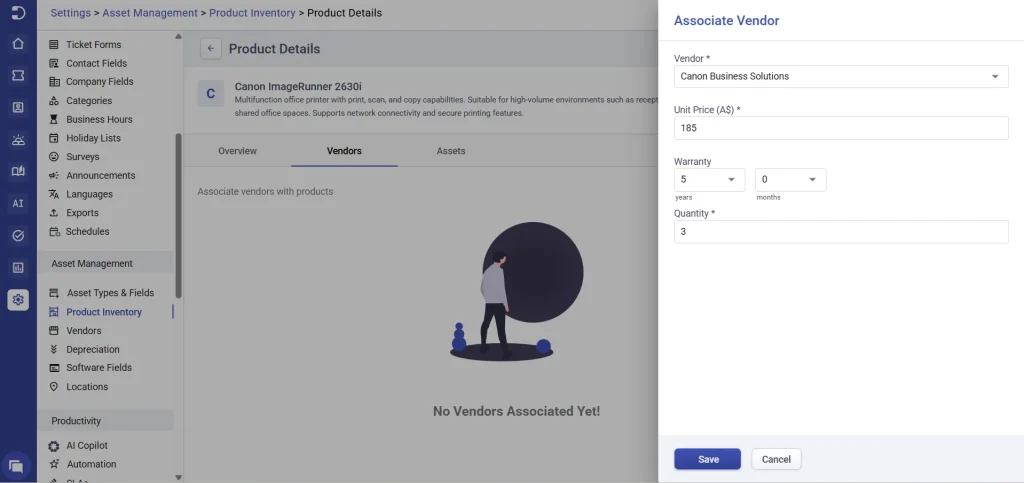
The vendor is now linked to the product and will be visible wherever that product is referenced.
How this helps in real scenarios
- Procurement teams often start from the vendor and associate all supplied products at once
- IT teams usually start from the product and link the correct vendor during setup
- Support agents can quickly trace issues back to the right vendor, regardless of where the association was created
Because the relationship is shared, updates made in one place are reflected everywhere.
Managing existing associations
- You can edit pricing, warranty, or quantity for an associated product at any time
- You can remove an association if the vendor no longer supplies that product
- Vendors themselves can be edited or deleted, provided they are not associated with active products or assets
Note: Deleting a vendor is restricted if it is linked to any product or asset, ensuring data consistency across your inventory.
Learn more about creating and managing assets