


As a business owner or customer support representative, one of the most important aspects of your job is providing excellent customer service. One way to achieve this is by setting up a comprehensive knowledge base within Desk365.
A knowledge base is a collection of information that is easily accessible to customers and support staff, enabling them to find answers to common questions and issues without needing to contact support directly.
Setting up a knowledge base in your helpdesk can greatly improve the efficiency and effectiveness of your customer support team. You should ideally cover all aspects of your product or service which your customers will be looking for in your knowledge base.
For example, if you’re an SAAS product, you can have detailed help center articles that would probably cover product features, billing and payment related questions, FAQs, and more.
Before you start setting up your knowledge base, it is important to determine what you want it to achieve. Do you want to reduce the number of support enquiries by providing self-service options to customers? Do you want to provide a resource for your support team to refer to when answering customer enquiries? Or do you want to do both?
Identifying the purpose of your knowledge base will help you to determine the content that you need to include and how to structure it.
The next step is to gather the content that you will include in your knowledge base. This can include information about your products or services, FAQs, troubleshooting guides, and instructions for common tasks.
Organizing your content in a coherent and user-friendly structure holds significant importance. To assist end-users in finding the information they seek, it is possible to have various categories and folders with their corresponding articles.
Make sure that your customers and support staff are aware of your knowledge base by promoting it through various channels. You can include a link to the knowledge base in your email signature, on your website, and in your support emails. You can also consider promoting it through social media and other marketing channels.
This help center article will guide you through the process of setting up a knowledge base in Desk365.
Creating a knowledge base in Desk365
Desk365 allows you to create and manage your knowledge base. These are steps to follow to create a knowledge base in Desk365.
- Navigate to knowledge base > categories in Desk365.
- Here, related solution articles can be organized into categories. Categories make it easy for users to read similar articles and other possible solutions to the problems they’re facing in your product or service.
- To further streamline your knowledge base, Desk365 allows you to organize articles into folders within each category.
For example, you could group articles related to ‘Payment Cycle’ and ‘Payment Methods’ within a folder called ‘Billing Details,’ which is then placed under the ‘Payments & Billing’ category.
Creating a category
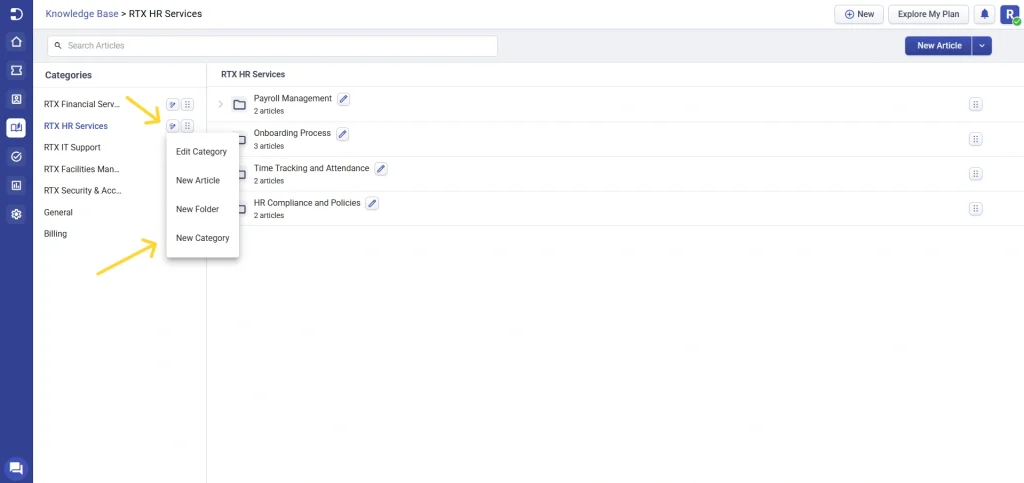
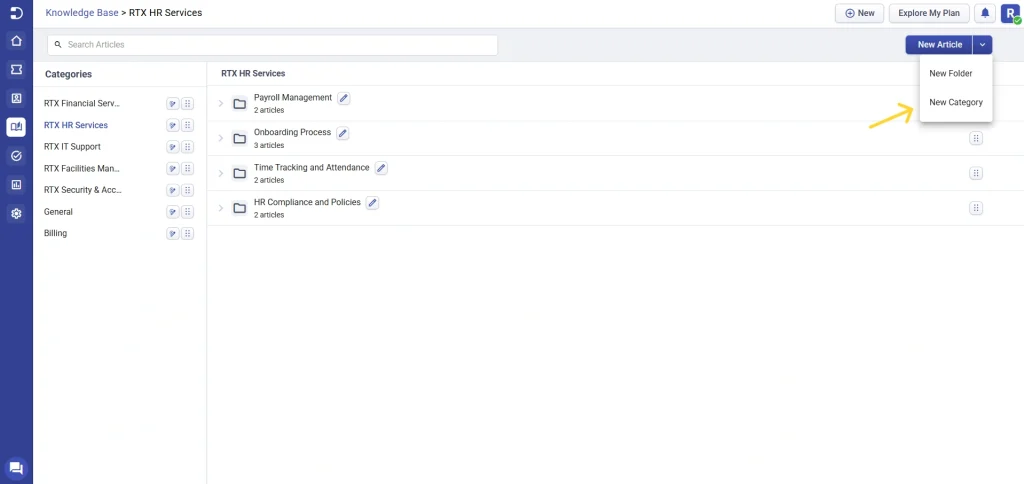
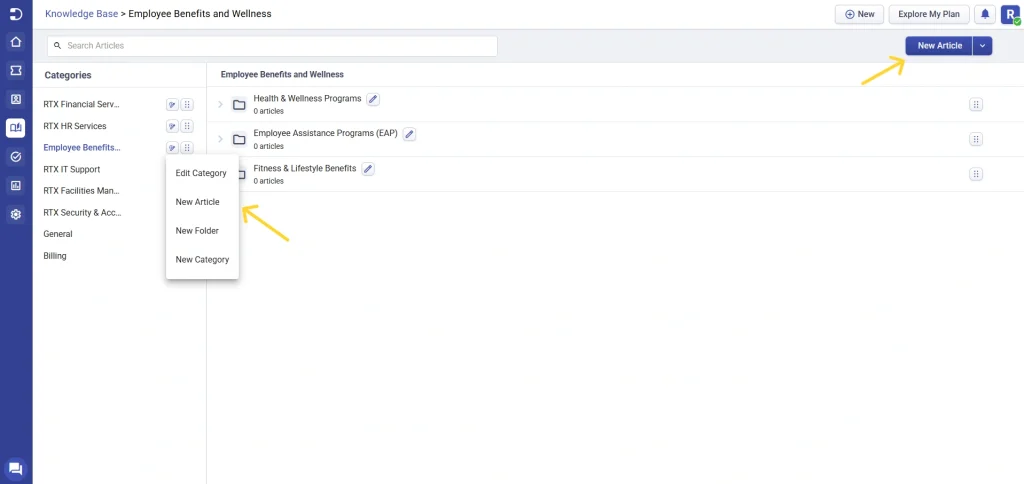
The first step in setting up your knowledge base is creating categories. Categories are the main topics that your knowledge base will cover. To create categories, navigate to the ‘Knowledge Base’ section of your Desk365 dashboard and click on the Edit/New Icon next to the category name. From the dropdown options that appear, choose “New Category.” You can also click on the drop-down next to the “Add Article” option. From there, you can create new categories and assign articles to them.
These are steps to follow to create a category in Knowledge base in Desk365.
1. Click on the ‘New Category’ button.
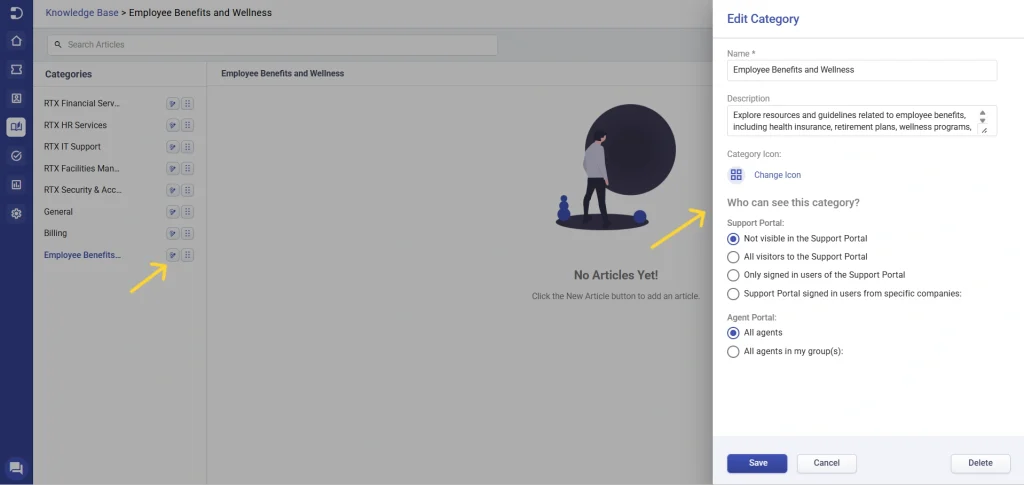
2. Provide a suitable name and description for the category and set the appropriate visibility options. When setting the visibility of knowledge base categories, you have several options to control who can access the content. Here’s a detailed explanation of each option:
Support portal
The support portal is the public-facing section where users can access knowledge base articles. The visibility settings for categories here determine who among your users can view the content.
- Not visible in the support portal:
If you select this option, the category will be completely hidden from the Support Portal. No users, whether signed in or not, will be able to see the category or its articles.
- All visitors to the support portal:
This option makes the category visible to anyone who visits your Support Portal, even if they are not signed in. This is ideal for general information that you want to be accessible to all Support Portal visitors.
- Only signed-in users of the support portal:
Selecting this option restricts visibility to users who are signed in to the Support Portal. Visitors who are not logged in will not see the category. This is useful for content meant only for registered users.
- Support portal signed-in users from specific companies:
This option allows you to restrict visibility even further by showing the category only to signed-in users who belong to specific companies. This is particularly useful for B2B scenarios where you have content that is tailored for specific clients or business partners.
Agent portal
The agent portal is the internal section of Desk365, used by your support agents to manage tickets and access internal knowledge base articles. The visibility settings here control which agents can view the content.
- All agents:
This setting makes the category visible to all agents within your organization. Any agent, regardless of their group or role, will be able to see and access the category.
- All agents in my group(s):
This option restricts visibility to only those agents who belong to specific groups. If an agent is part of one of these groups, they can see the category; otherwise, it remains hidden from them. This is useful for creating group-specific resources, such as internal guidelines or processes relevant only to certain teams.
These visibility settings give you control over who can access your knowledge base content. Ensure that each category is accessible only to the intended users or support agents by carefully selecting the appropriate visibility options.

3. Click the ‘Save’ button to save the category. You can also choose to edit a category by clicking on the Edit/New icon next to the category name.
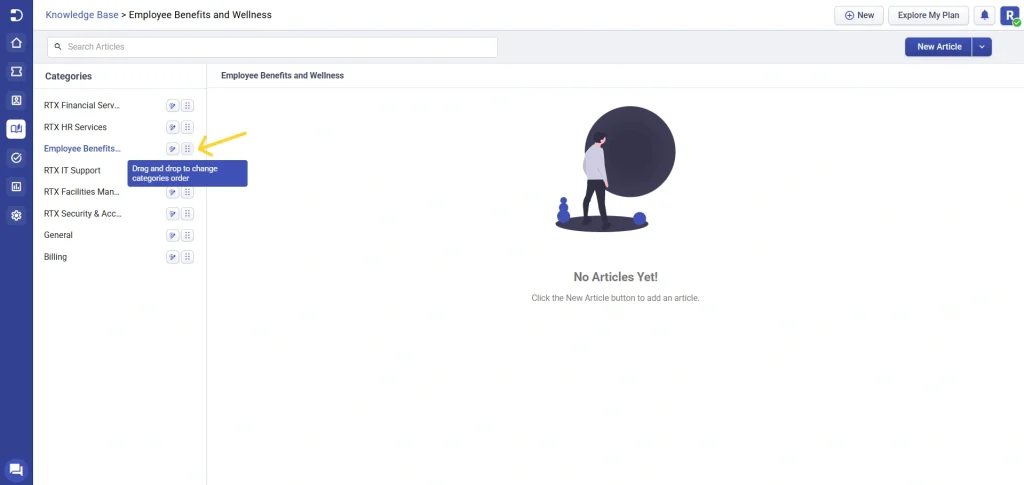
4. Similarly, you can drag and drop to change the ‘Categories’ order if needed.
Creating folders
The next step in streamlining your knowledge base is creating folders within each category. Folders help you group related articles, making it easier for users to find specific information.
These are steps to follow to create a folder:
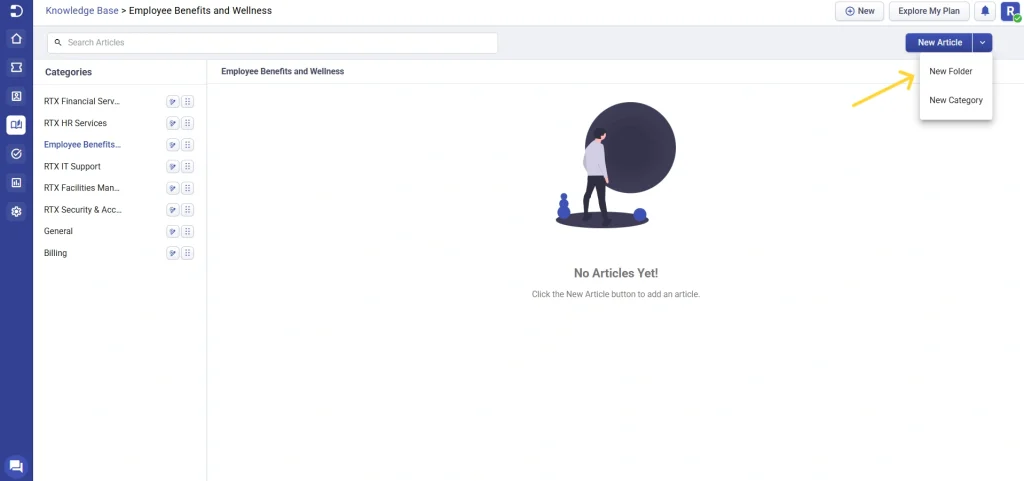
- Click on the Edit/New Icon next to the category name. From the dropdown options that appear, choose “New Folder” or you can also click on the drop-down next to “Add Article” and choose “New Folder”.
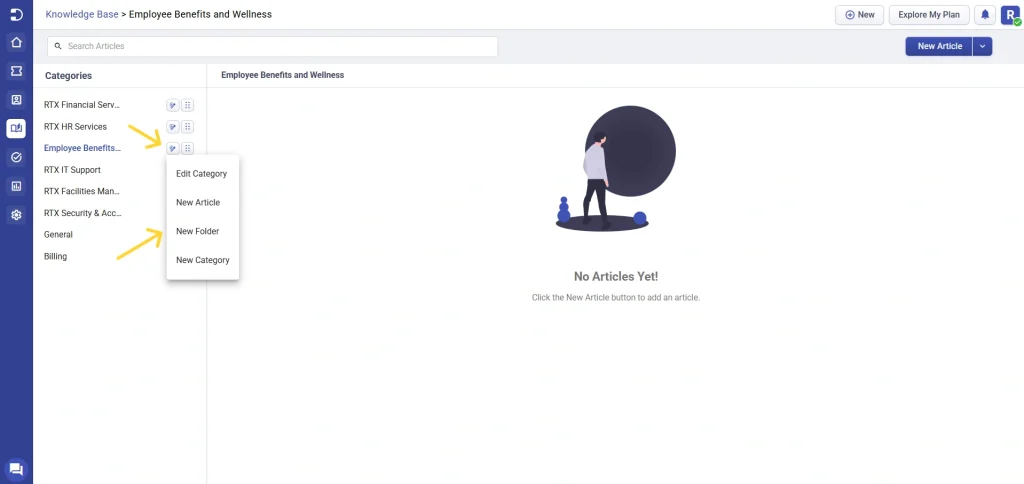
- You can name the folder based on the type of articles it will contain, such as “Health & Wellness Programs” or “Employee Assistance Programs”. Choose the relevant category from the drop-down and hit save.
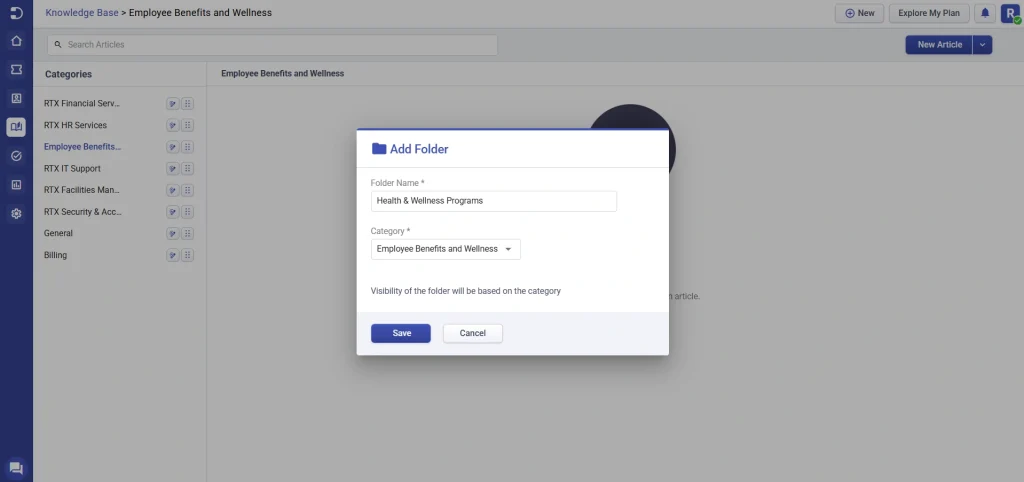
The visibility of the folder will be based on the category it resides in. If the category is visible to all visitors, the folders will also be visible to everyone. Conversely, if the category is restricted to signed-in users or specific companies, the same restrictions will apply to the folders within it.
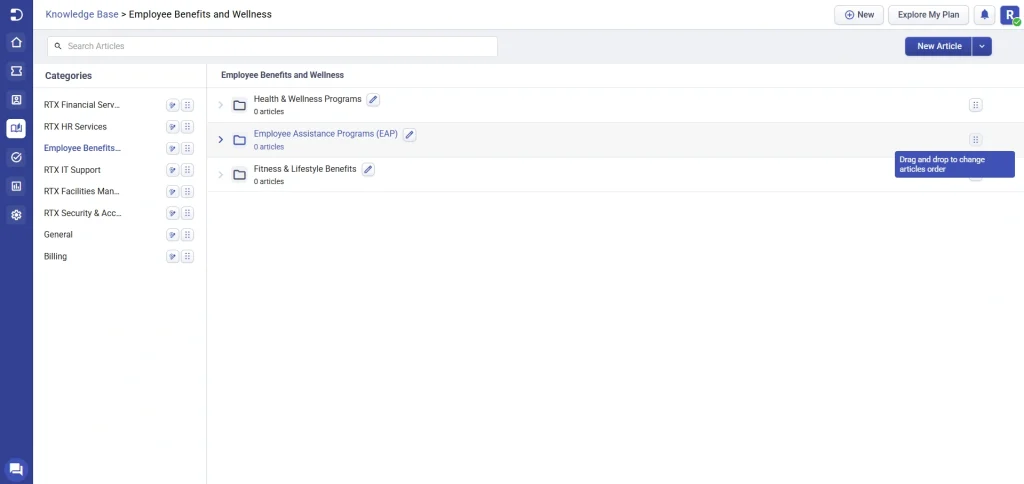
You can drag and drop folders within a category to change their order, ensuring the most important content is prominently displayed.
Creating an article
Once you have created a knowledge base category and folder, you can start creating knowledge base articles. Articles are individual pieces of content that provide information to your customers. When creating articles, it’s important to keep them clear, concise, and easy to understand.
To create a new article, go to the knowledge base section of your Desk365 dashboard and click ‘New Article’ button. From there, you can create new articles and assign them to the correct category and folder.
These are steps to follow to create an article and assign them to the right category and folder in Desk365.
- Click on the Edit/New Icon next to the category name. From the dropdown options that appear, choose “New Article” or you can also click the ‘Add Article’ button at the top.
2. Provide a suitable title and enter the description for the article you are going to create. Choose the appropriate category and folder from the ‘Articles Properties’ dropdown menu located in the right side under which you want to add this solution article.
When creating a knowledge base article, it is important to keep in mind that your customers are looking for clear and concise information. Use simple language and avoid technical jargon as much as possible. You can also use images and videos to make your articles more engaging and easier to understand.
If necessary, you can also choose to include attachments with a knowledge base article.
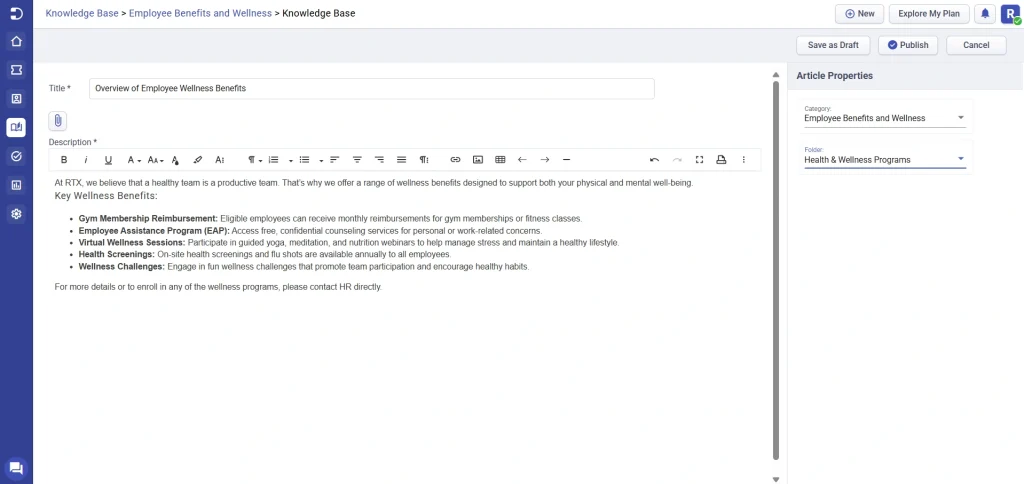
3. Click on the ‘Save as Draft’ button.
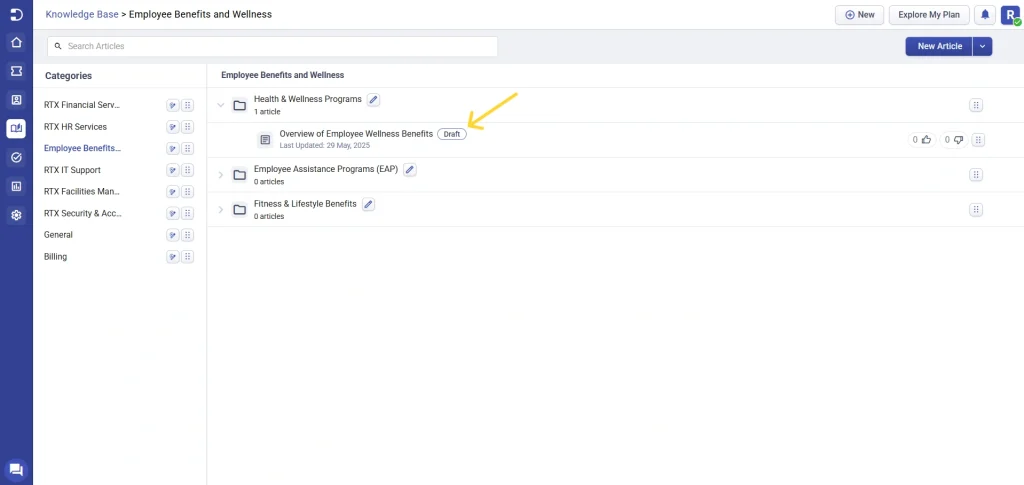
4. Now the article will be saved as a ‘Draft’. You can view your drafts by going to the required category and folder where you’ve created the article as ‘Draft’.
Drafts enable you to handle an offline version of your solution articles without getting published. It also helps to review the solution article with your team to understand if you’re missing any important information in the article or if there are any mistakes which need to be removed from the article.
When writing content for your solution articles, you can choose to save them as drafts and publish them later after discussing it with your team.
5. In this example, you’ll notice the draft here: Knowledge Base > Categories > Employee Benefits and Wellness > Overview of Employee Wellness Benefits
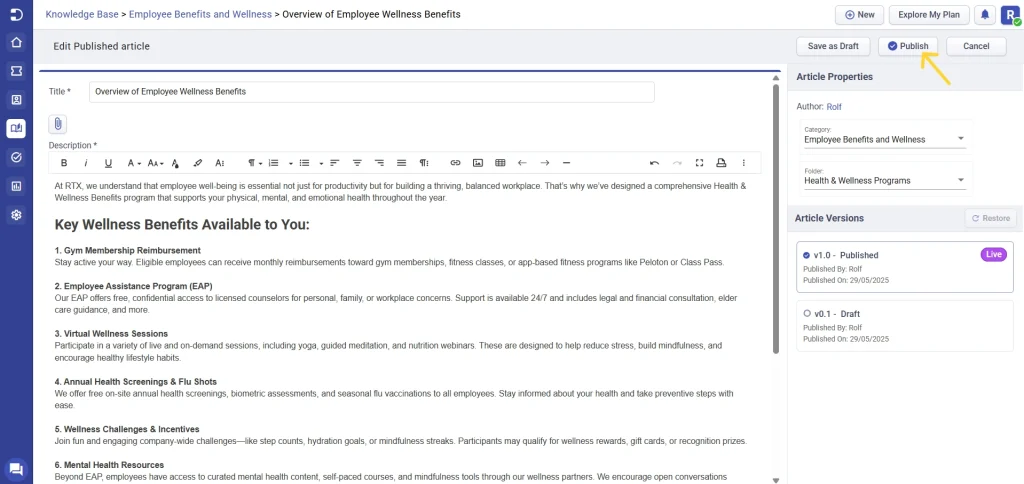
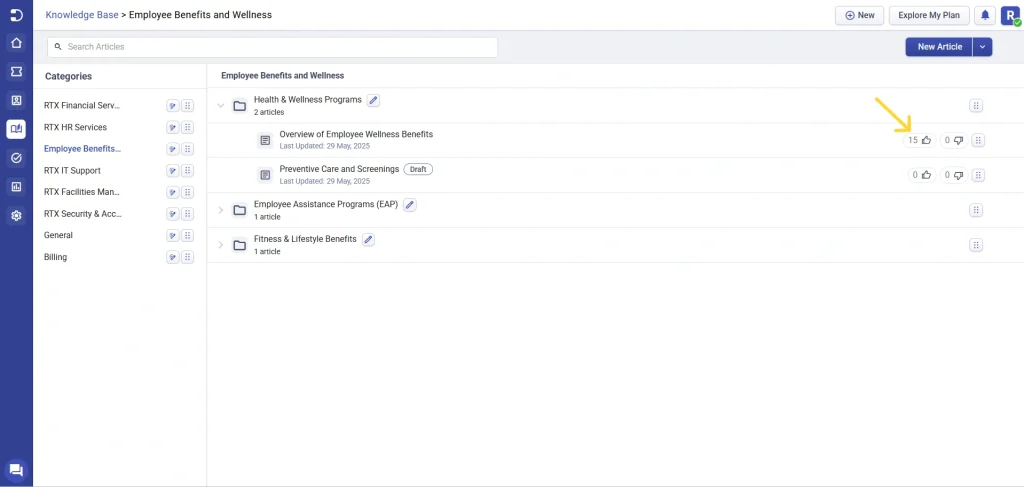
6. Click on ‘Publish’ once it’s good to go and the solution article is now published ‘live’.
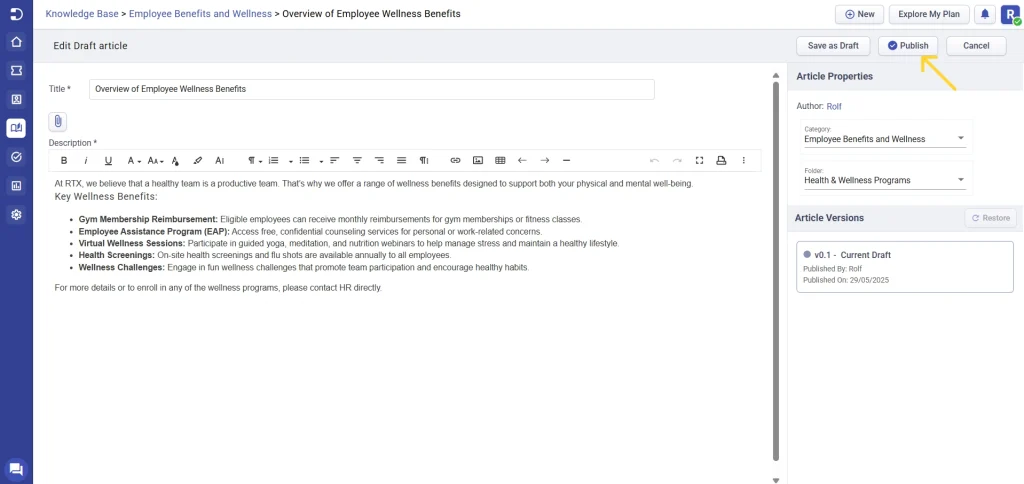
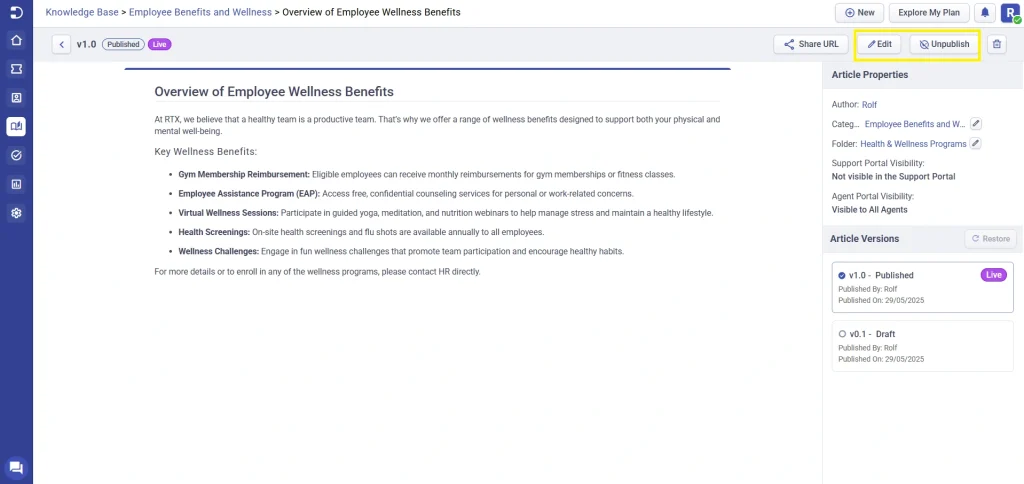
7. Once the article is created, and you notice some minor changes to be made in the article, you can select the article and it opens. Inside the article, you can click on the ‘Edit’ button and you can make the required changes and press the ‘Save’ button to save these changes.
8. Sometimes, you might want to make edits to the published version of an article that you would like your team to review. In this case, you can make the article go back to ‘Drafts’ again by clicking on the ‘Unpublish’ button present at the top instead of completely deleting the article.
9. Now you’ll notice the article appears as ‘Draft’ again. You can click on the ‘Publish’ button once again to publish these new changes over the existing published version once your team approves of the new changes suggested by them.
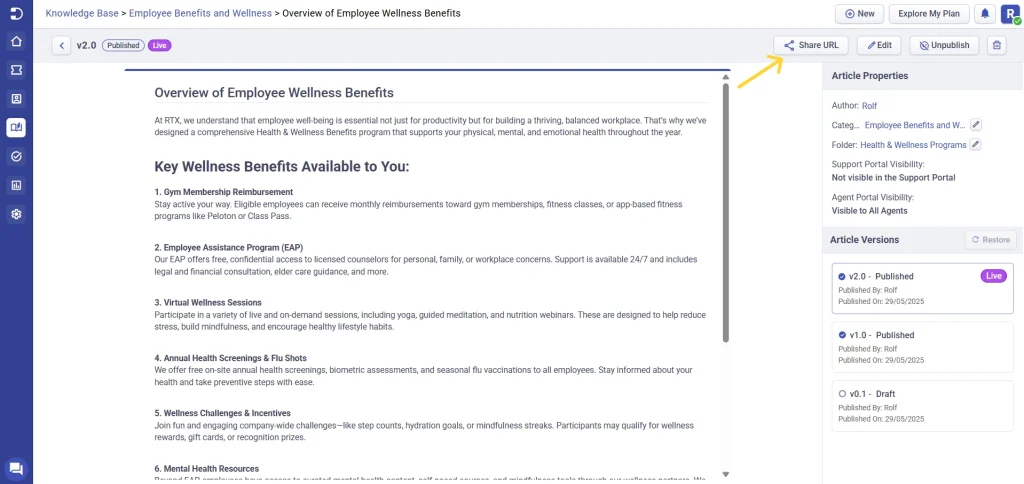
10. You can also share the knowledge base articles straightaway with your agents as well as to your end-users using the ‘Share URL’ option, as shown below.
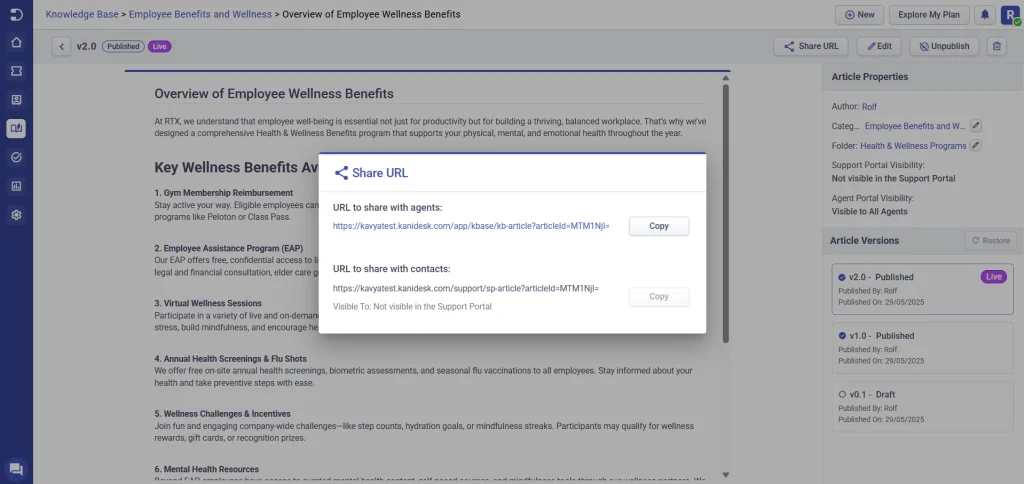
Once you click on the ‘Share URL’ button, you have two options: one for sharing with your agents and the other for sharing with your end-users. These links will guide agents to the article within the agent portal and direct end-users to the article within the support portal.
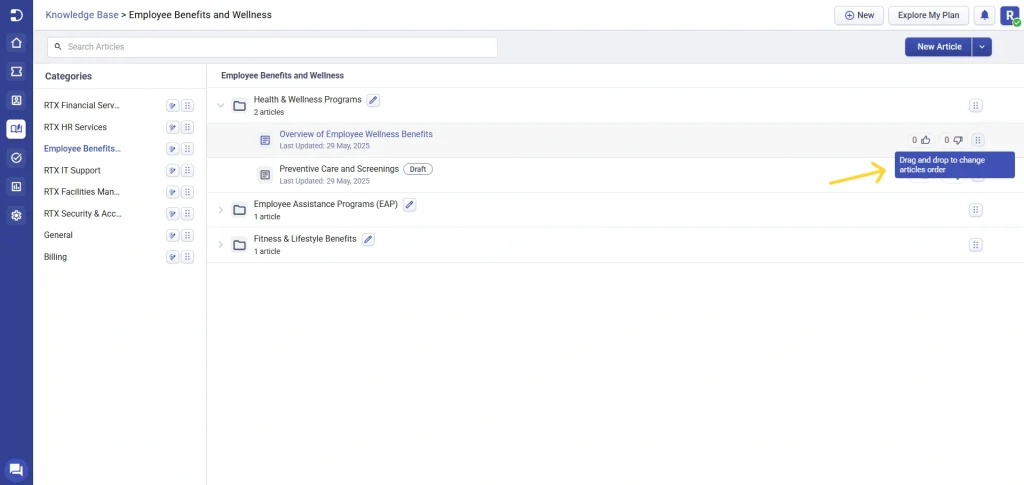
11. You can easily organize your articles by dragging and dropping them within the same folder, moving them to another folder within the same category, or leaving them unassigned without adding them to any folder.
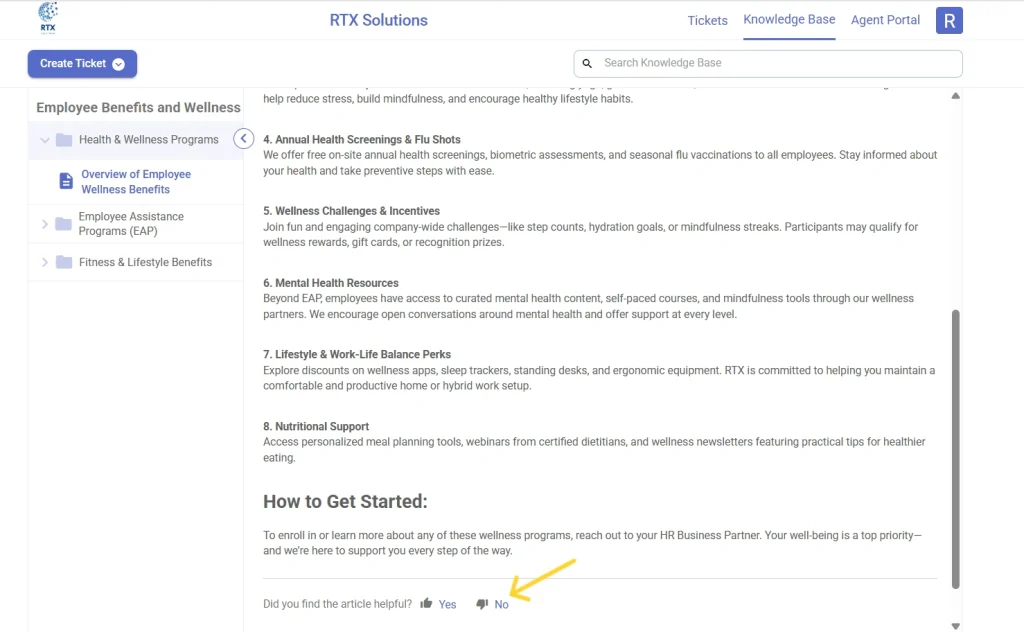
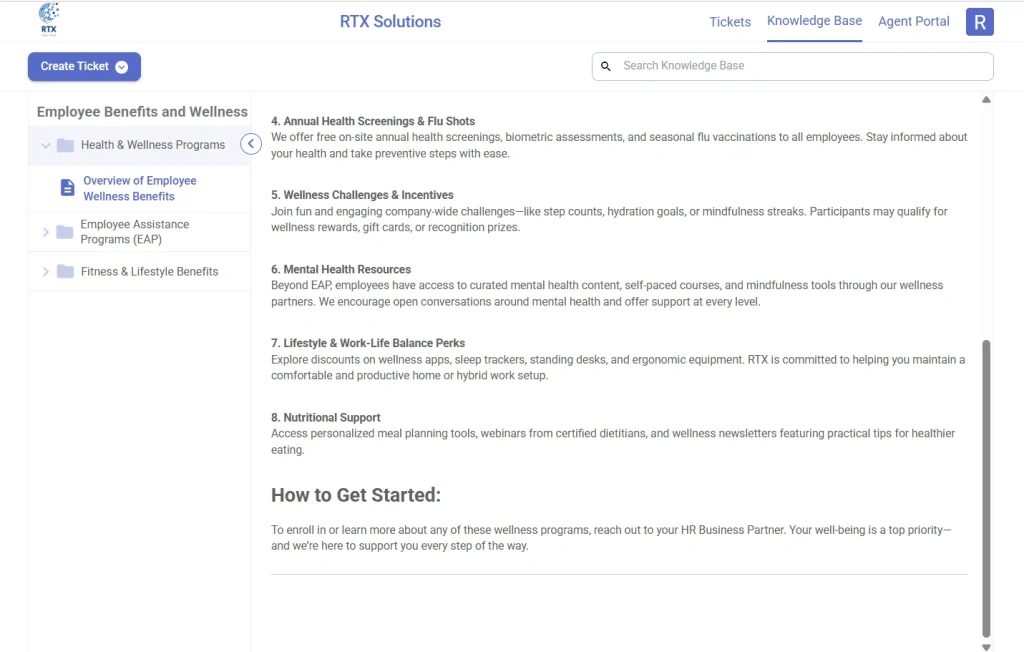
Finally, you can see the solution articles appear in a nice structure in the support portal.
Setting up knowledge base articles in Desk365 is a simple and effective way to provide your customers with the information they need to use your products or services more effectively. By following the steps outlined in this article, you can create high-quality articles that are easy to find and understand.
Disabling knowledge base feedback
Knowledge Base (KB) articles in Desk365 often include a feedback feature, allowing users to rate the helpfulness of the content. While this feature can help improve articles, there may be situations where disabling it offers a cleaner, more streamlined user experience.
Steps to remove KB feedback
- From the side navigation panel in Desk365 agent portal, locate and click on settings.
- Select support portal under the channels section. This will bring up various support portal configuration options, including custom domain, portal access, reCAPTCHA settings and so on.
- Scroll down in the support portal settings until you find the option labeled knowledge base.
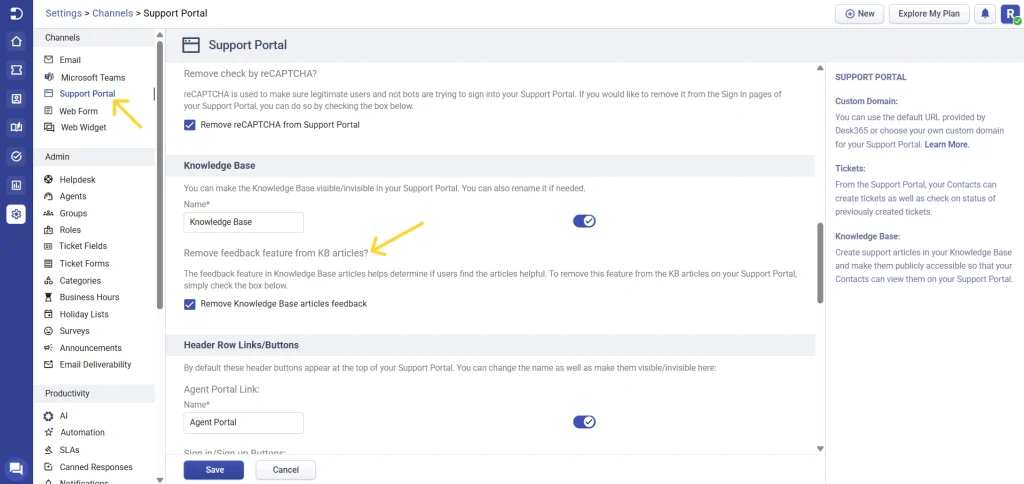
- To turn off the feedback feature, check the box next to ‘Remove knowledge base article feedback’ from support portal. This will prevent users from submitting feedback on individual knowledge base articles.
- After making your selection, click Save Changes. This ensures your new settings are applied, and the feedback section will be removed from your Desk365 support portal.

By following these steps, you can easily disable the feedback option for knowledge base articles in Desk365, creating a smoother user experience in your helpdesk system.


