


Switching helpdesk platforms can be time-consuming when you need to move existing support data without losing important information or disrupting your workflow. Desk365’s migration feature simplifies the process of moving your existing helpdesk data from Freshdesk to Desk365.
This helps you retain your existing tickets, company and contact information, and knowledge base content, so you can continue your support operations in Desk365 without having to recreate this data manually.
This article walks you through the steps to migrate your data from Freshdesk to Desk365.
Export data from Freshdesk
Before migrating your data to Desk365, export the supported data from your Freshdesk account.
Step 1: Sign in to your Freshdesk account, click the admin icon in the left panel, and go to Account > Account Details.
Step 2: In Account Details, locate Export data and click Export.
Step 3: In the Export window, select XML or JSON as the export format. Then enable the following data types as required:
- Tickets
- Contacts
- Companies
- Solutions (Knowledge Base)
For Tickets, Contacts, and Companies, click on the Created filter and select the time range for the data you want to migrate. Select Any time to export all available records.
Step 4: Make sure that all fields are selected for each data type, then click Export to generate the export file. Once the export is initiated, a confirmation popup will appear, and you will be redirected to the Account Exports page.
Step 5: On the Account Exports page, click Details to review the export configuration and verify that the required data has been included.
Once the export is complete, click Download to download the exported file. You will use this file to begin the migration in Desk365.
Import file into Desk365
Before starting the migration, we recommend preparing your Desk365 account to match your existing Freshdesk setup as closely as possible.
- Create the required ticket, company, and contact fields in Desk365 that you currently use in Freshdesk.
- Create the required Knowledge Base categories and subcategories to match your Freshdesk structure.
- Add your Freshdesk agents to Desk365 to retain the ticket assigned agent values properly
Step 1: In Desk365, go to Settings > Integrations > Migration, locate the Freshdesk card, click Upload, and select the exported Freshdesk ZIP file to begin the migration process. The ZIP file must contain the exported XML or JSON files and must not exceed 30 MB.
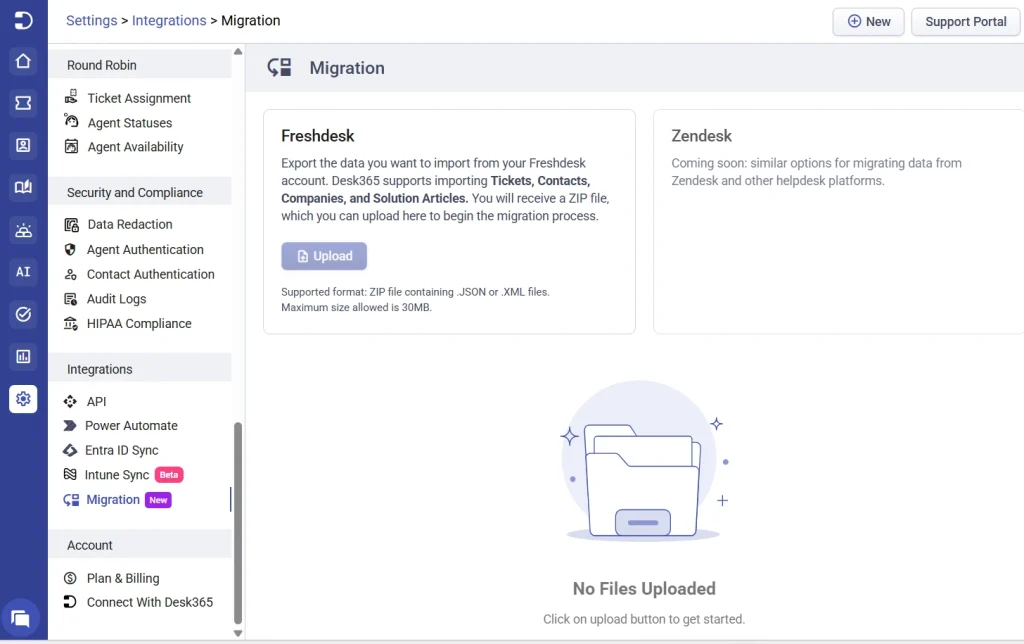
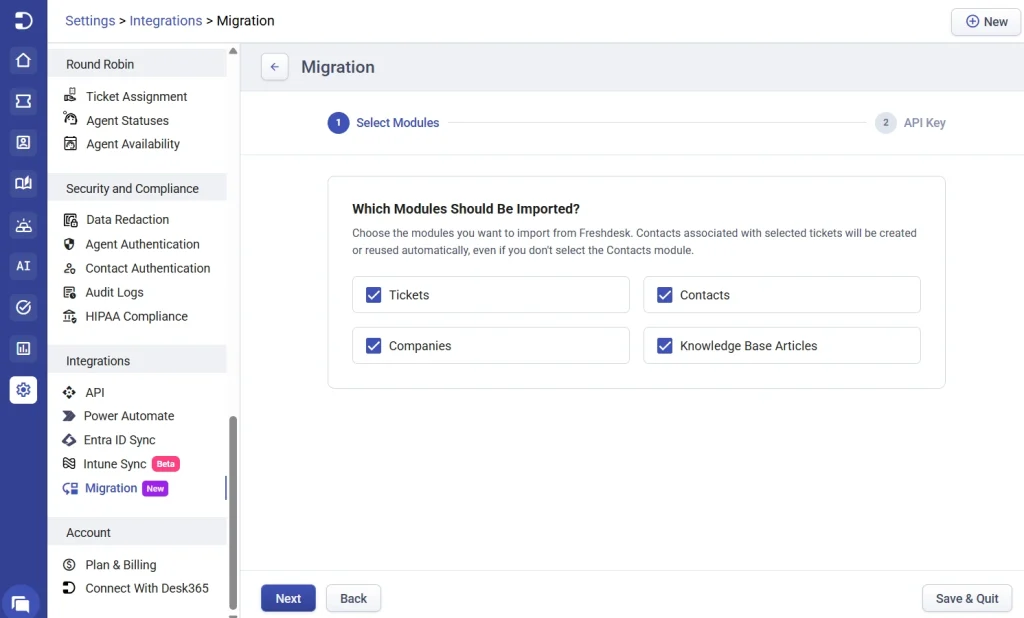
Step 2: Select the modules you want to migrate to Desk365 – Tickets, Contacts, Companies, and Knowledge Base Articles and click Next to continue.
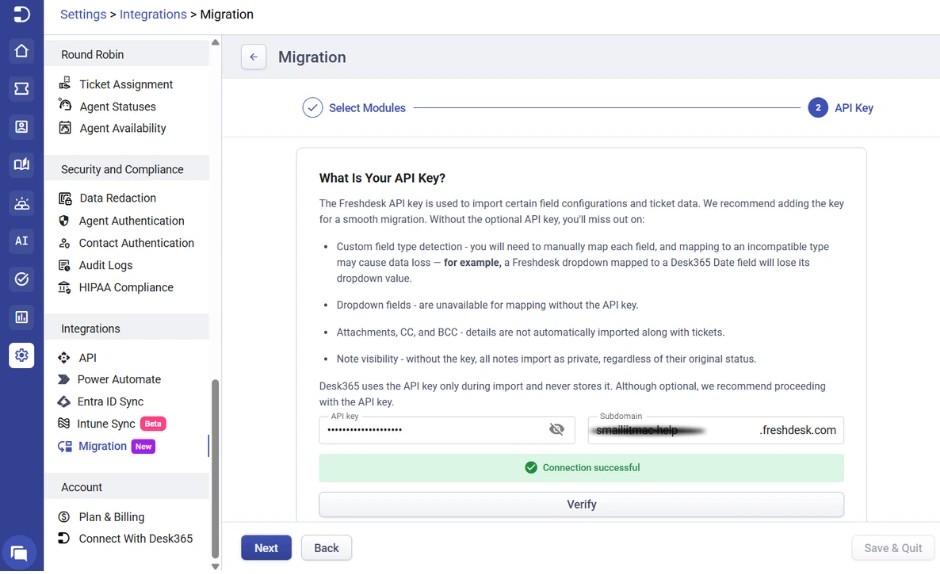
Step 3: Enter your Freshdesk API key and Freshdesk subdomain, then click Next to verify your Freshdesk account and continue the migration.
Note: We recommend providing your Freshdesk API key for a smoother and more complete migration. If you choose not to provide the API key:
- Desk365 cannot automatically identify custom field types, so you must manually map each field. Mapping a field to an incompatible type may result in data loss. For example, mapping a Freshdesk dropdown field to a Desk365 Date field will cause the dropdown value to be lost.
- Freshdesk dropdown fields will not be available for mapping.
- Ticket attachments and CC and BCC details will not be automatically imported.
- All imported ticket notes will be set as private, regardless of their original visibility in Freshdesk.
Desk365 uses the API key only during the migration and does not store it.
Step 4: Once the Freshdesk API key is successfully verified, Desk365 validates the exported data before starting the migration. This validation process typically takes around 30 minutes.
You can proceed with the migration once the validation is complete.
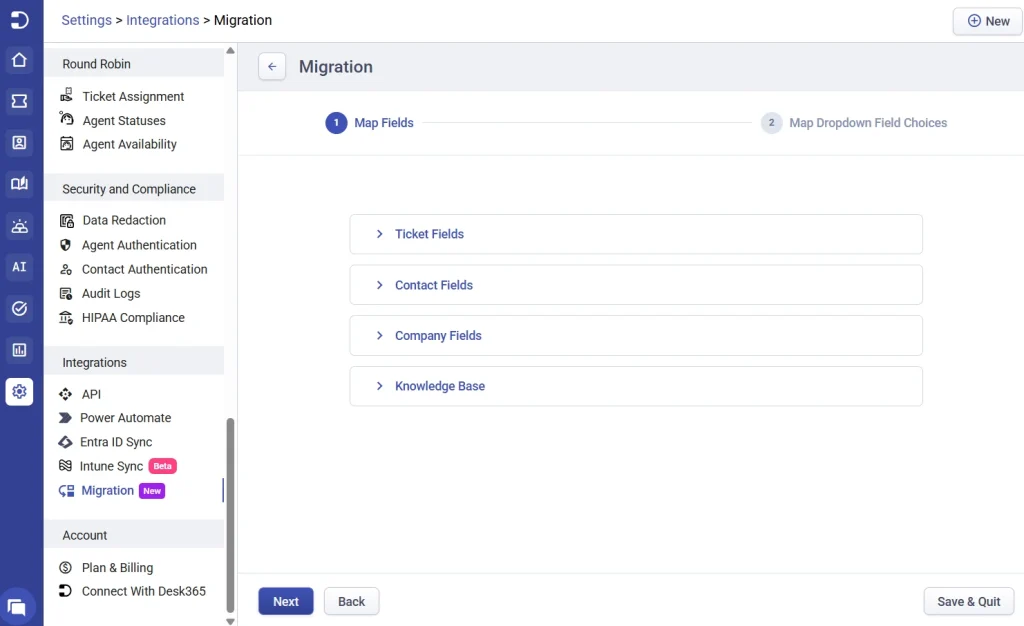
Step 5: The default fields for tickets, contacts, companies, and Knowledge Base are automatically mapped to their corresponding fields in Desk365. Custom fields can be mapped by users during migration.
Providing the Freshdesk API key helps Desk365 identify the types of your Freshdesk custom fields and display more compatible Desk365 field types for mapping. Without the API key, all available Desk365 custom field types will be displayed for each Freshdesk custom field, so users should carefully select the appropriate field type when mapping them.
For custom fields, any field containing text can be mapped to a Text or Paragraph field in Desk365. Number fields can be mapped to either a Number or Decimal field.
Review the field mappings and click Next to continue.
Note: Freshdesk supports number values of up to 18 digits, while Desk365’s Number and Decimal fields support up to 9 digits. If a number value is within the 9-digit limit, it can be mapped to a Number or Decimal field. If it exceeds the limit, map it to a Text field to preserve the complete value without truncation.
Step 6: Map the Freshdesk dropdown values to the corresponding Desk365 values. For Status and Priority, select the matching Desk365 choice from the available options.
For Agent fields, if an agent in Freshdesk is not available in Desk365, you can either map the agent to an available Desk365 agent or skip the mapping. If skipped, tickets assigned to that Freshdesk agent will remain unassigned in Desk365.
For Ticket Type, map each Freshdesk value to the corresponding Desk365 value. If you select Skip Choice, the Freshdesk value will not be imported, and the corresponding Desk365 field will be left empty for tickets containing that value.
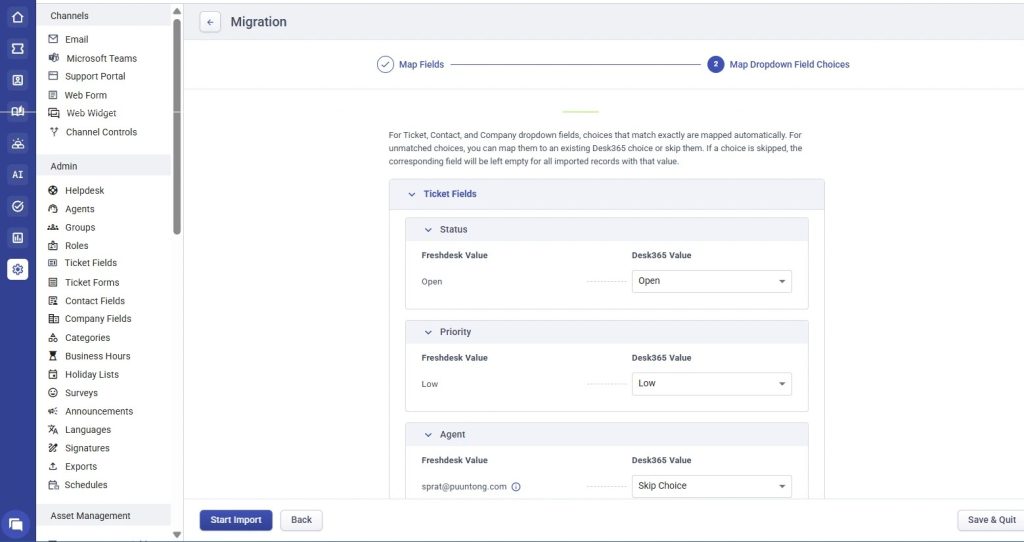
Review the dropdown mappings and click Start Import to begin the migration.
Step 7: Once the import is completed, the uploaded file will be marked as Successful. This confirms that the selected Freshdesk data has been successfully migrated to Desk365.
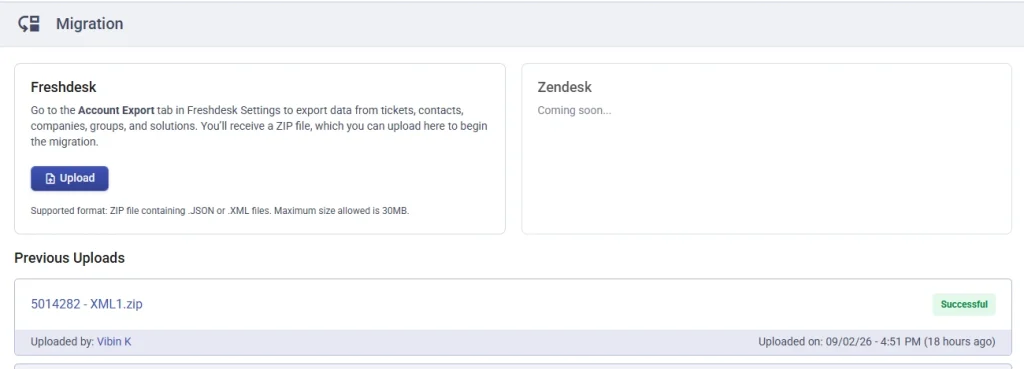
You can now access and manage your migrated tickets, companies, contacts, and Knowledge Base content in Desk365 and continue your support operations without interruptions.