


Contact notifications are an essential aspect of any helpdesk software, as they enable businesses to keep their customers informed about the status of their requests.
When a customer submits a request through a helpdesk system, they expect a timely response and regular updates on the status of their request.
Desk365 provides you with different contact notifications that you can set up. Contact notifications can be automated and these automated alerts are sent based on certain triggers or events, such as when a ticket is created, resolved, or closed.
The importance of contact notifications cannot be overstated, as they help to improve customer satisfaction by keeping customers informed and engaged throughout the support process. Customers who are kept informed about the status of their requests are more likely to be satisfied with the service they receive and are less likely to become frustrated or dissatisfied with the support process.
Contact notifications are sent via email or Microsoft Teams or both based on individual preferences. For tickets created through the Microsoft Teams Support Bot, contacts receive instant notifications with system generated messages if the Teams notification mode is enabled.
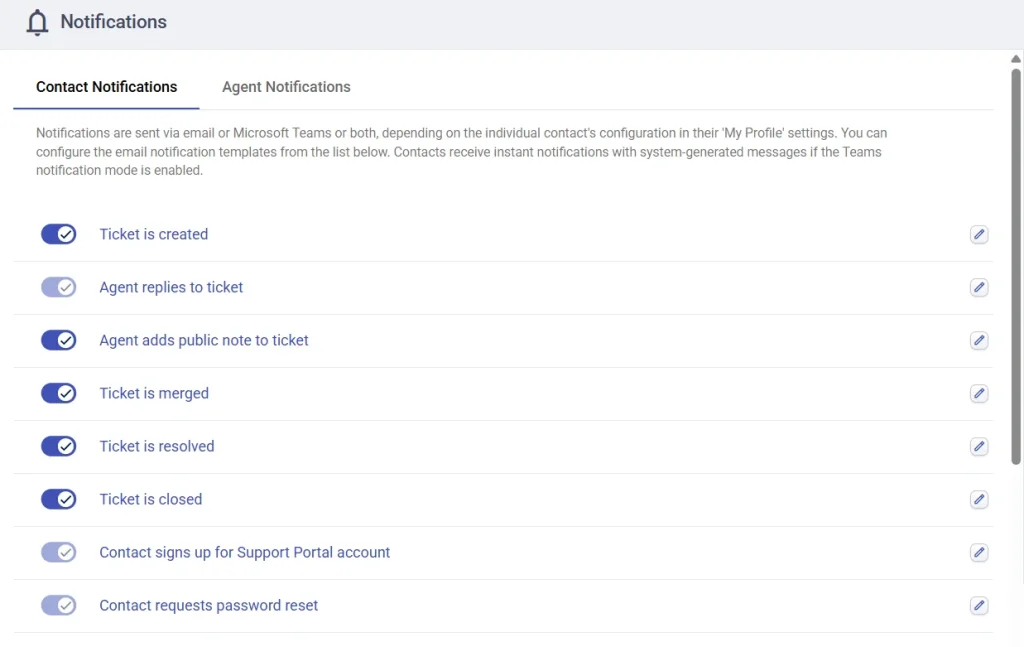
You can choose the actions for which you want your contacts to receive notifications.
Contacts can receive notifications for:
– Ticket is created
– Agent replies to ticket
– Agent adds public note to a ticket
– Ticket is merged
– Ticket is resolved
– Ticket is closed
– Contact signs up for Support Portal account
– Contact requests password reset
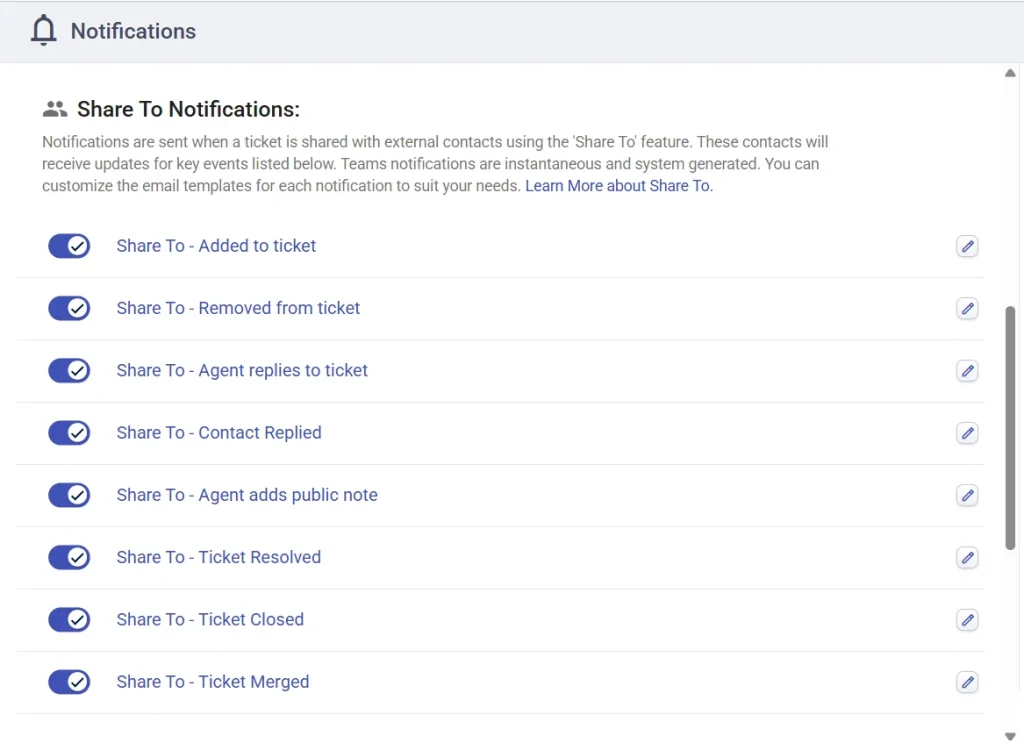
In addition to the standard contact notifications, Desk365’s Share To notifications are sent when a ticket is shared with external contacts using the ‘Share To‘ feature. The shared contacts will receive updates for key events, similar to the regular notifications, but tailored to the shared ticket. Share To notifications include:
– Added to the ticket
– Removed from the ticket
– Agent responds to the ticket
– Contact replies to the ticket
– Agent adds a public note
– Ticket resolved
– Ticket closed
– Ticket merged
Now, let’s take an example of ‘Contact Notification’ that occurs on an email when a ticket is created.
To configure notifications for contacts, follow these steps:
1. Log in to your Desk365 account.
2. Navigate to Settings > Productivity > Notifications tab.
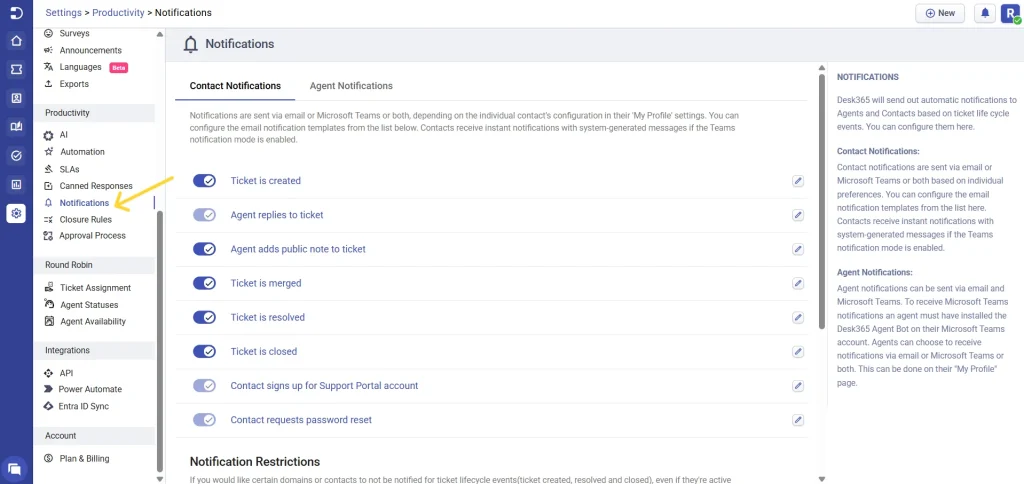
3. Click on the ‘Contact Notifications’ section.
4. Select the types of notifications that you want to configure, such as ‘Ticket is created’, ‘Ticket is resolved’, Ticket is closed’, and more.
You can also update the actual message by clicking on the notification links which take you to the message screen where you can configure the email notification templates.
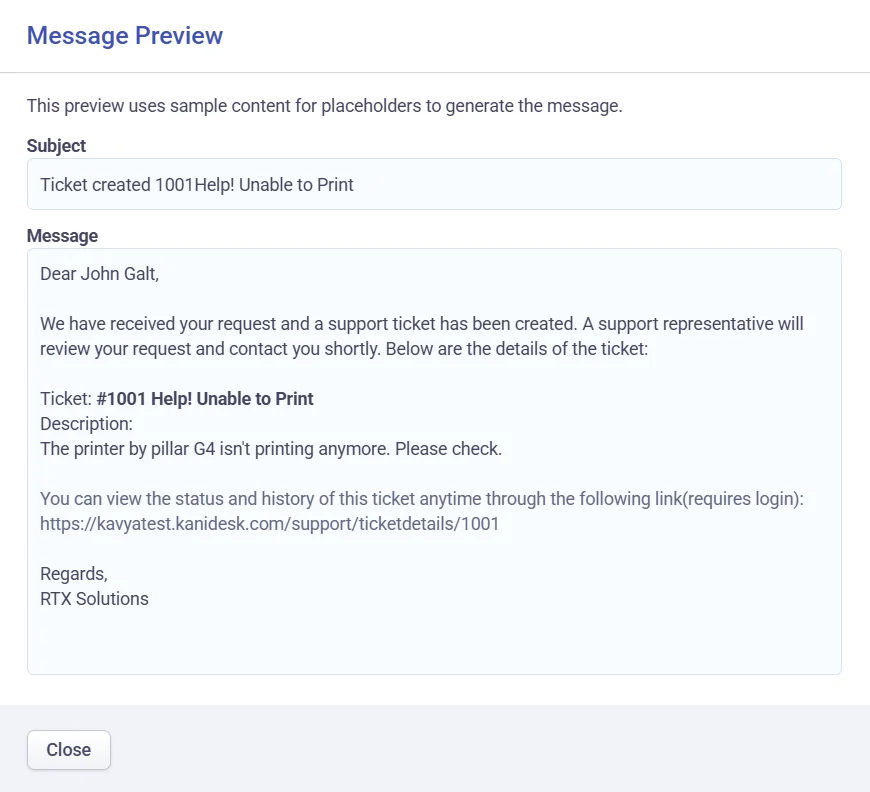
5. This is the email which is sent whenever a new ticket is created by the contact. This way the contact receives confirmation of the receipt of their new request, and assurance that it will be addressed promptly.
You can also customize the content of the email template as per your requirements.
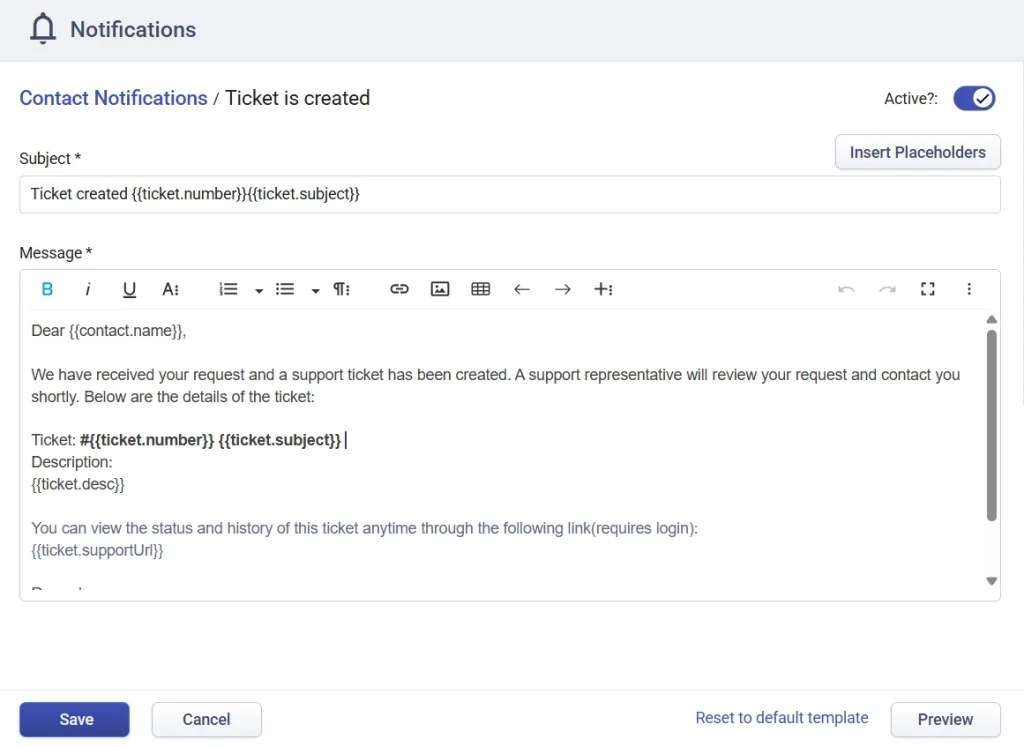
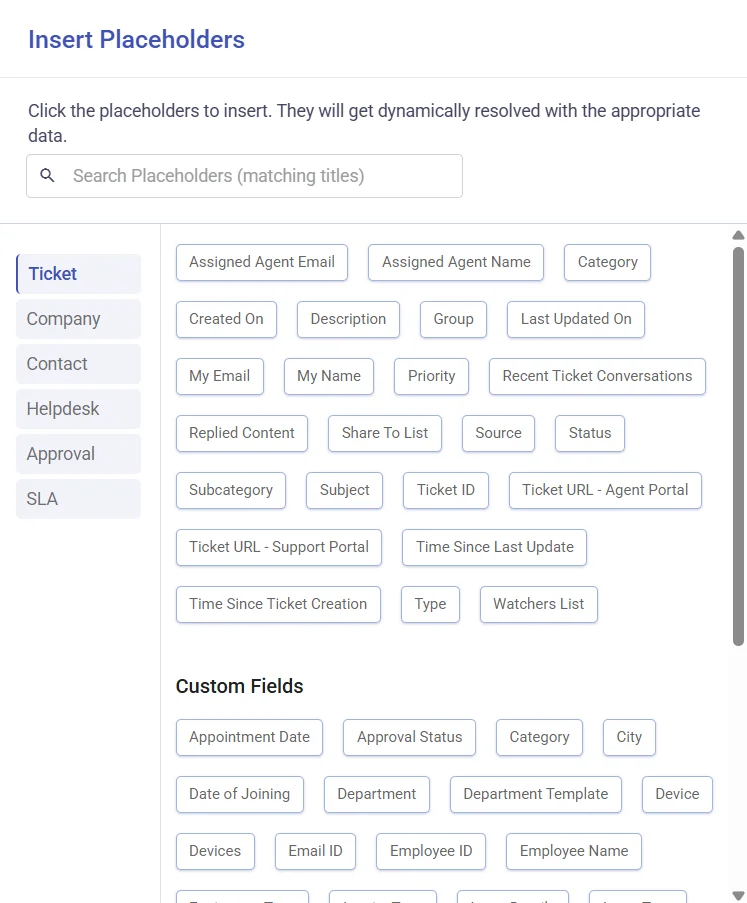
You can also include placeholders that are populated dynamically based on ticket and account properties.
6. You can also preview your message by clicking on the preview button.
7. Click on the ‘Save’ button to save your changes that you made to the template.
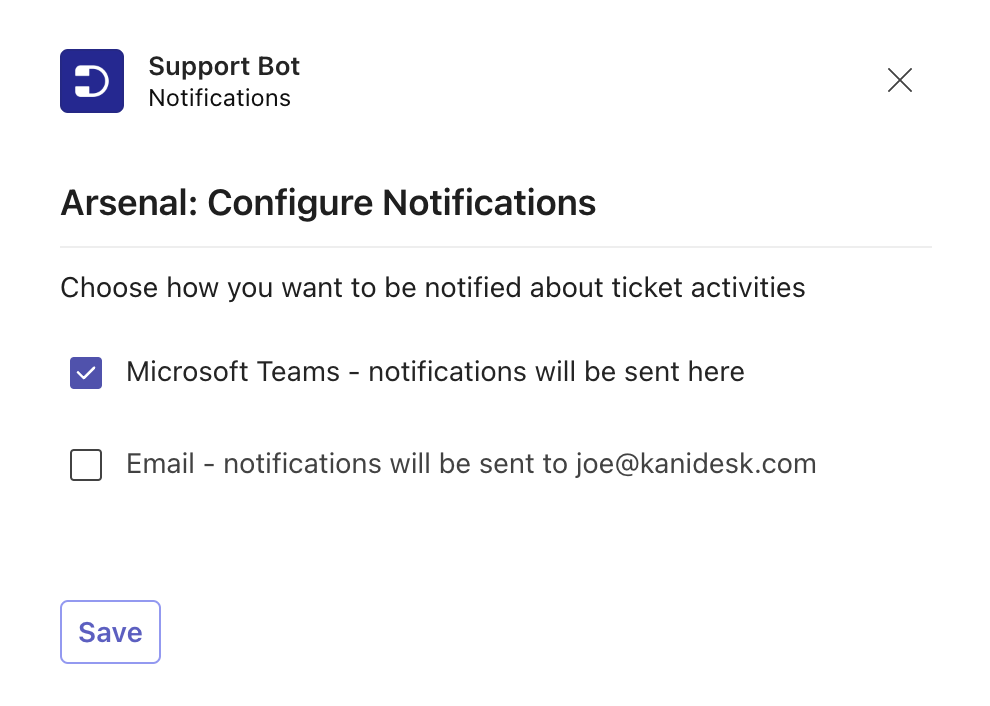
Likewise, contacts can easily configure their notification preferences on Microsoft Teams by clicking on the ‘notifications’ option.
In conclusion, configuring contact notifications in Desk365 is a simple and straightforward process that can help you stay on top of incoming requests and provide excellent customer service to your clients.


