


In a busy helpdesk environment, it is essential that agents are notified promptly when a new ticket is submitted or when an existing ticket is updated. Agent notifications play a crucial role within Desk365, ensuring that agents or support staff remain well-informed about new or modified tickets.
The importance of agent notifications cannot be understated, as they help to ensure that tickets are addressed promptly and efficiently. When agents are notified of new or updated tickets, they can prioritize their workload accordingly and ensure that no customer request goes unanswered.
Agents can choose to receive notifications in Desk365 via email or Microsoft Teams or both. To receive Microsoft Teams notifications, an agent must have installed the Desk365 Agent Bot on their Microsoft Teams account.
This can be done on their “My Profile” page. This help center article explains in detail about individual notification settings for agents.
Additionally, Desk365 offers real-time notifications within the Agent Portal, which ensures agents are immediately alerted to ticket updates as they happen. For more information, you can refer to the help article on real-time notifications.
Desk365 offers a variety of agent notifications that can be customized to keep your team informed and ensure timely responses. You can configure notifications based on ticket assignments, SLA reminders, approval requests, and watcher updates. Below are the different types of notifications you can set up:
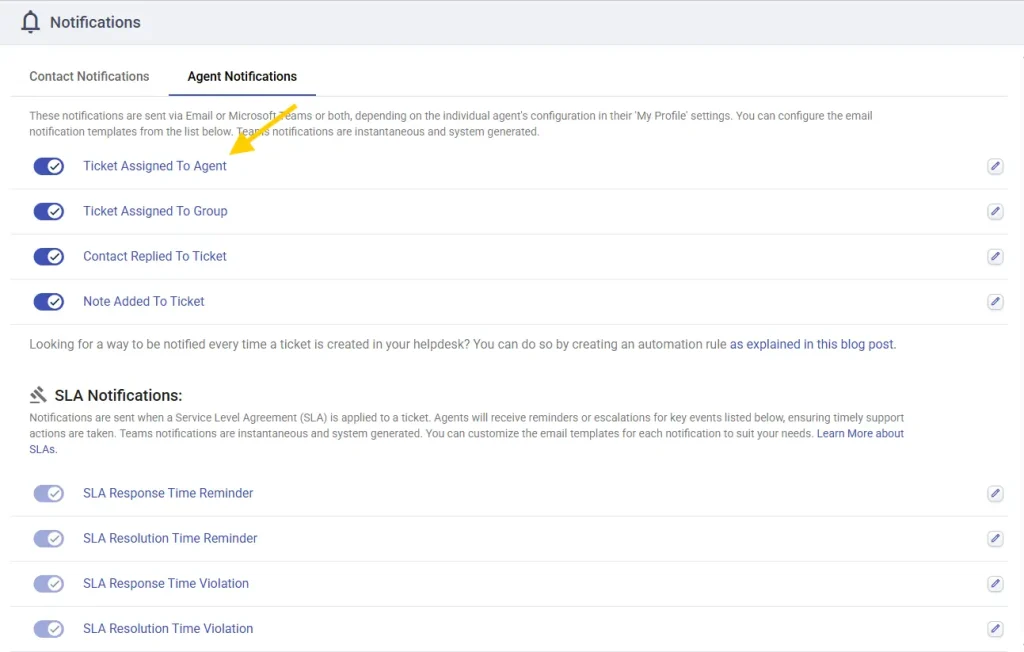
– Ticket is assigned to agent
– Ticket is assigned to group
– Contact replies to ticket
– Note is added to ticket
– SLA response time reminder
– SLA resolution time reminder
– SLA response time violation
– SLA resolution time violation
– Approval request created
– Approval request cancelled
– Reminder for approval request
– Approval granted
– Approval rejected
– Watcher added to ticket
– Watcher removed from ticket
– Watcher – Agent replies to ticket
– Watcher – Contact replies to ticket
Now, let’s take an example of ‘Agent Notification’ that occurs when a ticket is assigned to agent.
To configure notifications for agents, follow these steps:
1. Log in to your Desk365 helpdesk account.
2. Navigate to Settings > Productivity > Notifications tab.
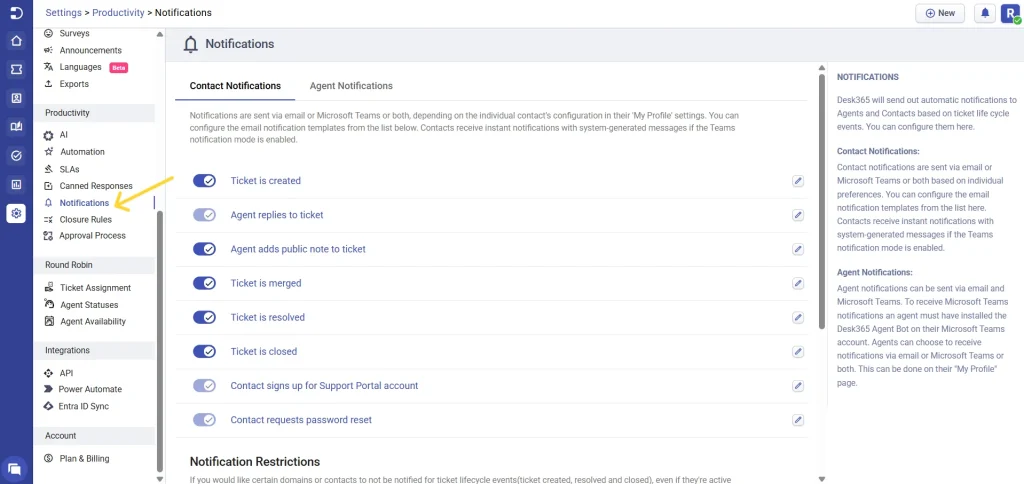
3. Click on the ‘Agent Notifications’ section.
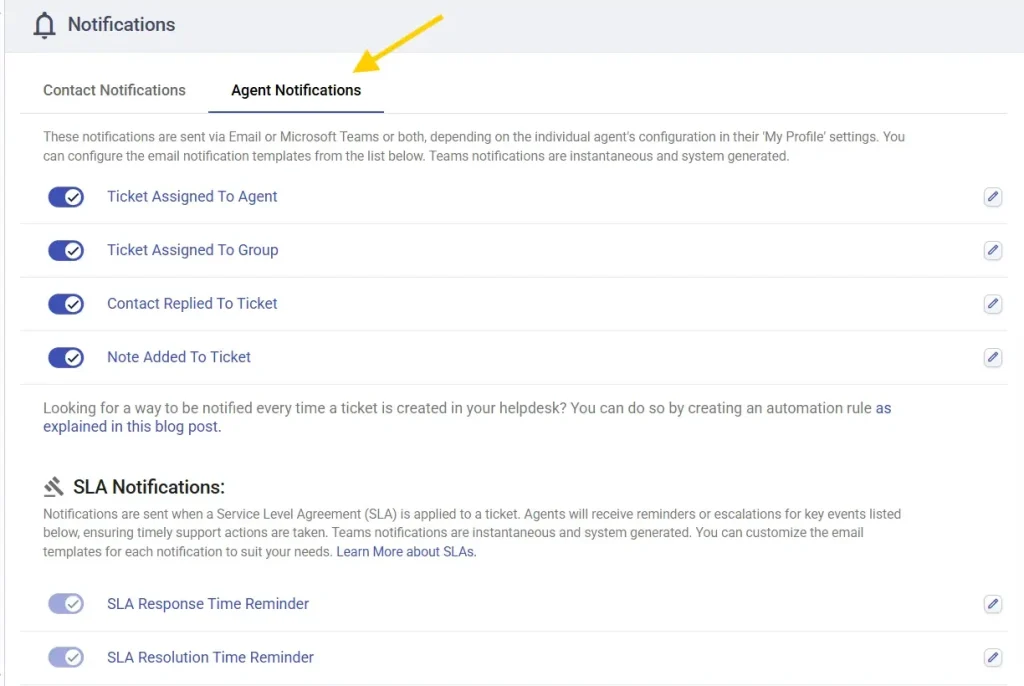
4. Select the types of notifications that you want to configure, such as ‘Ticket is assigned to agent’, ‘Ticket is assigned to group’, ‘Contact replies to ticket’, and more.
You can also modify the current message by clicking on the edit icon that will bring you to the message screen, allowing you to customize the email notification templates.
5. This email is automatically sent to an agent whenever a ticket is assigned to them. This notification alerts the agent about the newly assigned ticket, enabling them to initiate prompt action.
Additionally, you have the flexibility to personalize the email template according to your specific needs.
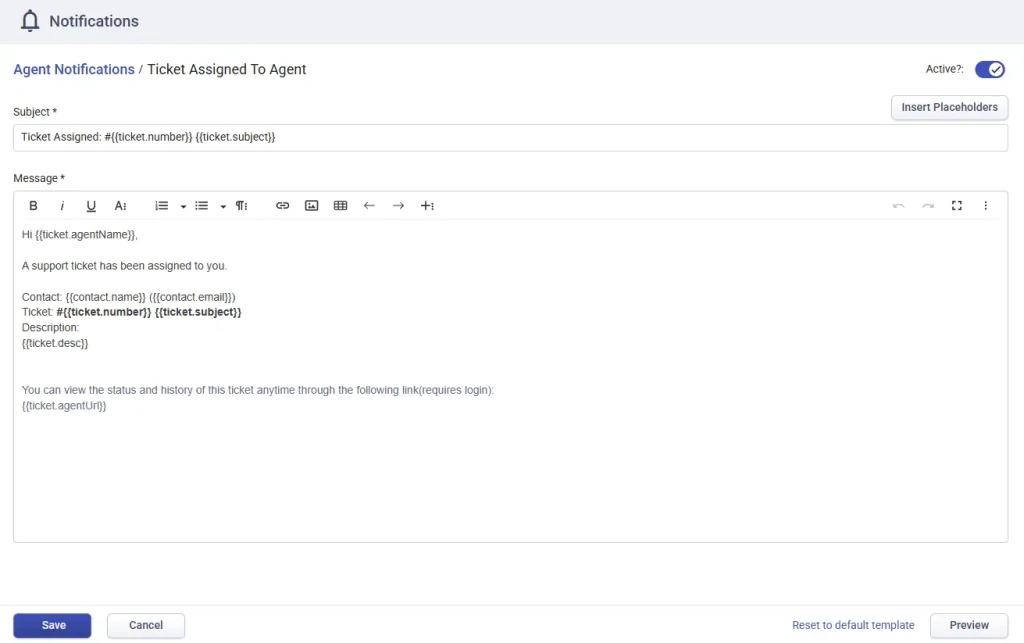
6. You can also incorporate placeholders that are populated dynamically based on ticket and account properties.
After making the required changes on the template, click on the ‘Save’ button to save your changes that you made to the template.
Configuring agent notifications is an important step in ensuring that your agents are always on top of their game when it comes to responding to customer enquiries.
By following the steps outlined in this article, you can set up notifications that work for your team and help you provide the best possible customer service.
Remember to identify the types of notifications your agents need, configure notification channels, test notifications, and monitor and adjust notifications as needed. With these steps in mind, you can configure agent notifications that help your team provide the best possible customer service.


