Periodically, it may become necessary to upgrade the Support Bot to a more recent version. This need could arise either because Desk365 has released a new version or due to custom modifications you’ve implemented in your Helpdesk’s Support Bot.
In this article we’ll take you through the steps needed to update the Support Bot to the newer version.
Check if there's a newer version available
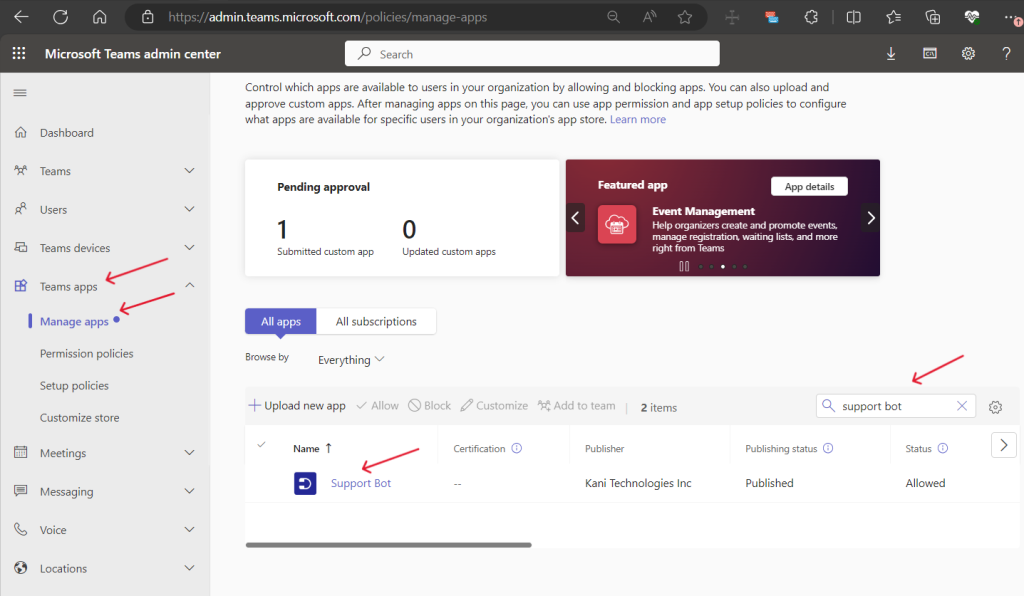
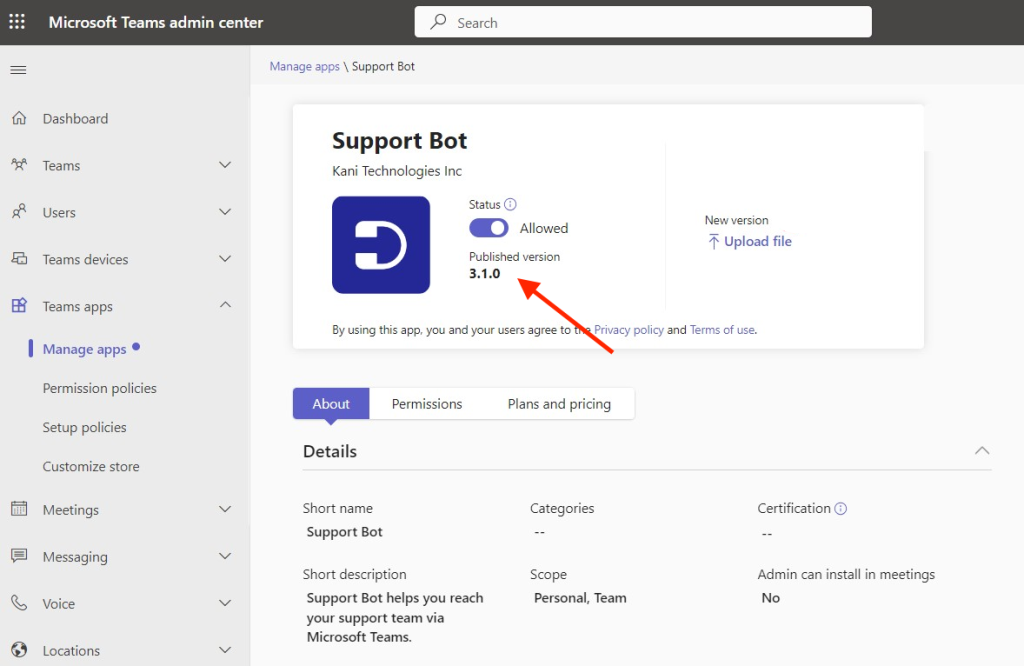
1. Check the version of the Support Bot that is currently in use in your tenant. This can be done from the Teams Admin Center by navigating to ‘Teams Apps’ and then ‘Manage apps’.
Installing the new version of the Support Bot
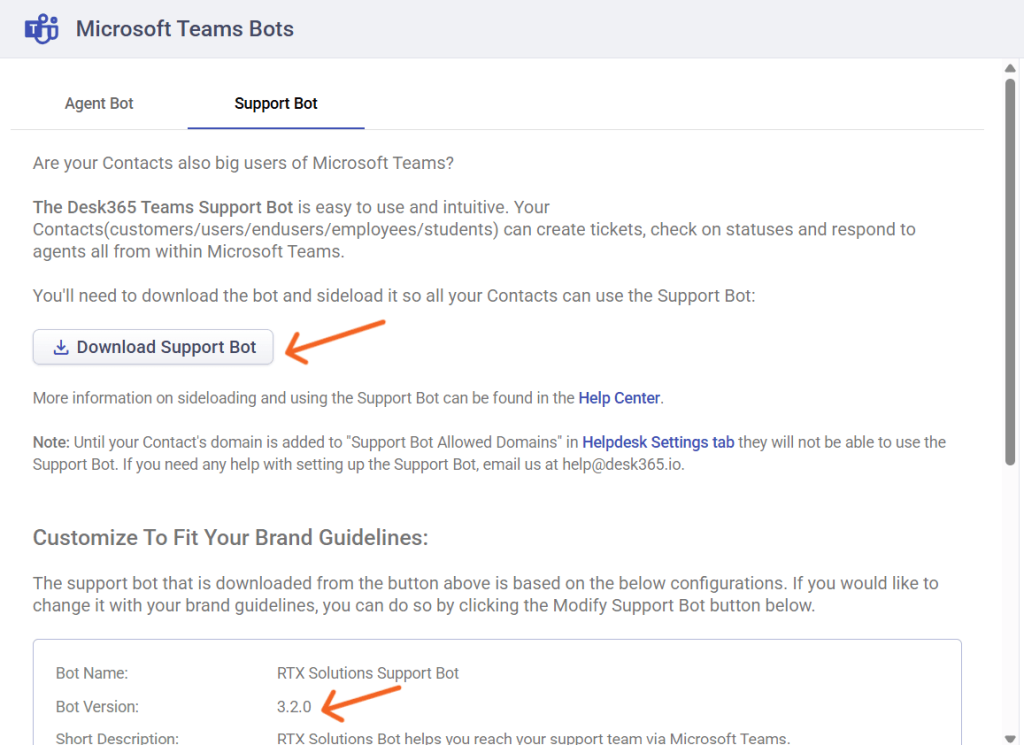
1. If a newer version is available, you can download the zip file from the Agent Portal.
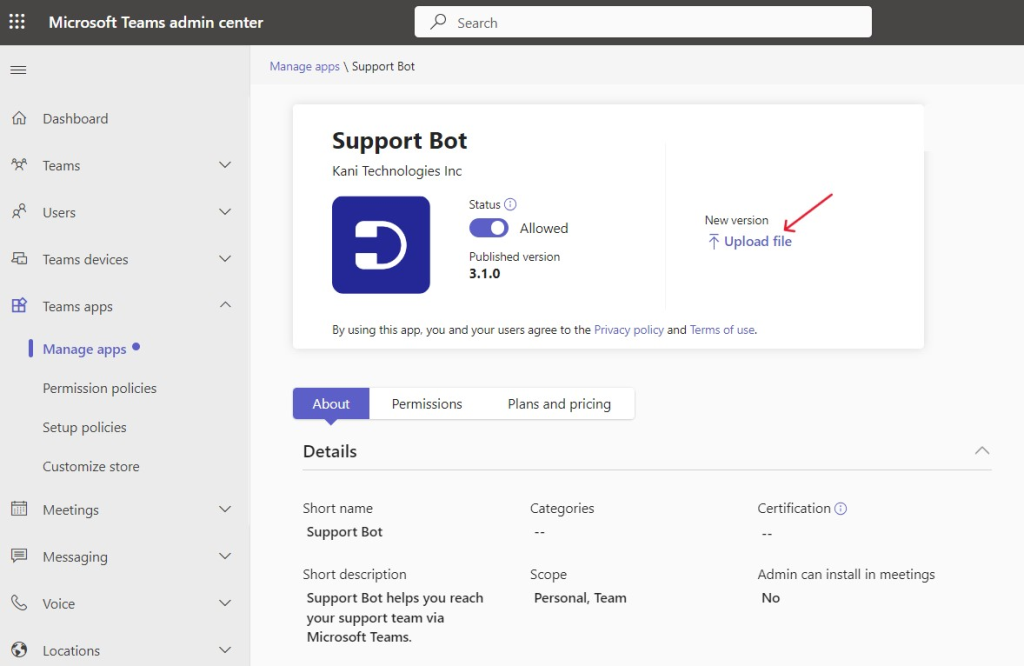
2. Visit the Microsoft Teams Admin Center and navigate to the ‘Manage Apps’ section and look for the Support Bot (of if you’ve a customized version then search for the custom name of the Support Bot).
3. Click on the ‘Upload file’ option and upload the zip file that was downloaded earlier.
How will these changes be reflected in the Microsoft Teams app?
- If you have configured “setup policies” for Teams apps in the Teams Admin Center, these changes (updating the bot to the new version) will be automatically applied to all users without requiring any action on their part.
- If you haven’t configured any “setup policies,” your users will be prompted to update the bot in their Teams app when they open the support bot. After they click “update,” the new version will be installed in their Teams app as shown below.
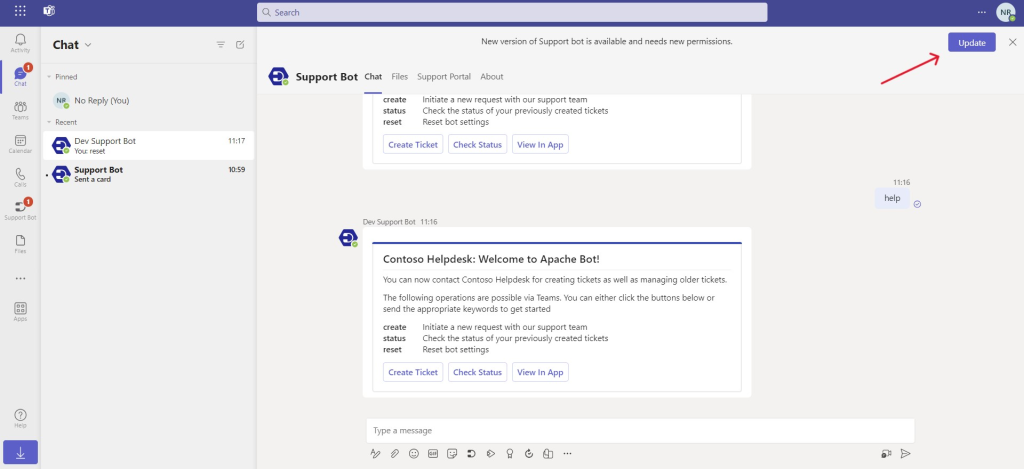
Please note that it may take some time for these changes to be reflected for all users. In some cases, users may need to refresh, log in, or log out to access the new version.


