Bring in the power of conversational ticketing to your helpdesk with the Desk365 Support Bot for Microsoft Teams. Follow the steps below to set up the Support Bot.
Download the Support Bot
First you’ll need to download the app manifest zip:
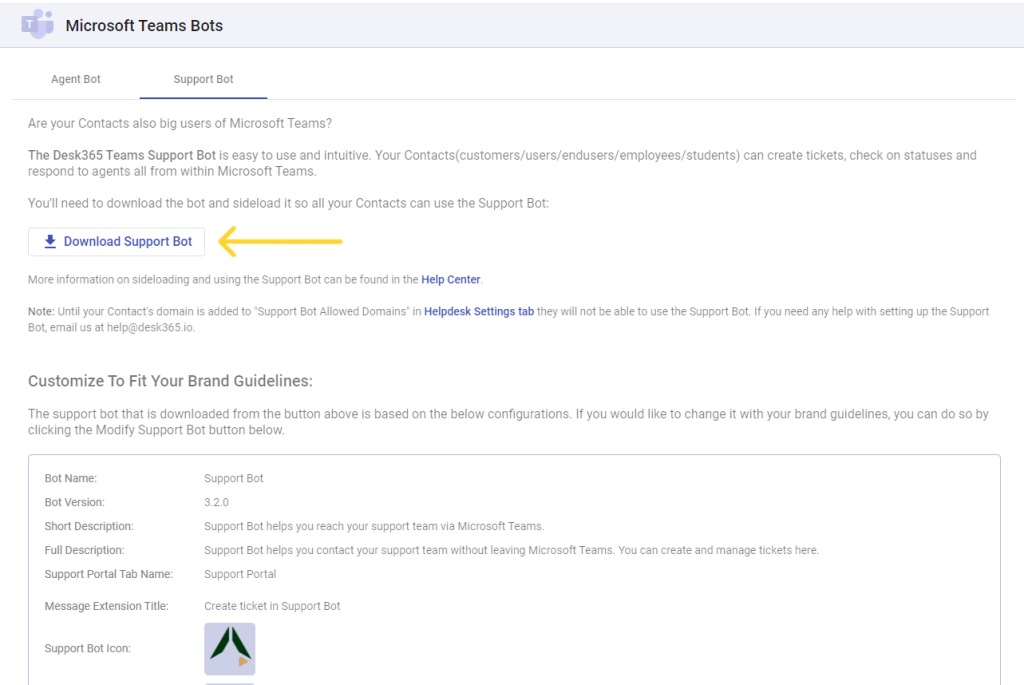
1. Sign in to the Desk365 Agent Portal.
2. Go to the Settings > Channels > Microsoft Teams and choose the ‘Support Bot’ tab.
3. Download the Support Bot.
Install/Upload Support Bot
If you’re installing the Support Bot for the first time, we recommend you to follow the instructions which we have explained in detail below. You’ll need to have appropriate permissions to upload Teams Apps to do the below:
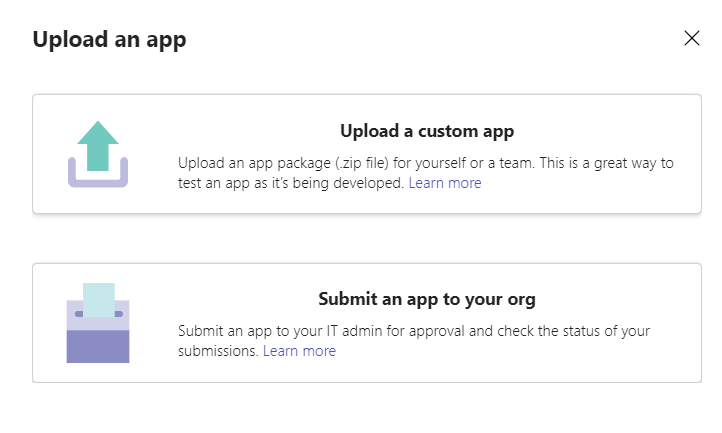
1. In the lower left corner of Teams, choose the Apps icon. On the Apps page, choose Manage your apps.
2. You can choose to:
(i) Upload a custom app.
(ii) Submit an app to your org.
3. Option (i) above is best if you just want to test the Support Bot and Option (ii) is best when the Support Bot is used organization wide.
4. You can then choose the Support Bot app you downloaded before and install it.
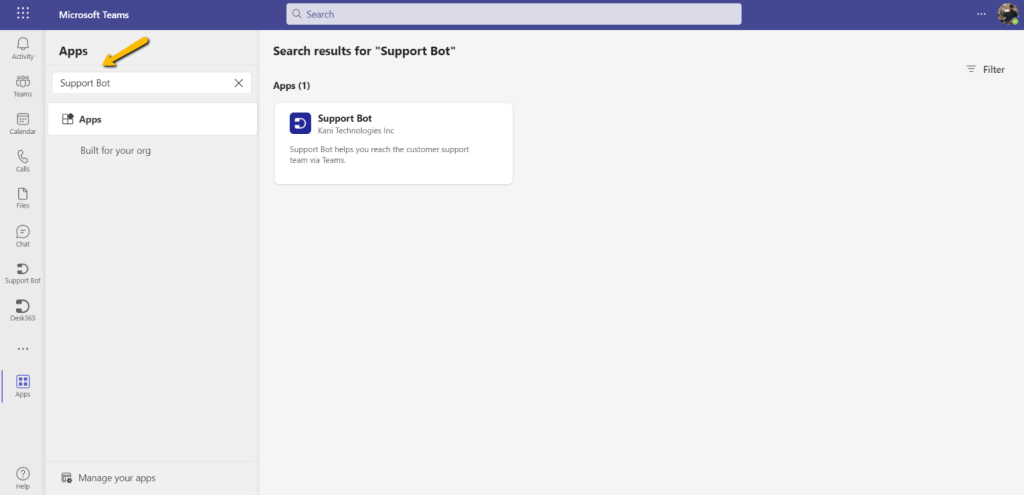
Finding Support Bot in Teams:
Once it is installed for your organization a user can easily add Support Bot to their Teams instance.
1. Select Apps in the Teams sidebar to open the Apps tab.

2. Find and select Support Bot to open the details window.
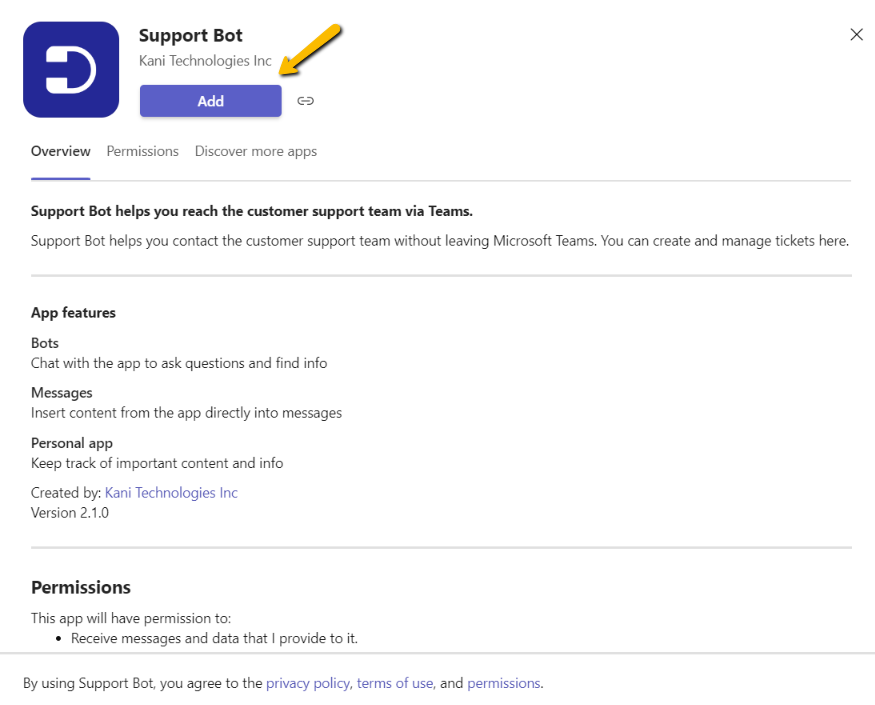
3. In the support bot details window, click Add.
That’s it! You have added the Support Bot to your Microsoft Teams instance.
Support Bot welcome message:
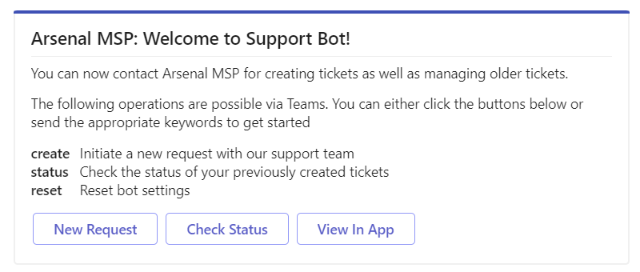
When the Support Bot is installed, it sends a welcome message. This message provides a quick introduction to get started.
Configuring Allowed Domains for the Support Bot
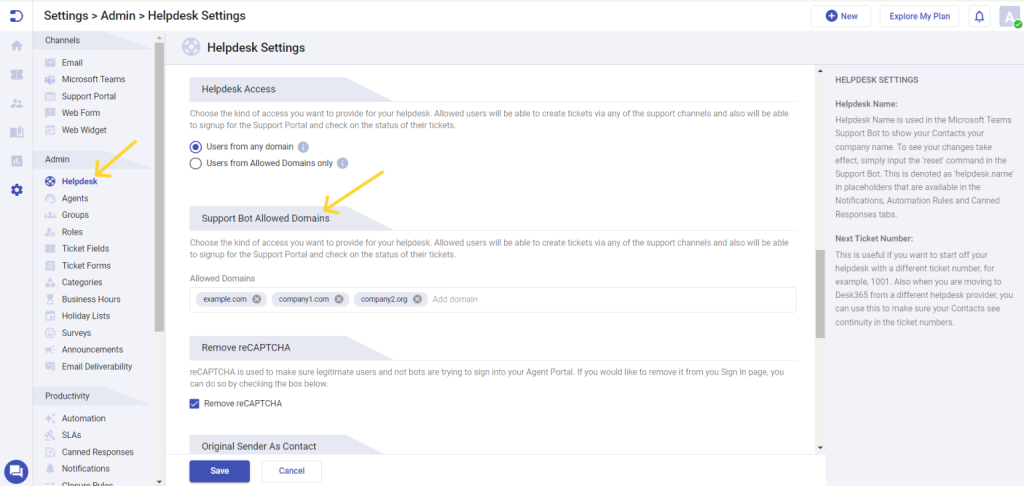
To enhance security and manage access effectively, Desk365 offers an Allowed Domains feature for the Support Bot. This allows administrators to specify which email domains are recognized by the helpdesk system, ensuring that only users from trusted sources can interact with the Support Bot. To learn more, visit How to set up Allowed Domains for the Support Bot in Desk365.
Customizing and Troubleshooting Information:
We have more information in our help center regarding how to customize the Support Bot and address any installation issues. Be sure to visit the ‘Setting up Desk365 Microsoft Teams Support Bot‘ section for further information.
Listed below are a few links:


