Yes, you’ve heard it right. You can customize the Desk365 Teams Support Bot and make it appear in your native language.
It’s very simple to change the language in the Desk365 Teams Support Bot as you prefer, so that all items use the selected language (like ticket fields, ticket buttons).
Steps to change the language in Support Bot
Follow the steps below to change the language in Support Bot.
1. Go to Settings > Admin > Languages in the Desk365 Agent Portal.
2. In ‘Choose Support Bot Language’ section, choose the language you would like to use in the Desk365 Teams Support Bot.
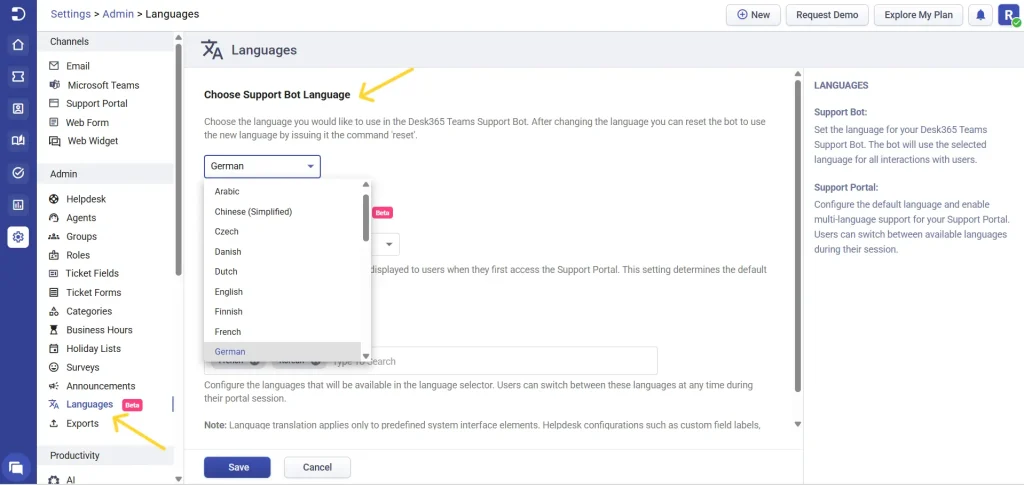
For this example, let’s choose ‘German’ as the language and click on the ‘Save’ button below (by default, the language of the Bot is English).

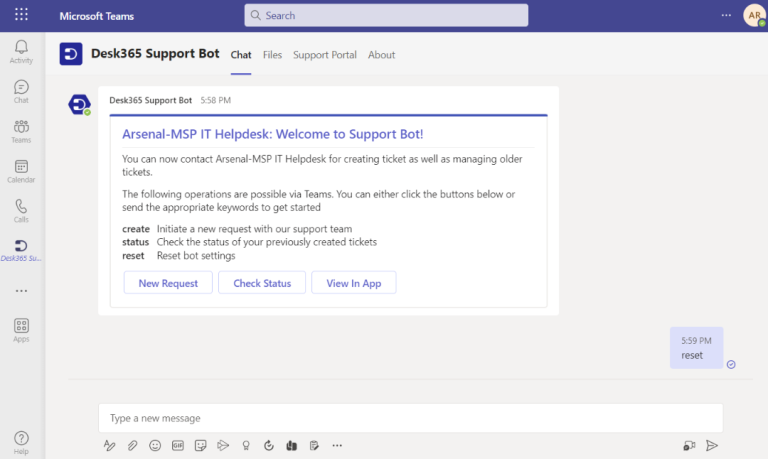
3. Now let’s go to Desk365 Teams Support Bot. Since you’ve changed the language to German, you can reset the Bot to use the new language by typing the command ‘reset’ and press send.
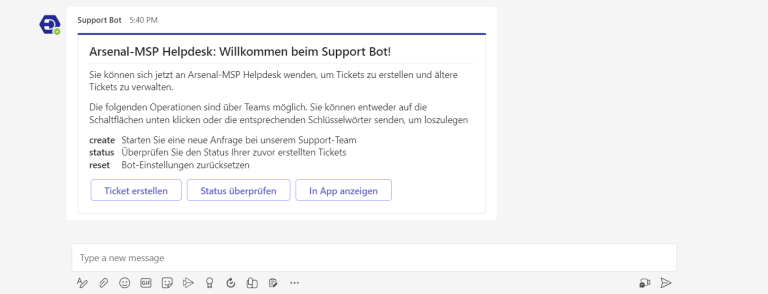
You’ll notice it sends a welcome message in ‘German’ and makes the Bot appears localized (instructions, commands, and buttons).
This message provides a quick introduction to get started.
4. Now, let’s create a new ticket in Support Bot.
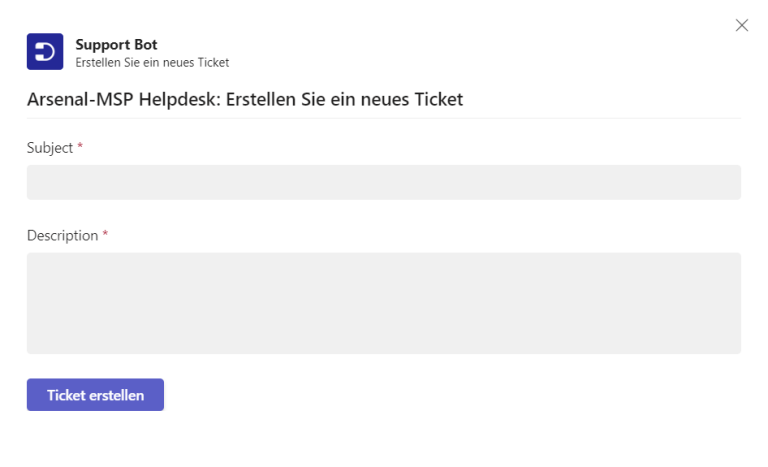
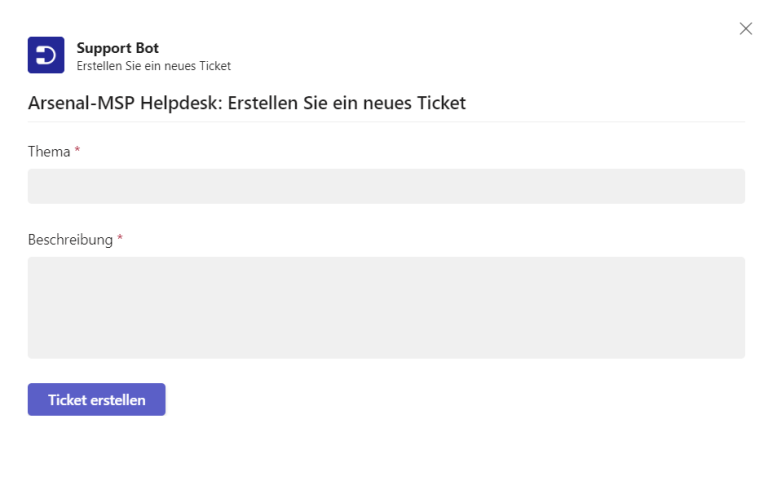
You’ll notice that the title and button appear in the language that you’ve chosen. Now, let’s change the ticket fields (Subject and Description) to German as well.
5. Go to Settings > Admin > Ticket Fields. Here you can change the label for ‘Subject’ and ‘Description’ so that contacts will see these fields appear in the ‘German’ language when they create a ticket. Click on the ‘Save’ button to reflect these changes in the Support Bot.
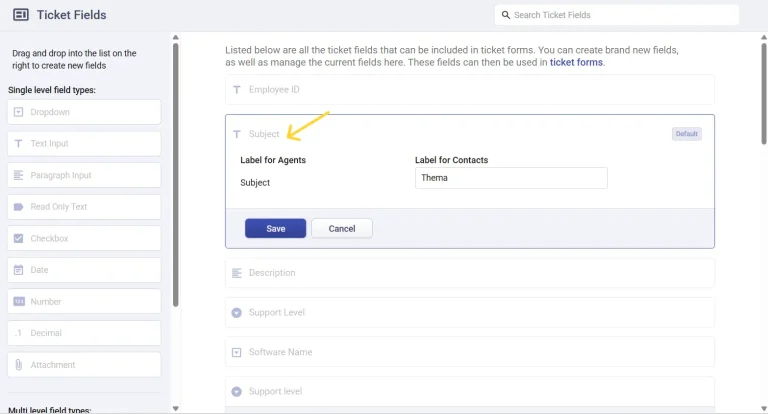
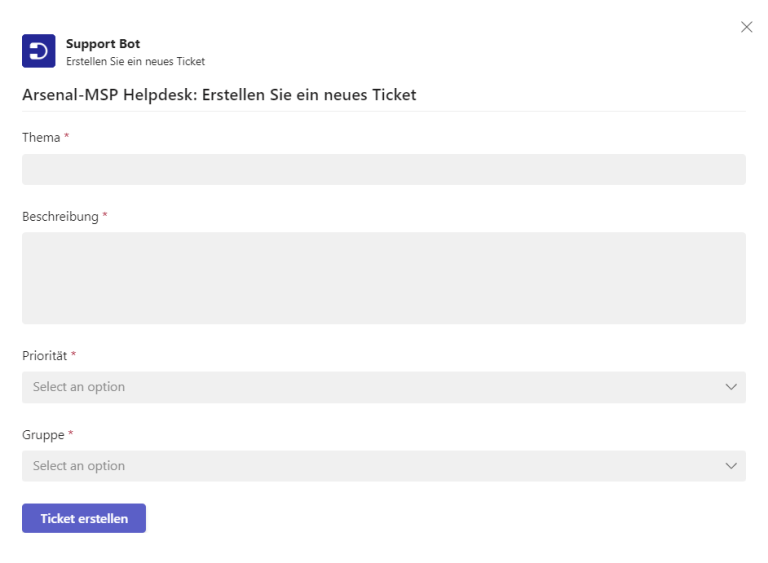
Now, let’s create a ticket again in the Support Bot. You’ll notice the changes being reflected and the ticket fields appear in the German language for contacts facilitating a personalized support experience for your end-users/contacts.
6. Let’s add two more new fields to the form: ‘Priority’ and ‘Group’.
To do this, Go to Settings > Admin > Ticket Forms.
Choose the ‘Create Ticket’ form in the Support Bot.
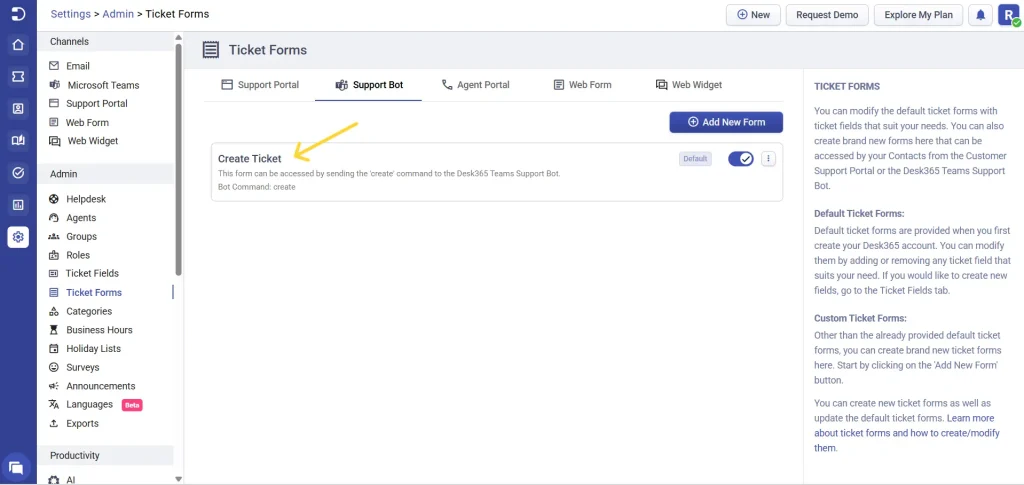
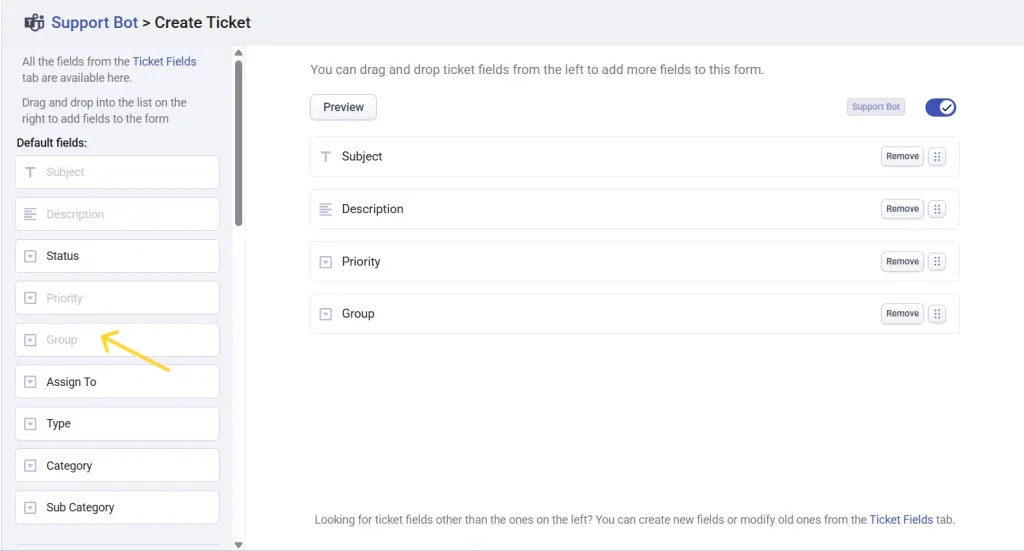
The ‘Create Ticket’ Support Bot form appears. Here, you can add two more fields to the form: ‘Priority’ and ‘Group’ by dragging these fields from the left and dropping them into the list on the right.
Also, you can make the necessary ticket fields required for the contacts if needed.
7. Now, let’s visit the Teams Support Bot again. Type the command ‘create’ and press ‘Send’. You’ll notice the new fields that we added just now appear in the bot in ‘German’ language.
Voila, that’s it.
User Locale language settings
You can also find another option called ‘User Locale’ along with other languages.
User Locale within Desk365 synchronizes the language preferences with Microsoft Teams, extending the same settings to the Teams Support Bot. This harmonized language approach enhances the overall efficiency of your helpdesk, making it intuitive for users across all the regions.

You can find the option of setting your Teams language under General Settings > Language as shown.
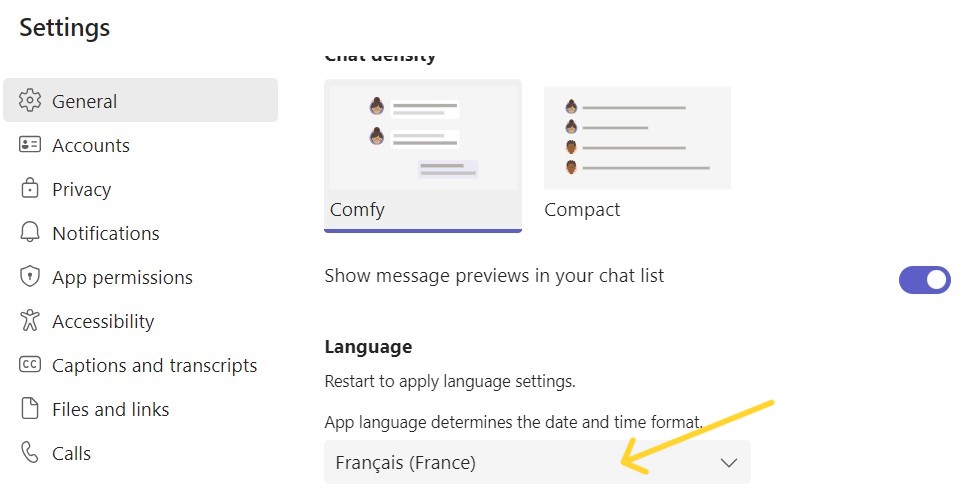
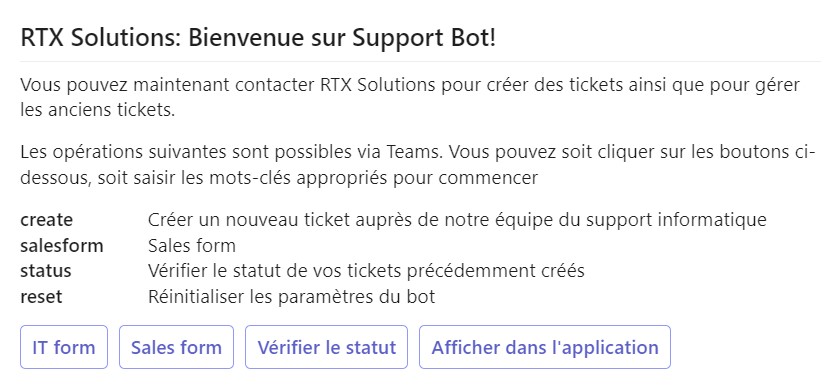
For instance if user 1 has set the Teams language to French, the Support Bot will also be displayed in French.
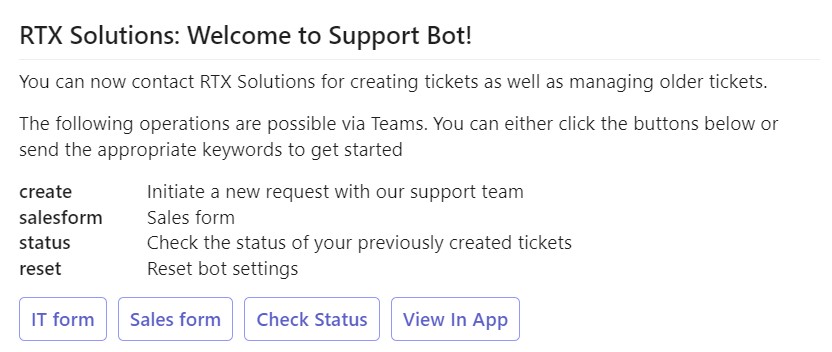
And If User 2 has configured the Teams language to English, the Support Bot will automatically retrieve English as its language and display accordingly.
Note: The user locale is applicable to the Teams Support Bot only if the languages available under the Helpdesk’s ‘Choose Language’ option match the user’s preferred Teams language. If the chosen language is not available in the Desk365 list, it will default to English as it’s language.
Hence, the user locale option enables Desk365 admins to permit users to operate the Support Bot in their preferred languages selected in Teams. This enhancement not only improves customer satisfaction but also fosters communication with users from diverse regions.


