


One crucial aspect of providing exceptional customer service is ensuring that Service Level Agreements (SLAs) are configured and applied to tickets appropriately.
Understanding and effectively configuring SLAs is a critical help desk best practice. This article will guide you through the process of configuring SLAs in Desk365 so that they can be easily applied to any ticket.
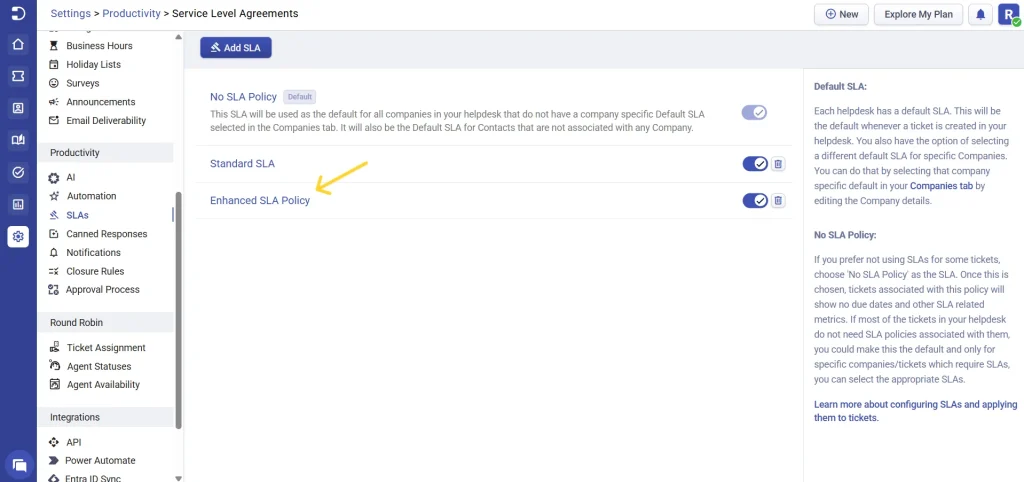
No SLA policy
When you create your helpdesk account for the first time, it includes a special type of SLA known as the ‘No SLA Policy’.
By applying the ‘No SLA Policy’ to a ticket, you essentially remove any SLA requirements for that particular ticket. If you prefer not to use SLAs for certain tickets, you can select the ‘No SLA Policy’ as the SLA option. Once chosen, tickets associated with this policy will not have any due dates or other SLA-related metrics.
If the majority of tickets in your helpdesk do not require SLA policies, you can set the ‘No SLA Policy’ as the default for the entire helpdesk. For specific companies or tickets that do require SLAs, you can select the appropriate SLA accordingly.
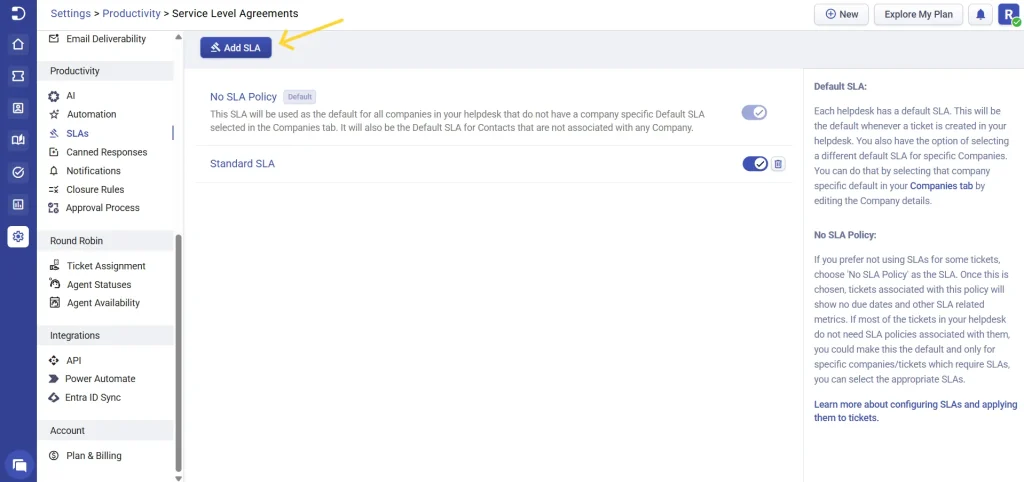
Adding a new SLA policy
If you haven’t created new SLAs yet, your tickets will only be subject to the ‘No SLA Policy’. As a result, your tickets won’t have any SLA-related metrics associated with them.
1. To get started with SLAs, simply navigate to the Settings > Productivity > Service Level Agreements tab and click on the ‘Add SLA’ button to create a new SLA.
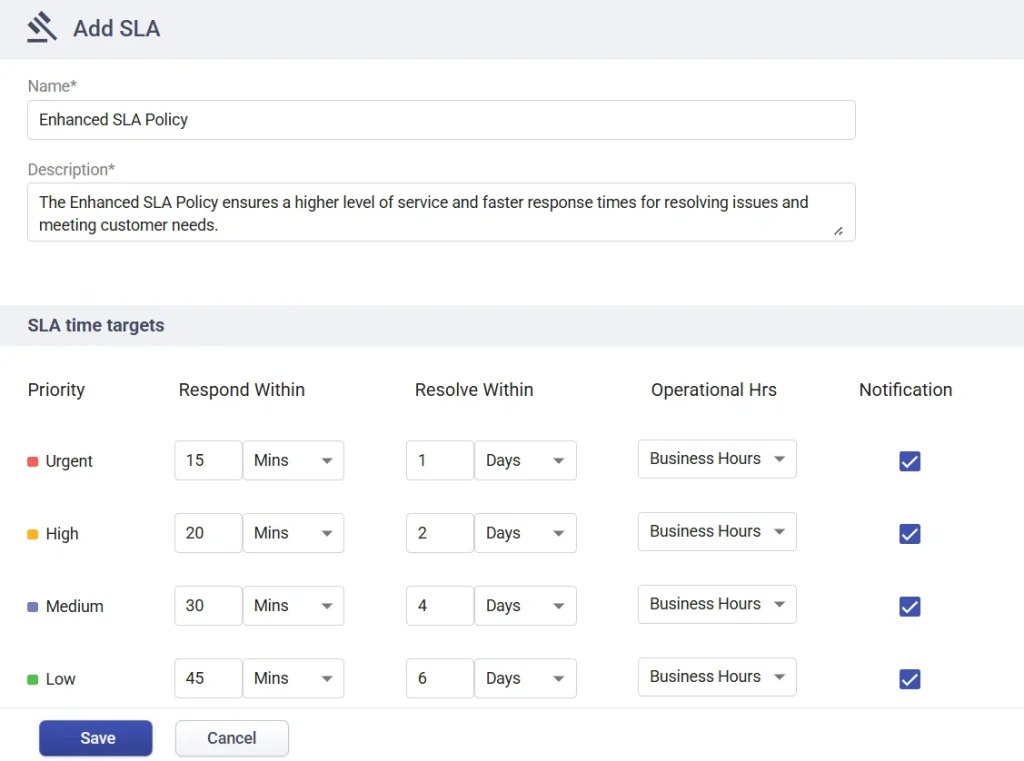
2. Provide a name and description for the policy. The name should be descriptive and easy to understand, and the description should provide details about the policy’s purpose and scope.
3. The next step is to set SLA time targets for different ticket priorities (Urgent, High, Medium, and Low). The SLA time targets define the maximum time allowed to respond to and resolve a ticket based on its priority.
You have the flexibility to select the response and resolution times for each priority level.
The ‘Respond Within’ time is the maximum time allowed to respond to a ticket, and the ‘Resolve Within’ time is the maximum time allowed to resolve a ticket. These times should be based on the helpdesk team’s capacity and the customer’s expectations.
5. Finally, the helpdesk team needs to choose the operations hours for the SLA policy. This can be either business hours or 24×7. The operations hours should be based on the helpdesk team’s availability and the customer’s needs.
6. You can enable the ‘Notification Email’ option to notify agents for SLA reminders/violations. If you want to restrict sending notifications for specific priorities, you can do so by unchecking it.
7. Click on the ‘Save’ button to create the new SLA policy.
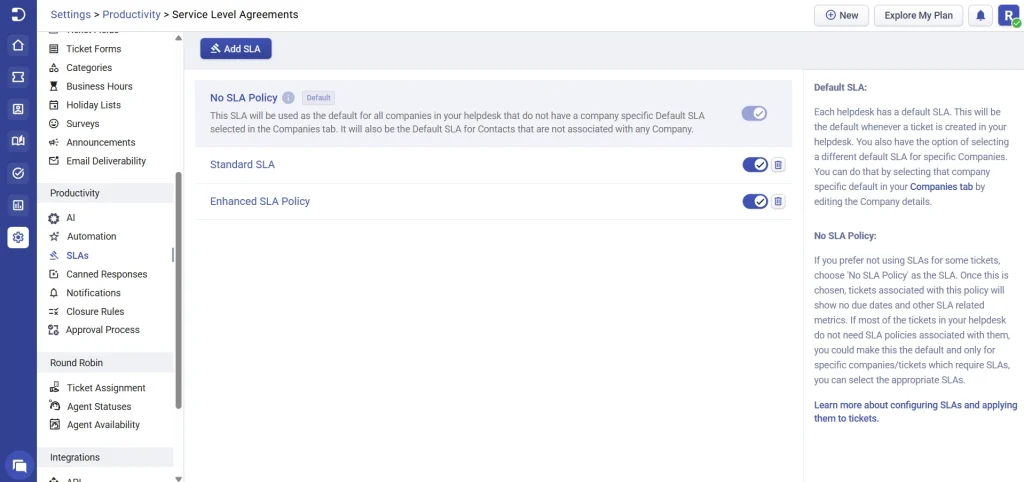
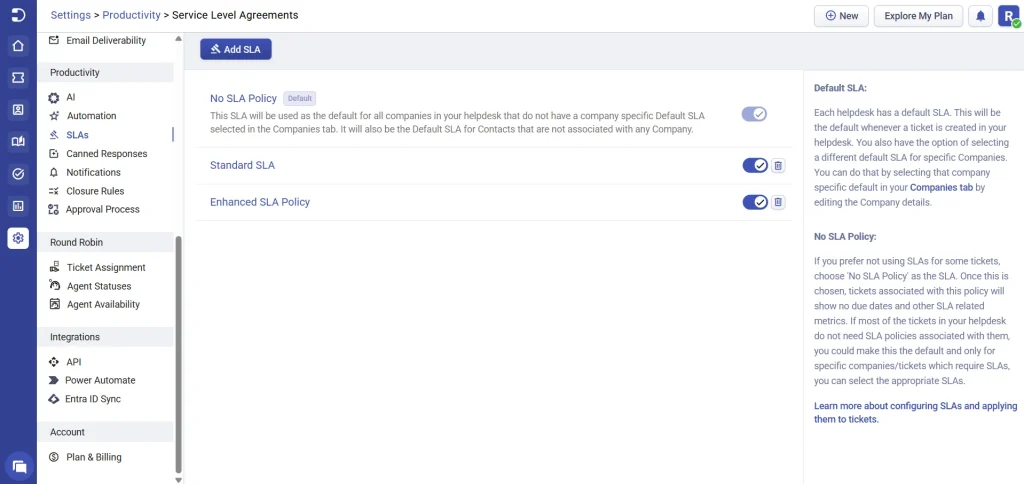
The helpdesk now features the newly created ‘Enhanced SLA policy’, which can be found in the list of available SLA policies.
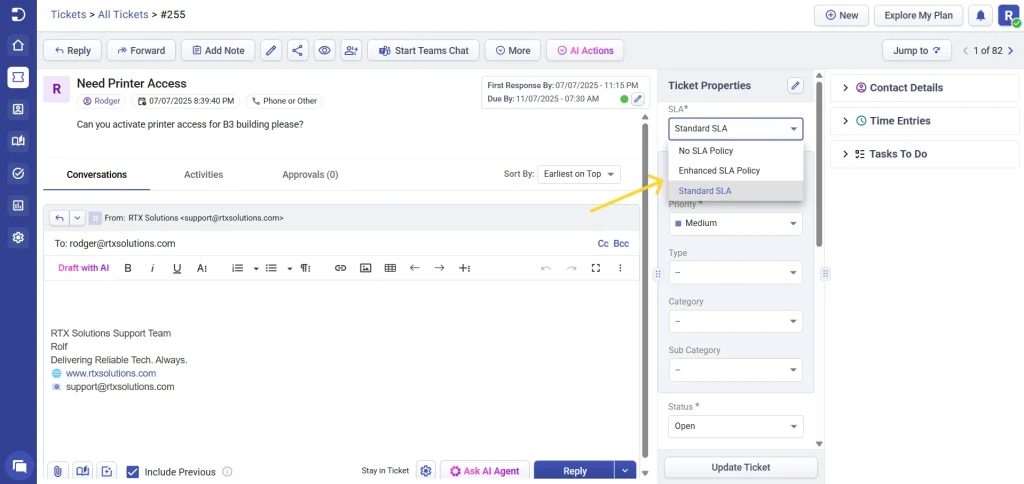
Once you’ve created an SLA here, you’ll start seeing it appear as a choice in all the places where you have an SLA dropdown. Then, you have the ability to apply this SLA on any of the tickets in your helpdesk. For example, in the image below, you can see the newly created ‘Enhanced SLA policy’ appear as a choice in the ticket’s details view.
Enabling SLA reminders and escalations
After creating a new SLA policy, the next step is to enable SLA reminders and escalations.
SLA reminders are alerts that are sent to the helpdesk team before the response time and resolve time targets are reached.
SLA escalations involve sending notifications to the appropriate individuals when there are SLA violations due to failure in meeting response time and resolve time targets.
Steps to set up reminders
To configure SLA reminders in Desk365, follow these steps:
1. Navigate to the Settings > Productivity > Service Level Agreements tab.
2. Click on the SLA policy for which you want to configure reminders.
3. Set the time intervals for the reminders before the ‘Response Time’ and ‘Resolve Time’ targets are reached.
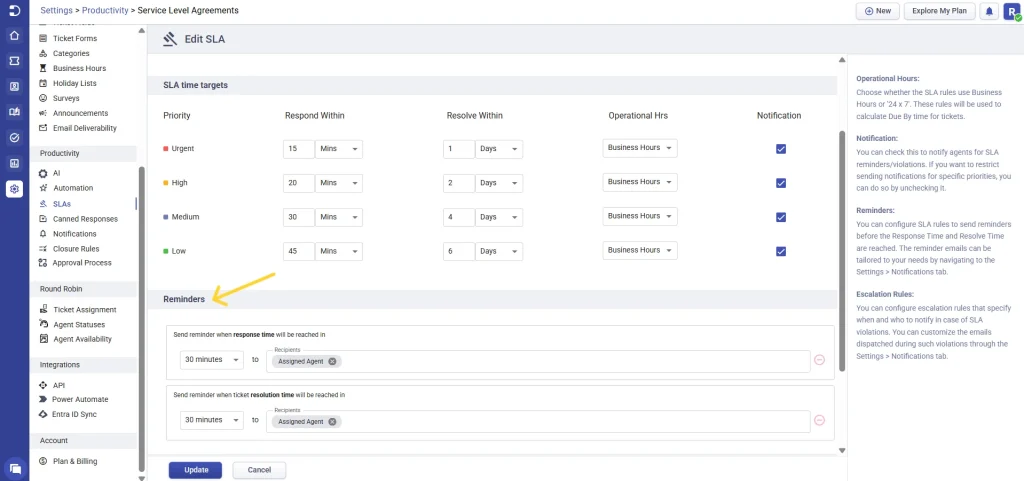
4. Customize the reminder email templates by navigating to the Settings > Productivity > Notifications tab.
By configuring SLA reminders, the helpdesk team will receive alerts before the Response Time and Resolve Time targets are reached. This will help them stay on top of their tickets and ensure that they meet the SLA targets.
Steps to set up escalation rules
To configure SLA escalation rules in Desk365, follow these steps:
1. Navigate to the Settings > Productivity > Service Level Agreements tab.
2. Click on the SLA policy for which you want to configure reminders.
3. Set the escalation rules that specify when and who to notify in case of SLA violations.
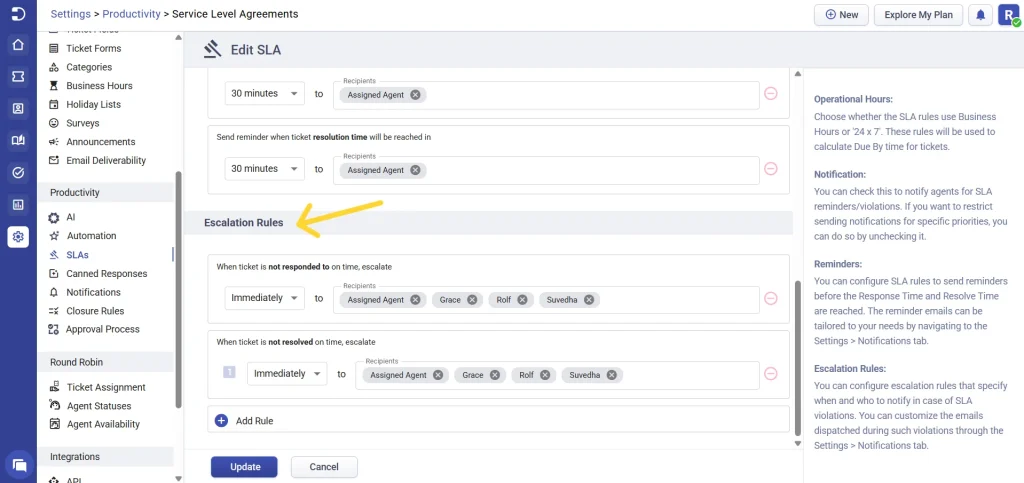
4. Customize the escalation email templates by navigating to the Settings > Productivity > Notifications tab.
By configuring SLA escalation rules, the helpdesk team will receive notifications when the Response Time and Resolve Time targets are not met. This will help them take action to resolve the tickets quickly and avoid SLA violations.
In conclusion, by configuring SLA reminders and escalations, the helpdesk team can stay on top of their tickets and take action when the SLA targets are not met.
Configuring email notifications for SLA reminders and escalation rules
After enabling SLA reminders and escalation rules in your helpdesk, you can configure email notifications for these rules. Email notifications are an essential part of SLA management as they keep the helpdesk team informed about SLA targets and violations.
To configure email notifications for SLA reminders and escalation rules in Desk365, follow these steps:
1. Navigate to the Settings > Productivity > Notifications tab.
2. Click on the ‘Agent notifications’ tab.
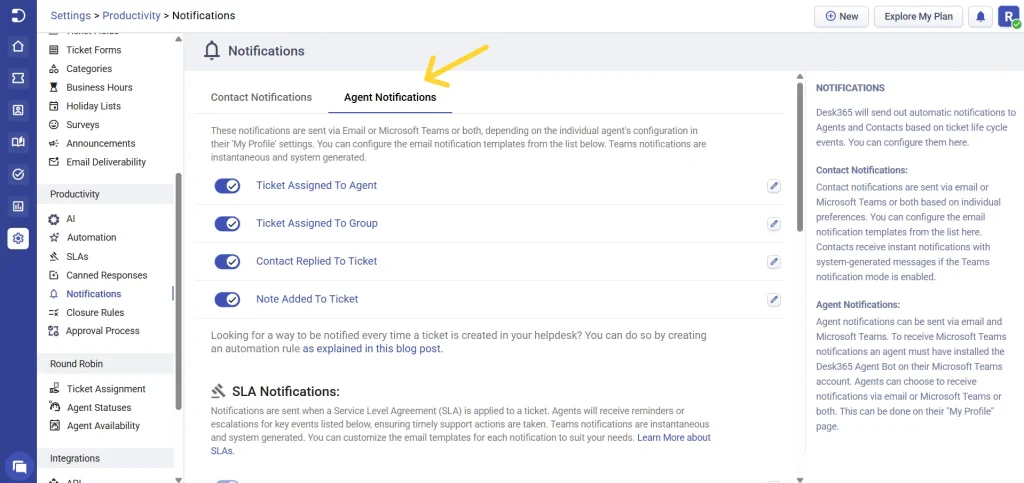
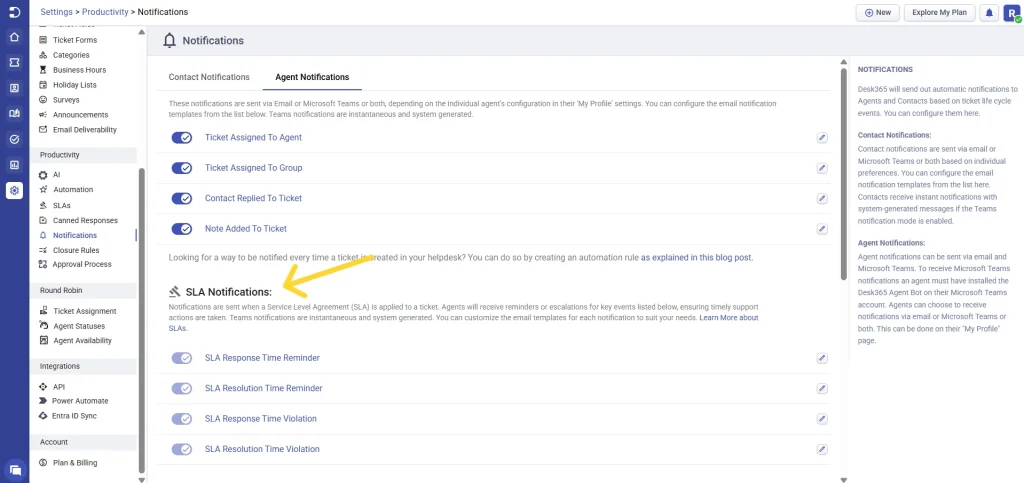
3. Select the specific SLA notification that you wish to customize by clicking on it.
4. Customize the email template by adding your own words (and language). You can also make use of placeholders for system generated content that will be dynamically replaced with the correct data before the email is sent.
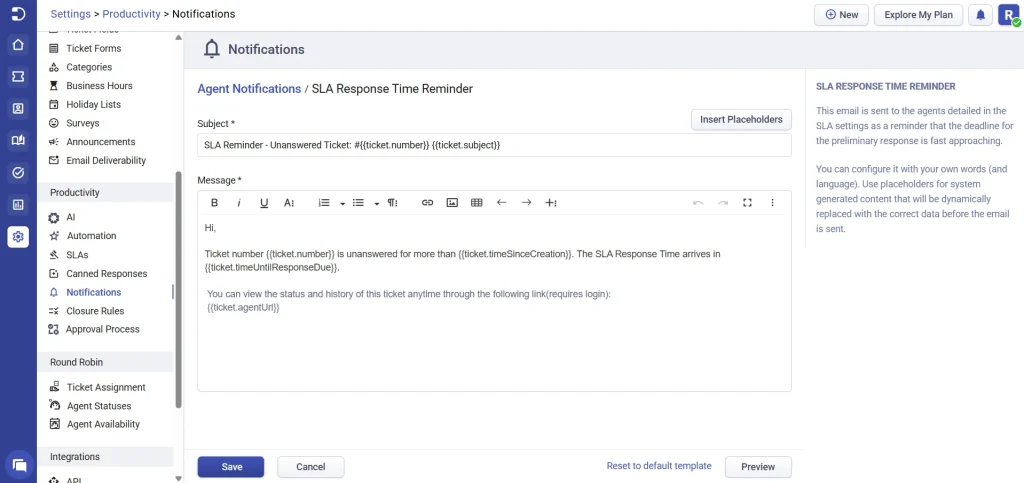
5. Save the changes.
Let’s take a look at the SLA notifications in detail below.
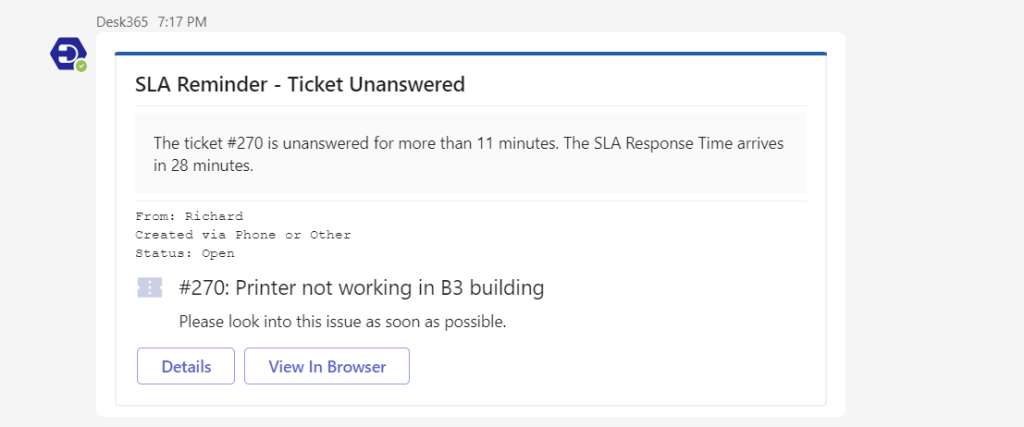
SLA Reply Reminder: This notification will remind agents when they have an SLA that is about to expire for a customer ticket that requires a reply. This will help ensure that agents respond to customer enquiries within the agreed-upon timeframe.
SLA Resolve Reminder: This notification will remind agents when they have an SLA that is about to expire for a customer ticket that requires resolution. This will help ensure that agents resolve customer issues within the agreed-upon timeframe.
SLA Reply Violation: This notification will alert agents when they have violated an SLA for a customer ticket that requires a reply. This will help agents to take corrective action and improve compliance with SLAs.
SLA Resolve Violation: This notification will alert agents when they have violated an SLA for a customer ticket that requires resolution. This will help agents to take corrective action and improve compliance with SLAs.
In Desk365, you have the option to customize your notification preferences. If you select ‘Microsoft Teams’ as your notification channel, SLA notifications will be sent directly to your Microsoft Teams account.
Alternatively, if you have chosen to receive notifications via email, SLA notifications will be delivered straight to your email inbox.
If you have opted to receive notifications through both email and Microsoft Teams, you will receive the SLA notifications through both channels.
By customizing the email templates for SLA notifications, the helpdesk team can receive relevant and actionable information about SLA targets and violations. This will help them take corrective action and improve compliance with SLAs.
Helpdesk wide Default SLA
Your helpdesk will always have an SLA that is the default for the entire helpdesk.

In the example above, ‘No SLA Policy’ is the default SLA. All tickets that are created in this helpdesk will now default to the ‘No SLA Policy. You can still choose to apply the ‘Enhanced SLA Policy’ on specific tickets if you wish to do so.
Company wide Default SLA
Continuing with the same example as above, let’s now consider a case where you would like a different SLA (say, ‘Enhanced SLA Policy’) to be applied whenever a ticket is created by Contacts from a specific Company. You can do that with ‘Company wide Default SLA’.
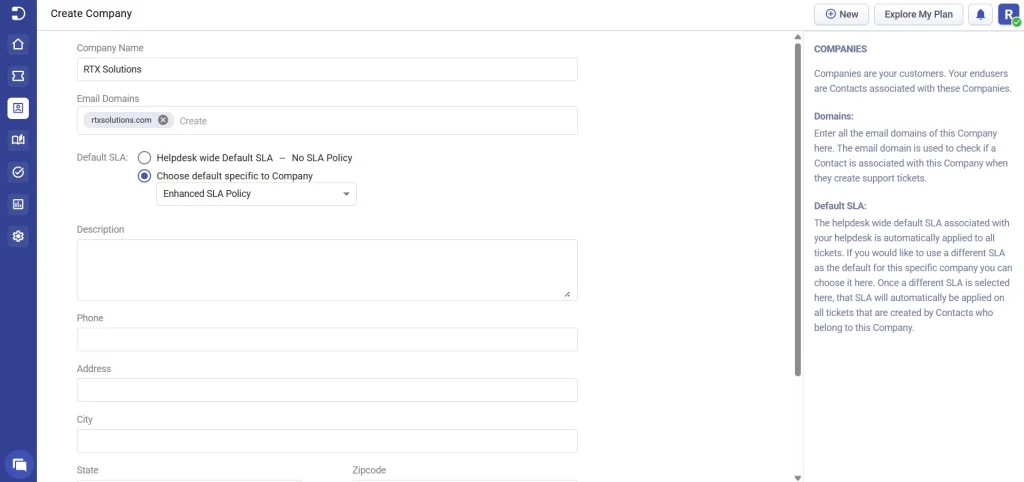
Once ‘Enhanced SLA Policy’ is chosen as the default for this company, any ticket that is created by Contacts who belong to this company (in this example, anyone with an email domain of kanidesk.com) is automatically associated with ‘Enhanced SLA Policy’.
With Desk365, you have a great amount of flexibility in choosing the right SLAs to apply your tickets. You can just go with a helpdesk wide SLA that applies on all your tickets, or use that in combination with company specific default SLAs for important companies/customers. And, you have the flexibility to override the defaults and apply a specific SLA for individual tickets.


