Automation rules in Desk365 help you define a workflow with a predefined set of actions that have to occur during ticket creation as well as during ticket updates.
These actions can be triggered based on specific ticket or account properties and updates that happen to them.
With the ability to define a set of predefined actions for ticket updates, businesses can automate repetitive tasks, reduce manual errors, and improve productivity.
Setting up automation rules to run on ticket updates
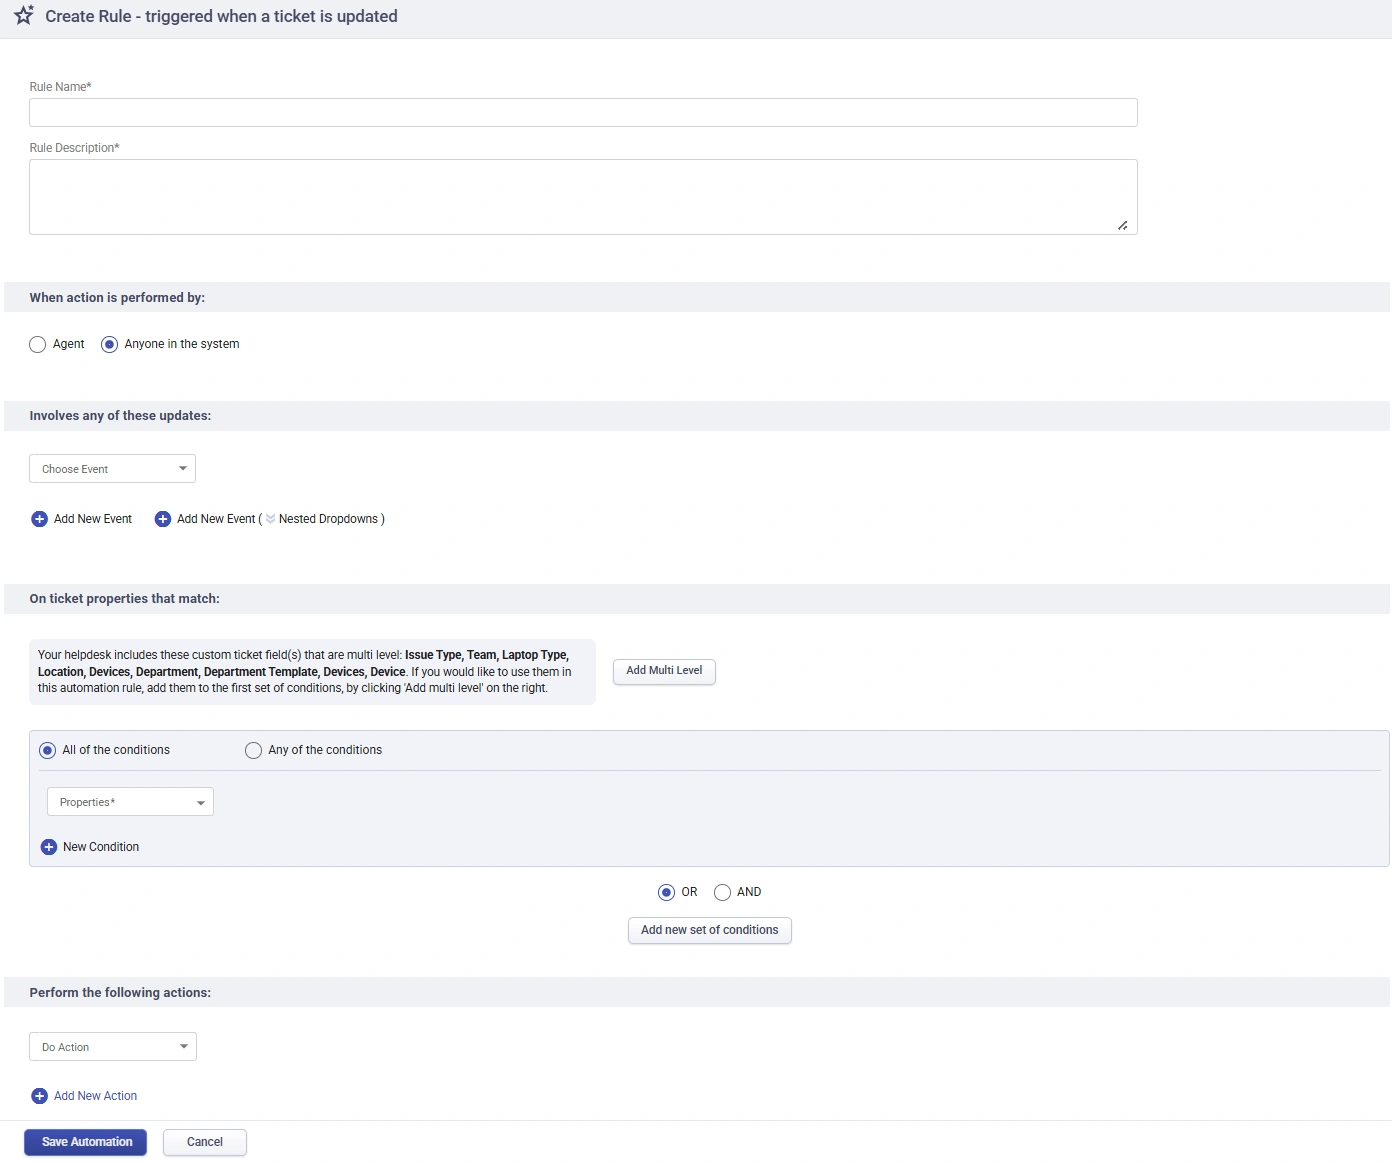
‘Ticket Updates’ rules are like ticket creation rules, that are triggered during the ticket update process. With ticket updates, it is possible to configure the rules to be triggered only when a particular agent or group of agents perform an update action.
You can easily configure these rules by going to Settings > Productivity > Automation tab in Desk365 and choose the ‘Ticket Updates’ tab to get started.
Automation rules for ‘Ticket Updates’ in Desk365 let you automate various tasks to simplify your customer service process. Here are some simple examples:
– Assigning tickets to specific agents or groups for high-value customers when there is a change in priority or status.
– Automatically sending an email notification to a customer when their ticket has been resolved or when a ticket has been escalated to a higher priority level.
– Deleting tickets based on specific conditions and more.
Now, let’s explore the process of creating an automation rule in Desk365 that will be executed when a ticket gets updated.
1. To get started, log in to your Desk365 account and go to the Settings > Productivity > Automation tab. From there, click on the ‘Create New Rule’ from the Ticket Updates tab.
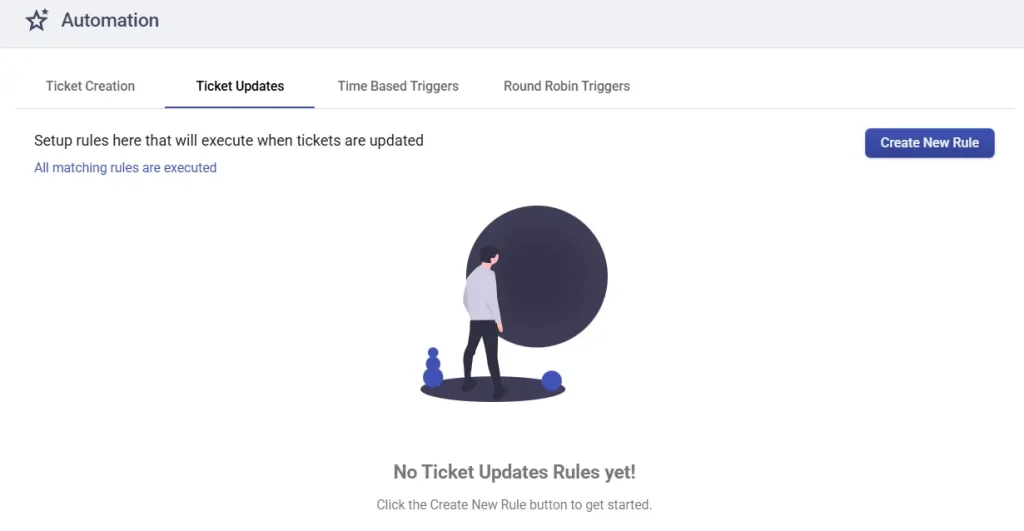
2. Provide a name for the rule and enter the description if you have any in the below box.
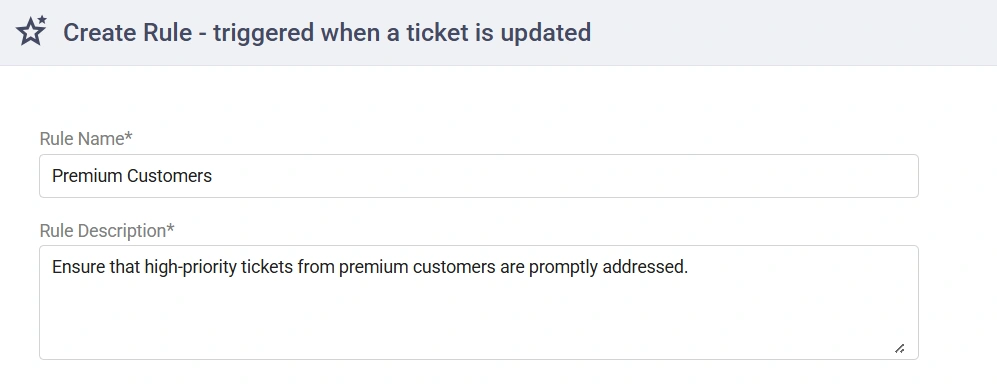
3. Ticket updates are typically triggered when a ticket is being updated, and the action performed will depend on the user who is performing the update.
If the update is being performed by an agent, you will need to select the specific user. It is possible to add multiple agents to this selection.
Additionally, you can select anyone in the system, which will trigger the ticket update when the action is performed by anyone within the system.
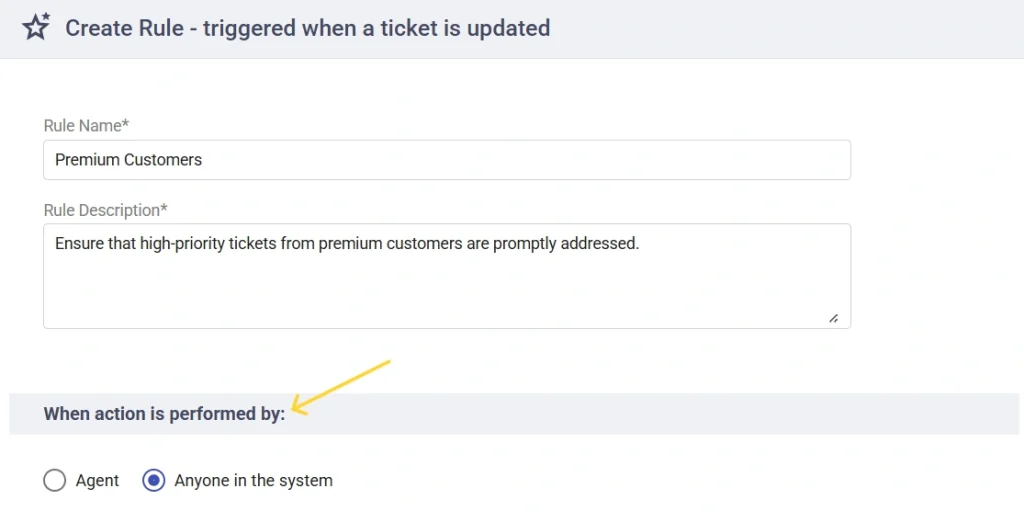
4. Choose the event when updated, this rule has to be triggered.
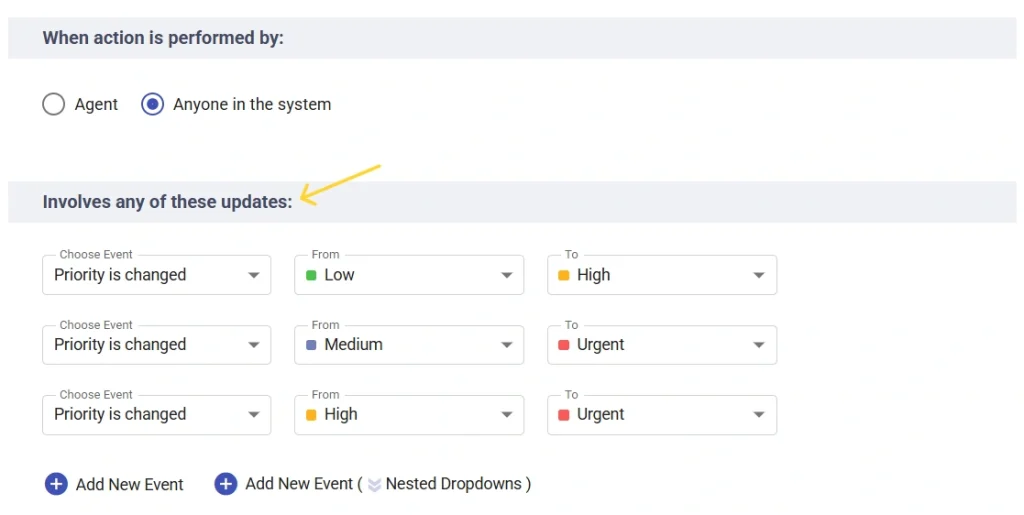
Now, let us look into the different events that can be utilized for configuring automation rules in detail below:
Priority is changed: In the event that a particular agent or anyone in the system modifies the priority level of a ticket, it is possible to establish a suitable action for this scenario by setting up an automation rule.
Type is changed: In the event that a particular agent or anyone in the system modifies the ticket type, it is possible to establish an appropriate action for this situation by creating an automation rule.
Status is changed: If a specific agent or anyone within the system changes the status of a ticket, it is possible to create an appropriate action for this situation by setting up an automation rule.
Group is changed: If a ticket that has been assigned to a specific group is changed, either by an agent or anyone in the system, it is possible to create an appropriate action for this scenario.
Agent is changed: If an agent or anyone in the system modifies a ticket assignment, it is possible to create a suitable action for this scenario by setting up an automation rule.
Category is changed: If the category of a ticket is modified by an agent or anyone in the system, an appropriate action can be established for this scenario by setting up an automation rule.
Sub Category is changed: When the subcategory of a ticket is changed, either by an agent or the system, an automation rule can be created to implement the desired action for this situation.
Contact Responded: If a contact replies to a ticket and certain ticket properties match, it is possible to establish an appropriate action by setting up an automation rule for this scenario.
Agent Responded: If an agent replies to a ticket and certain ticket properties match, it is possible to establish an appropriate action by setting up an automation rule for this scenario.
Private Note Added: If a private note is added to a ticket, it is possible to create an automation rule to perform a suitable action for this scenario.
Public Note Added: When a public note is added to a ticket, an automation rule can be configured to trigger the appropriate action for this event.
5. Next step is similar to the one we saw in the ticket creation automation rule, and it verifies if the ticket properties match the updated ticket.
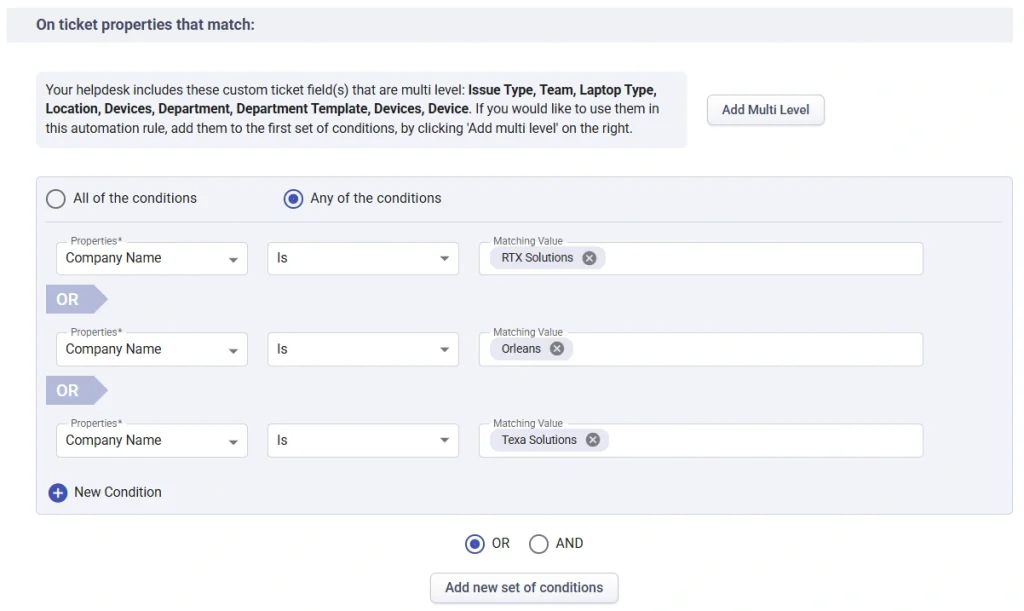
When the ticket is satisfying all the conditions, a set of actions can be performed. Choose the desired action from the ‘Do Action’ dropdown menu.
If needed, you can also add multiple actions by clicking on the ‘Add New Action’ button and remove an action at any point of time using the ‘Remove’ (-) icon.

After configuring all the conditions and actions, click the ‘Save Automation’ button to create your automation rule.
Once the rule is created, you’ll notice it appearing on the ‘Ticket Updates’ tab in Desk365.
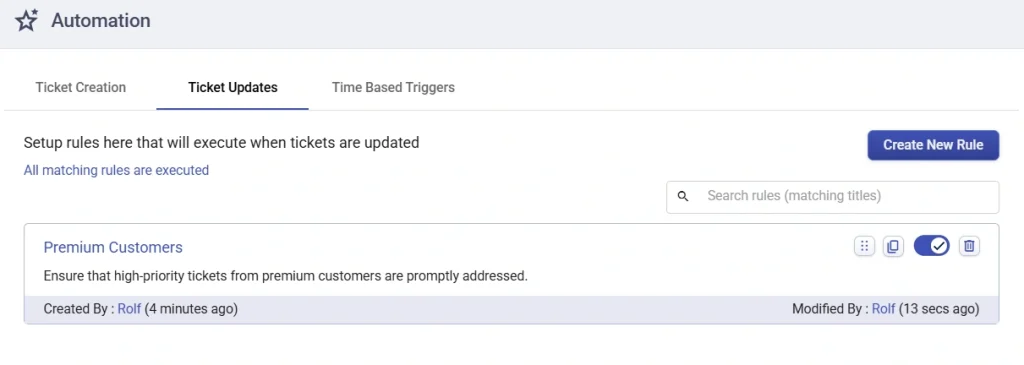
Examples of automation rules that you can set-up during ticket updates
Now, let’s discuss an example below of an automation rule that you can configure during ticket updates to enhance your workflow.
Updating ticket status when contact responds
The ability to automatically update a ticket’s status during the support process can greatly improve efficiency and enhance the overall customer experience.
One requirement maybe to have an automation rule that updates the ticket status from ‘Waiting for Customer’ to ‘Pending’ whenever a response is received from the contact.
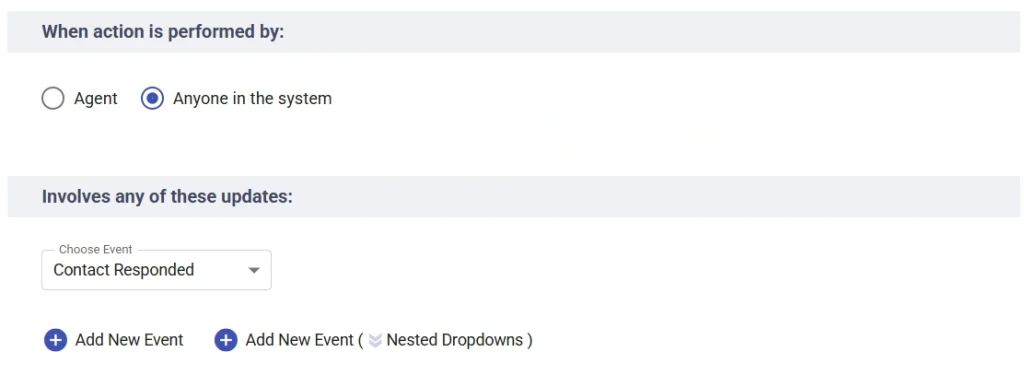
By setting up this automation rule during ticket updates, you can avoid delays in resolving customer issues and ensure that tickets are addressed in a timely manner. This helps to improve the overall support process by streamlining workflows and reducing the workload on support agents.
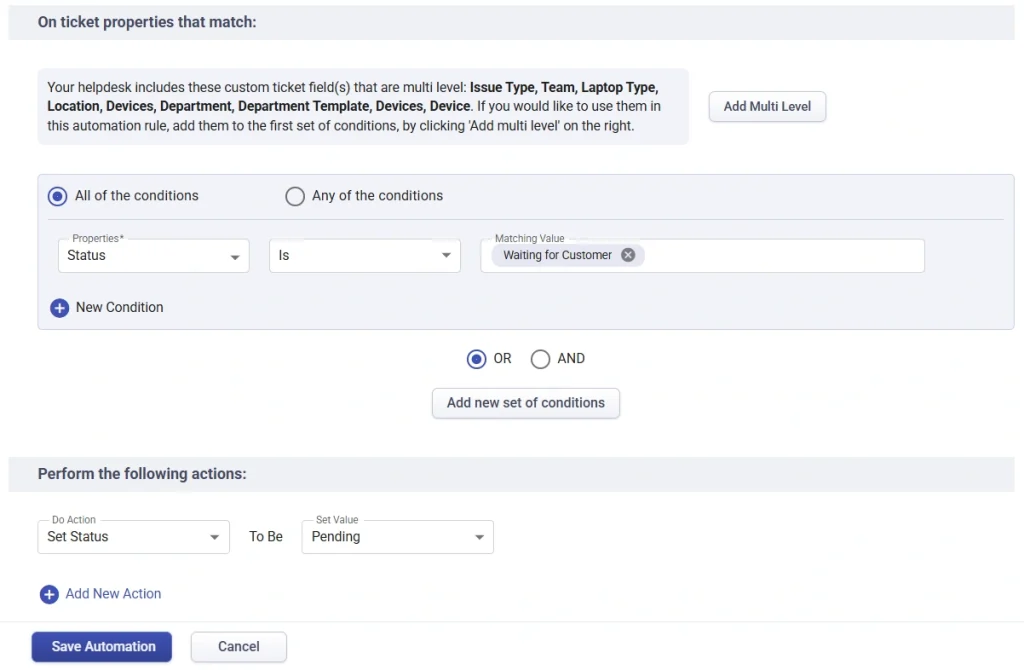
Additionally, this automation rule allows for a more proactive approach to support, as it eliminates the need for manual status updates and reduces the risk of tickets being overlooked or lost in the system.
By providing customers with timely updates on their ticket status, you can enhance their experience and build trust in your support process.


