Providing excellent customer support is essential for ensuring customer satisfaction. One way to enhance support services is by implementing the Round-Robin ticket assignment system. This refers to the circular assignment of tickets, i.e., when tickets are assigned to a group, the Round-Robin system will automatically assign tickets in circular order to the agents online in that group.
Assigning tickets using the Round-Robin method guarantees that incoming tickets are equally distributed among agents, saving you time and helping your agents start working on the tickets immediately, improving the response and resolution times.
In this guide, we will walk you through setting up an efficient ticket assignment system using the Round-Robin method, by integrating SharePoint with Desk365’s Power Automate Connector.
Prerequisites
Sign in to Microsoft SharePoint using your Microsoft account.
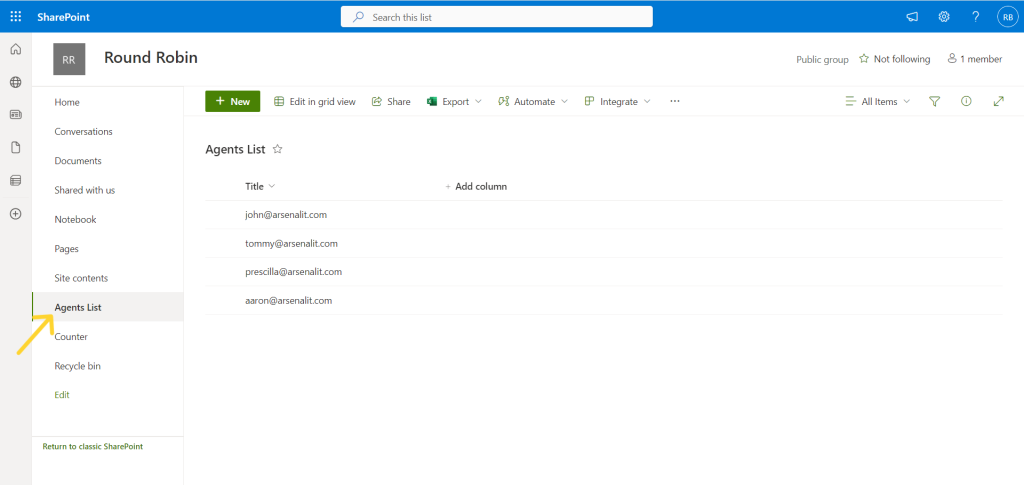
Create your agent list in SharePoint, by including the email ids of the agents.
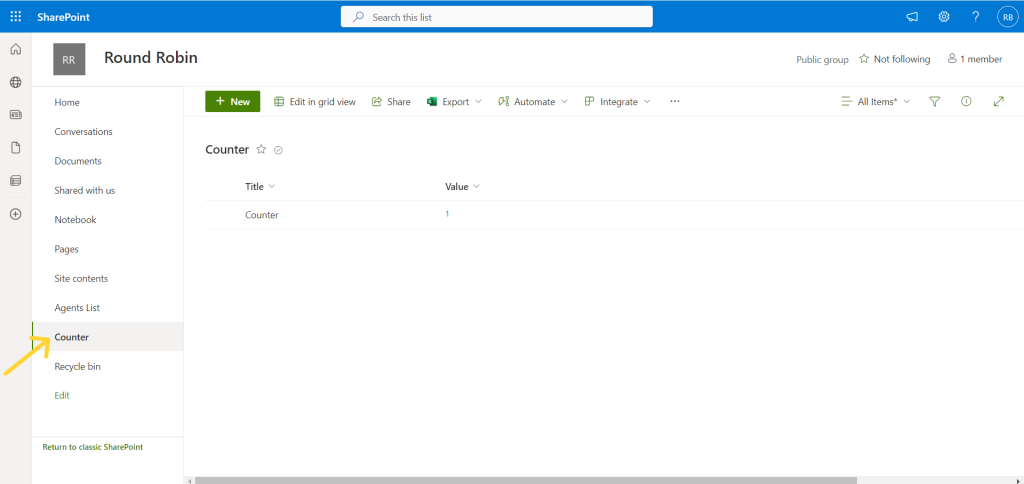
Create another list called the Counter and have only the title and the value field here. Set the value to One. This counter is going to be used in our flow to loop through, handle, and determine where we are in the loop of the Round-Robin.
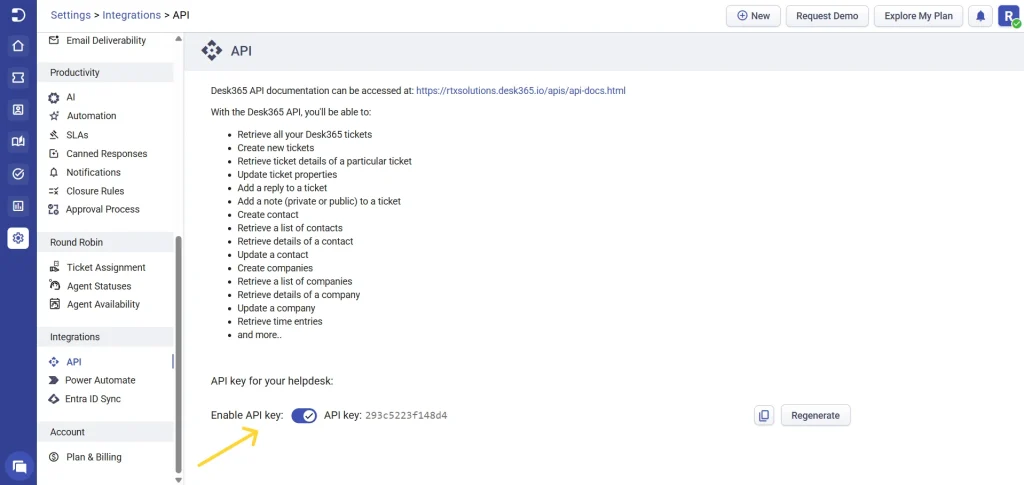
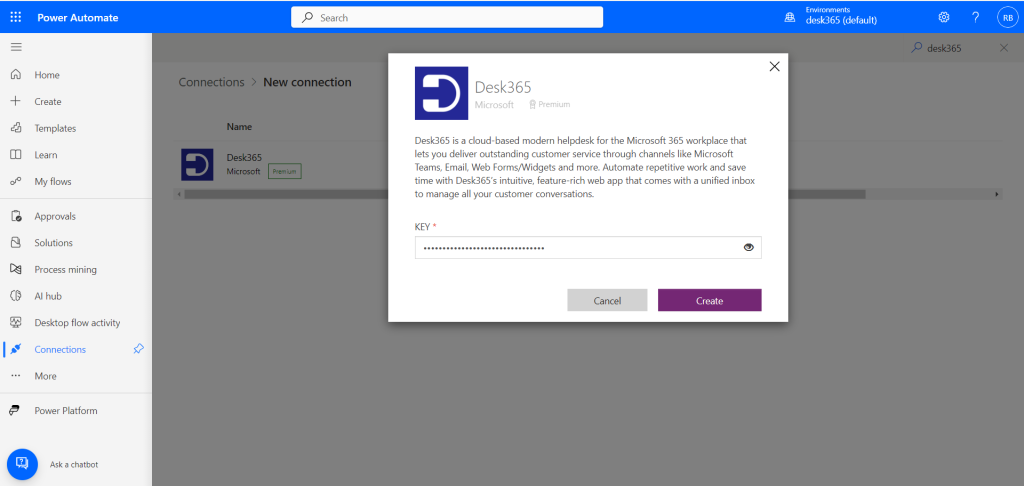
You will require an API Key to utilizethis flow. To access the API Keynavigate to Agent Portal –Settings – Integrations – API.
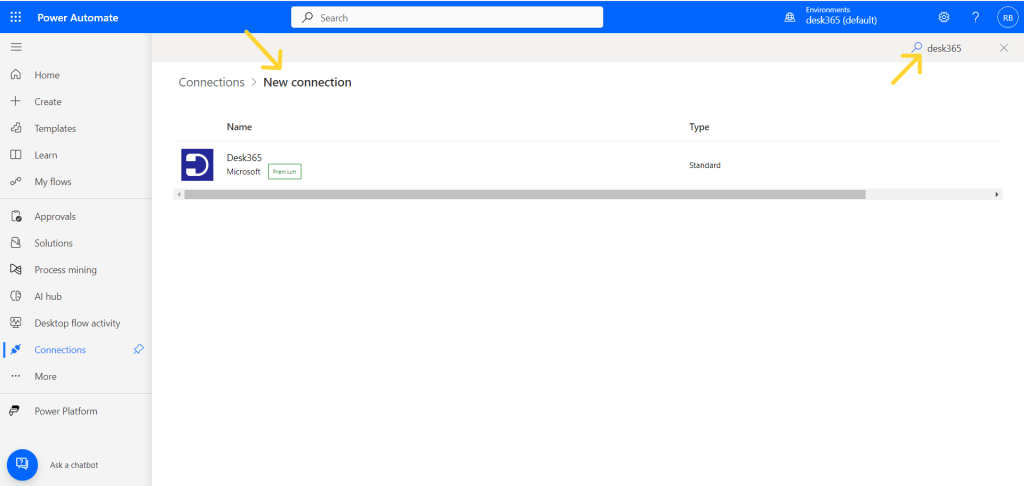
Click New Connection and in the Search Bar type Desk365 as shown below.
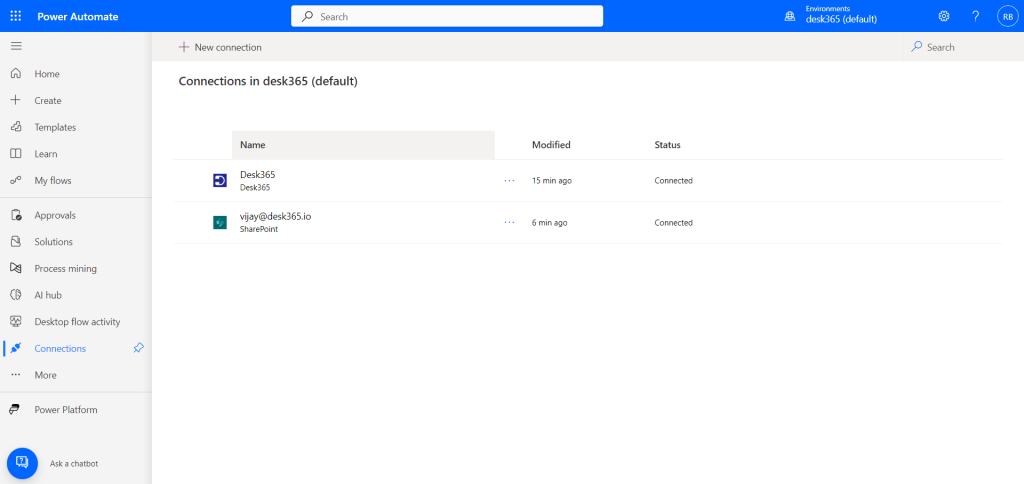
Copy and paste the API Key from the agent portal as mentioned above and hit create. Desk365 is now a connection.
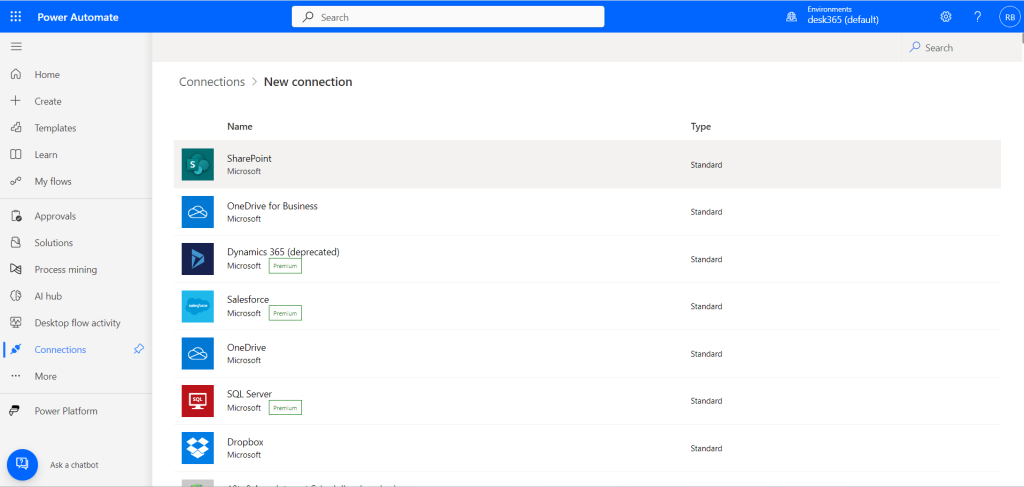
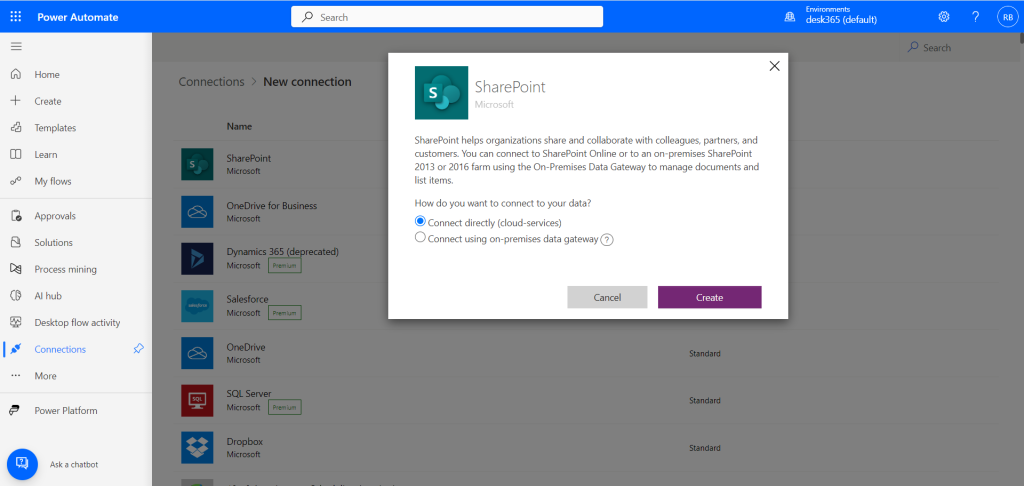
Microsoft SharePoint connection:
In Power Automate below connections, you will find SharePoint. Simply, click on it, click create and login using your Microsoft account. You can now notice SharePoint established as a connection.
Adding the Desk365 Round-Robin flow to Power Automate
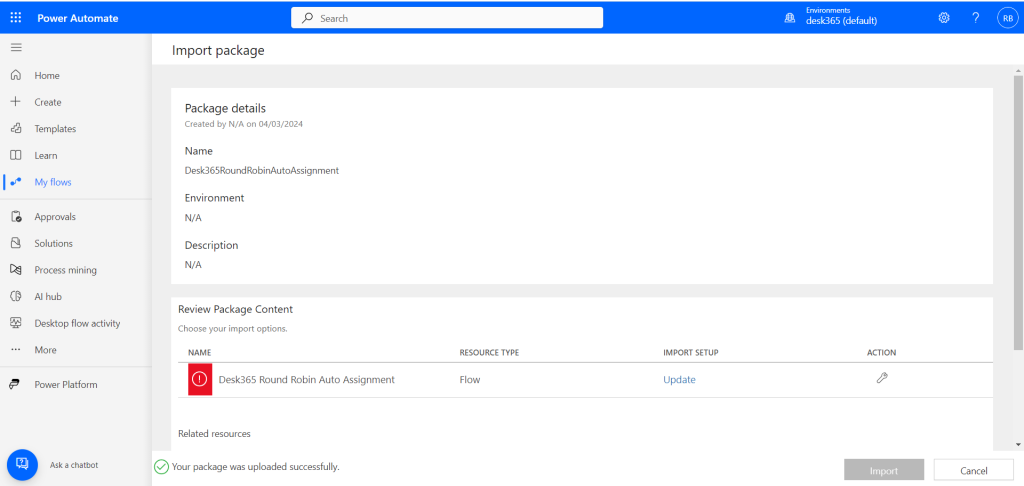
Navigate to My Flows – Import – Import Package Legacy in Power Automate.
Upload the ZIP file containing the auto-assignment file. You will then find the package imported.
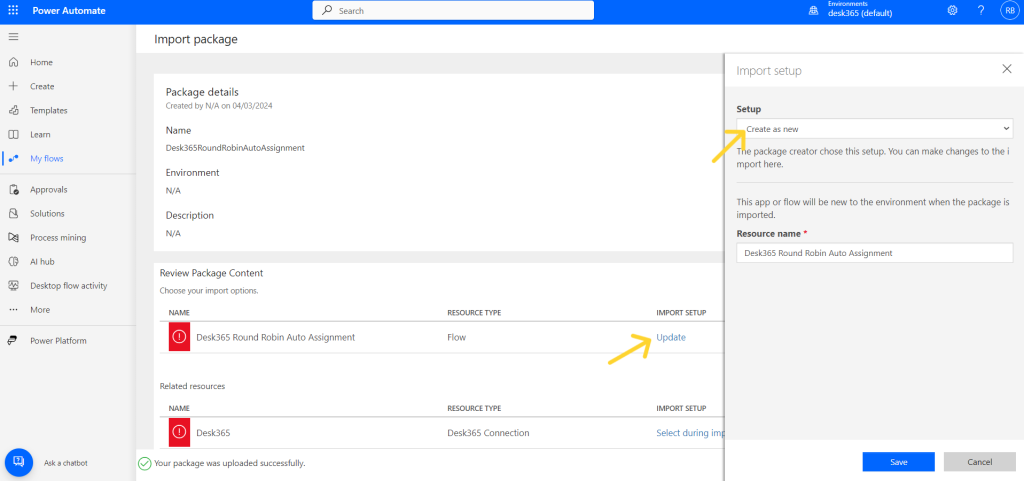
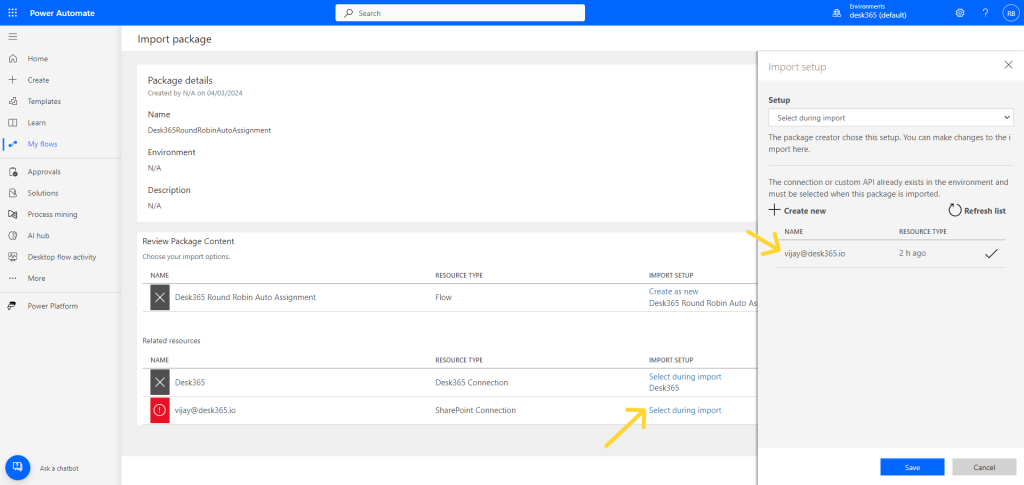
Click on “Update” below the “Import Setup” as shown in the image below. In the dialog box below the Setup select “Create as new” and hit save.
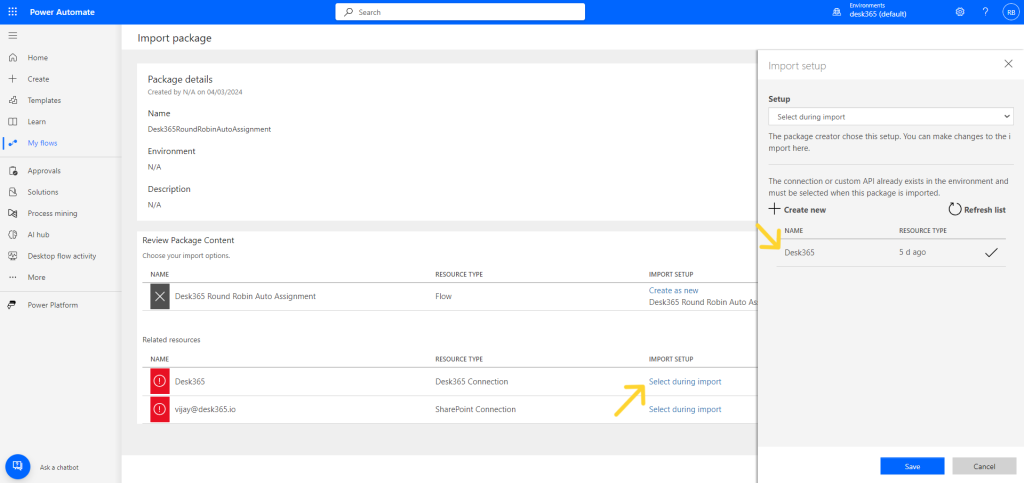
Below the Related Resources next to Desk365 click on “Select during import”. Select Desk365 and you will notice a tick mark appear. Hit save.
Next, click on “Select during import” in the SharePoint connection. Select the email and you will notice a tick mark appear. Hit save.
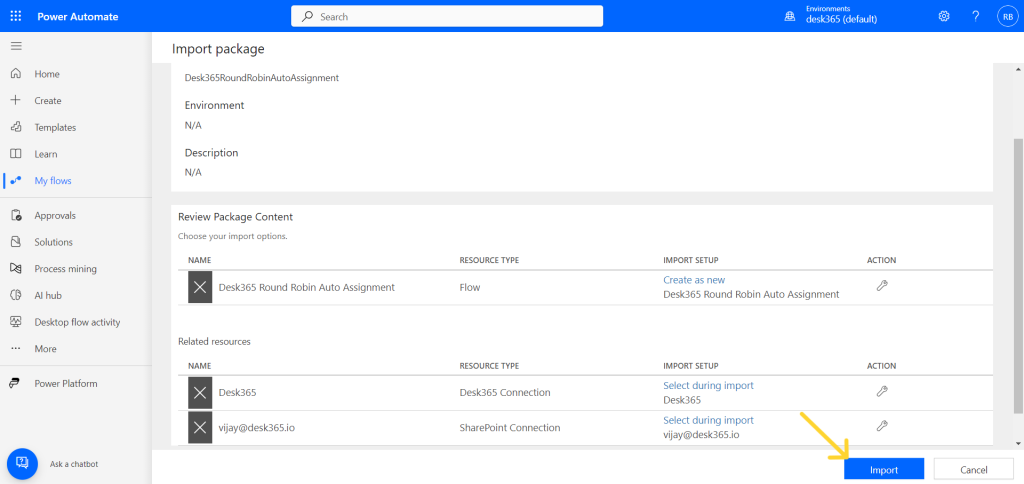
Import all three package details by hitting the import button.
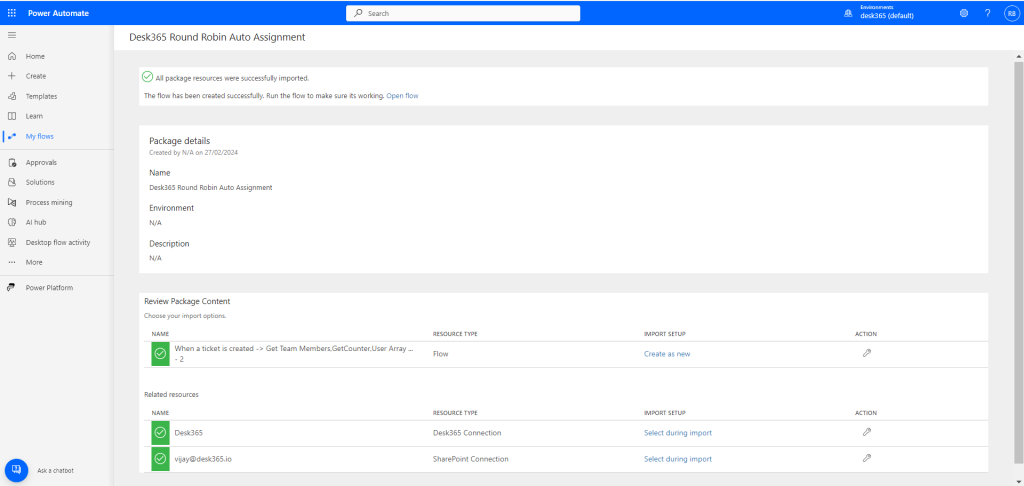
You can now find Desk365 Round-Robin Auto Assignment imported successfully.
After importing this flow, follow these steps:
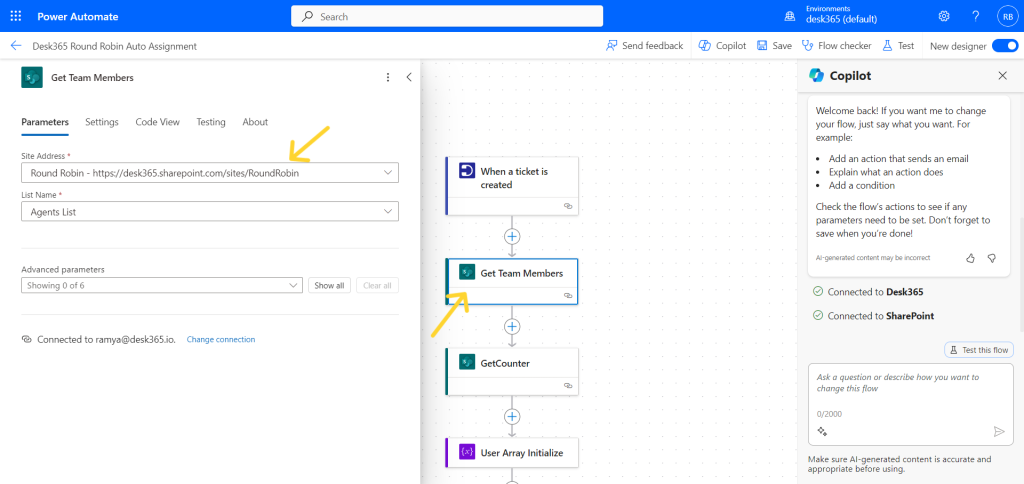
Navigate to “My Flows” and you’ll find the imported flow. Select it and click “Edit”.
Click on “Get Team Members” action and enter your SharePoint URL in the “Site Address” text box and choose the “Agent List” from the List Name.
Click on “GetCounter” action and enter your SharePoint URL in the “Site Address” text box and choose the “Counter” from the List Name.
Similarly, enter your SharePoint URL and List Name for each SharePoint action component such as “Update Item,” “Update Item 1,” and “Get Team Member Info“.
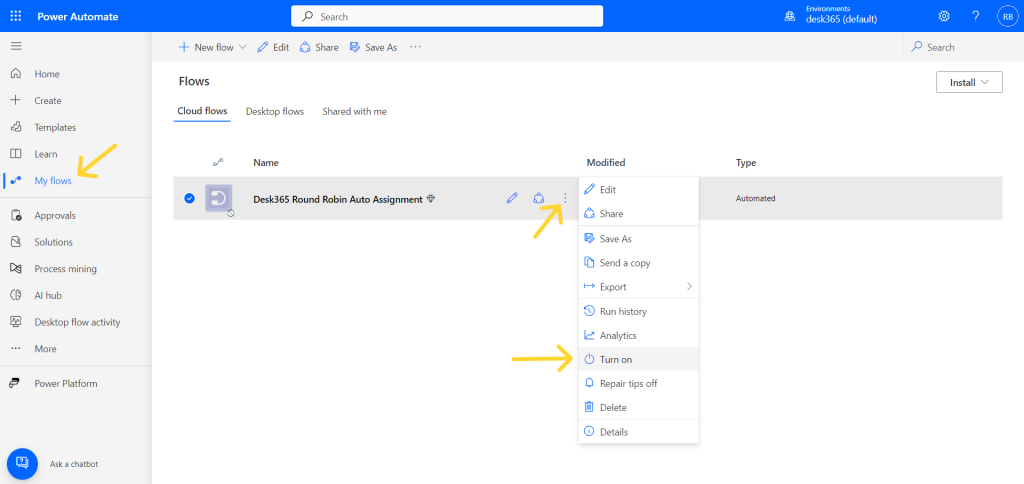
Note: Please make sure the imported power automate flow is turned on. To check on this navigate to My Flows – More commands – Turn On.
By following these instructions, you ensure the smooth operation of Desk365’s Round-Robin flow, enhancing ticket management efficiency and agent productivity.
Understanding the Round-Robin flow
The flow includes four major steps from creating a ticket to automatically assigning the tickets to the agents as described below:
When a ticket is created: This trigger initiates the flow whenever a new ticket is created in Desk365. You can customize this trigger based on various parameters such as subject, status, priority, agent, and group.
Get team members: This step fetches the agent list from Microsoft SharePoint.
Get counter: This step retrieves the counter list created in SharePoint, which assigns a numerical value to each agent. The Round-Robin method ensures that tickets are evenly distributed among agents based on these numerical values.
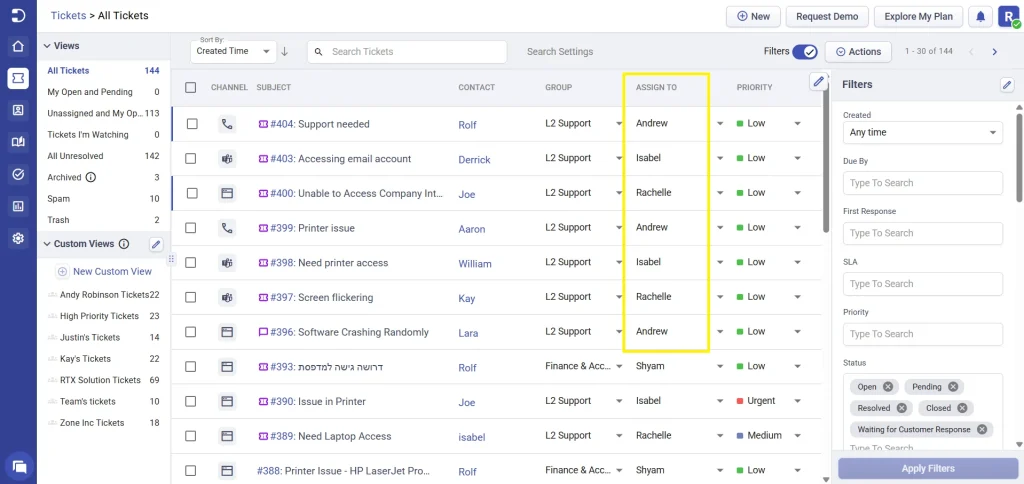
Update a ticket: This step automatically assigns the ticket to the agents in the round-robin method.
Automate ticket assignments all by yourself in Desk365 using your SharePoint and Microsoft Power Automate connector. Streamline your support team’s workflow and ensure efficient handling of incoming tickets. We are also working on adding Round Robin as a ‘single click’ feature within the Desk365 Agent Portal. With this enhancement, setting your helpdesk to use Round Robin Assignments will be as simple as clicking a button. Keep an eye out for announcements regarding this exciting feature, coming soon to Desk365.