


One area where automation plays a crucial role is in the use of ticket forms.
However, simply having ticket forms is not enough. Businesses must also configure automation rules to ensure that the requests and enquiries are handled efficiently. One common use case for automation rules is to automatically assign tickets to the appropriate group based on the ticket form used.
For example, if a customer submits a request using an HR related form, the ticket should be automatically assigned to the HR group. This not only saves time and effort in manually assigning tickets, but it also ensures that tickets are handled by the appropriate team with the necessary expertise.
In this help center article, we will explore the benefits of configuring automation rules using ticket forms and discuss how it can streamline the ticket assignment process, leading to enhanced productivity and customer satisfaction.
Understanding ticket forms
One key feature of Desk365 is ticket forms, which allow customers to submit requests and enquiries in a structured and organized way.
Before diving into automation rules, it’s important to grasp the concept of ticket forms. A ticket form is a predefined template that captures essential information about a support request. By categorizing tickets into specific forms, support teams can effectively organize and prioritize incoming queries.
Ticket forms typically include various elements such as custom fields, attachments, allowing agents to gather all the necessary details upfront.
Configuring automation on tickets created through a specific form
To configure automation rules using ticket forms in Desk365, these are the steps to follow:
Step 1: Identify the ticket forms
The first step is to identify the ticket forms that require automation rules. Businesses should review their ticket forms and categorize them based on the type of request or enquiry. For example, IT-related forms can be categorized separately from marketing-related forms.
Step 2: Define the automation rules
Once the ticket forms are identified, businesses should define the automation rules for each form. Automation rules typically involve setting up triggers and actions.
Triggers are conditions that must be met for the automation rule to be activated, while actions are the tasks that the automation rule performs.
In our example, the trigger would be the submission of an IT-related form, and the action would be to assign the ticket to the IT group.
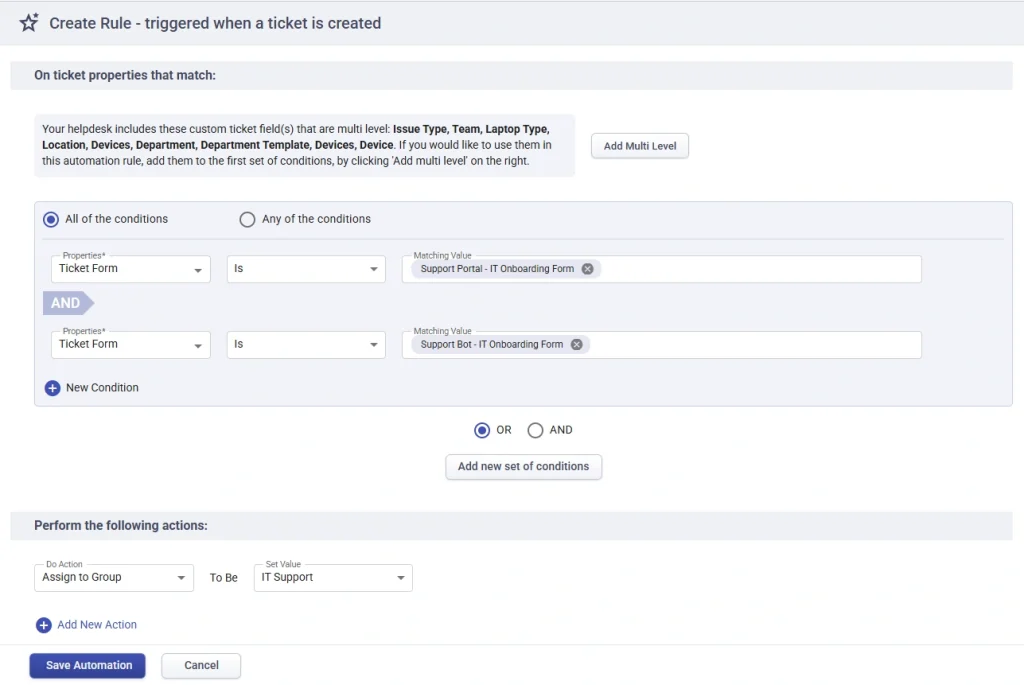
Once you create this automation rule, every time a new ticket is submitted via either the ‘Support Portal IT Onboarding Form’ or the ‘Support Bot IT Onboarding Form,’ the ticket will be assigned to the IT Support Team automatically.
Configuring automation rules on tickets created through a specific form can help businesses streamline their support processes and ensure timely responses to customer requests. By automatically assigning tickets to the appropriate group based on the ticket form used, businesses can improve efficiency and ensure that customer requests and enquiries are handled by the appropriate team.
By identifying the form, creating automation rules, and testing and refining the rules, businesses can improve their customer support experience and ultimately, their bottom line.


