


Creating tickets to raise a support request is usually the first experience your users have with your support team. Let’s see how you can configure a Create Ticket form in Desk365 that makes it easy for your users to raise a ticket with fields that make sense for your support agents as well as your users.
Ticket fields in Desk365
Go to the Settings > Admin > Ticket Fields tab to get started.
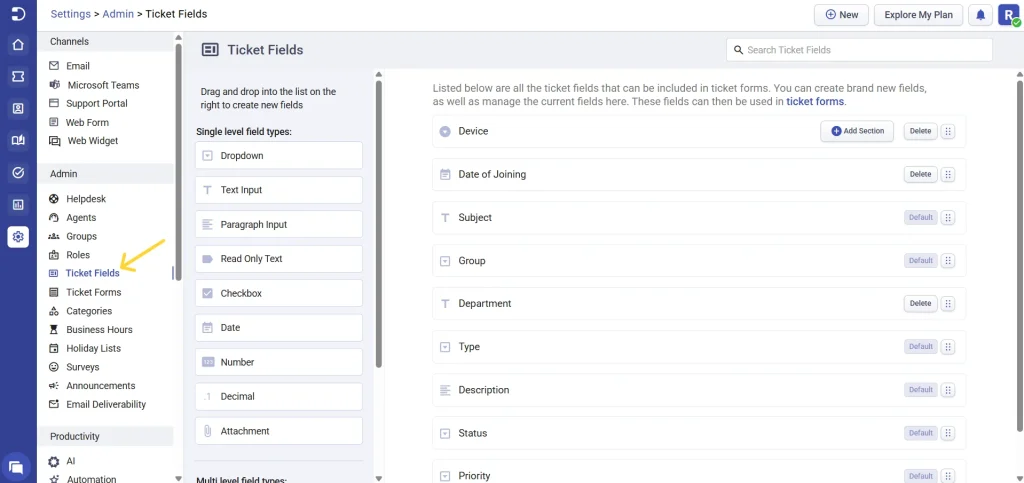
The tab comes pre populated with ‘Default’ fields that are already part of Desk365. These are fields like Priority, Status, Subject, Type etc., that are common fields found in tickets.
Other than the ‘Default’ fields you can also add customized fields that are more specific to your own helpdesk. You can add them to your create Ticket Form by dragging them from the left side of the Ticket Fields tab into the right side where you see the ‘Default’ fields.
You’ll find two types of these customizable fields:
– Single level field types
– Multi level field types
Among the single-level fields are standard elements like Dropdown, Text Input, Checkbox, Date, Number, and so on that you can use depending on what you need for your Create Ticket form. As the name implies, Multi-level fields are those that can dynamically populate a second or more levels when you select an element in the top level.
Now, let’s go through some examples that illustrates some of the customization capabilities you can do in Desk365.
How to customize the default fields?
You can change the label of default ticket fields as required. This can be done as follows.
1. Click on any of the Ticket Field. Let’s say we click on ‘Group’.
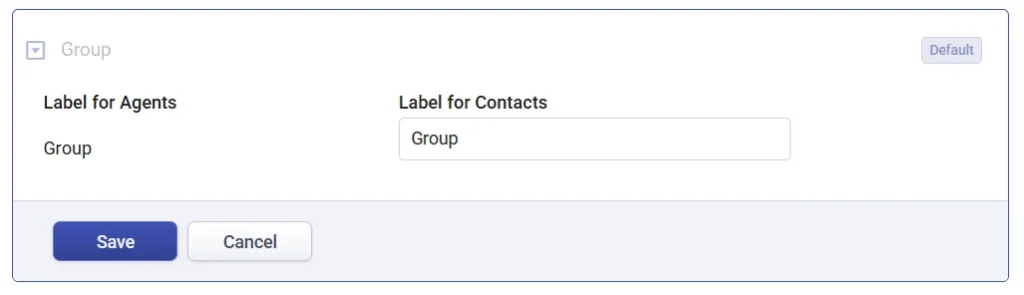
2. Your users may know it as a Department and not as a Group. Therefore, you have the option to modify the Contacts Label to say ‘Department’.
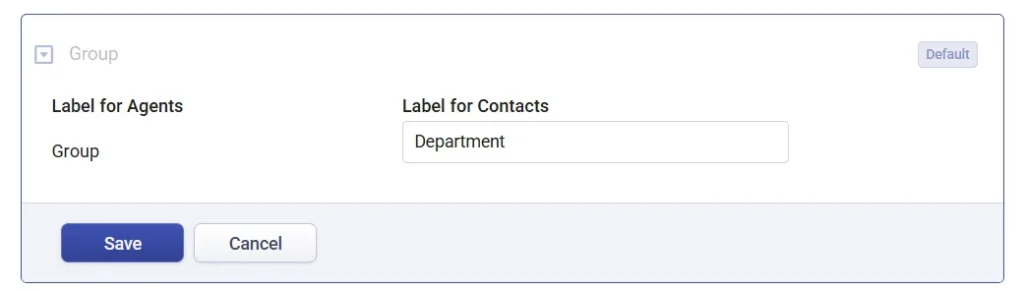
This is a very simple customization that can be done on Default fields. As you get familiar with Ticket Fields, you’ll discover the ability to personalize them in order to meet the demands of even your most intricate workflow needs.
How to create custom ticket fields?
With Desk365, you can create any number of additional ticket fields along with the default ticket fields. These can be further displayed to both the end-users and agents.
To illustrate, let’s proceed with an example. Suppose you require ‘Location’ to be added as a required field in the tickets you receive from end users, you can achieve this using the following steps.
1. Select the ‘Dropdown’ field under Single Level Field types, then simply drag and drop it to the right as shown below:
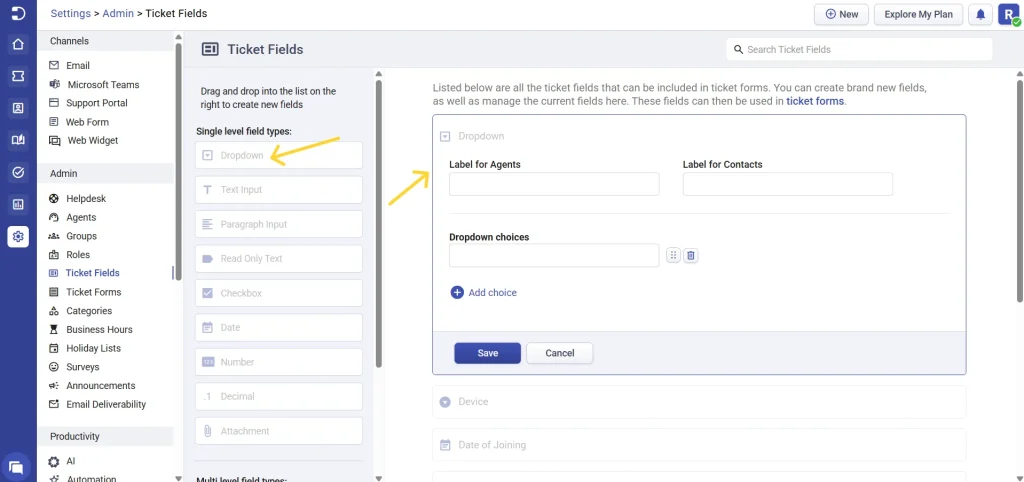
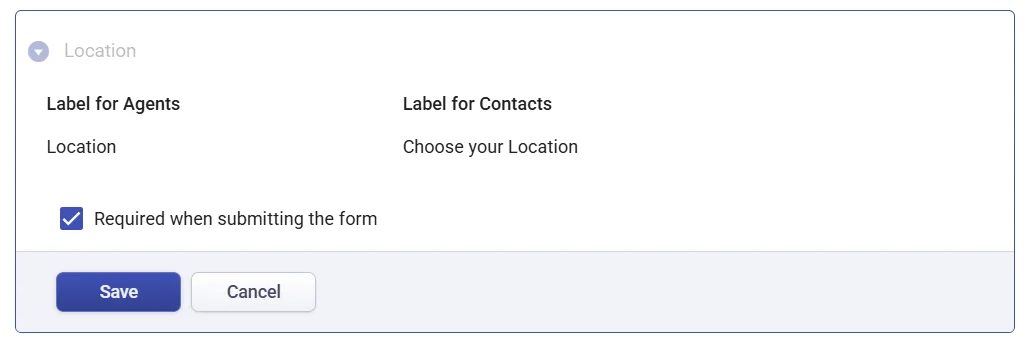
2. Label it as ‘Location’ for agents, and you can assign any label for your contacts. For instance, here it is named ‘Choose your Location’.
3. Next, provide the necessary dropdown choices as required by clicking on ‘Add choice’.
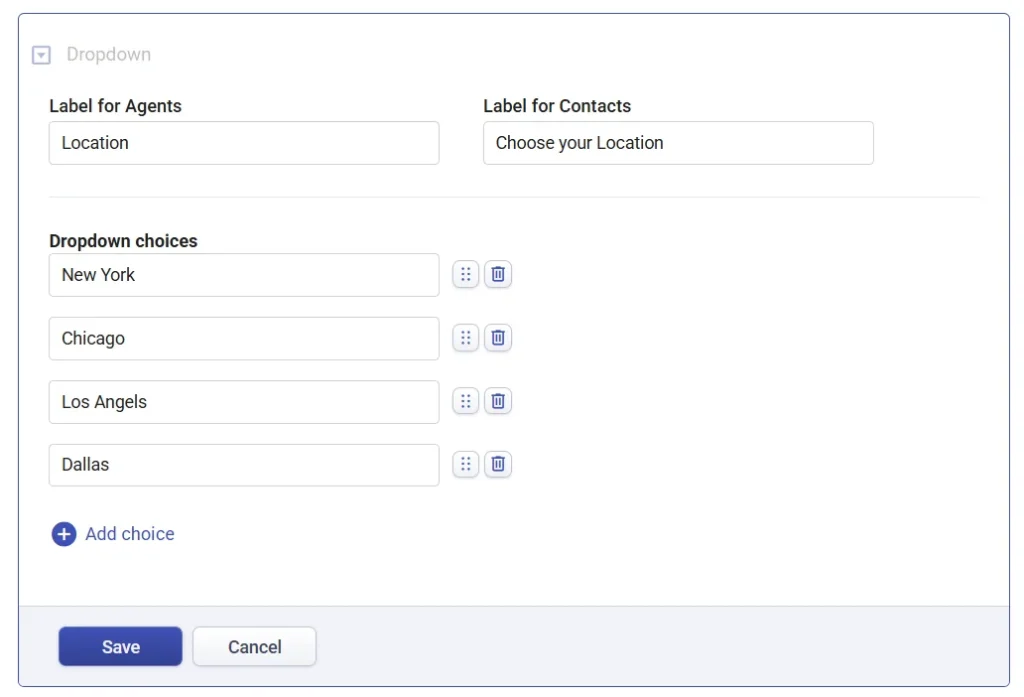
4. Click on ‘Save’. Now your custom field ‘Location’ will be added.
Note: Editing dropdown choices will update all existing tickets, ticket activities, automations, and closure rules that use this field. Please review your changes before saving.
How to add a ticket fields to a ticket form?
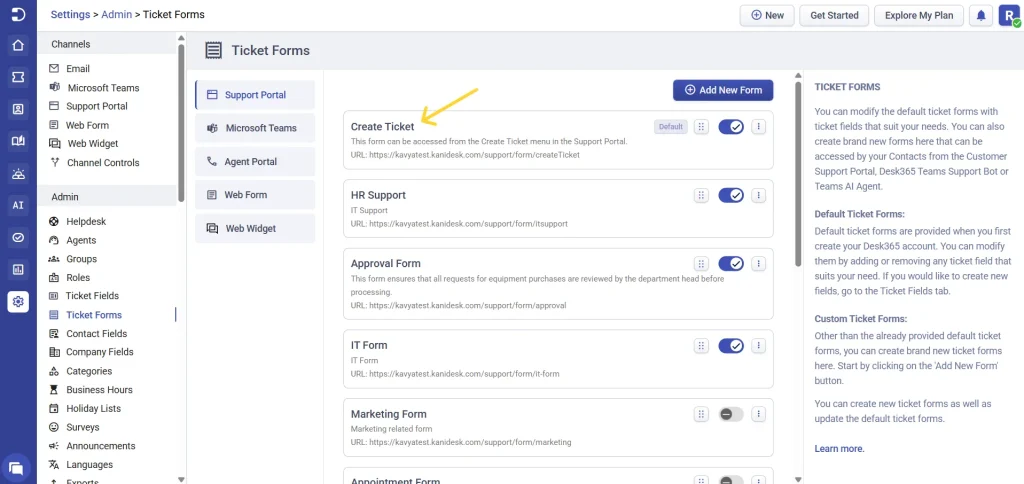
You can utilize these custom ticket fields in the various ticket forms available under the ‘Ticket Forms’ Tab.
For example, let’s add the default field ‘Group’ and the custom field ‘Location’ to the Create Ticket Form in the Support Portal.
1. Navigate to the Create Ticket Form of the Support Portal under the Ticket Forms tab, as shown below:
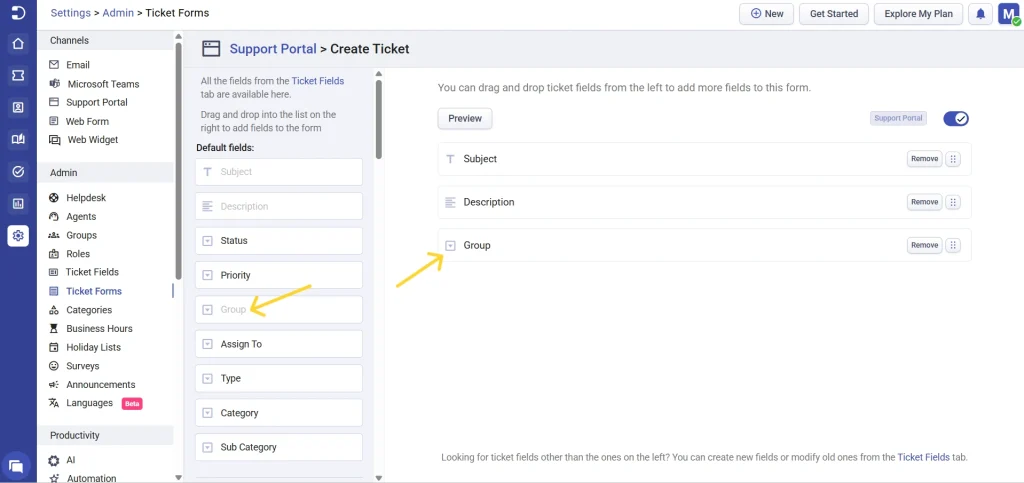
2. Drag and drop ‘Group’ from the default fields to the form on the right in order to add it to the Create Ticket form.
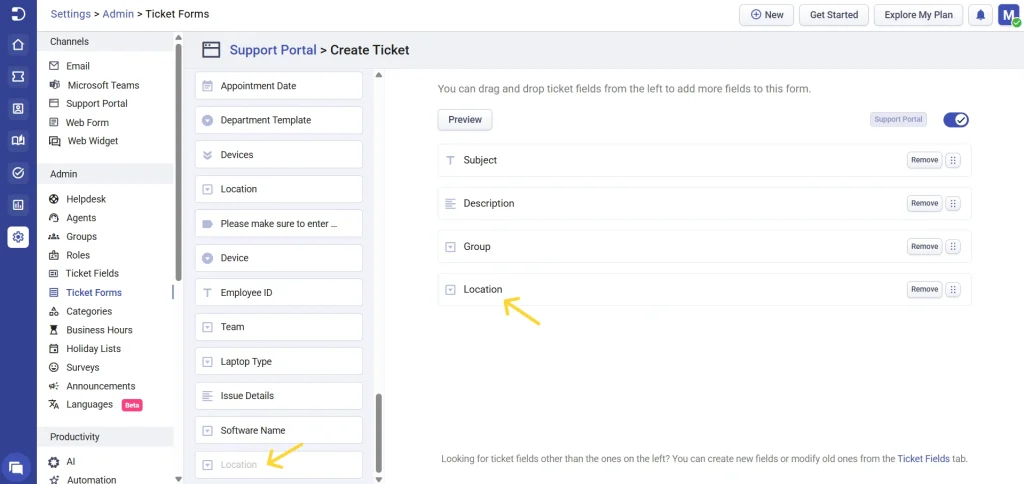
3. Drag and drop ‘Location’ from the custom fields to the form on the right in order to add it to the Create Ticket form.
4. You can make a field mandatory according to your requirements. For instance, click on the location and enable the checkbox to make it a required field. Click ‘Save’.
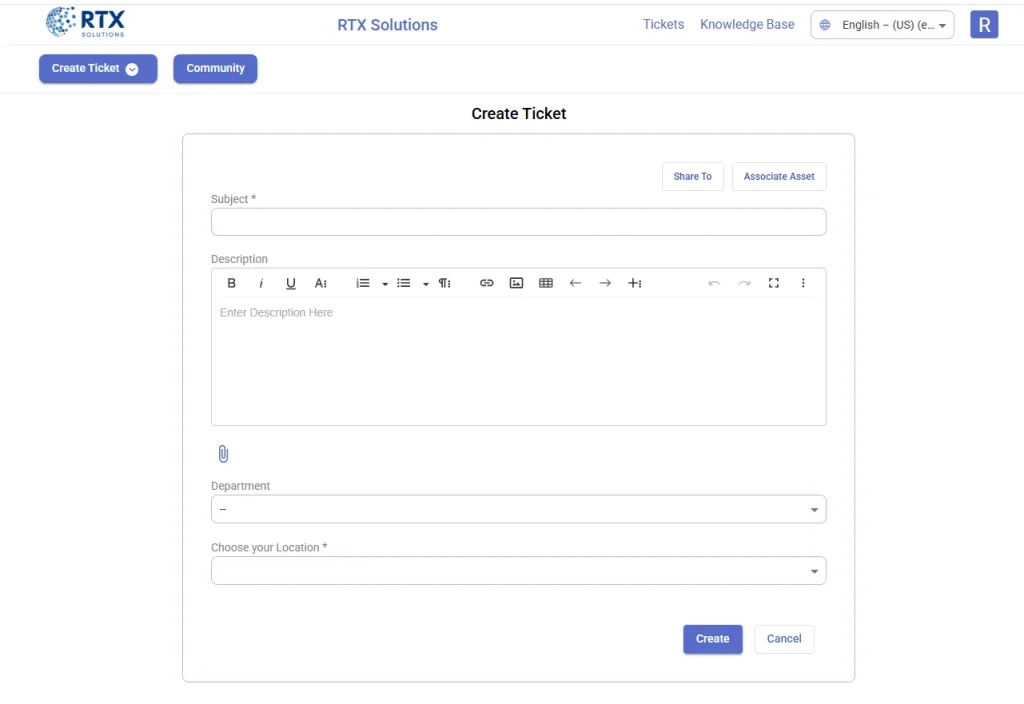
5. Finally, when end-users create a ticket via the Support Portal, they will be able to see the newly added ticket field ‘Choose your Location’.
Desk365 offers a range of customization options for creating ticket fields that cater to the specific needs of your helpdesk. By using the ticket fields tab, you can add custom fields, change the label of default fields, and even add required fields to ticket forms.
With Desk365, you can create a seamless experience for your users by providing them with a simple and intuitive way to raise support requests, while also ensuring that your support agents have access to the right information to resolve tickets quickly and efficiently.


