


Using Desk365, you can create any number of custom ticket fields that can be included in ticket forms.
There are ‘Default’ ticket fields like Subject, Priority, Status, Type, and more that are already part of Desk365.
Other than the ‘Default’ fields you can also add customized fields that are more specific to your own helpdesk.
You’ll find two types of customizable fields in Desk365: single level and multi-level.
Single Level Fields: These are fields that have a single level of hierarchy, fields like Dropdown, Text Input, Date, Number etc.
Multi-level fields: These fields have multiple levels of hierarchy. You can start at one level and based on the choice at the first level, the next level will display a different set of fields.
There are two types of Multi-level fields available in Desk365. They are ‘Dropdown with sections’ and ‘Nested Dropdowns‘.
We have introduced a new ticket field type: Read Only Text. This allows you to make certain fields read only for your end-users.
With this ticket field, you’ve the ability to add view only labels to the ticket forms and do more.
Let’s discuss how the ‘Read Only Text’ field will be useful for your business.
Read only texts in ticket fields
Read Only Text fields are useful if admins want to display helpful information in the form without requiring any user input. You can use them to:
- Share instructions
- Highlight important steps
- Add context to a section of the form
- Remind users to provide specific information
They also help structure longer forms and make them easier to understand for end-users.
Let’s go through an example of how to add this.
- Navigate to Settings > Admin > Ticket Fields.
- From the list of field types, drag and drop the ‘Read Only Text’ field into your custom field list.
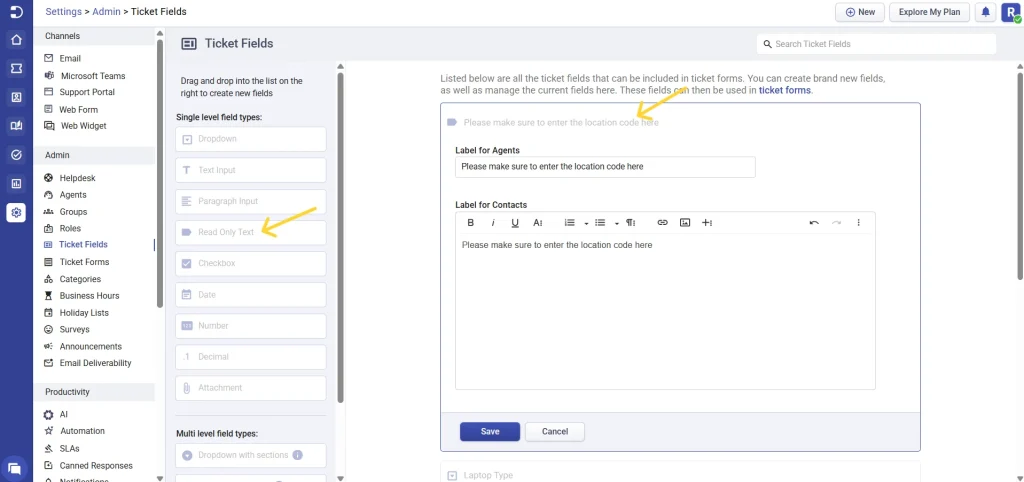
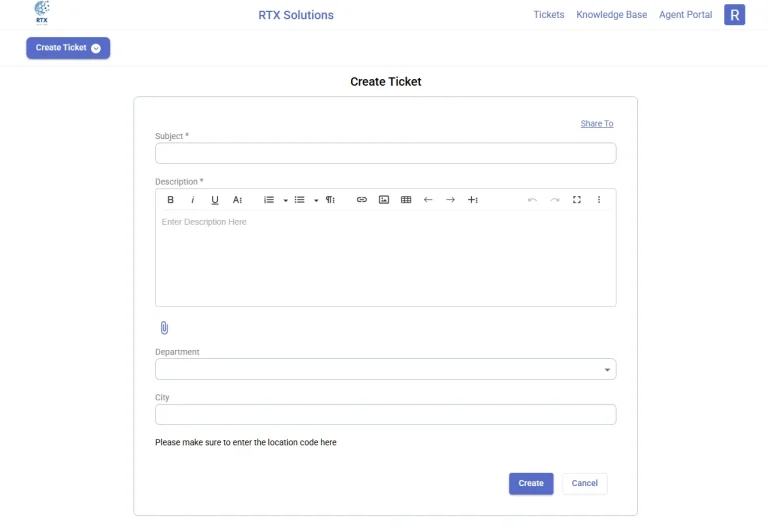
- Enter a message in the ‘Label for Agents’ and ‘Label for Contacts’ fields — for example: “Please make sure to enter the location code here”.
- Click Save.
Once added to a ticket form (like the ‘Create Ticket’ form in the Support Portal), this field will appear as a non-editable informational block that users can view but not change.
You can use this ticket field in multiple ways, like if you want to alert or give a warning to your end-users so that they don’t miss out on filling important fields.


