


Ticket statuses are labels that help you track the progress of a ticket from creation to resolution. By default, Desk365 comes with a set of predefined ticket statuses, such as Open, Pending, Resolved, and Closed on every new account.
However, you may need to create custom ticket statuses to reflect the unique stages of your support process.
You can access the Settings > Ticket Fields tab in the Desk365 account to view, edit, and manage ticket statuses. You can:
– Create new ticket statuses
– Edit existing ticket statuses
– Use the Drag & Drop function to re-order the existing available statuses
The newly created ticket status fields are now available under the status dropdowns on every ticket, and you can also notice it on multiple places like customer support portal, reports, export tickets, and more.
Understanding custom ticket statuses
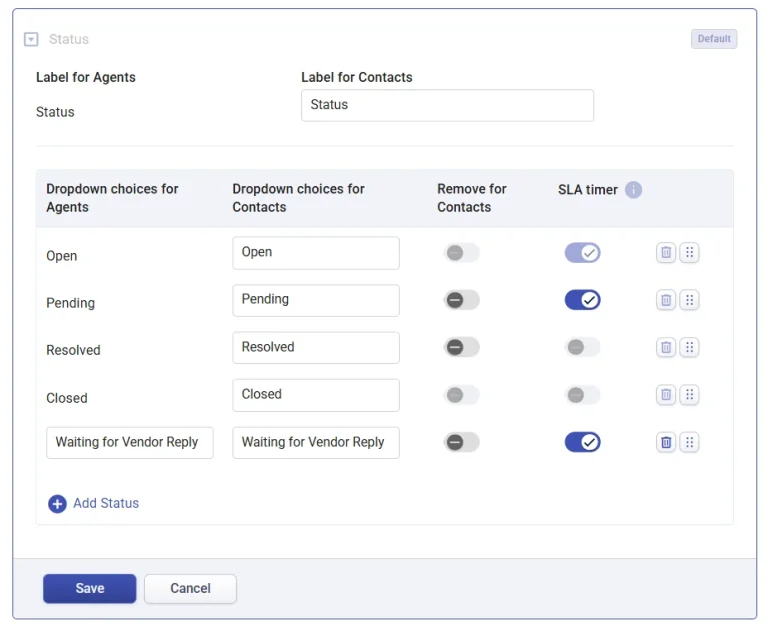
Custom ticket statuses allow you to bring additional steps in your support process and helps to manage your tickets better. For example, a ticket might get delayed waiting for specific inputs from your third-party vendors.
You might want to create an additional status field called ‘Waiting for Vendor Reply’.
You can create these additional ticket statuses by clicking on the ‘Add Choice’ button on the ticket status field.
With custom statuses, you also have the ability to decide what should be displayed to the customers when they login to the portal to check the ticket status and the same for your agents. That means you can customize the ticket status as ‘Waiting for Vendor Reply’ for both your agents and customers for this example. So, when customers login to the portal to see the ticket status and when they notice ‘Waiting for Vendor Reply’ as their current ticket status, they will understand that it might take more time as external support is required for ticket resolution.
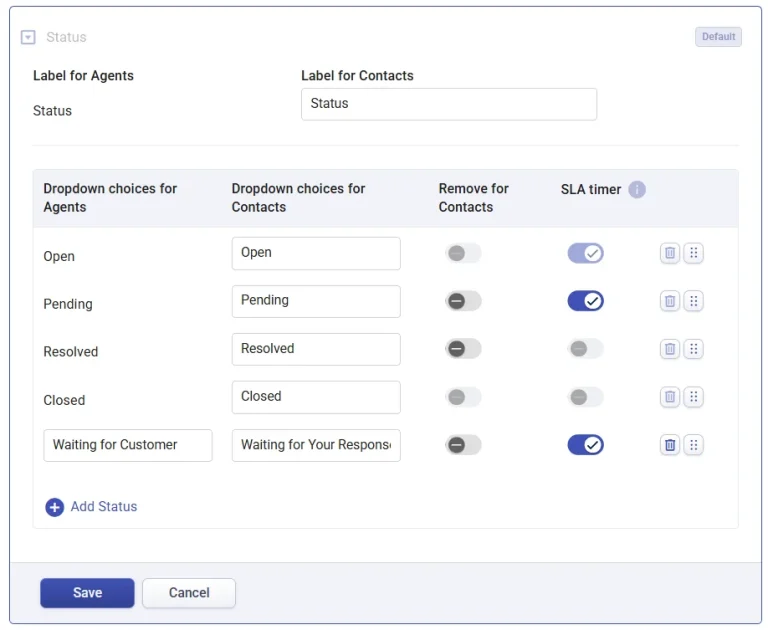
Let’s take a look at one more example of custom ticket statuses.
For example, you might want to create a custom field called ‘Waiting for Customer’, when you are waiting for some inputs from your customers. That means you can show the ticket status as ‘Waiting for Customer’ for your agents, but when your customers login to the portal, they can see the status as ‘Waiting for Your Response’.
Quick guide to adding a custom ticket status in Desk365
- Login to your Desk365 account.
- Go to Settings > Admin > Ticket Fields.
- Click on the status field.
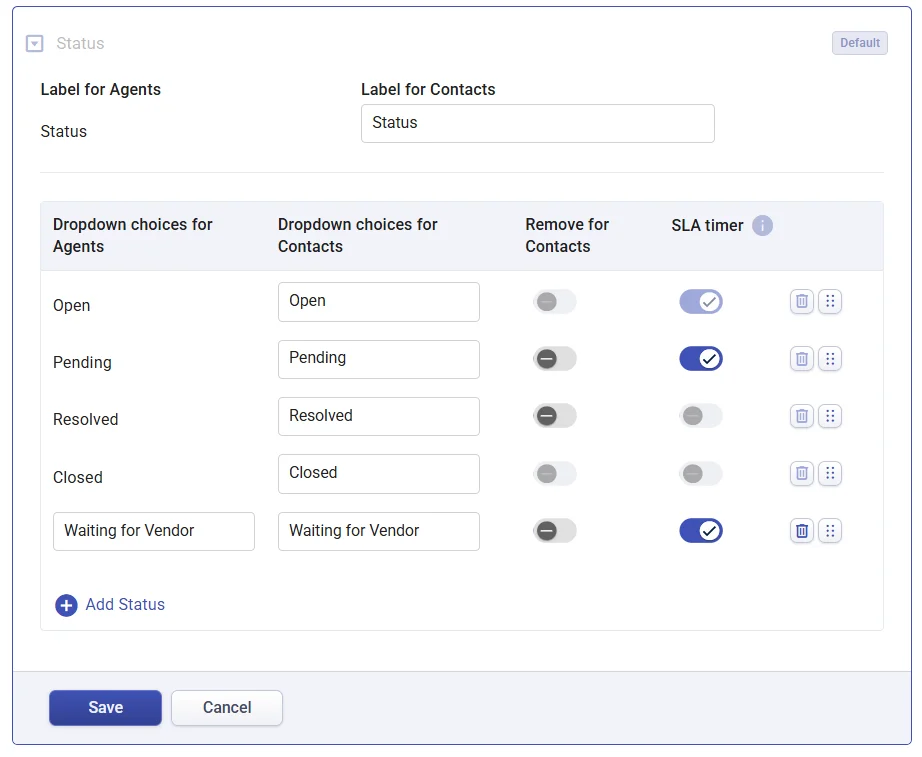
- Under the status choices section, you can see the list of statuses that are currently in your helpdesk.
- Click on the ‘Add Status’ button to include a new ticket status.
- Enter the name of your new custom status for both agents and customers. You can choose different names for agents and contacts if you wish to.
- Click on the save button to save your newly created status field.
- You can always come back and delete a custom status by clicking on the delete choice button on the right-hand side.
Customizing ticket statuses in Desk365 is a powerful customization feature that can help you tailor your helpdesk to your specific needs.
By following the simple steps outlined above, you can create custom ticket statuses that reflect the unique stages of your support process, prioritize tickets based on their level of urgency, route tickets to the appropriate team or department, and provide more accurate and timely updates to your customers.


