Using Desk365, you can create any number of ticket fields that can be used in ticket forms
You’ll find two ticket field types in Desk365: Single level and Multi-level.
Single Level Fields: These are fields that have a single level of hierarchy like Dropdown, Text Input, Date, Number etc.
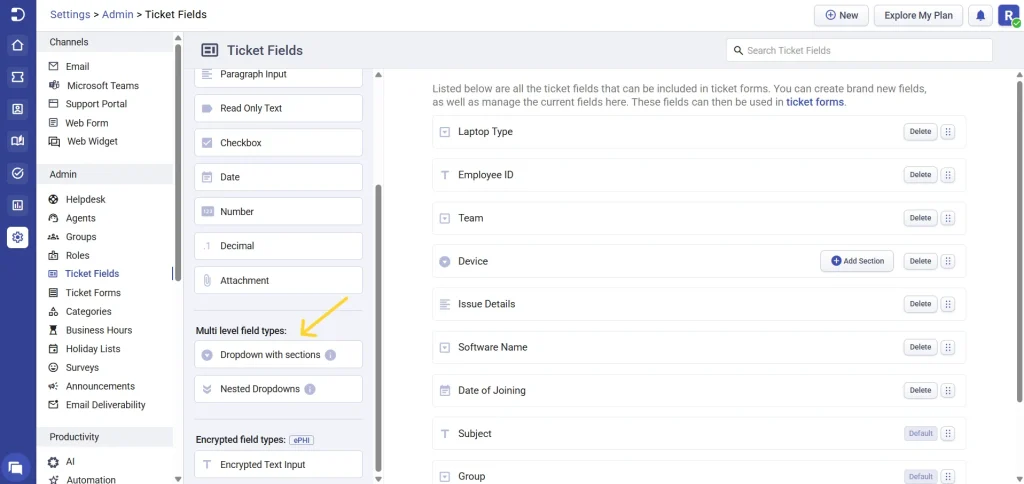
Multi-level fields: There are two types of Multi-level fields available: ‘Dropdown with sections’ and ‘Nested Dropdowns‘.
In this article, we are going to cover how to use ‘Dropdown with sections’ field in your ticket form.
Creating dropdown with sections field in Desk365
This is a dropdown field that can be configured such that upon selection of a choice, it dynamically displays sections (with their own fields) underneath the dropdown. These fields have multiple levels of hierarchy. You can start at one level and based on the choice at the first level, the next level will display a different set of fields.
For example, if you have two common requests, one for password reset and another for a printer running out of ink, you could use this field with these two choices in the dropdown. Upon selection of each choice, you could have a different section displayed underneath the dropdown with its own set of fields specific to the choice that was selected.
In the Settings > Ticket Fields tab, you’ll find a field called ‘Dropdown with sections’.
Let’s go through an example below on how different companies use Desk365’s ‘Dropdown with sections’ field when creating tickets.
Use-case: Using Desk365 as an internal help desk
In this example, we want to change the Create Ticket form in the Support Portal such that for each request we want the Contact to enter their department, and the fields will change dynamically. All these are required before they can submit a ticket.
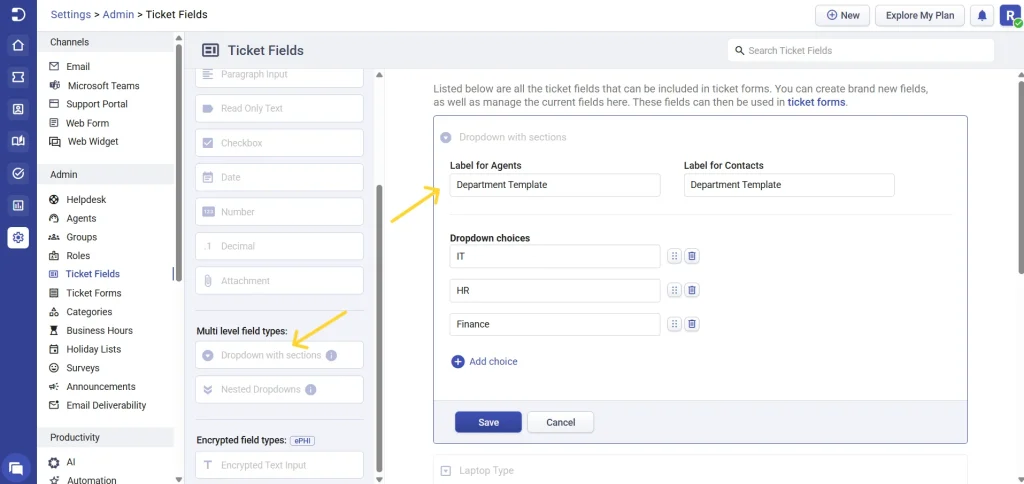
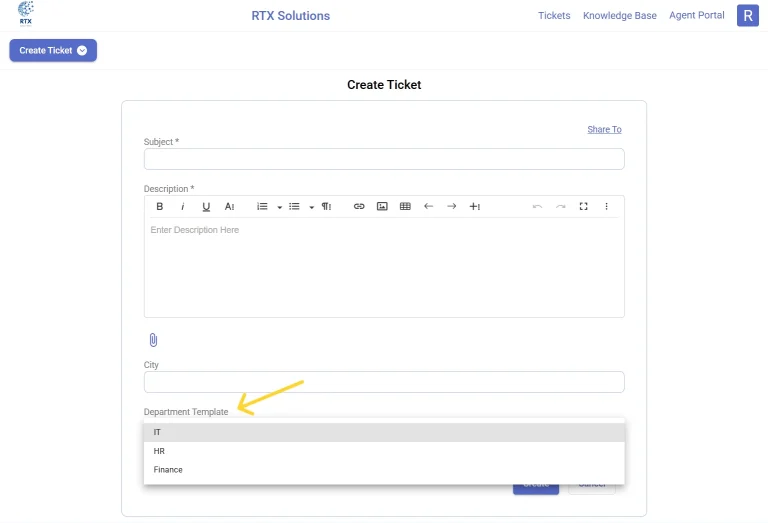
We’ve created a department template to include three different departments as a dropdown – ‘IT’, ‘HR’, and ‘Finance’.
Let’s see how we can create unique ticket fields when you select a particular department. Click on the ‘Save’ button to save the department template.
Now let’s add a new section to the Department Template. Click on the ‘Add Section’ button and give a Section Title in Section Properties dialog box.
Give the Section Title Name as ’IT Section’ and select the ‘IT’ department as the correct choice under this section. Click on the ‘Save’ button.
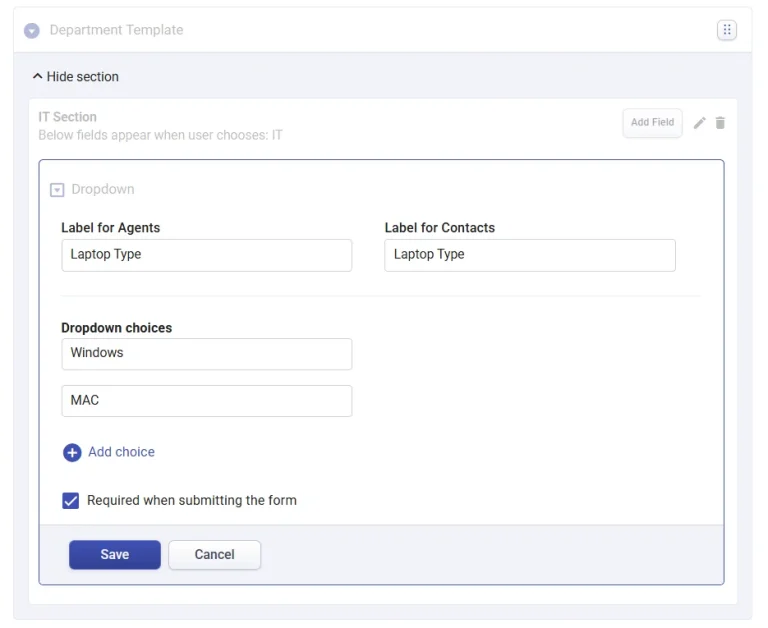
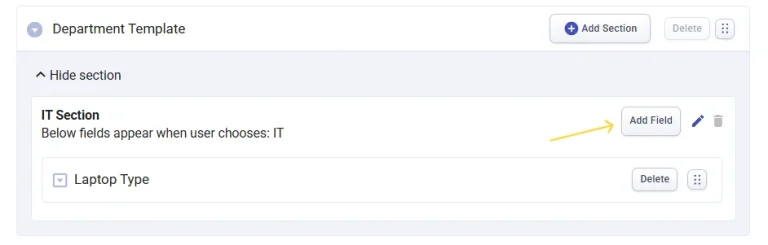
Now the new section ‘IT Section’ appears below the Department Template. Now let’s add unique fields that you want to appear in the ‘IT Section’ when the employee selects the ‘IT’ as the dropdown choice.
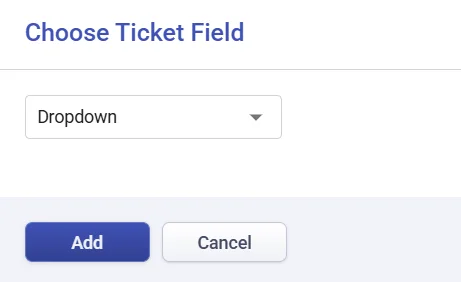
Choose the ticket field option as a Dropdown field.
Now provide a name that you want your agents and employees to see. In this example, we’ve given the name as ’Laptop Type’. You can change the name anytime you wish to.
As you see in the screenshot below, we’ve successfully created the first unique field under the ’IT Section’ which is ‘Laptop Type’.
We chose ’Dropdown’ as the ticket field option as you want your employees to choose their preferred laptop type which is either ‘Windows’ or ‘Mac’.
For this example, I want to show these dynamic ticket fields in the Create Ticket form in the Support Portal as it will be easy for the employees to submit the tickets to the IT department when they’re joining a company.
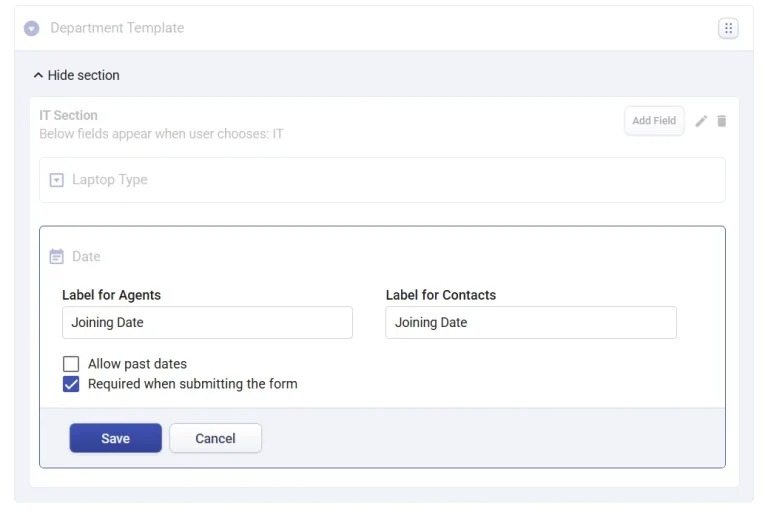
Now, let’s add one more field under the ‘IT Section’.
This time let’s choose ‘Date’ as the Ticket field since we want to collect and know the joining date of the employee so that we can provide them laptop and facilitate them with a fantastic onboarding experience.
Give a name for the new field. Click on the ‘Save’ button.
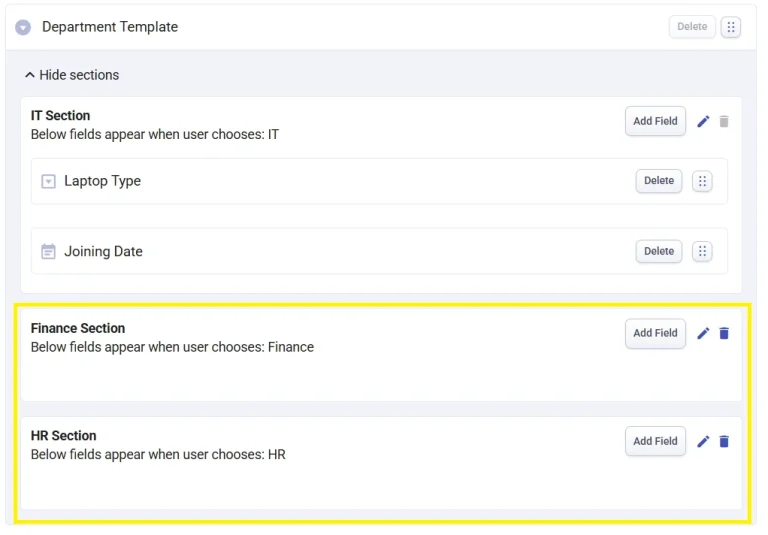
Now let us repeat the same steps for the other two departments – ’Finance’ and ’HR’ by creating unique fields suitable for these departments.
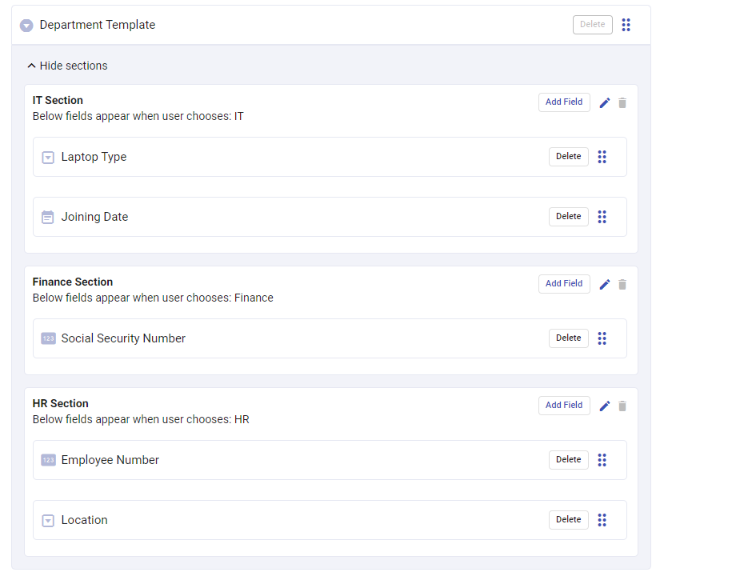
As you see in the screenshot below, we’ve created different unique fields for the ‘HR’ and ‘Finance’ section.
Note:Editing dropdown choices will update all existing tickets, ticket activities, automations, and closure rules that use this field. Please review your changes before saving.
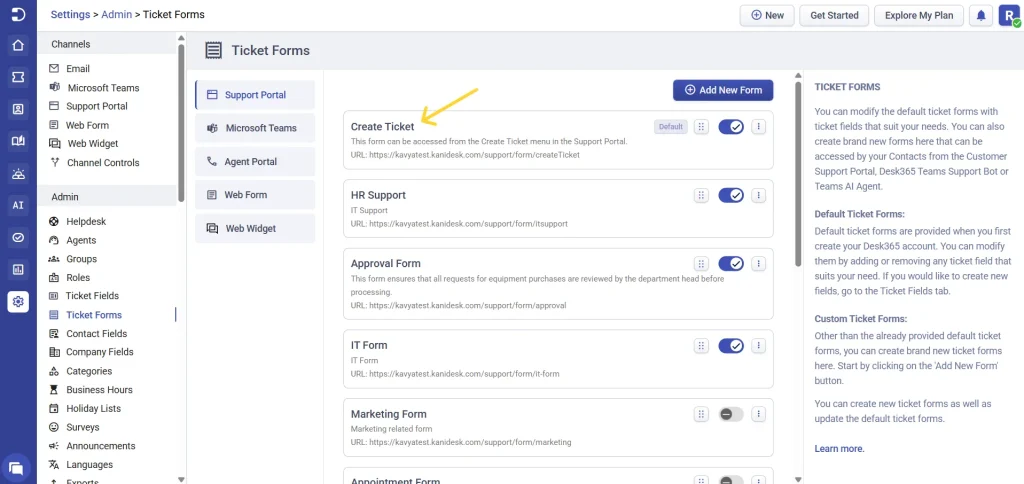
Now, let’s add this ‘Dropdown with sections’ ticket field to the Create Ticket form in the Support Portal.
To do this, go to Settings > Admin > Ticket Forms.
Choose the ‘Create Ticket’ form in the Support Portal.
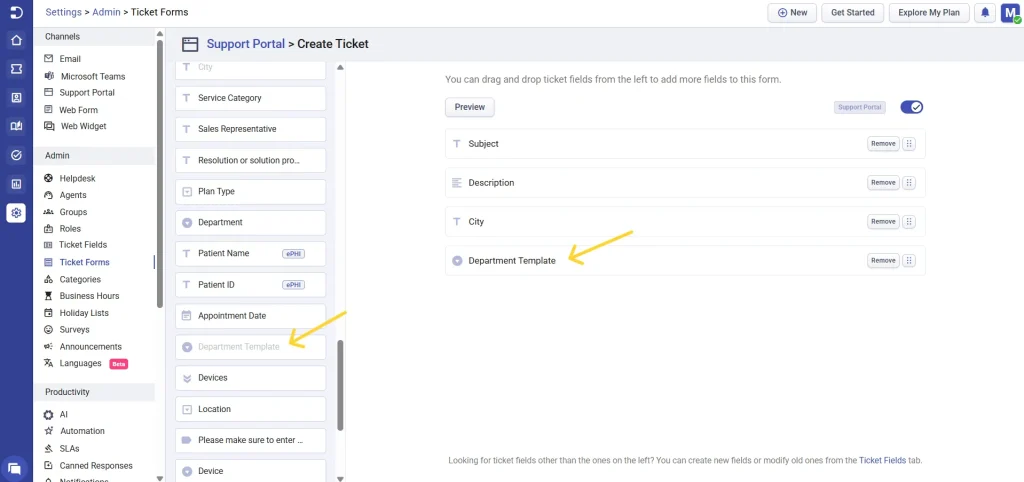
Drag and drop the custom field ‘Department Template’ from the left to this form on the right.
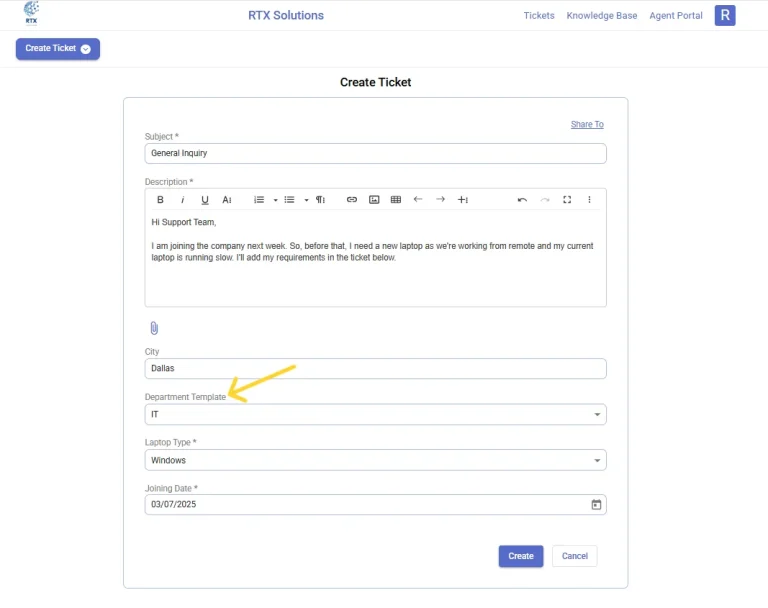
Now that we have added the ticket field to the ‘Create Ticket’ form in the Support Portal, let’s see in action how this works.
This screenshot shows an example of the ‘IT Department’ template that we created above. As you see from the screenshot, we’ve created two unique fields for the ‘IT Department’.
They are ‘Laptop Type’ and ‘Joining Date’.
The screenshot below shows an example of the ‘HR Department’ template that we created. As you see from the screenshot, we’ve created two unique fields for the ‘HR Department’.
They are ‘Employee Number’ and ‘Location’.
This is such a powerful feature and hence we want to explain all the potential things that you can do using the ‘Dropdown with sections’ field in Desk365.
You can choose the Department Template that you want, and unique fields appear for each section within it.
Using a Dropdown with sections field helps to ensure that customer enquiries are routed to the appropriate team or agent. For example, if a customer has a billing issue, you can set up your helpdesk system to automatically route their inquiry to the billing team.
This helps to ensure that customers receive prompt and accurate assistance and can help to reduce response times.
If you’re not already using a Dropdown with sections field in your helpdesk system, it’s definitely worth considering as a way to improve your team’s productivity and customer satisfaction.