


Desk365 offers Service Level Agreement (SLA) management capabilities to ensure timely resolution of customer queries and issues. One key feature is the ability to pause the SLA timer. This guide will walk you through setting up and customizing pause conditions to optimize SLA management within Desk365.
Understanding the pause condition
The pause condition allows you to temporarily halt the SLA timer under specific circumstances. This ensures that the SLA clock does not continue ticking when a ticket is moved to specific ticket statuses, such as ‘waiting for customer feedback’ or awaiting external dependencies.
Configuring SLA timer pause for ticket statuses
To pause the SLA Timer for specific statuses, follow these steps:
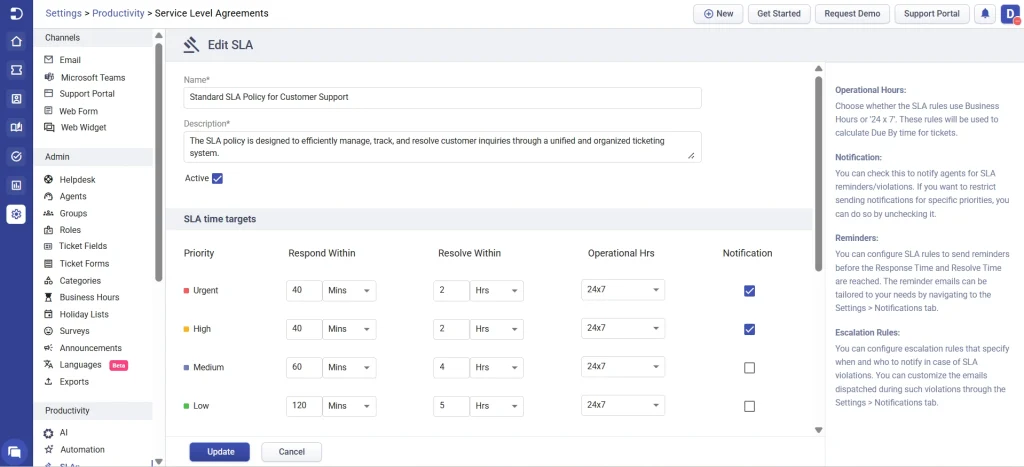
- Navigate to Settings > Productivity > SLAs in the Agent Portal to make sure SLAs are active and configured according to your helpdesk needs.
- Add or edit your SLA policy. The SLA policy can be designed to cater to different support needs, for both business hours and 24/7 coverage.
- Go to Admin > Ticket Fields and click on ‘Status’.
- In the status field, locate the SLA Timer column.
- Toggle the SLA Timer on or off for the statuses such as ‘Pending’ or for the ones you wish to configure. Examples include: ‘Waiting for customer response’, ‘Awaiting Approval’, ‘Waiting for Vendor’ etc.
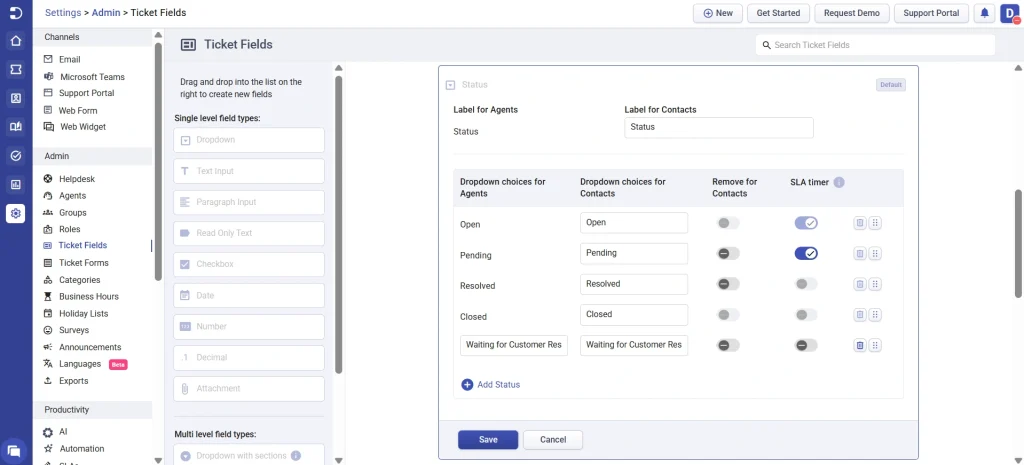
By default, the SLA Timer is enabled for the “Open” status and disabled for “Resolved” and “Closed” statuses.
- Configure your status accordingly and click Save.
Now, whenever a ticket is created, the SLA timer will start functioning according to your configured pause conditions. Let’s understand it better with an example.
Example of SLA timer usage in Desk365
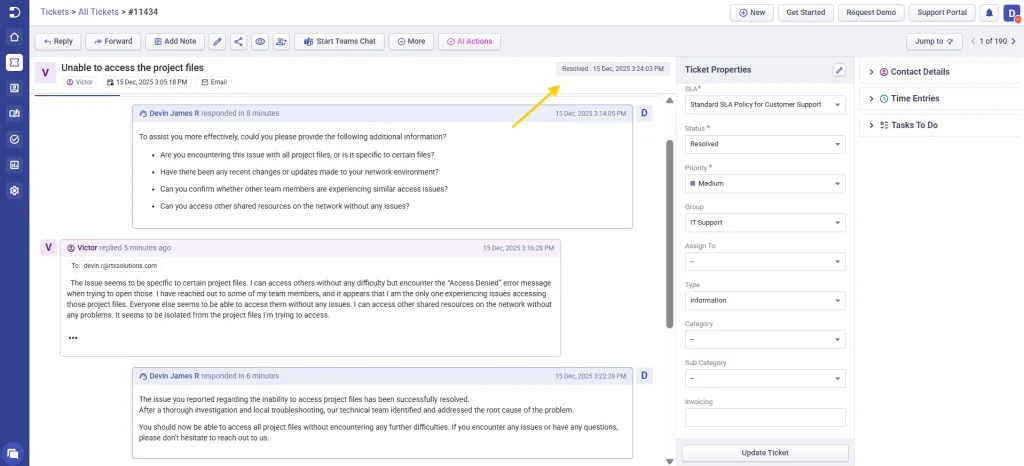
Let’s say, an employee submits a ticket regarding an issue he encountered while working on a project. The SLA timer starts counting.
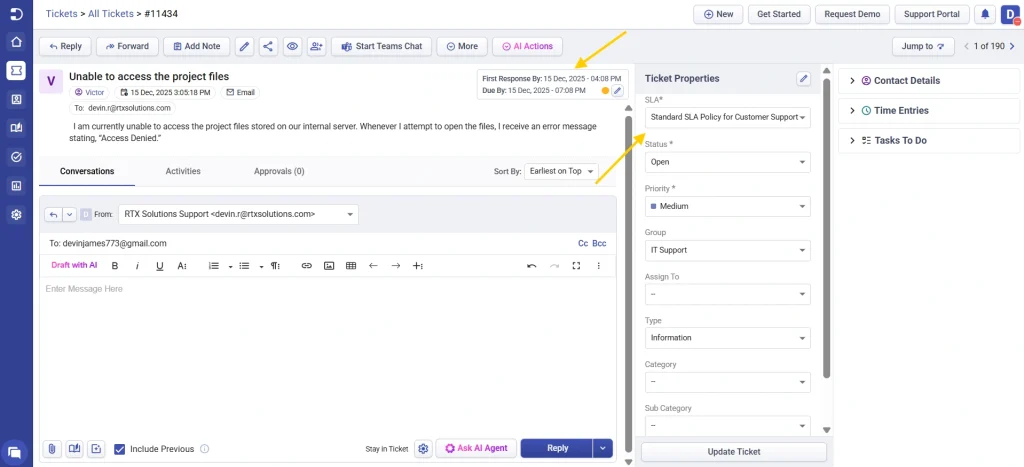
In this example, as per the SLA policy configured by the support team, the system calculates the response time and resolution time based on the ticket priority level with the operational hours being 24*7. The priority here is set to Medium. The resolution time for Medium priority tickets for this SLA is 4 hours.
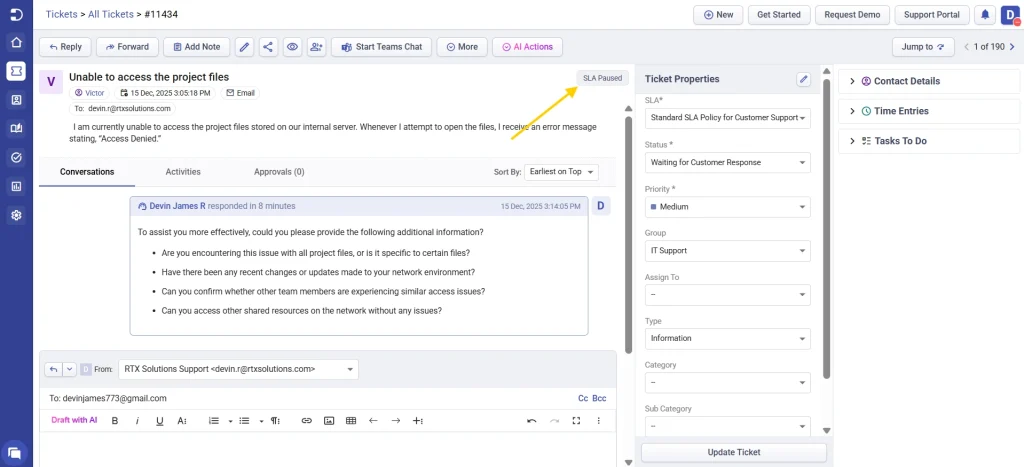
A support agent reviews the ticket and responds to the ticket within 8 mins. Since the agent requires additional information to proceed with the troubleshooting, the agent changes the ticket status to “Waiting for Customer Response.” As configured in Desk365, the SLA timer is automatically paused at this point to prevent any penalties for the delay caused by waiting for customer feedback.
In the Ticket Details page you’ll notice an indicator for ‘SLA Paused’ for this ticket.
For this example, let’s assume that the user responds back in 5 hours. Since the SLA Timer is now paused, even though it takes 5 hours for the user to respond back, the ticket is not in breach of the SLA policy.
Once the user submits the additional information, the ticket status updates back to “Open“ automatically if the automation rule is setup. The SLA timer automatically resumes from the point it was paused, ensuring that the time spent waiting for customer response is not counted towards the resolution time.

The SLA timer continues to count down, tracking the time until the issue is resolved based on the configured resolution timeframes.
By effectively utilizing the SLA timer in Desk365, the support team can ensure that tickets are handled promptly while accounting for pauses due to dependencies or waiting for customer input. This leads to improved efficiency in issue resolution and enhanced customer satisfaction.


