


In today’s business landscape where every second counts, efficiency is key. As a modern helpdesk solution, Desk365 understands the importance of streamlining communication and improving response times.
Support agents often face repetitive questions, despite the existence of a comprehensive knowledge base.
Addressing these recurrent enquiries can be time-consuming, taking away from agents’ ability to handle more pressing issues from valued customers.
That’s where Canned Responses can be useful for your support team.
Canned Responses are predefined templates that can be quickly placed in replies to customers. You can create several predefined templates that can streamline your workflow and improve efficiency.
Additionally, you can use placeholders that are dynamically populated based on ticket and account properties, such as Agent Name/Email, Ticket URL, Contact Name, Company Name, and more.
In this help center article, we’ll delve into the process of creating and implementing Canned Responses in Desk365.
Creating a canned response in Desk365
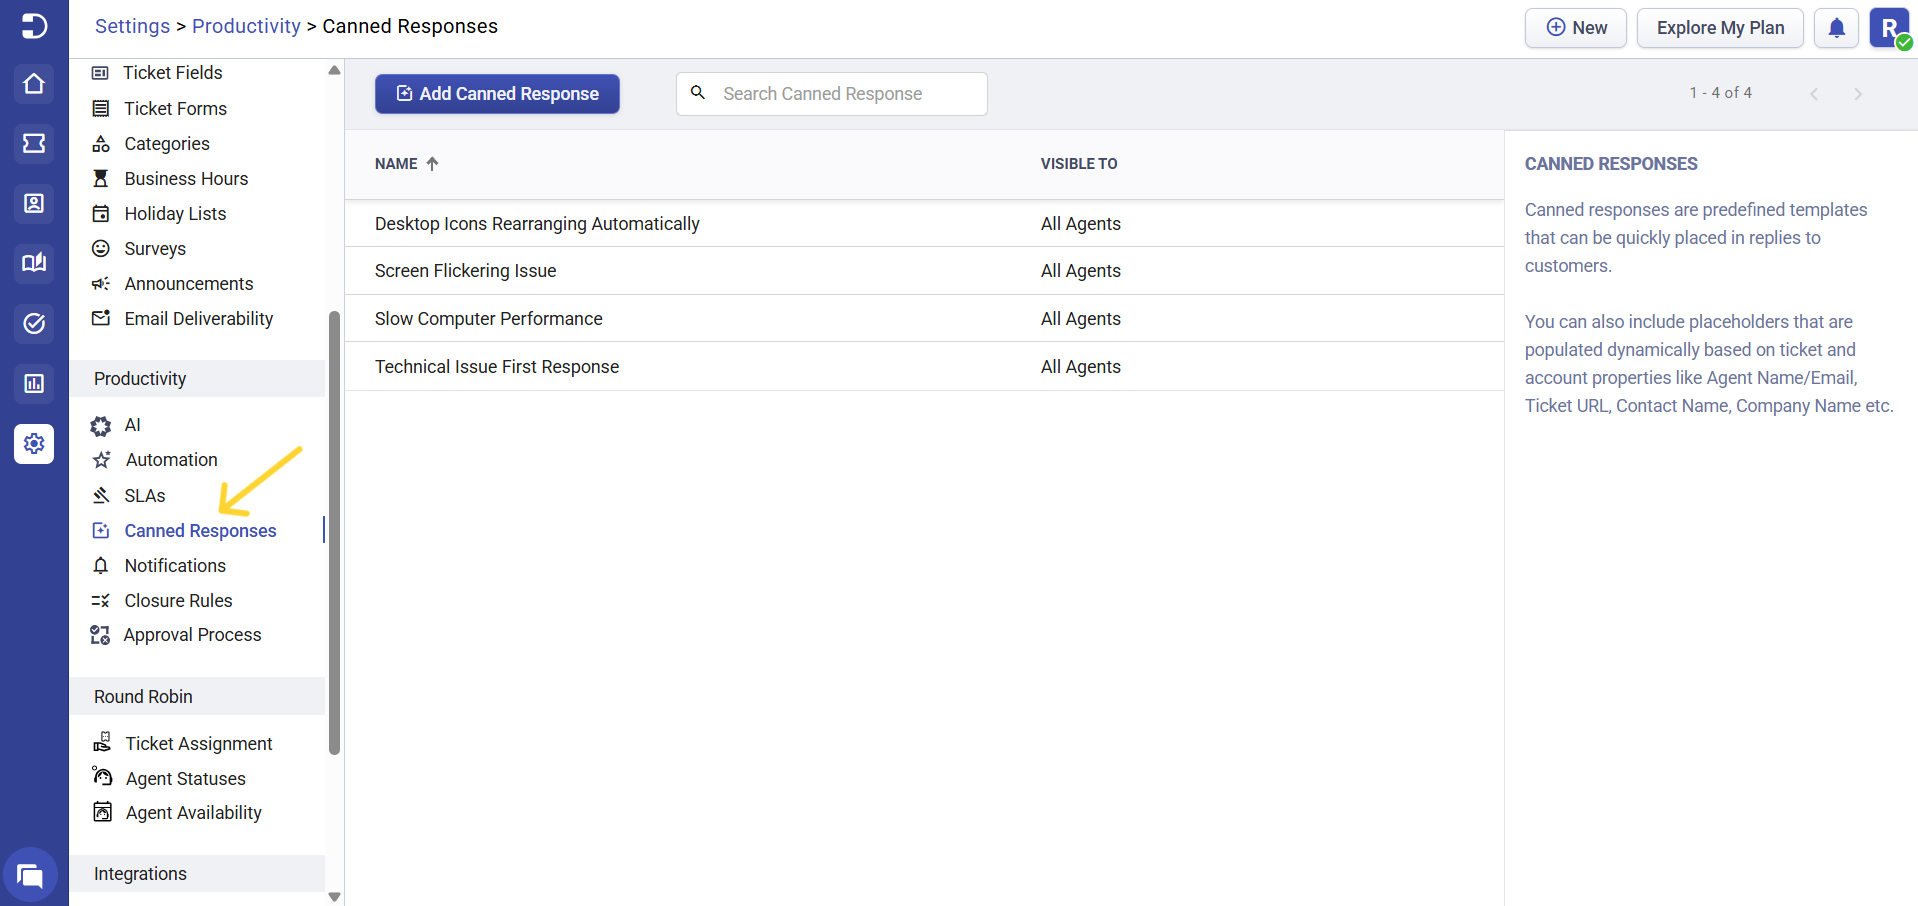
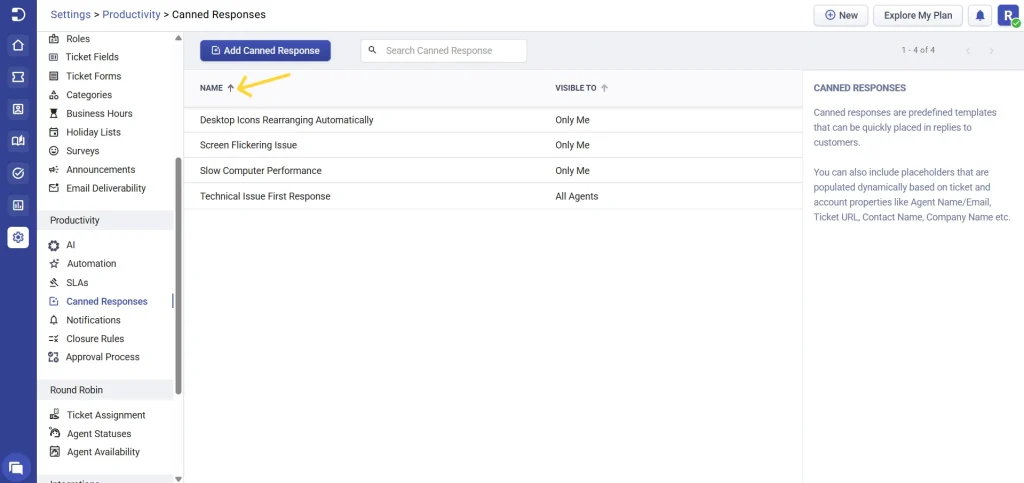
1. Log in to your Desk365 account and navigate to Settings > Productivity > Canned Responses.
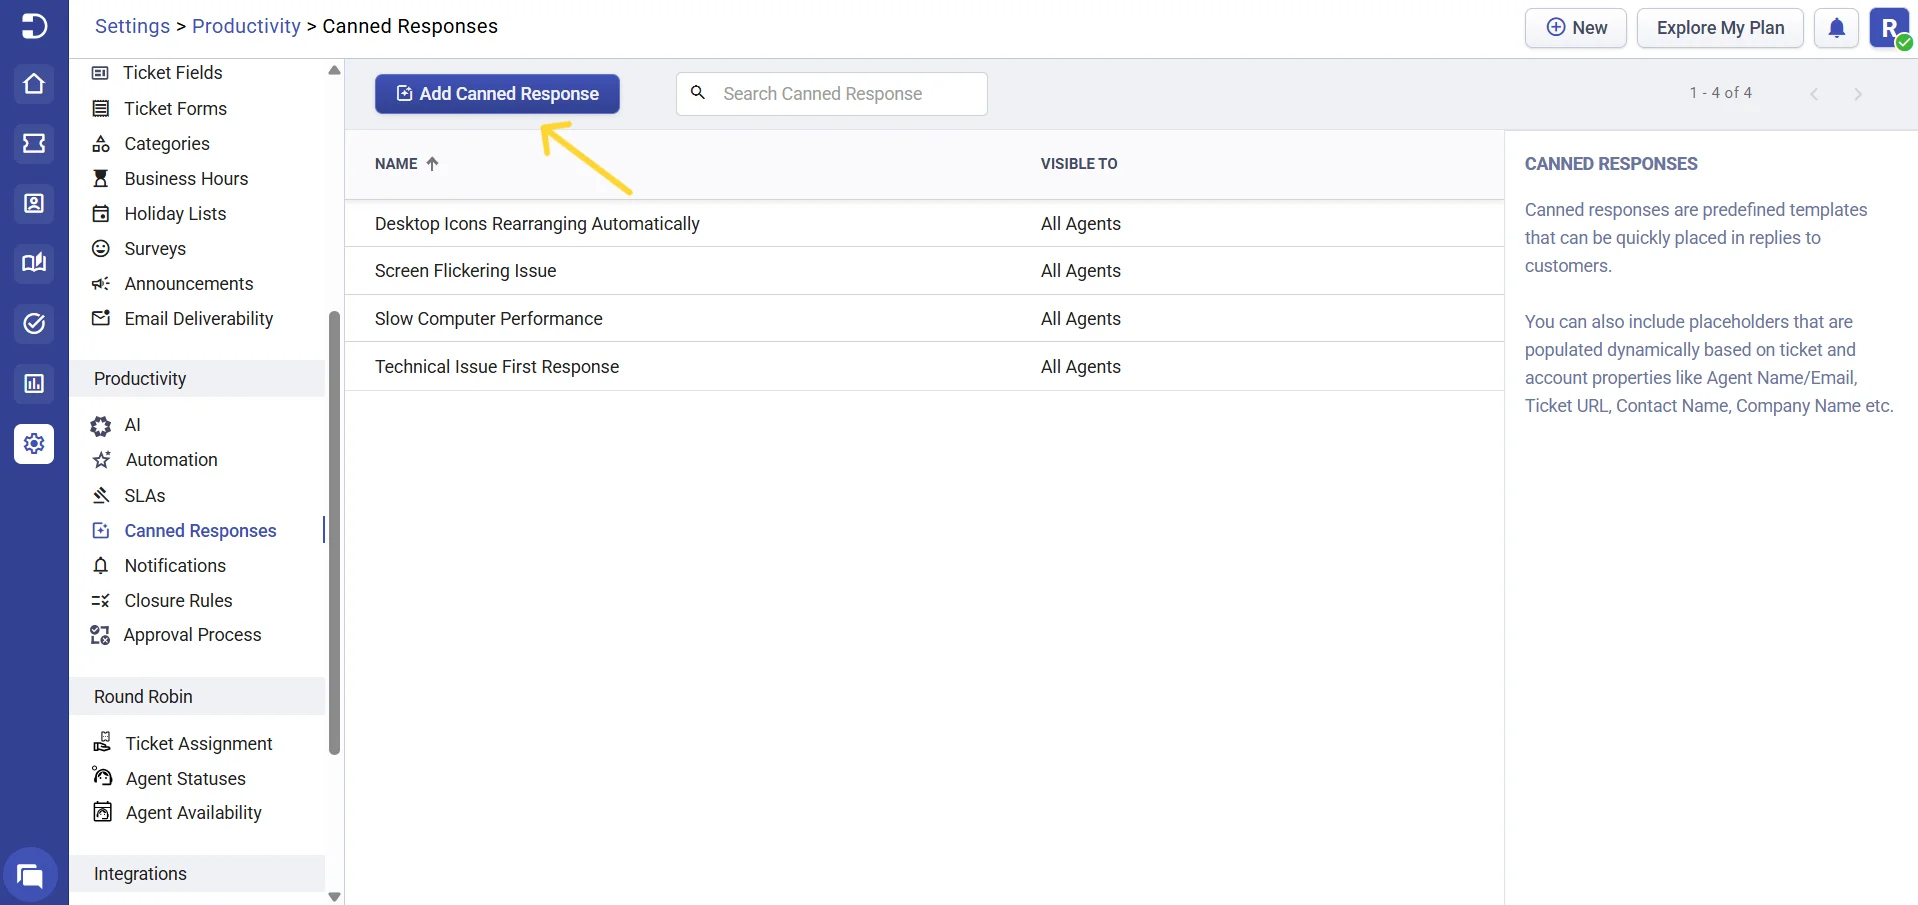
2. Click on the ‘Add Canned Response’ button at the top.
3. Provide a title to this Canned Response to distinguish from other responses and enter the message you want to save as a Canned Response. You can also include placeholders that are populated dynamically based on the ticket and account properties.
Additionally, you even have an option to add attachments to the Canned Response of size less than 20MB.
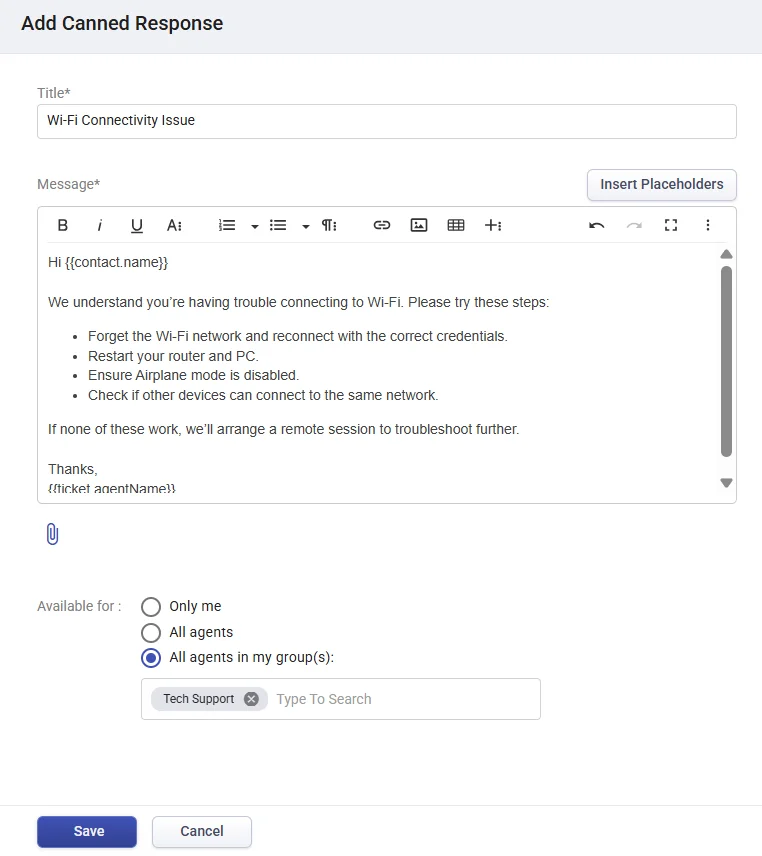
4. Choose whether you want this template for all agents in your helpdesk, a specific group or just for you. As you see from the screenshot above, we have chosen the ‘All agents in my group(s)’ option from the available for settings, as we want to share this template with all agents in my ‘Tech Support’ group.
Now, let’s take a closer look at the different ‘Available for settings’ options that are available when creating Canned Responses.
Only me: If you select the ‘Only me’ option, the Canned Response will be visible only to you and not to the other agents in your organization.
All agents: If you choose the ‘All Agents’ option, it means that any agent in your organization can use this Canned Response while replying to the tickets.
All agents in my group(s): By selecting the ‘Group’ option, you can specify a particular group who will have access to use this Canned Response when responding to customer tickets.
You can set the visibility settings for each Canned Response that you’re going to create in your helpdesk.
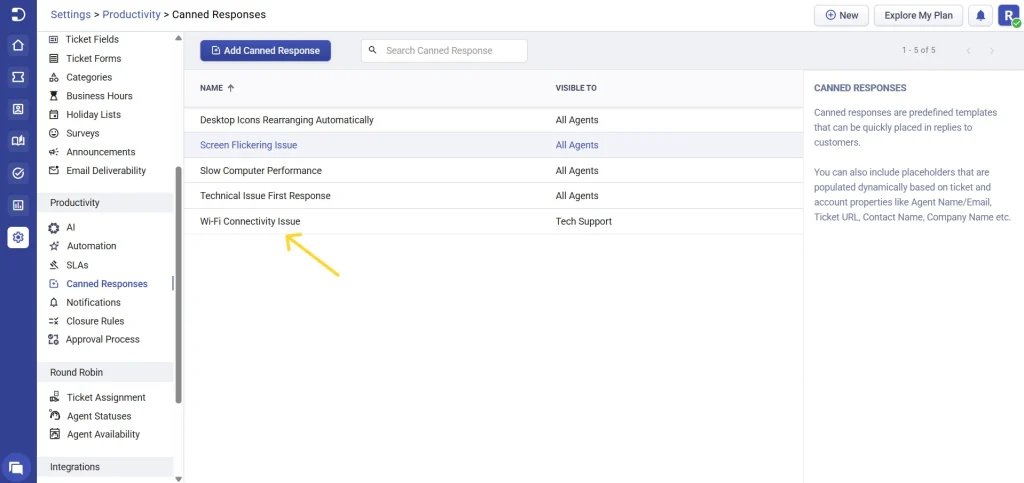
5. Finally, click on the ‘Save’ button to create this ‘Canned Response’ template.
This is just one example that we covered. In Desk365, you can create countless canned responses tailored to your specific business needs.
When contacts have questions about common issues such as ‘Internet Issue’, ‘Printer Access’ or ‘Password Reset’, your agents can swiftly reply with a pre-written response, freeing up time to handle other important tasks.
Using the created canned response in ticket replies
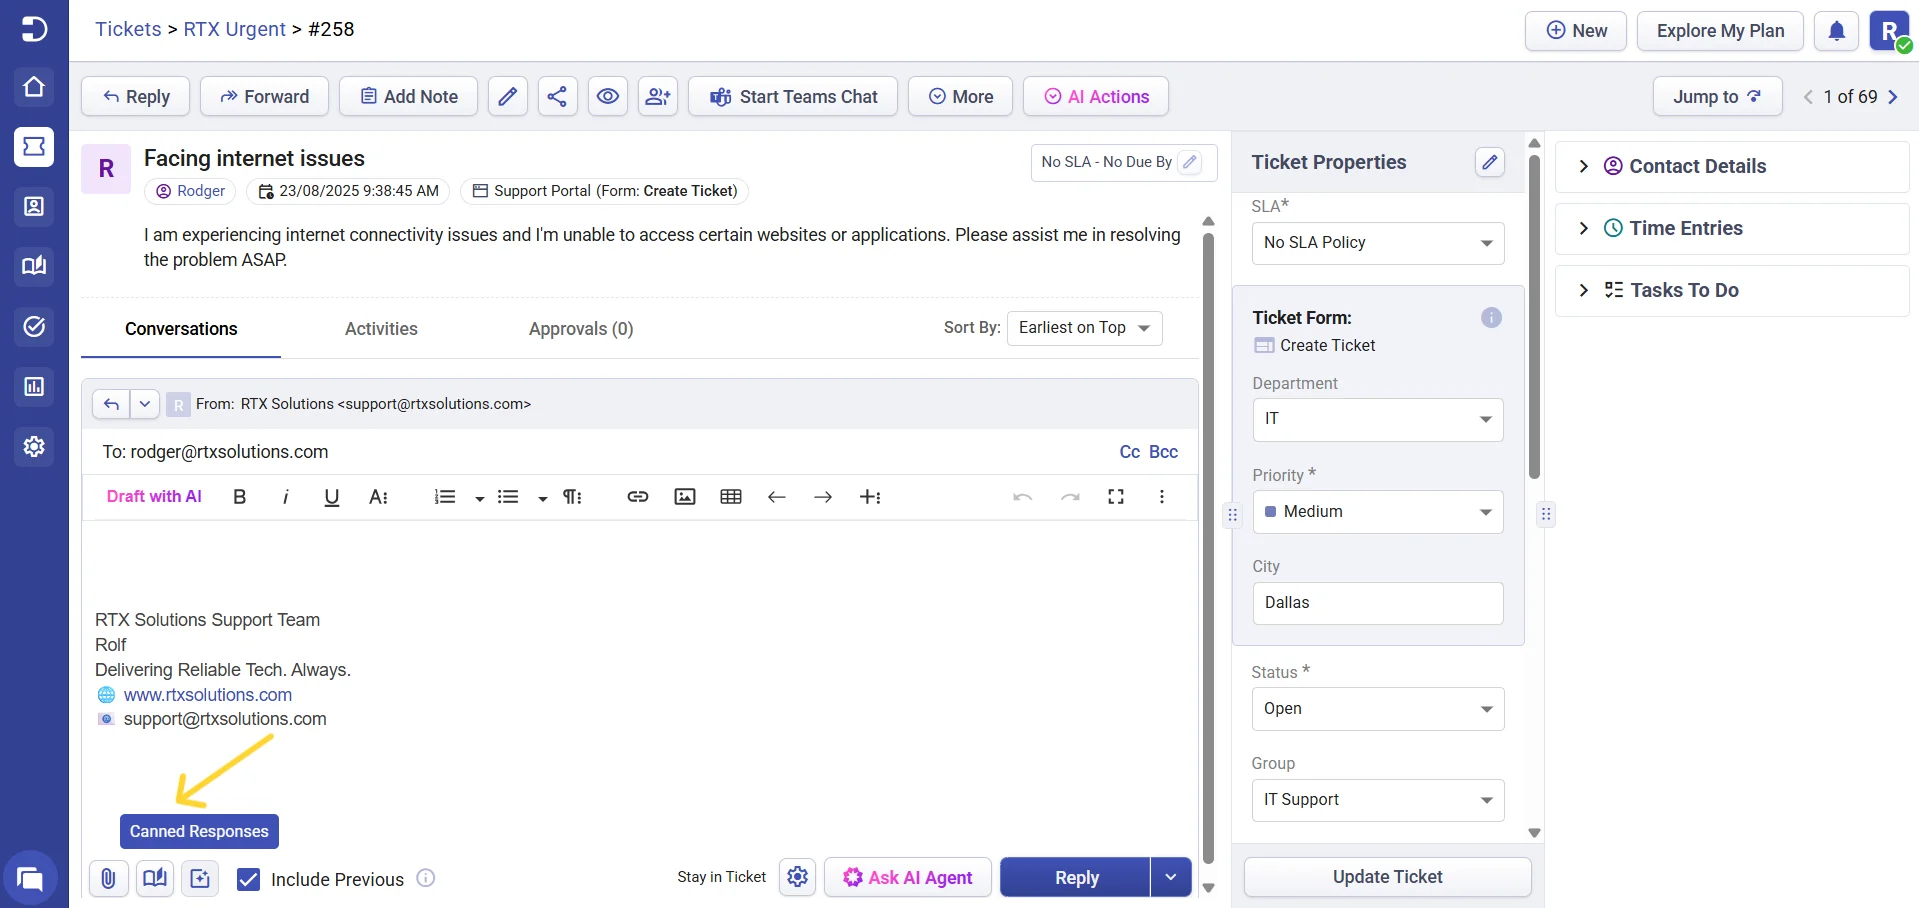
Using a canned response in Desk365 is simple and straightforward. Once canned responses are created, you can swiftly apply it to a ticket reply by clicking the ‘Canned Responses’ button in the reply text editor.
Let’s look at the steps to do this in Desk365 in detail below.
1. Navigate to the ticket where you would like to use Canned Response. You’ll notice the ‘Canned Responses’ icon to the right of the ‘Attach Files’ option.
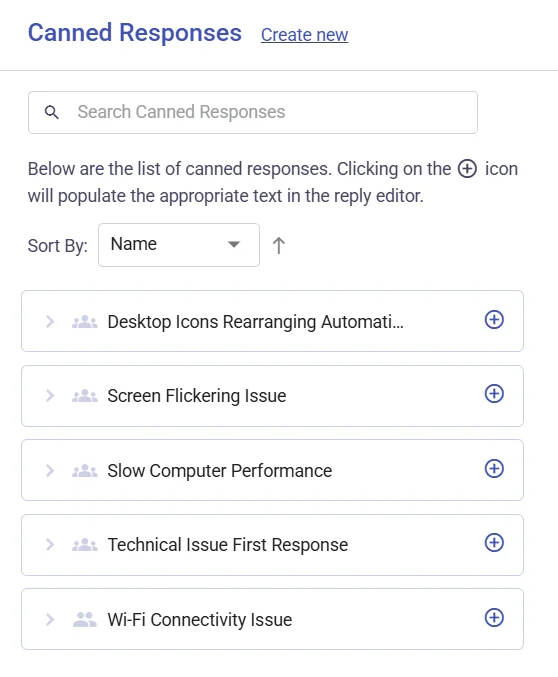
2. Click the ‘Canned Responses’ button located at the bottom of the reply text editor. This will open a menu of all your saved canned responses that are available for you, from which you can select the one you wish to include in the ticket.
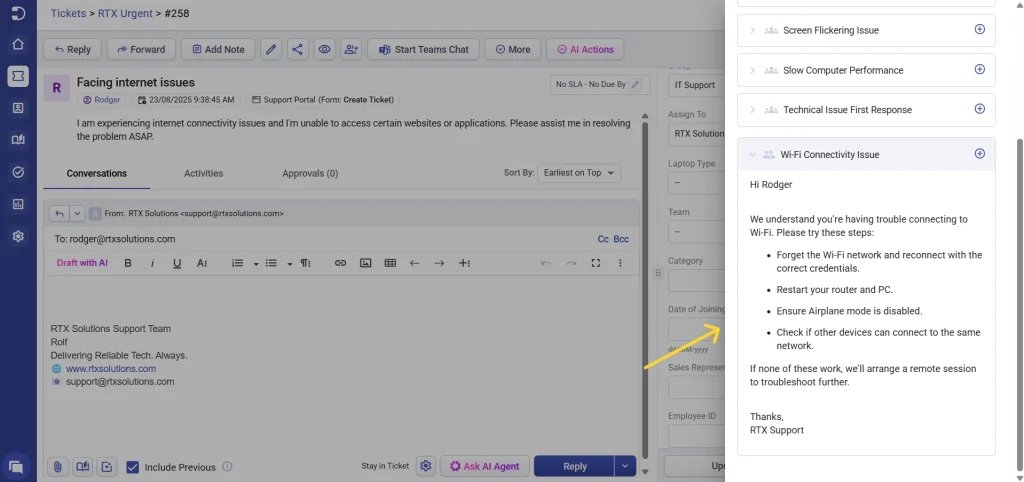
3. To ensure that you select the correct response before adding it to the ticket, you can preview it by clicking on the > icon.
This will display a preview of how the message will appear when it is sent to the contact.
4. Your agents can now use the canned response you have created by clicking the ‘Insert’ icon (the plus symbol).
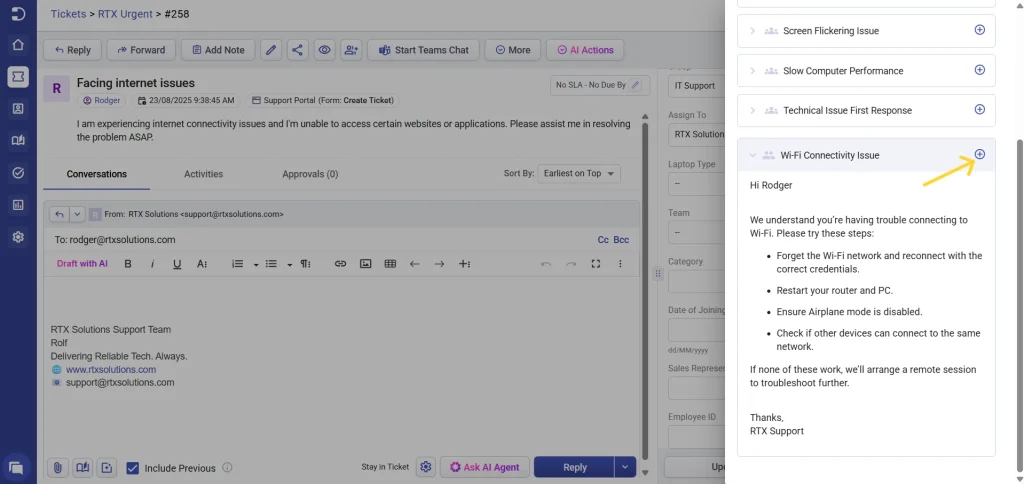
5. This will insert the canned response into the reply text editor and the message will be automatically populated on the ticket. You can make any necessary changes before sending the reply, if required.
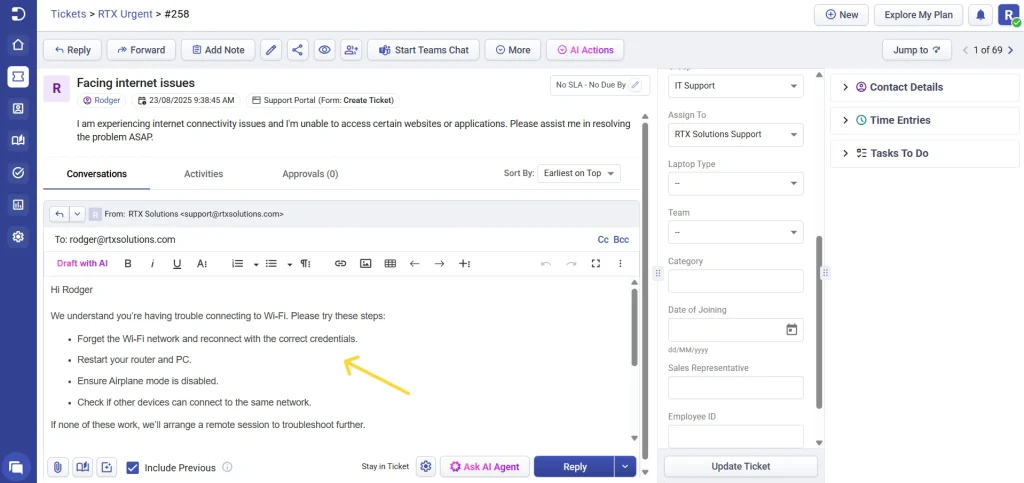
6. To use it as a response, click on the ‘Reply’ button to send this canned response as a reply to your end-users.
This makes it easy to provide consistent, high-quality responses to your customers in a fraction of the time it would take to type out a response from scratch.
Understanding placeholders in canned responses
Placeholders is a useful feature that allows you to personalize your responses and save even more time.
With placeholders, you can insert dynamic content into your canned responses that is automatically populated based on ticket and account properties like Agent Name/Email, Ticket URL, Contact Name, Company Name etc.
As an example, you can use the ‘Assigned Agent Name’ placeholder to include the name of the agent responsible for the ticket, or the ‘Contact Name’ placeholder to add the name of the contact who created the ticket. You can also use the ‘Status’ placeholder to keep them updated on any status changes.
This not only saves time for your agents but also ensures that your responses are personalized and relevant to the specific ticket and customer.
These are the steps to insert placeholders to a Canned Response in Desk365.
1. Log in to your Desk365 account and go to Settings > Productivity > Canned Responses
2. Choose any canned response that you’ve created already. Click on the ‘Insert Placeholders’ button.
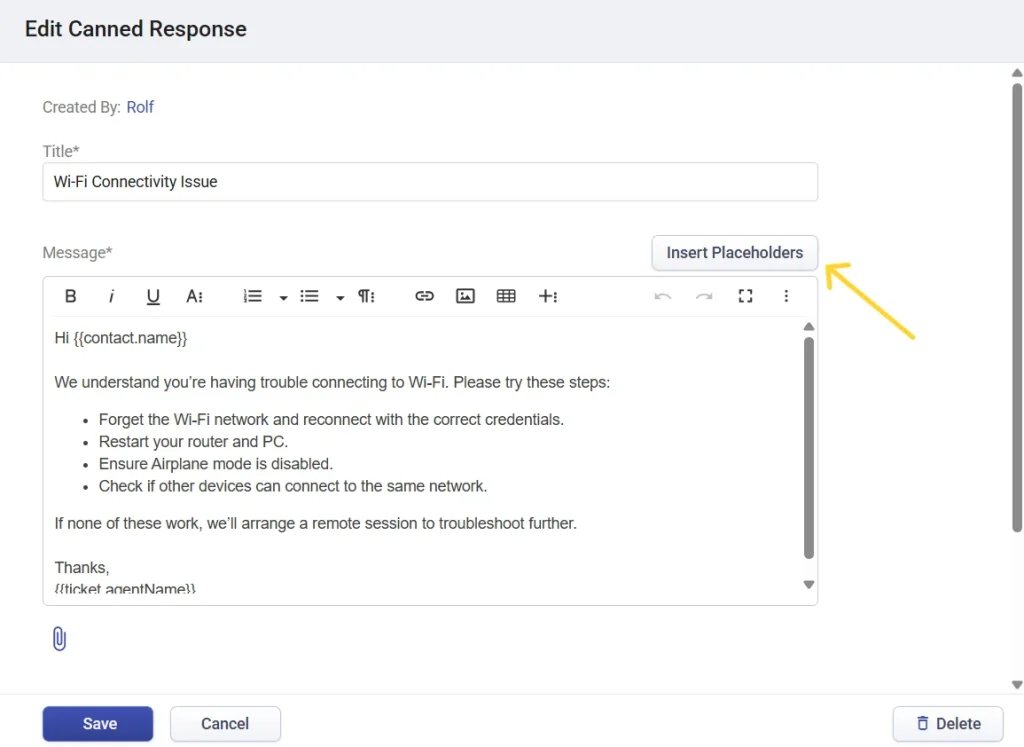
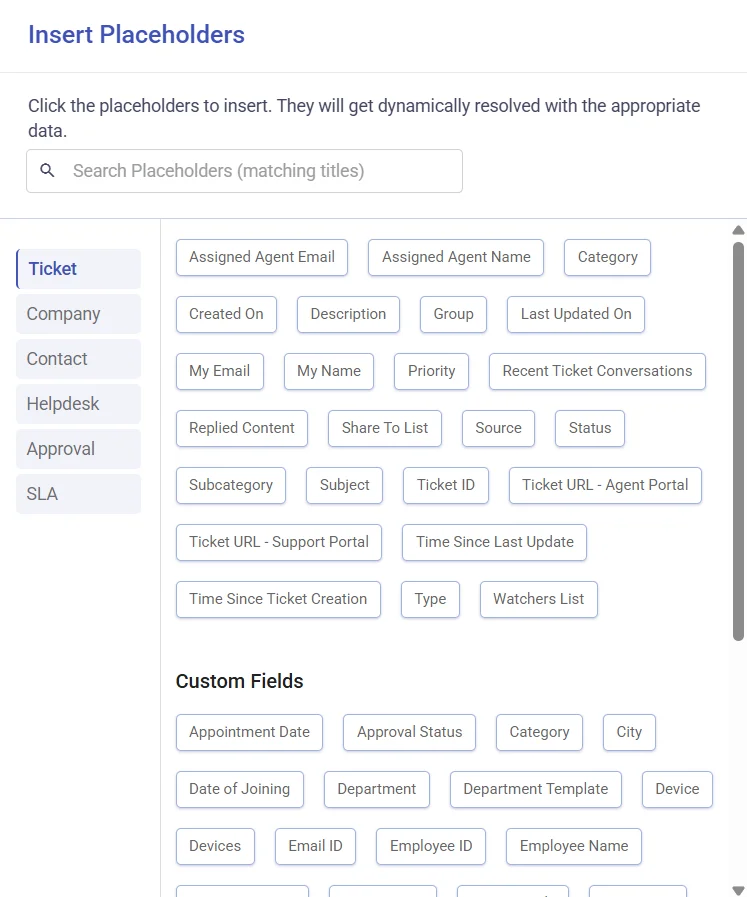
This will open a list of Placeholders that are available to be use with Canned Responses (which are manually inserted into ticket replies).
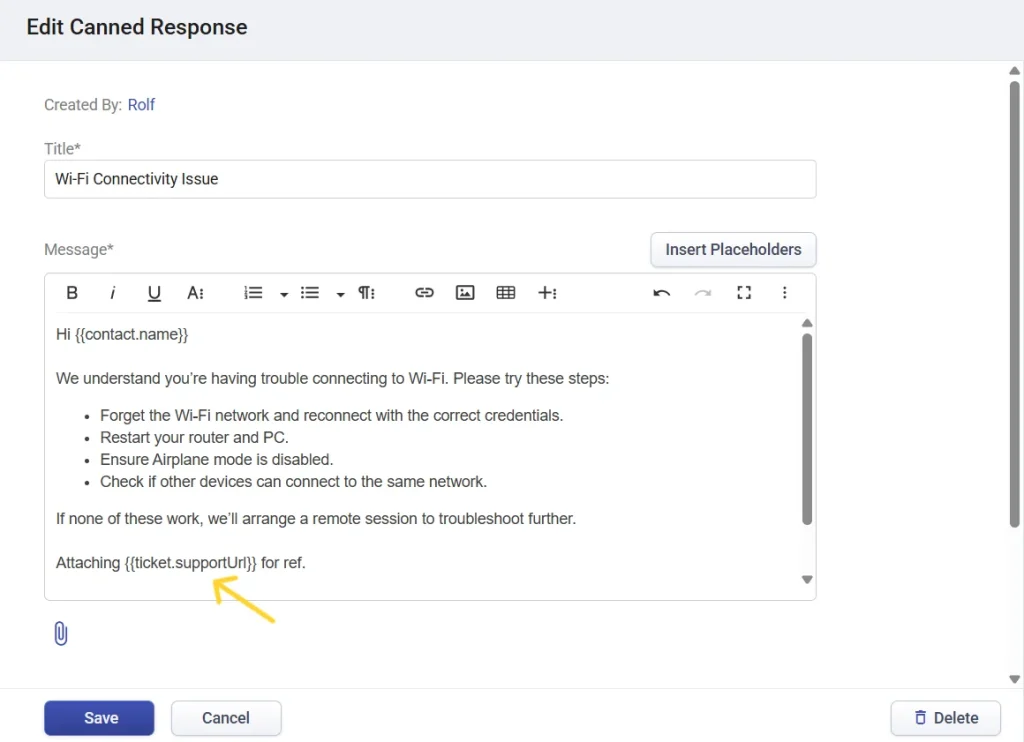
3. If you wish to include the ticket URL in the support portal within the canned response, you can do so easily by selecting the {{ticket.supportUrl}} placeholder.
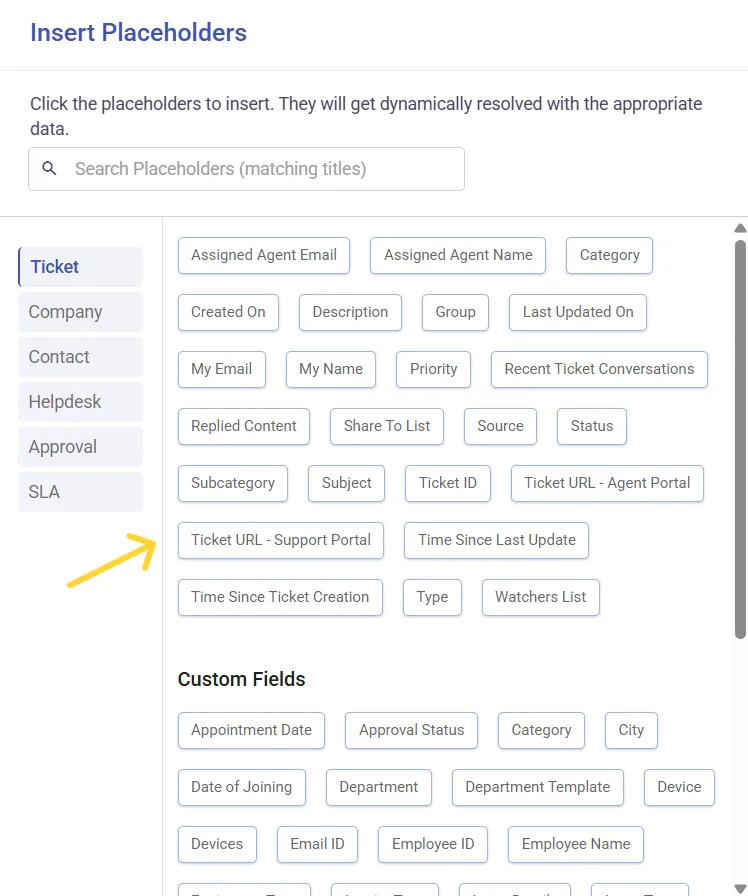
You can now see that the ‘Ticket URL – Support Portal’ placeholder has been added successfully to the canned response. Additionally, we made some minor text changes to the canned response to make it easier for contacts to visit the ticket in the Support Portal.
Click on the ‘Save’ button to save these changes.
Editing canned responses
You can easily edit a canned response at any time if you wish to do so. These are the steps to do so.
1. Log in to your Desk365 account and go to Settings > Productivity > Canned Responses.
2. Select the particular ‘Canned Response’ that you want to edit from the list of responses that are available for you.
3. Once you have made the desired changes, click the ‘Save’ button to save the modifications.
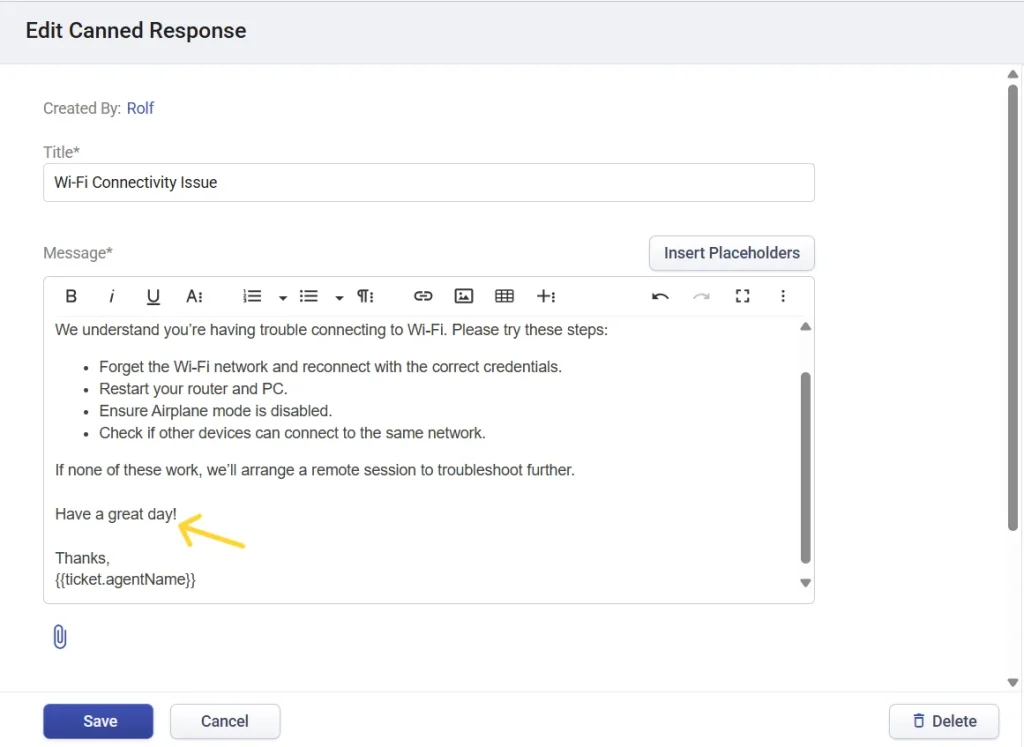
The changes will be saved in the Canned Response.
Sorting canned responses
Desk365 gives you flexible sorting options to help you find and organize canned responses faster.
In the canned responses settings page, admins can sort canned responses by Name. By default, they are displayed in ascending alphabetical order, but you can toggle to descending order. This helps you better manage and organize a large library of templates.
In the ticket details page, when you insert a canned response into a ticket, you can sort your responses either by Name or Created Time. Sorting by Name lists responses alphabetically (A–Z) by default, with the option to switch to descending (Z–A).
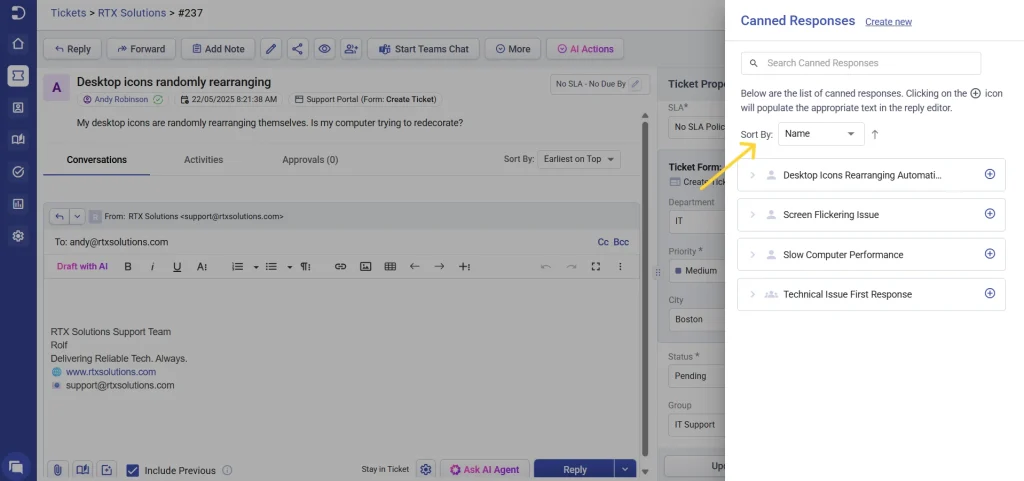
Sorting by Created Time lets you quickly access either the newest or the oldest templates, making it easier to find the right response without disrupting your workflow.
This ensures both agents and admins can quickly locate the right canned response, whether while replying to tickets or managing the canned response library.
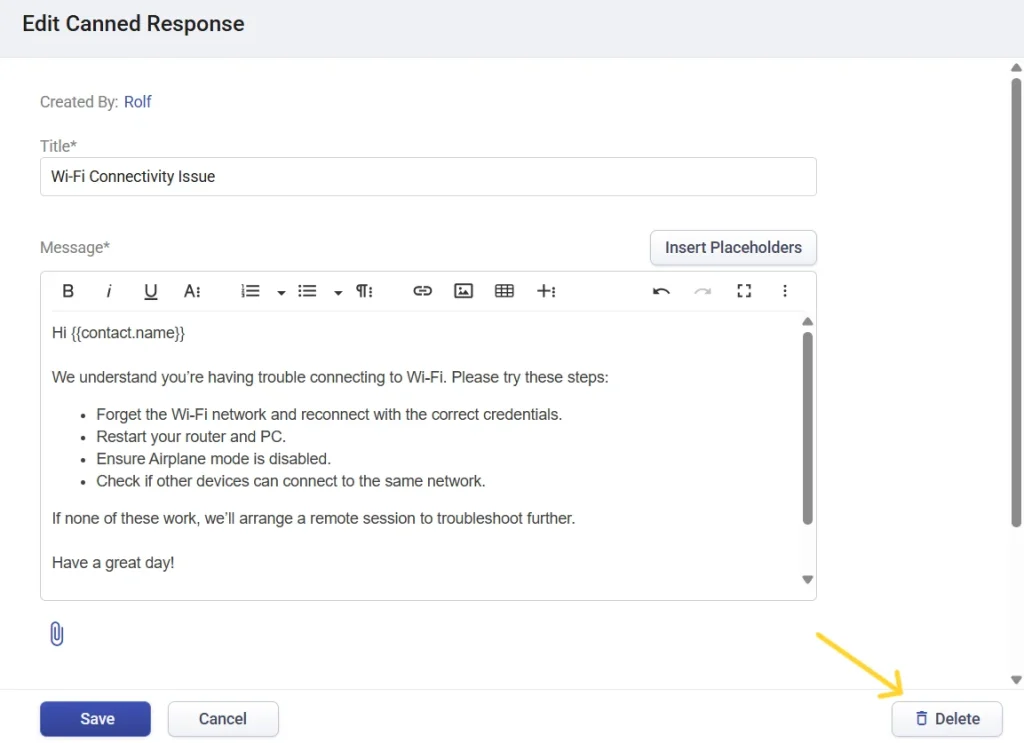
Deleting canned responses
If you no longer find a particular canned response useful and want to remove it from your helpdesk, you can easily do that. These are the steps to do so:
1. Log in to your Desk365 account and navigate to Settings > Productivity > Canned Responses.
2. Select the ‘Canned Response’ that you wish to delete.
3. To remove the selected ‘Canned Response’ from your helpdesk, click on the ‘Delete’ button located at the bottom.
The ‘Contact First Response’ canned response is now successfully deleted from your helpdesk.
Utilizing canned response templates for customer support can greatly streamline the customer support process.
They enable agents to quickly respond to common queries, provide consistent and accurate information, and ultimately improve customer satisfaction.
With the ability to customize and personalize canned responses using placeholders and easily edit or delete them as needed, they can save time and effort for support teams while still delivering high-quality service to customers.


