The nested dropdown is ideal for organizations with more complex workflows and the need for several dropdown options to be selected before arriving at the final choice. These fields allow you to create a hierarchy of options within a dropdown menu, allowing users to drill down and select a specific option that is relevant to their needs.
If you need two levels of categorization, then you can use the default field provided for category and sub category. However, when there are multiple levels of hierarchy, then the nested dropdown field is useful to capture your workflow.
These fields can be added to a ticket form and configured to appear in the desired support channel.
You can find nested dropdowns in the Settings > Admin > Ticket Fields tab.
Next, we will examine the process of including a nested dropdown field in the ticket form.
Creating nested dropdown fields in Desk365
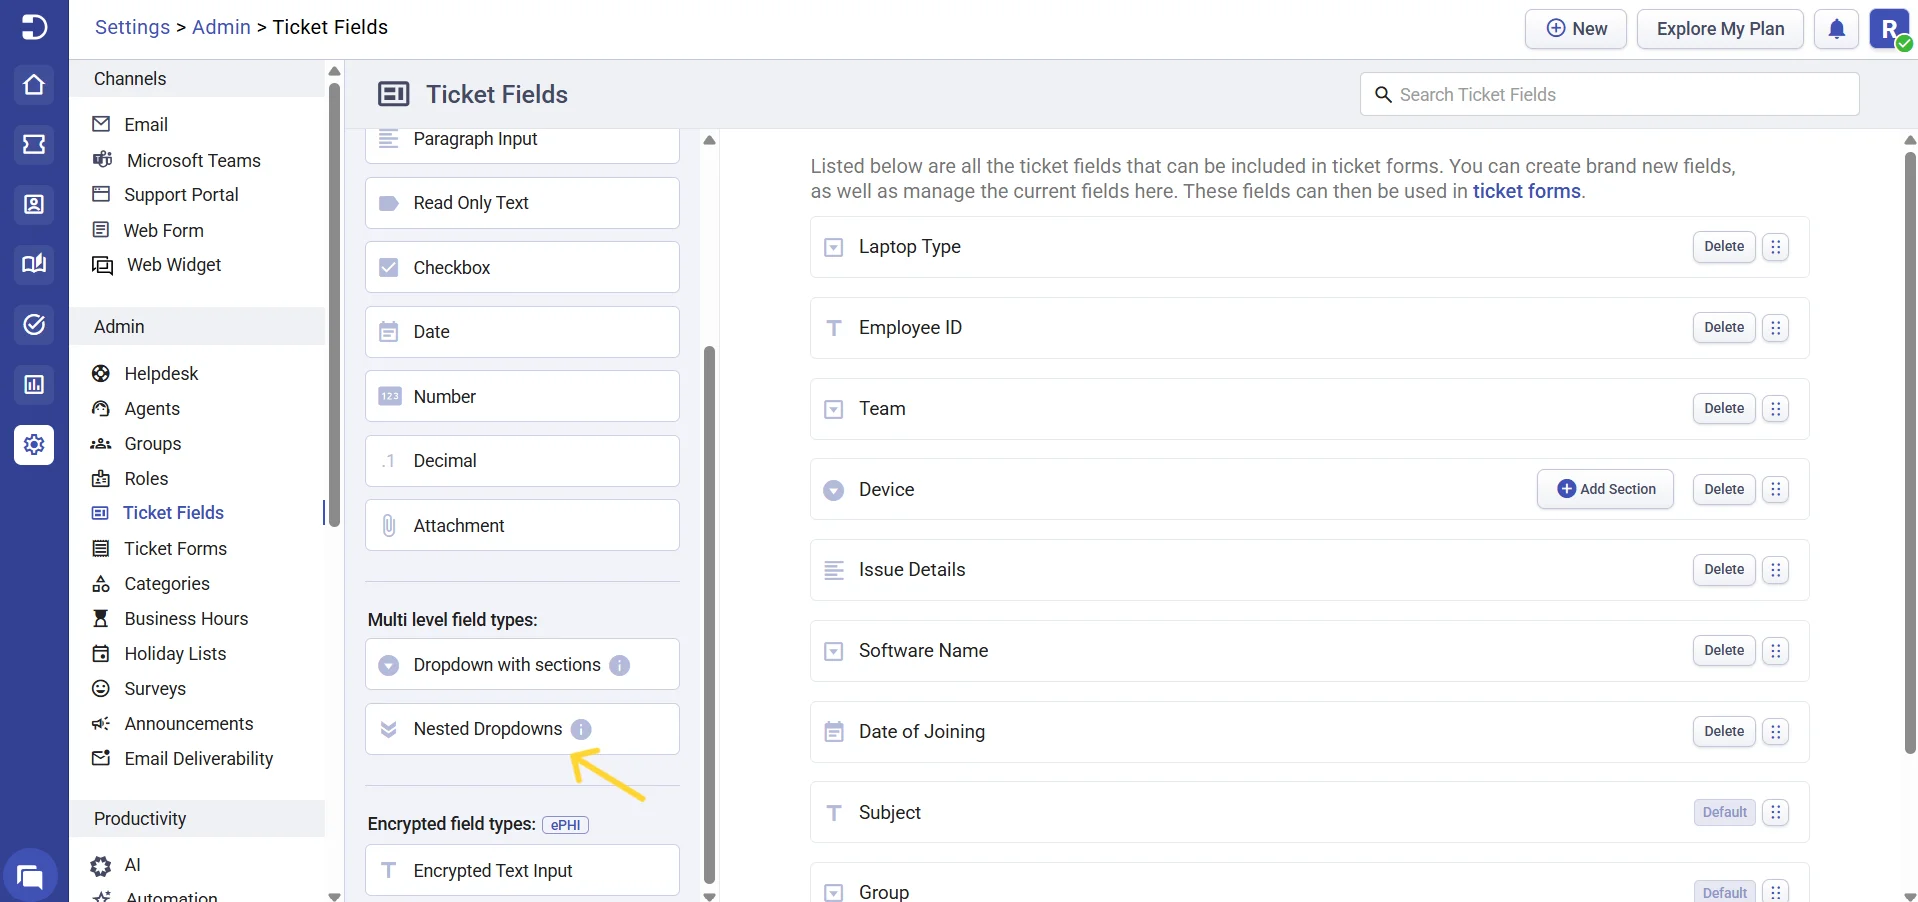
Step 1: You can use the nested dropdown ticket field by going to Settings > Admin > Ticket Fields.
Step 2: Drag and drop the nested dropdown field onto the right-hand side to create a new field and position the field.
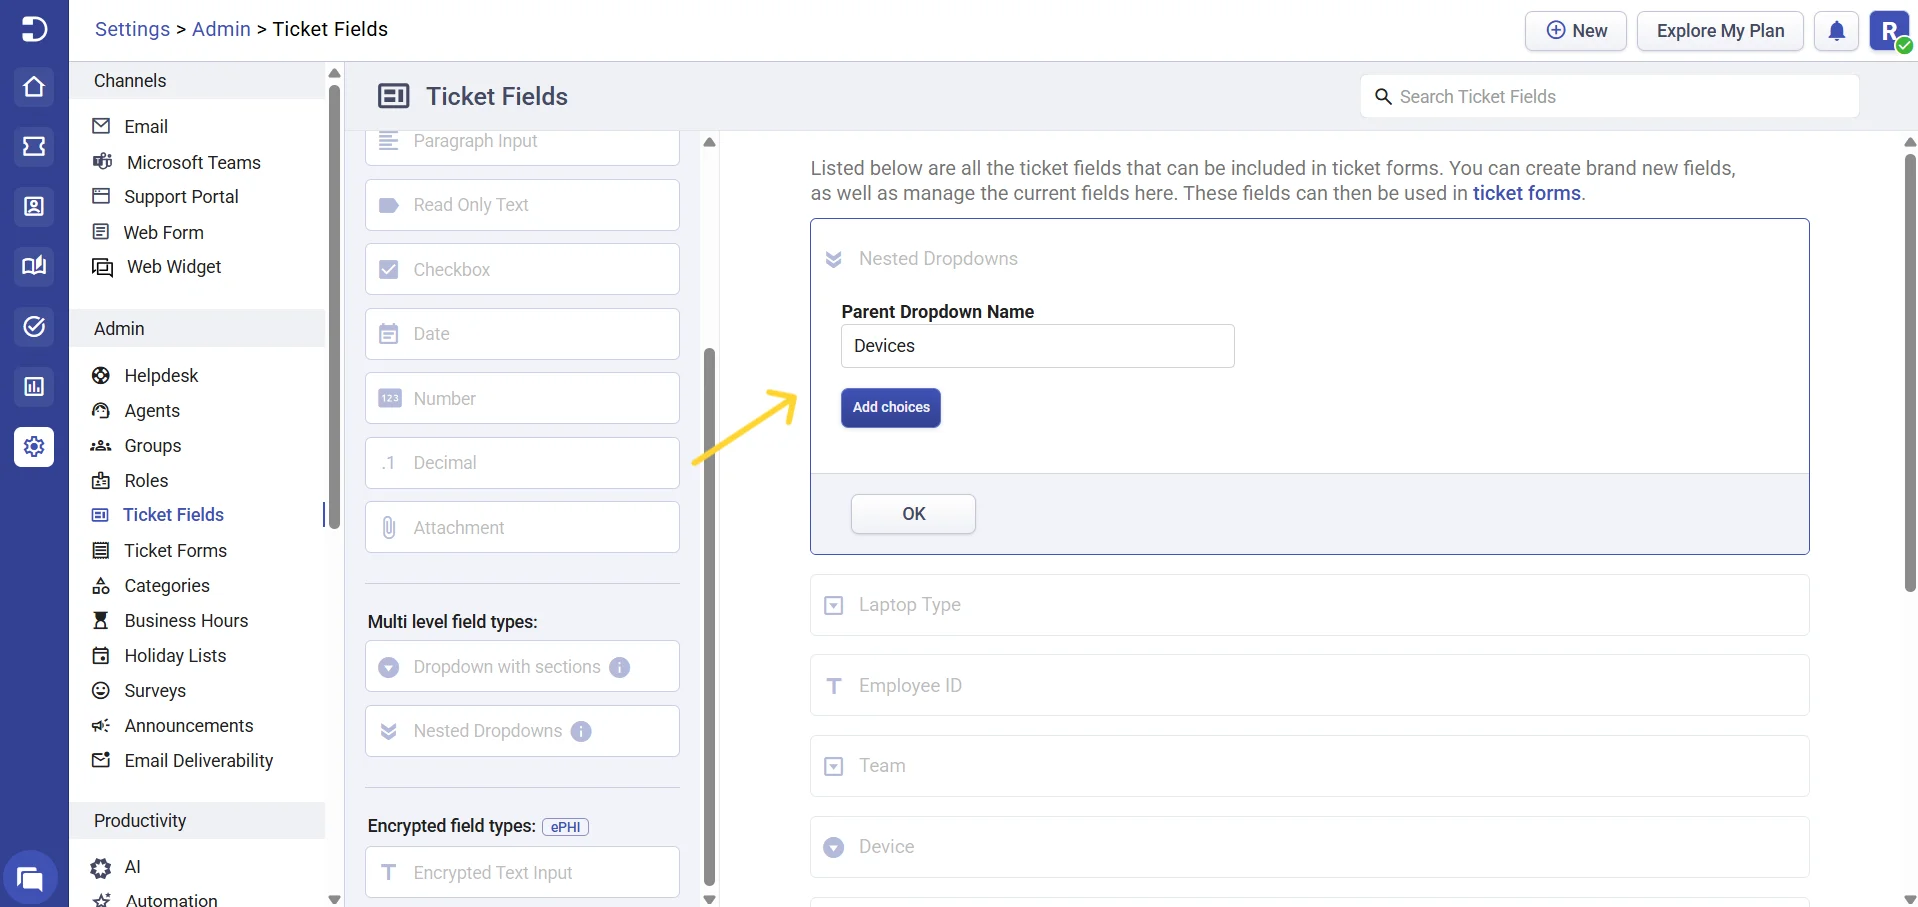
Step 3: Give a name to the parent dropdown and click on ‘Add choices’.
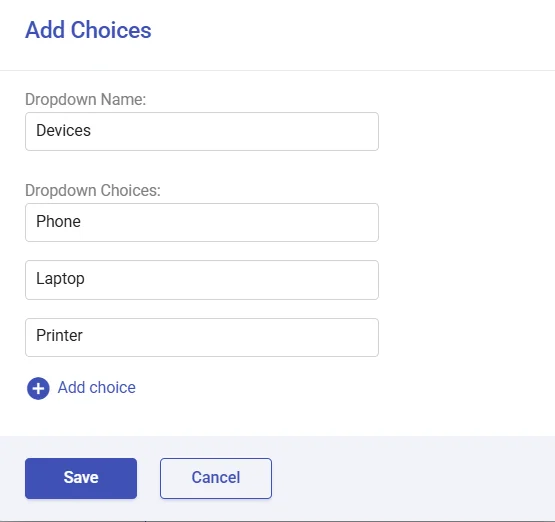
Step 4: List down the different choices you would like to add to your parent dropdown menu. In the below screenshot, we can understand that ‘Devices’ is the parent dropdown, while ‘Phone’, ‘Laptop’, and ‘Printer’ are its choices.
Here you can add as many choices as you want and then click the ‘Save’ button.
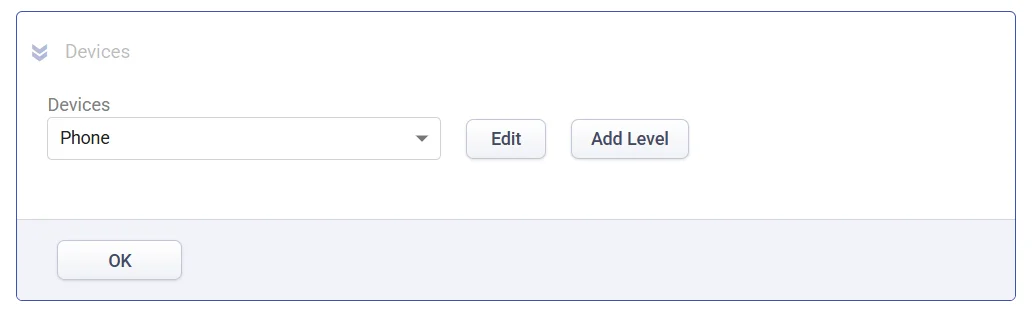
Now you can see that, by default, the first choice is selected for the dropdown menu.
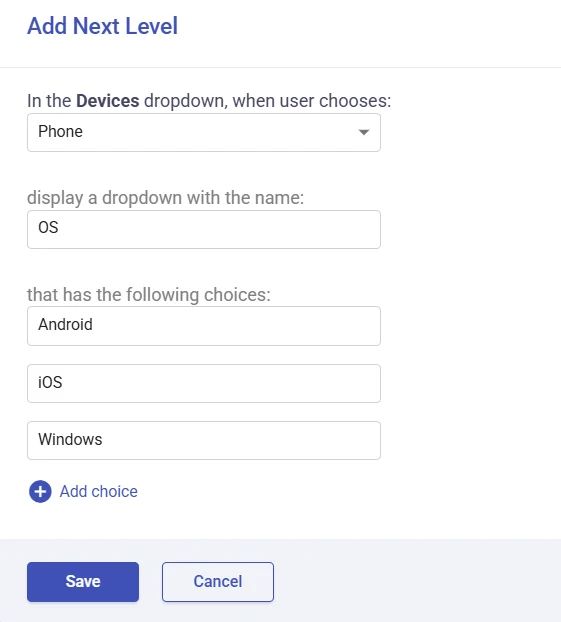
Step 5: Click on the ‘Add Level’ to give options for each dropdown choice you have given in earlier steps. A new pop-up arises where you can add the next level for each choice.
For example, we are attempting to provide additional options for the ‘Phone’ category, specifically different operating systems. Some potential choices could include ‘Android’, ‘iOS’, and ‘Windows’.
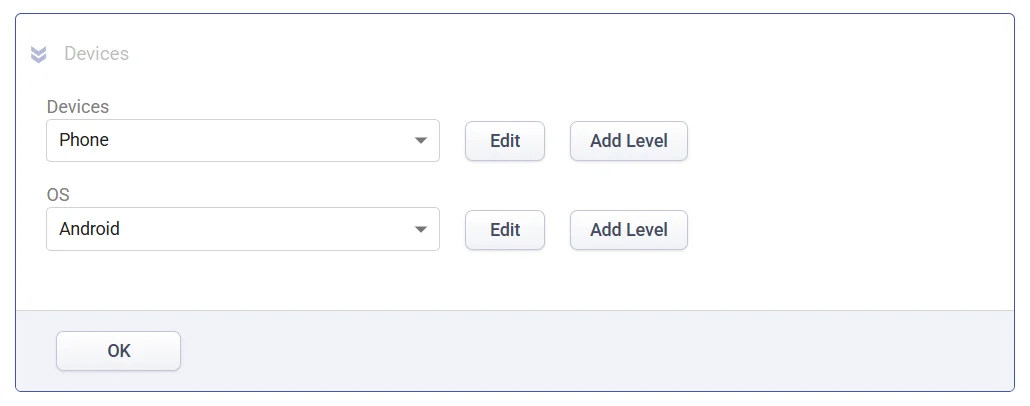
You can add more choices by clicking on the ‘Add choice’ and click on the ‘Save’ button.
Step 6: Now, we can further add more levels under the ‘Android’ choice.
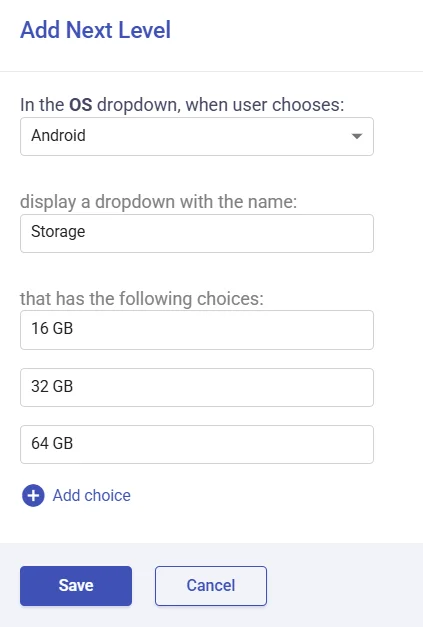
Let’s say we are adding ‘Storage’ under the Android option, and we are giving multiple Storage choices under it. Refer to the image below.
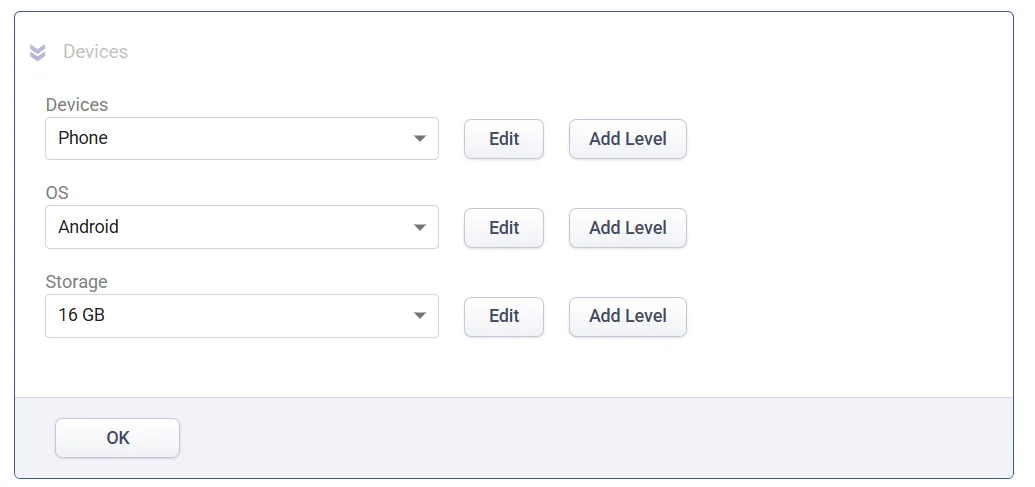
Now, we have created 3 levels of Nested dropdown for ‘Phone’.
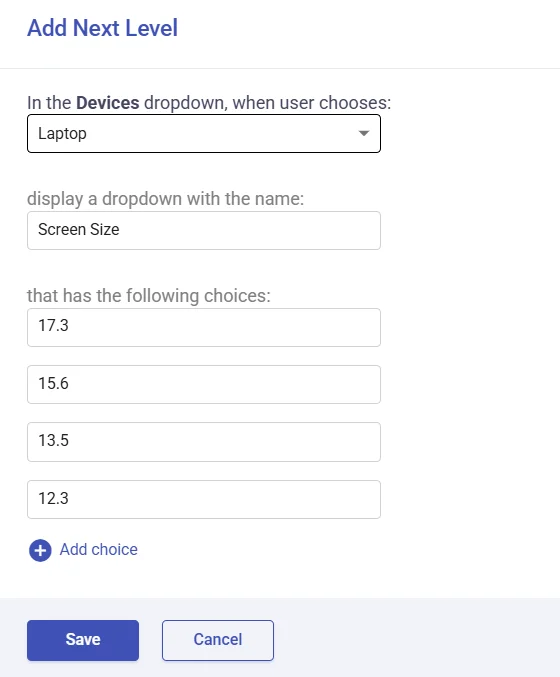
Step 7: Let us add more levels for the ‘Laptop’ option. Select ‘Laptop’ from Devices and click on ‘Add Level’.
Give different dropdown choices for ‘Screen Size’. You can add the choices by clicking on the ‘Add choice’.
Click on the ‘Save’ button.
Step 8: Similarly, you can perform the same steps for the ‘Printer’ choice by choosing to add a new drop down and add choices under it. Here we have added ‘Laser printer’, ‘Inkjet printer’, and ‘Supertank printer’ under a dropdown called ‘Type’.
Step 9: Click on ‘Save’.
Note:Editing dropdown choices will update all existing tickets, ticket activities, automations, and closure rules that use this field. Please review your changes before saving.
Now that we’ve created different unique fields for different devices, let’s see how this behaves in the ‘Create Ticket’ form in the support portal.
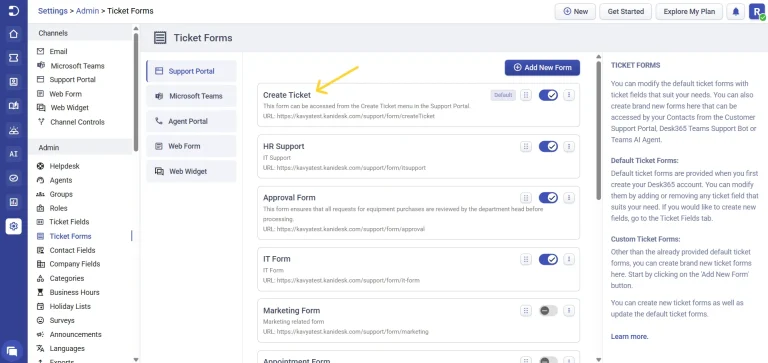
Now, let’s add this nested dropdown ‘Devices’ ticket field to the ‘Create Ticket’ form in the support portal.
To do this, go to Settings > Admin > Ticket Forms.
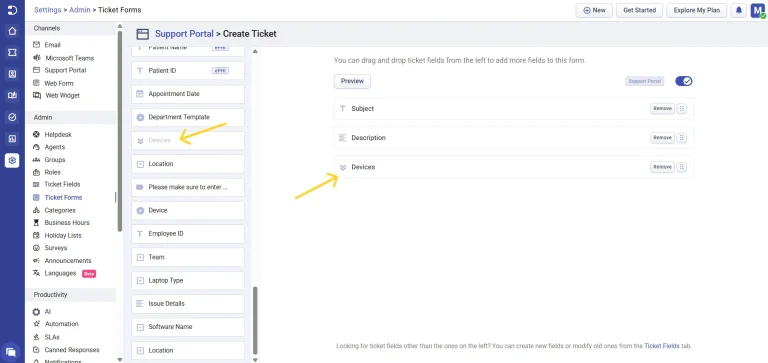
Choose the ‘Create Ticket’ form in the support portal.
Drag and drop the Nested field ‘Devices’ from the left to this form on the right.
Now that we have added the nested ticket field to the ‘Create Ticket’ form in the support portal, let’s see in action how this works.
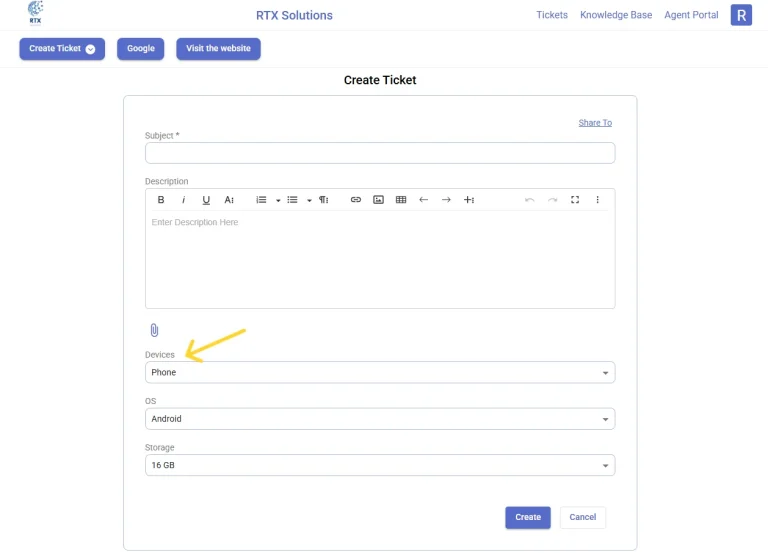
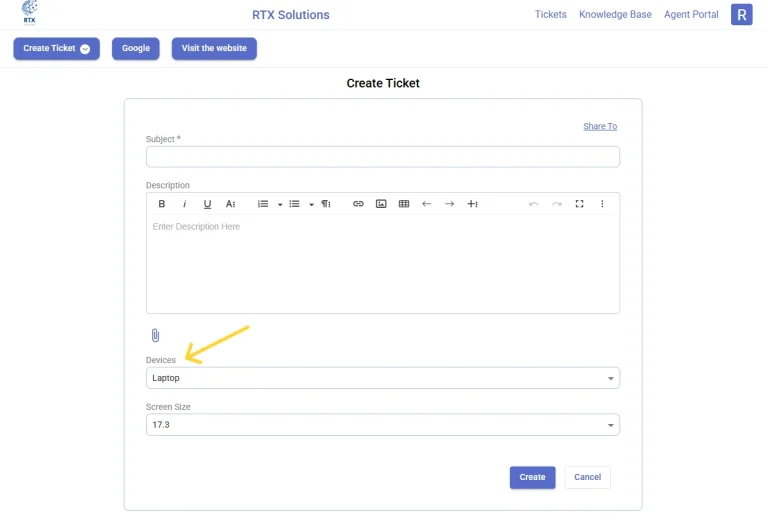
This screenshot shows an example of the nested ticket field that we created above. As you see from the screenshot below, when the user choose the device type as ‘Phone’, fields such as ‘OS’ and ‘Storage’ that we added under the ‘Phone’ level gets populated in the ticket form.
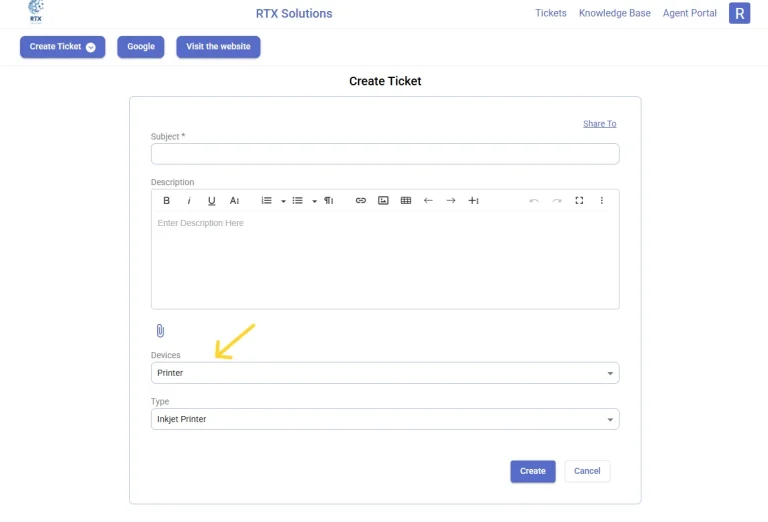
Similarly, when the user choose the device type as ‘Laptop’, and ‘Printer’, they’ll notice the unique ticket fields that they created under each level appear in the ticket form.
Overall, the implementation of nested dropdown fields can greatly improve the efficiency and organization of a helpdesk system.
By allowing users to select multiple options within a single field, it can provide more specific and accurate information to support staff, enabling them to better resolve issues and provide assistance.