If you’ve submitted support tickets through the Desk365 Support Portal, you can easily export them to a CSV file. This is useful if you want to keep a copy for your records, review all your past requests, or share them with your team.
Follow the steps below to export your tickets:
Steps to export tickets
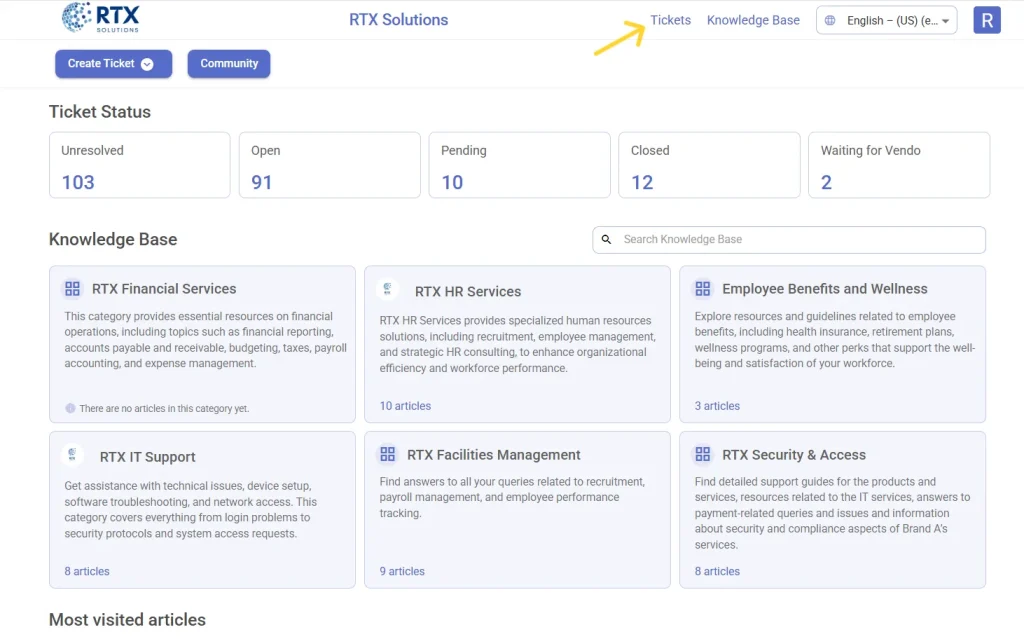
- Navigate to your Desk365 Support Portal and sign in.
- Click on the Tickets tab at the top of the page. This will take you to the Tickets view, where you can see all the tickets you’ve submitted.
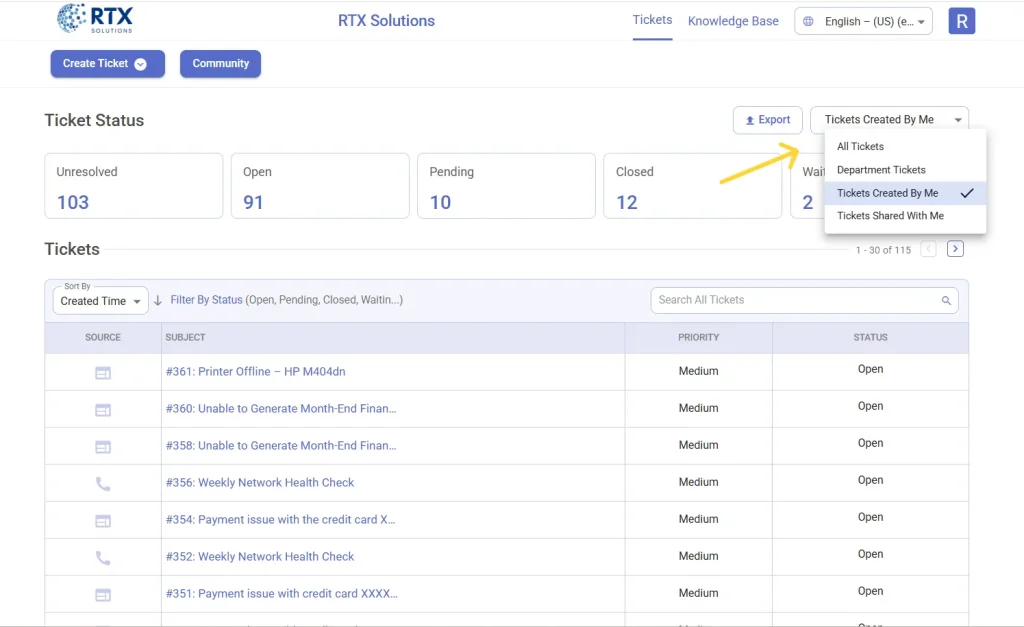
- On the top-right of the page, next to the Export button, you’ll be able to choose between exporting “All Tickets”, “Department or Company Tickets”, “Tickets Created by Me” and ” Tickets Shared with Me”. This gives you flexibility in selecting the scope of the tickets you want to include in your export.
- Next, click on export. You can now filter your tickets by:
– Created Time – Sort tickets based on when they were created.
– Resolved Time – Filter tickets by the date they were marked as resolved.
– Closed Time – View tickets based on when they were officially closed.
– Date Range – Select a time frame, like the last 4 weeks, to narrow down the export.
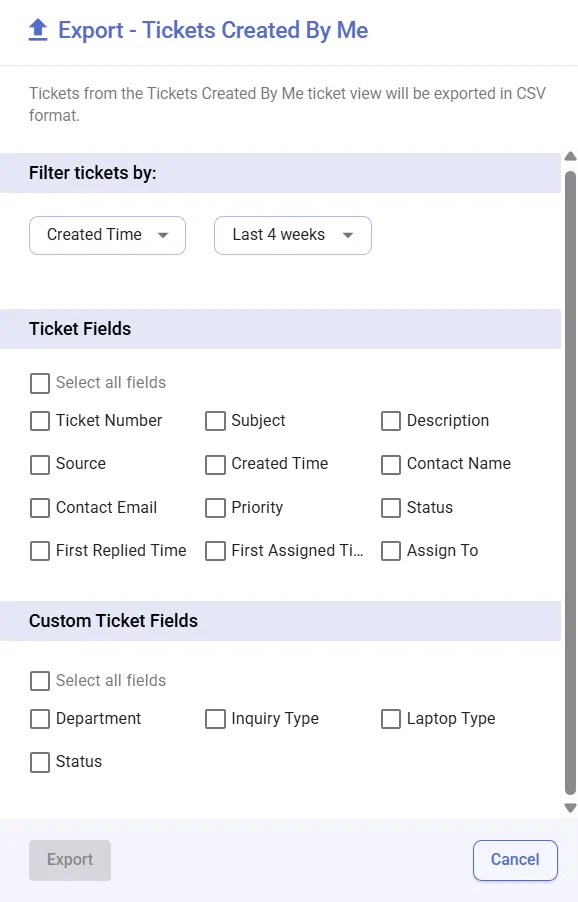
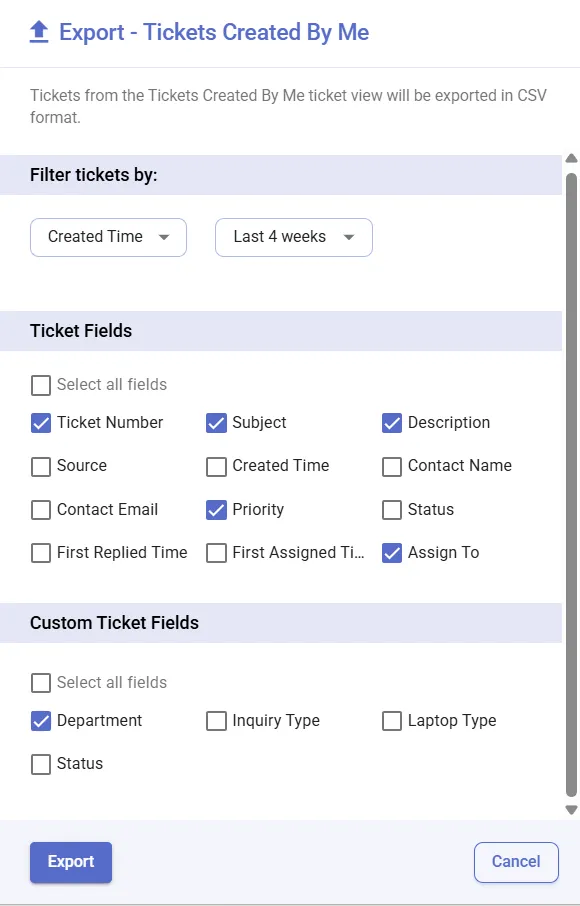
- You can then select the fields you want to export from the list of available fields. By default, the following fields are always included in the export: Ticket Number, Subject, Description, Source, Created Time, Contact Name, and Contact Email. Select any additional fields you want to export from the list of available options such as status, priority, category, sub-category, type, custom fields (if any), and more.
Tip: Check the box next to “Select all fields” if you want to include everything.
- Once you’re happy with the selection, click the Export button at the bottom of the panel.
- Your tickets will be downloaded in a CSV file format.
How export ticket fields are determined
The ticket fields available for export in the support portal are based on the selections made in the support portal settings, configured by your admin.
You can manually select which ticket fields should be included in the export by clicking the Change button. The fields you choose will appear under Selected Fields and will be available when users export tickets from the Support Portal.
You can drag and drop fields within the Selected Fields list to change their display order in the exported file, giving you more control over how the data is structured.
By default, the export includes fields like Ticket Number, Subject, Description, Source, Created Time, Contact Name, and Contact Email. You can expand this list to include any other fields that matter to your workflow.
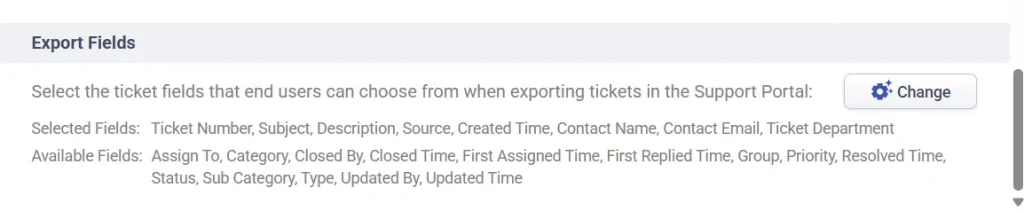
Fields listed under Available Fields are options you can add, but unless selected, they will not be included in the export file.
This gives you greater flexibility and control over the ticket data shared via export, ensuring only the most relevant information is included in the final file.
By allowing end-users to export their tickets with just a few clicks, Desk365 ensures your support process is both transparent and user-friendly.
Exporting your support tickets is a quick and simple way to stay on top of your requests. If you have any questions or can’t find a specific field, contact your support team, they can help you out.