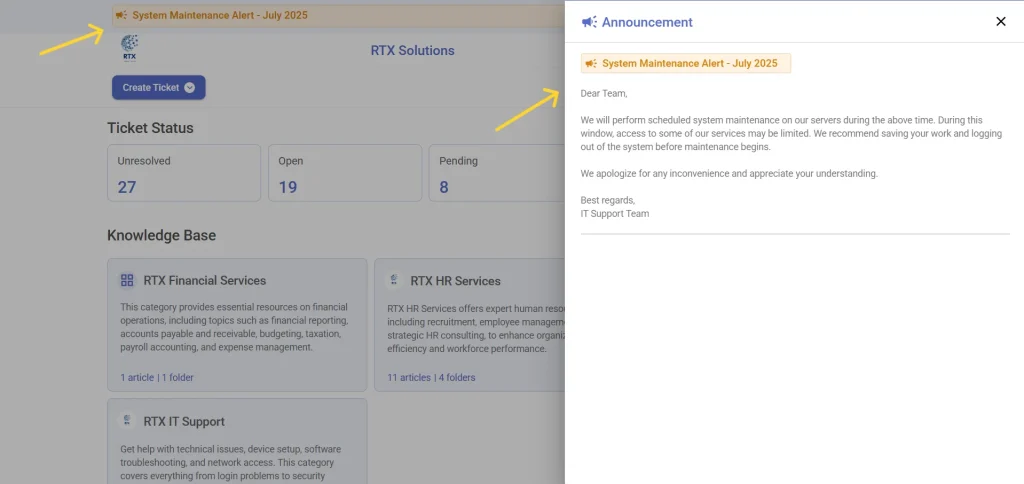
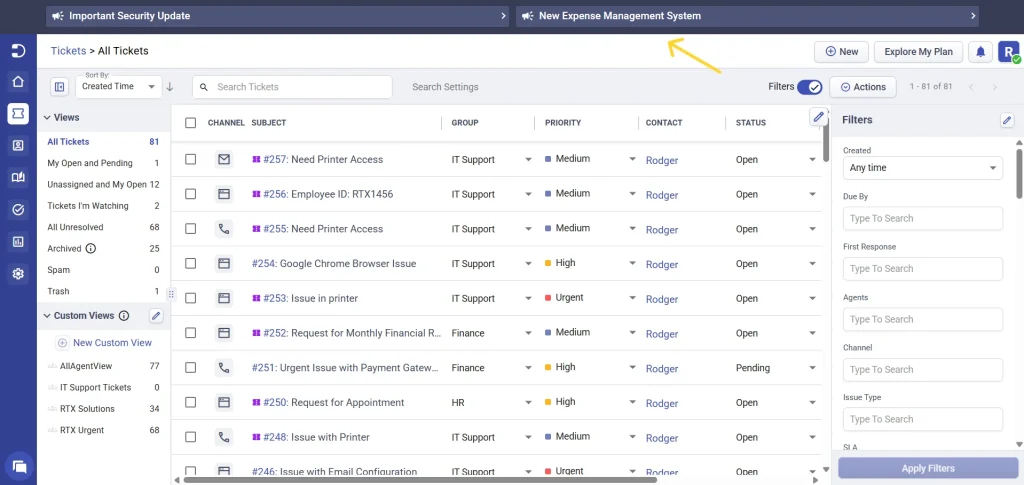
The Announcements feature in Desk365 is a powerful tool that allows administrators to communicate crucial information directly to both end users and support agents. Displayed prominently at the top of the Support Portal and Agent Portal, announcements ensure that important messages are not missed. Whether it’san upcoming maintenance window, a new feature launch, or any other critical update, this feature makes sure that the right people are informed at the right time.
Why is the announcements feature useful?
For end users
Transparency: Keep your users informed about changes, service interruptions, or any other information that might affect their experience.
Targeted messaging: Tailor announcements to specific user groups, ensuring that each segment receives relevant information.
For support agents
Stay updated: Agents can be informed about internal updates, system outages, or policy changes without needing to check emails or other communication channels.
Enhanced communication: Group-specific announcements ensure that relevant information reaches the right teams, improving overall efficiency.
How to configure and use the announcements feature in Desk365?
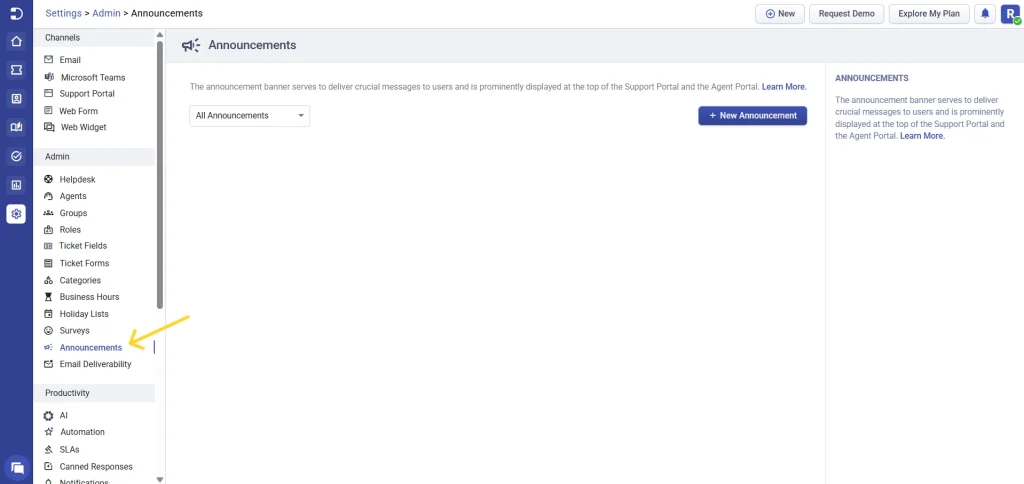
Accessing the announcements feature
To start using the announcements feature, navigate to Settings > Admin > Announcements in your Desk365 agent portal.
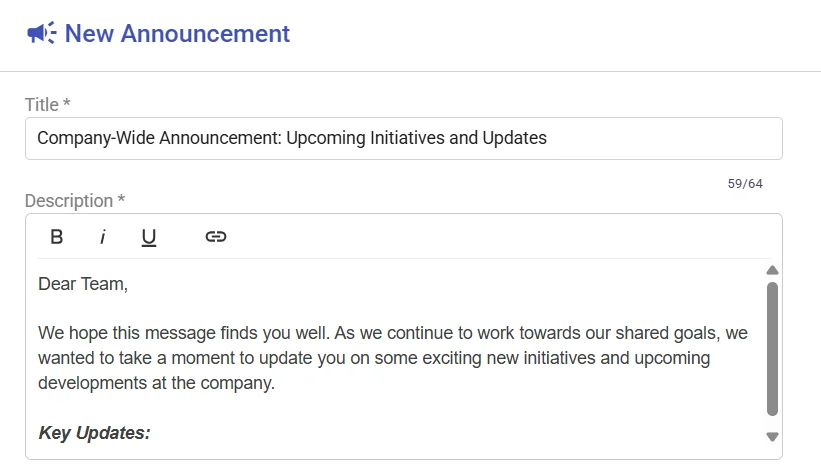
Creating a new announcement
Click on “New Announcement” to begin creating your message.
Enter the title of your announcement.
Provide a description with detailed information. Here, you can format the text to make it stand out: – Bold – Italic – Underline – Add links for more detailed references.
Configuring schedule and visibility
Scheduling
You can schedule your announcements to go live at a specific date and time. This is useful for planning communications in advance, ensuring that your message is delivered exactly when needed.
Visibility
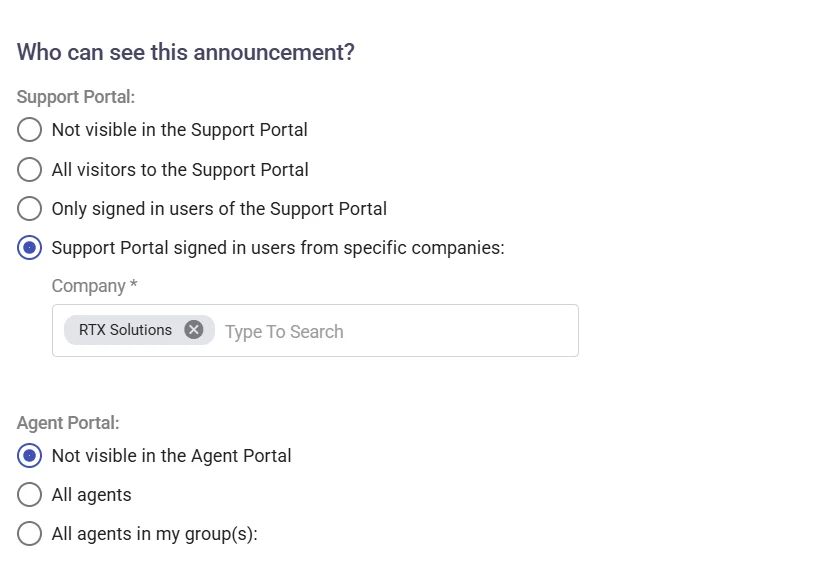
The visibility settings allow you to control who can see the announcements, ensuring that it reaches the right audience within the Support Portal and Agent Portal. Options include:
Support Portal
Not visible: If you don’t want the announcements to appear in the Support Portal, select this option.
All visitors: Choose this if you want the announcements to be visible to everyone visiting the Support Portal.
Only signed-in users: Restrict the announcements to users who are logged into the Support Portal.
Specific companies: Target the announcements to signed-in users from specific companies.
Agent Portal
Not visible: If the announcements are not relevant to agents, select this option.
All agents: Make the announcements visible to all agents in the Agent Portal.
Specific groups: Limit the visibility to agents who belong to certain groups.
Display options
You can customize how the announcements are displayed in the portal:
Single line with expandable option
This option displays only the title of the announcement initially. Users and support agentscan click on the title to expand and view the full description. This is useful for keeping the interface clean and uncluttered while still providing access to detailed information.
Full display
Choose this option if you want the entire content of the announcement to be visible without requiring users to click to expand. This ensures that all information is immediately available to users.
Once you’ve configured all the settings, click the Save button to finalize your announcement. The announcement will then go live based on the schedule you set, ensuring that your message is delivered at the right time.
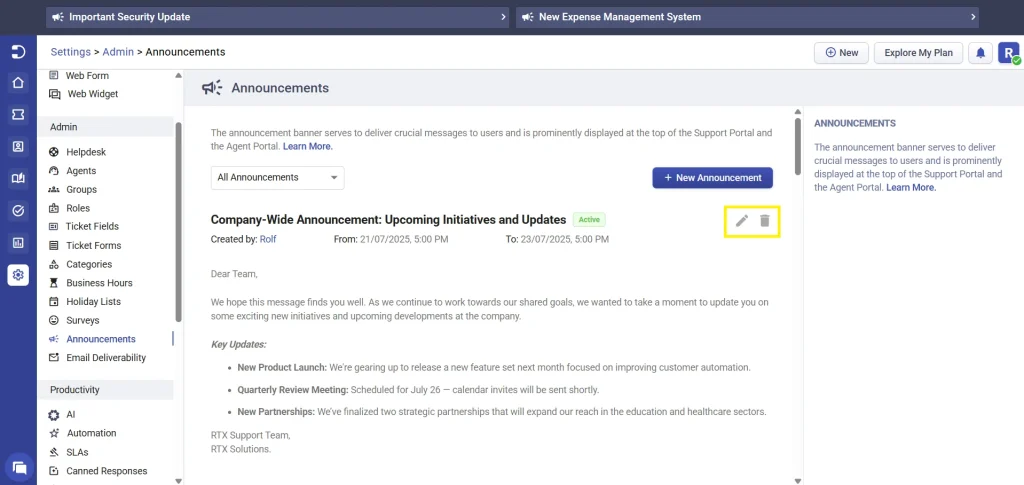
Editing or deleting an announcement
Once an announcement has been saved, you can make changes to it or delete it at any time, as long as it is either active or scheduled for a future date.
To edit an announcement, click the edit icon next to the one you’d like to update.
After editing, click update to apply the changes. The updates will be reflected immediately in the Support Portal and Agent Portal, based on the visibility settings configured.
To delete an announcement, click the delete icon next to it. A confirmation prompt will appear to ensure that you want to permanently remove the announcement.
Note: Only active and future announcements can be edited or deleted. Past announcements remain read-only and cannot be modified or removed.
Managing announcements
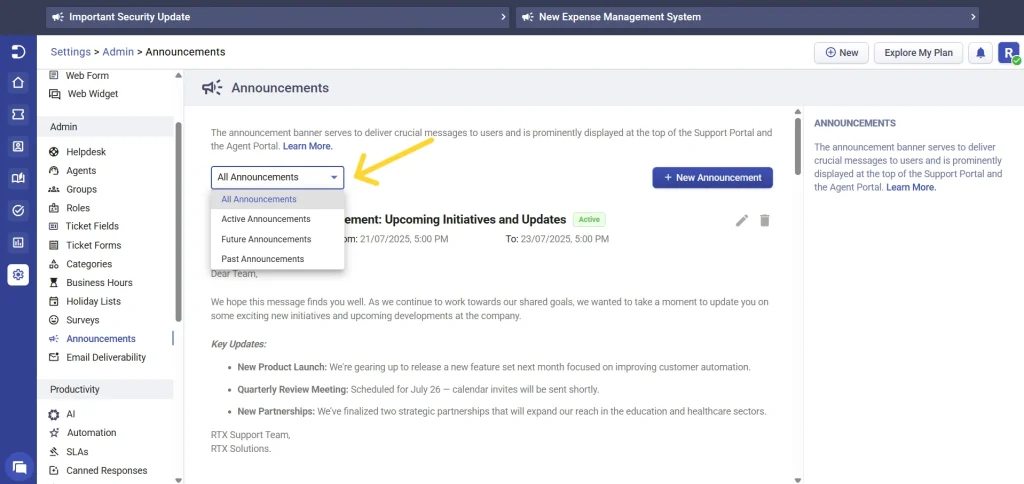
In the Announcements section, you’ll see a drop-down menu that allows you to filter announcements. You can choose from:
All announcements: View every announcement that has been created.
Active announcements: See only the announcements that are currently live.
Future announcements: View announcements that have been scheduled for a future date.
Past announcements: Review previous announcements that have already expired.
If there are active announcements, the drop-down will default to “Active Announcements,” ensuring that you see the most current information first. Announcements are listed with the latest ones at the top, so the most recent information is always the first thing you see.
Note:
Once an announcement has expired, it cannot be deleted. This ensures that there is a record of all communications for reference.
The Announcements feature in Desk365 is designed to streamline communication, making sure that vital information reaches the right audience in a timely and efficient manner. By following these steps, you can effectively use this feature to keep your support team and end users informed and engaged.