In today’s fast-paced business environment, customer support is a critical aspect of building customer loyalty and growing revenue. The ability to promptly and accurately respond to customer issues can set a company apart from its competitors.
At Desk365, this feature allows support teams to add custom ticket types to the ticket fields, enabling them to capture more specific and detailed information.
In this help center article, we will explore what custom types are and how they can benefit your business.
What are custom ticket types?
The ‘Type’ ticket field helps agents categorize and prioritize tickets based on the nature of the request.
Desk365 offers four default choices for the ‘Type’ field – Question, Incident, Problem, and Request. While these options provided a broad range of choices, they were limited in their ability to cater to the unique needs of different businesses.
With the introduction of custom types, you have the ability to add custom types in ticket field ‘Type’ which enables the collection of even more specific and precise information from end-users, which will help the support team resolve tickets more efficiently.
Custom Ticket Types allows businesses to create additional types and unique workflows within Desk365. They allow businesses to define the data they want to capture and how they want to use it to streamline their customer support processes.
How to add custom ticket types in Desk365?
Here are the steps you can follow to add a Custom Ticket Type in Desk365.
1. Go to Settings > Admin > Ticket Fields tab. You’ll notice a ticket field called ‘Type’ which is a default field in Desk365.
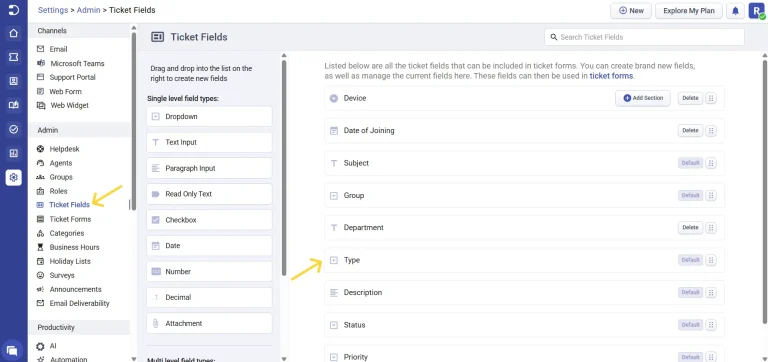
By default, you’ll notice that the ticket field ‘Type’ has four choices (Question, Incident, Problem, and Request).
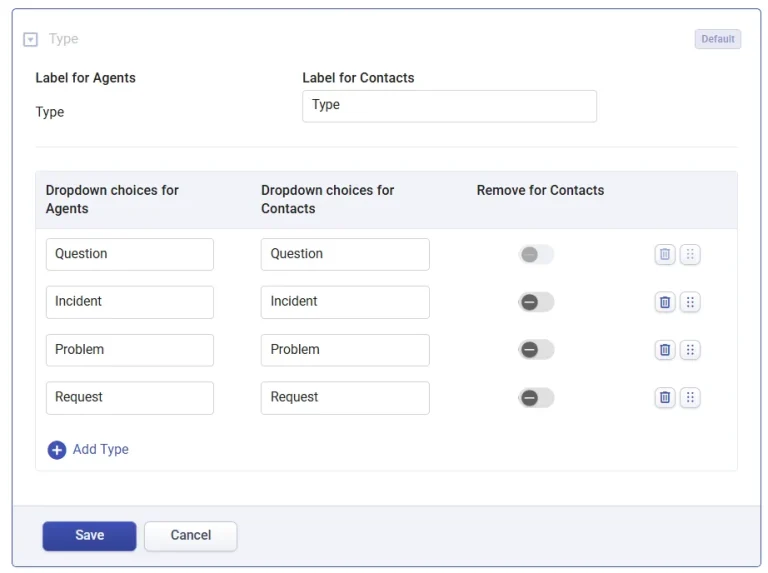
2. However, you can create new custom types that you want to include in the ticket forms in addition to the default four choices.
Also, the support team has the ability to modify the names of the four available options (Question, Incident, Problem, and Request) for both contacts and agents to use when working on tickets. This is a great way to customize the ticket creation process for the support agents and make it more user-friendly.
Important note: When you edit the dropdown choices for the Type ticket field, Desk365 will display a confirmation message informing you that the changes will apply to all previously created tickets. This means that existing tickets, ticket activities, automations, and closure rules that use this field will be updated to reflect the new dropdown options. Be sure to review your changes carefully before saving.
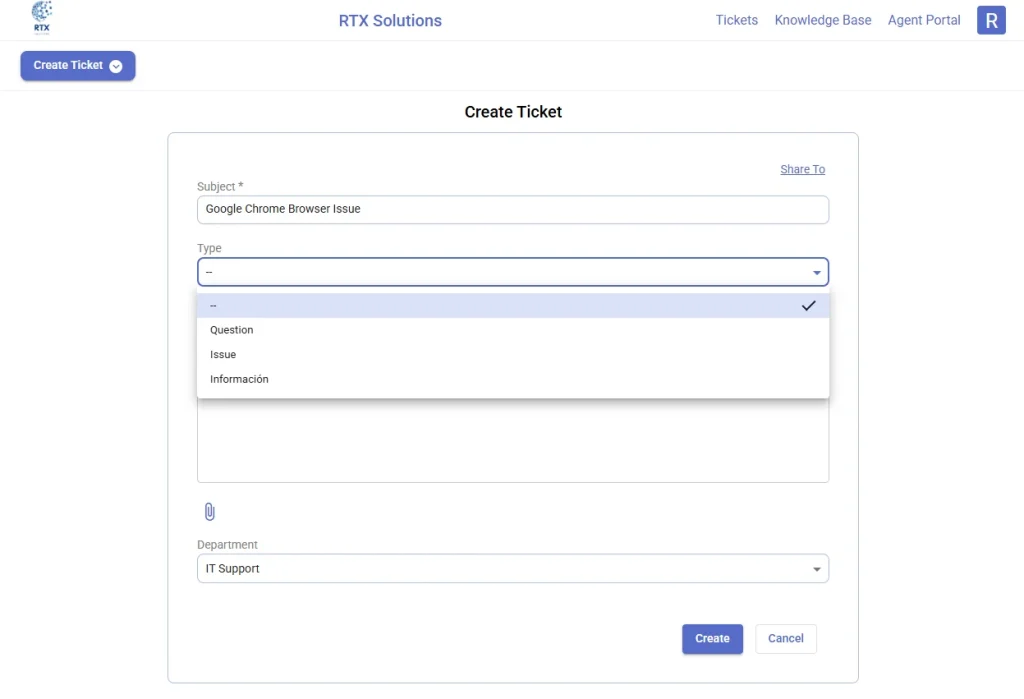
For this example, we have added a new custom type called ‘Información’.
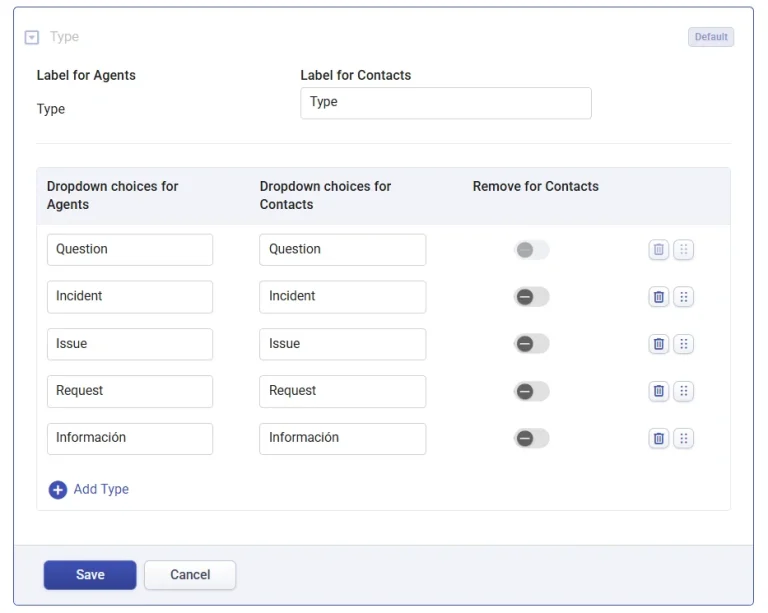
You also have the option to remove any of the ‘Type’ fields from the ticket form that is visible to your contacts. For example, if the support team only wants to display custom types such as Question, Issue, and Información for the contacts, they can choose to remove the other choices. This is an effective method of streamlining the ticket creation process for end-users and improving the overall user experience.
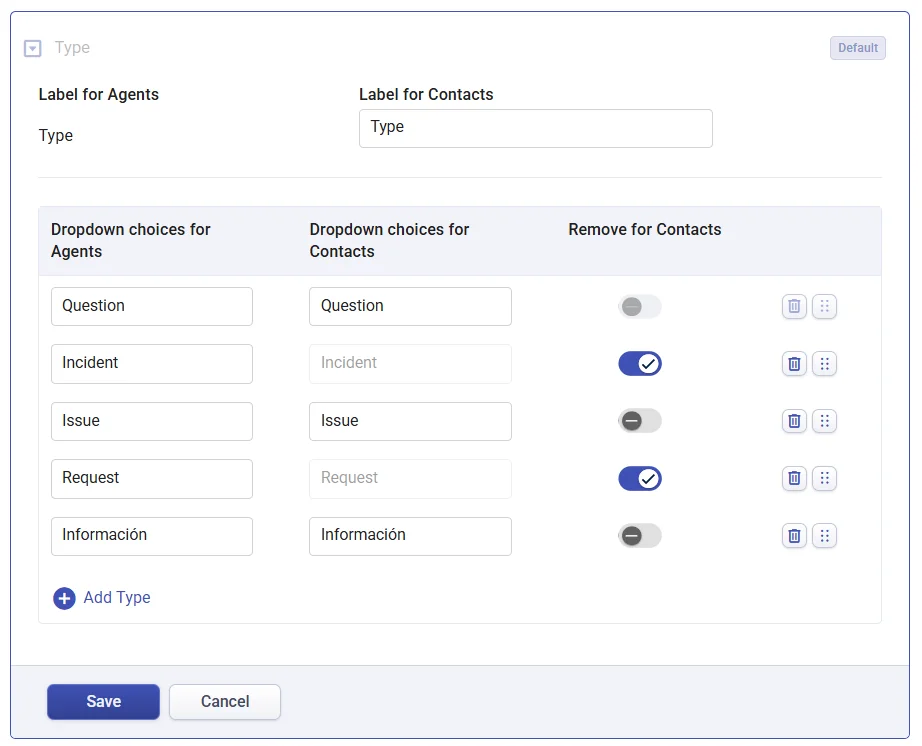
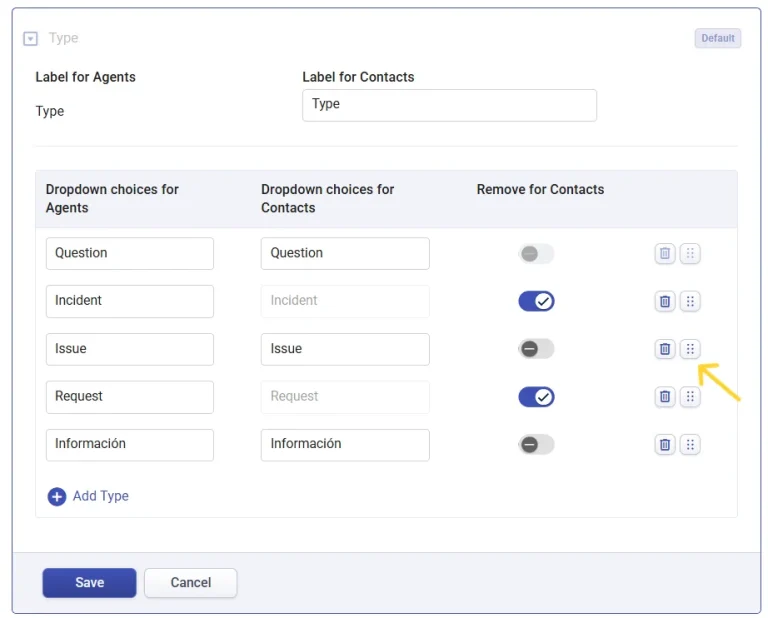
Moreover, you now have the ability to modify the ‘Type’ options in the ticket form by deleting, reordering, or renaming them to fit your needs.
Adding 'Type' field to ticket forms
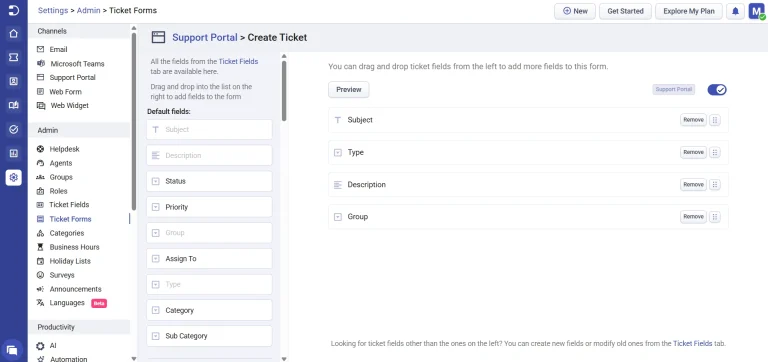
Suppose you intend to include the ‘Type’ field in the ‘Create Ticket’ form of the Support Portal.
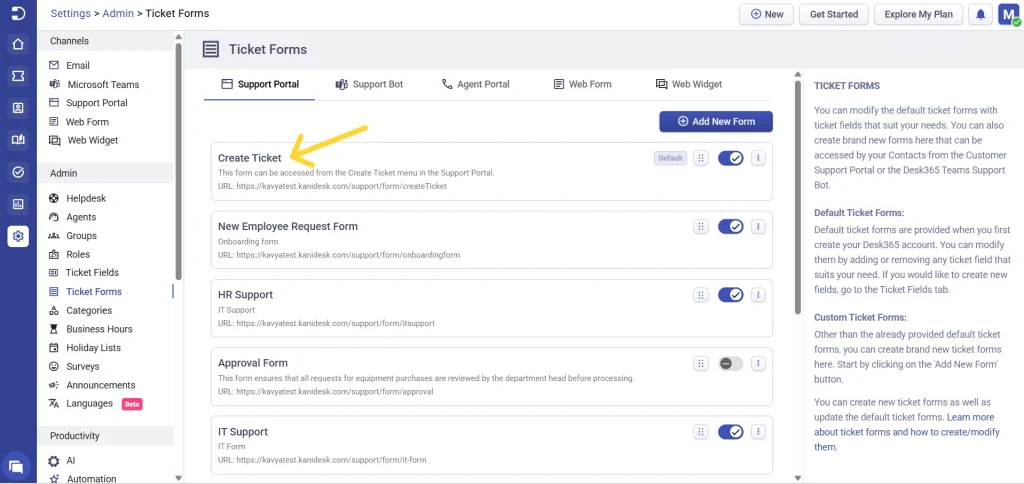
1. Navigate to Settings > Admin > Ticket Forms tab. Click on the ‘Create Ticket’ form of the Support Portal.
2. The form will display only the ‘Subject’ and ‘Description’ fields by default.
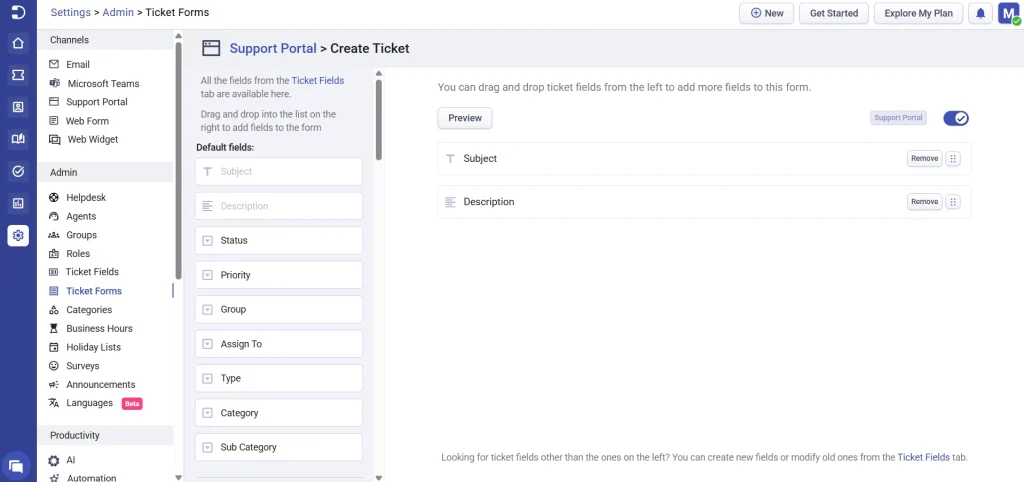
3. However, you have the option to easily move the ‘Type’ field and any other desired fields from the left side to this form on the right through a simple drag and drop action.
4. Let’s say that your contact is submitting a ticket through the Create Ticket form in the Support Portal.
5. The ticket gets created and the agent can proceed to work on the support ticket through the Agent Portal.
The use of custom types data enables the collection of precise information from end-users, which in turn assists the support team in quickly resolving issues. This further enhances the efficiency and streamlines the ticket creation process.
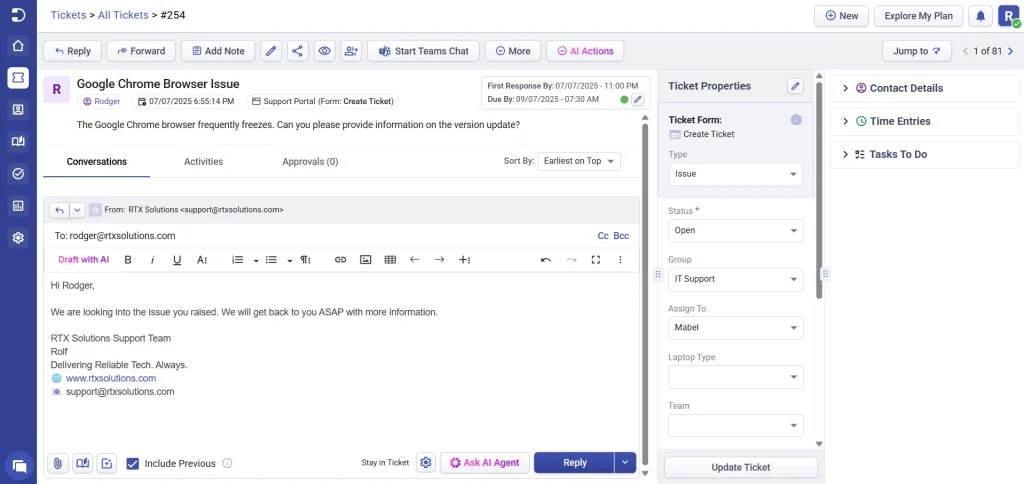
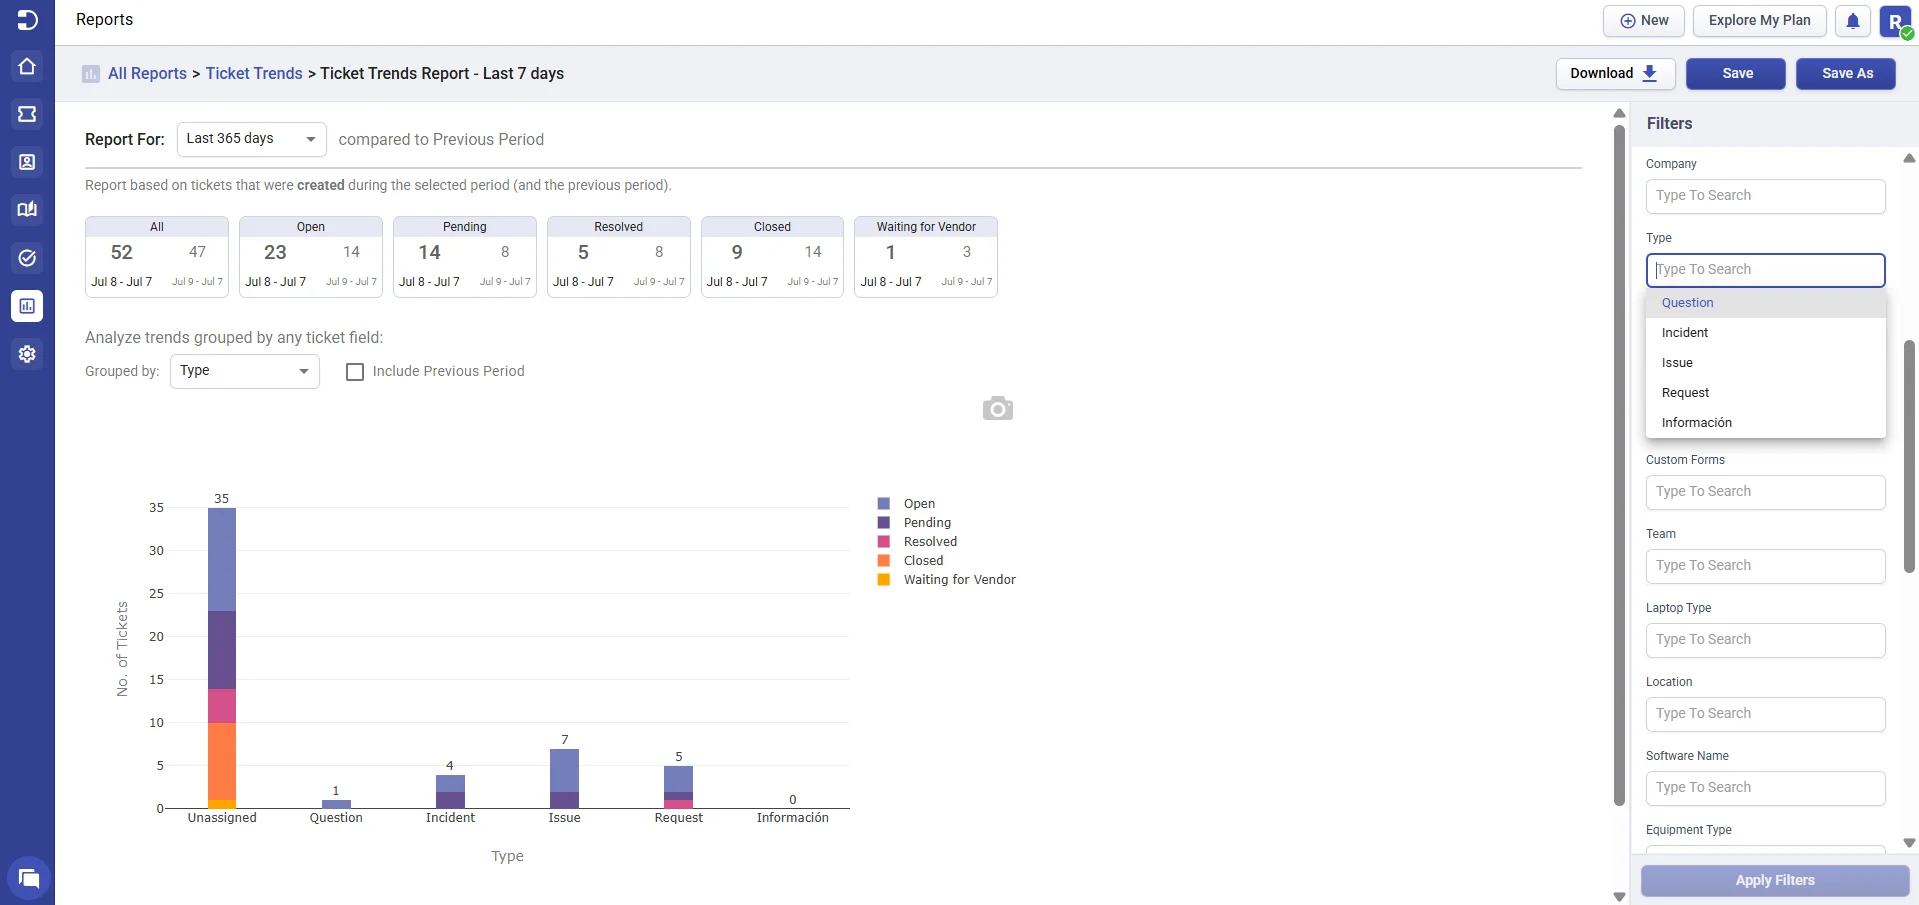
You can also use custom types as filters in the Tickets list page, within reports, and when creating automation rules.
