


Exporting tickets from your helpdesk can be a valuable way to analyze and manage customer support data.
It is also helpful for creating reports, tracking ticket volume data, sharing information with other team members, and identifying areas for further improvement in your support team operations.
When you export tickets from a helpdesk, you are essentially creating a copy of your ticket data in a different format, such as a CSV file or an Excel spreadsheet that can be easily accessed, analyzed, and manipulated in a variety of ways.
Desk365 makes it easy for you to export your tickets in just a few simple steps.
In this help center article, we will discuss how to export tickets from Desk365 and some best practices for doing so.
To export your tickets, follow these steps:
1. Log in to your helpdesk account and navigate to the ticket list view.
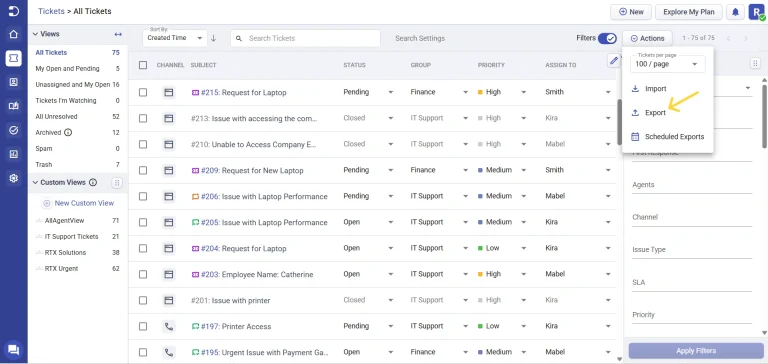
2. Click on the ‘Export’ button at the top in the Agent Portal as shown in the image.
3. Select the time period for which you want to export the tickets and choose the necessary ticket fields and contact fields that you would require.
You’ll receive the exported file in your email inbox that will be in the .csv format.
Several types of exports options are available in Desk365 such as:
* Standard ticket view
* Current ticket view
* Custom view
* Search tickets
* Time entries
Let’s cover all these different export options in detail below.
Export tickets
1. All tickets (Standard ticket view)
You can export the entire list of active tickets directly from the “All Tickets” view in your helpdesk.
Here are the steps you need to follow to exports all your tickets in Desk365:
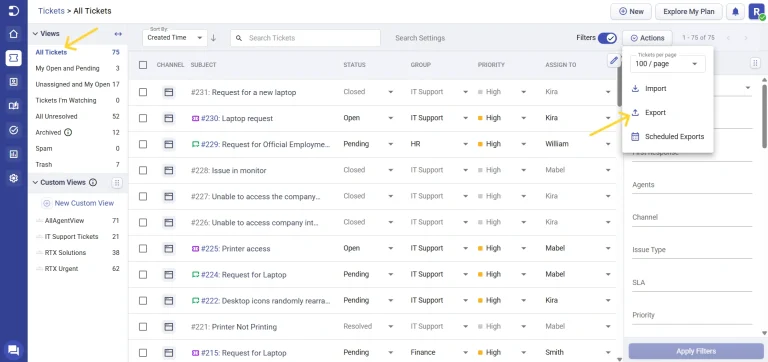
1. In the Tickets tab, choose ‘All Tickets’ from the Views list on the left.
2. Click on the ‘Export’ button at the top in the Agent Portal.
3. ‘Export – All Tickets’ dialog box appears. Here you can filter the export by choosing one of the following time period options: ‘Created Time’, ‘Resolved Time’, and ‘Closed Time’.
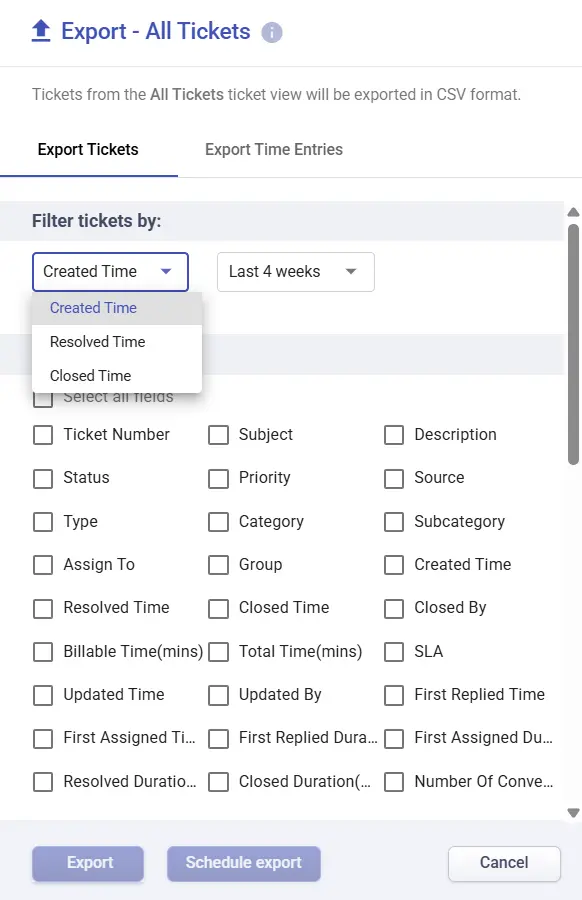
Created Time: Tickets that were created during the time-frame specified will be exported.
Resolved Time: Tickets that are currently in ‘resolved’ status and resolved during the time-frame specified will be exported.
Closed Time: Tickets that are currently in ‘closed’ status and closed during the time-frame specified will be exported.
4. Choose the required ticket fields, contact fields, and even the custom ticket fields that you would like to export.
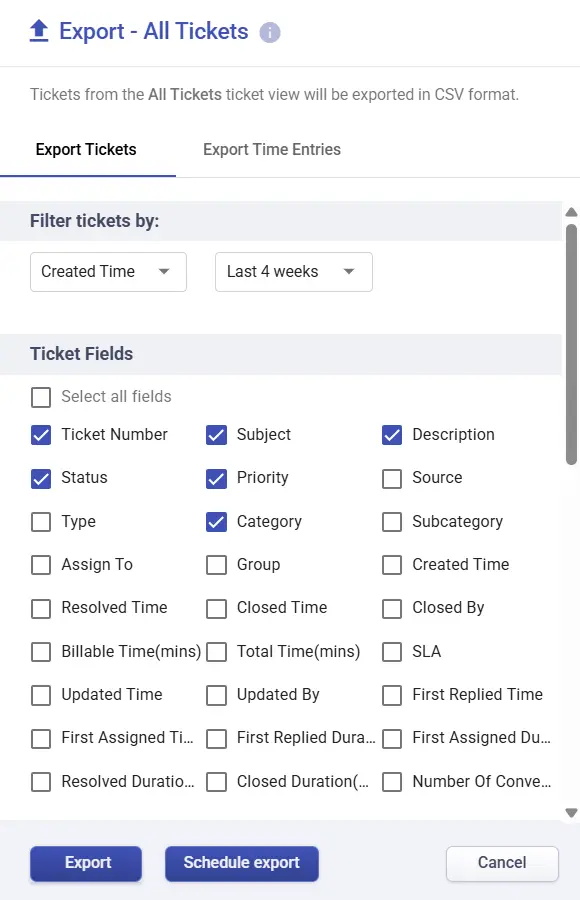
5. Click on the ‘Export’ button at the bottom to begin the export process. Once the export is completed, you’ll receive the exported file in your email inbox that will be in .csv format.
You can also export time entries to a ticket which we’ll be discussing later.
2. Other ticket views (Current ticket view)
You can export your current view in your helpdesk. Let’s say you’re taking a look at your ‘Open’ and ‘Pending’ Tickets and you want to export just that information in an excel sheet.
Here are the steps you need to follow to export your current ticket view in Desk365:
1. Go to ‘My Open and Pending’ view and click the ‘Export’ button at the top in the Agent Portal.
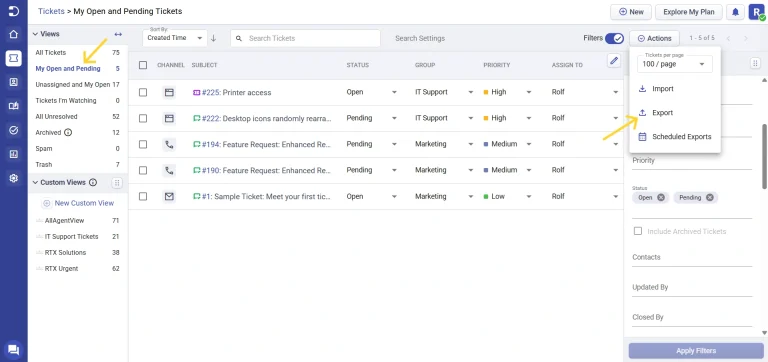
2. ‘Export – My Open and Pending’ dialog box appears. Choose the time period and the required ticket fields, custom fields, and contact fields that you want to export.
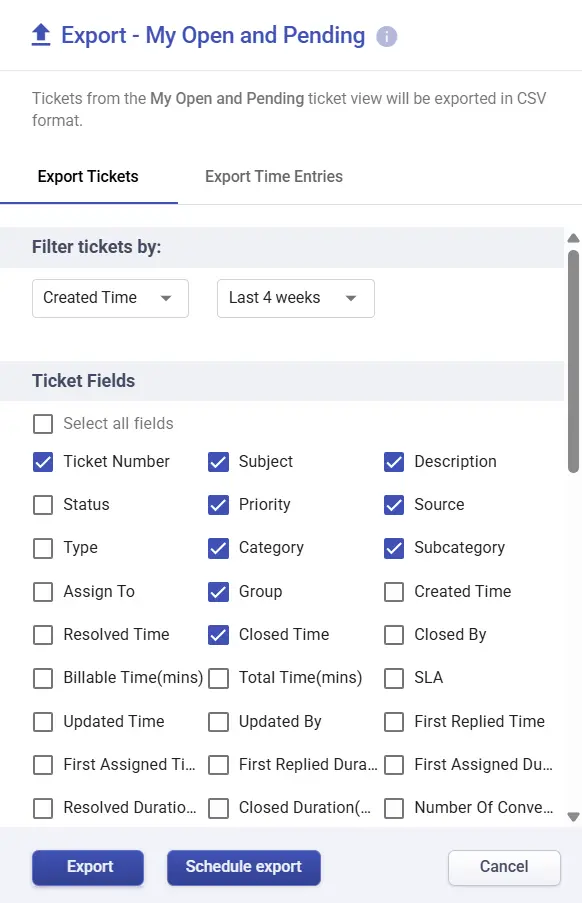
Tickets from the ‘My Open and Pending’ ticket view will be exported in .csv format and you’ll notice only 6 tickets which are your ‘Open’ and ‘Pending’ tickets appear in the CSV file.
Note: To export all your tickets, you need to export tickets from both the ‘All Tickets’ and ‘Archived Tickets’ views separately.
3. Export tickets - Custom view
You can export tickets for any custom views as well. This is pretty useful as you don’t want to export all the tickets every time and carry out some manual tasks in excel to get the custom view you’re looking for.
You can export tickets belonging to a custom view and get them in an .csv format.
1. Choose the ‘Custom View’ that you want to export and click on the ‘Export’ button at the top. For this example, let’s say you wanted to download only the urgent tickets from a particular company called ‘RTX Solutions’.
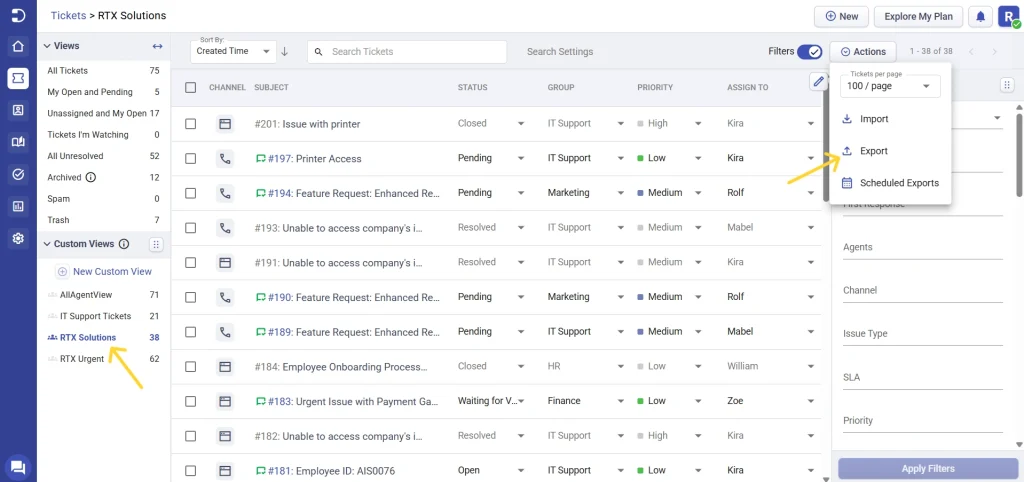
2. ‘Export – RTX Solutions’ dialog box appears. Choose the time period and the required ticket fields, custom fields, and contact fields that you want to export.
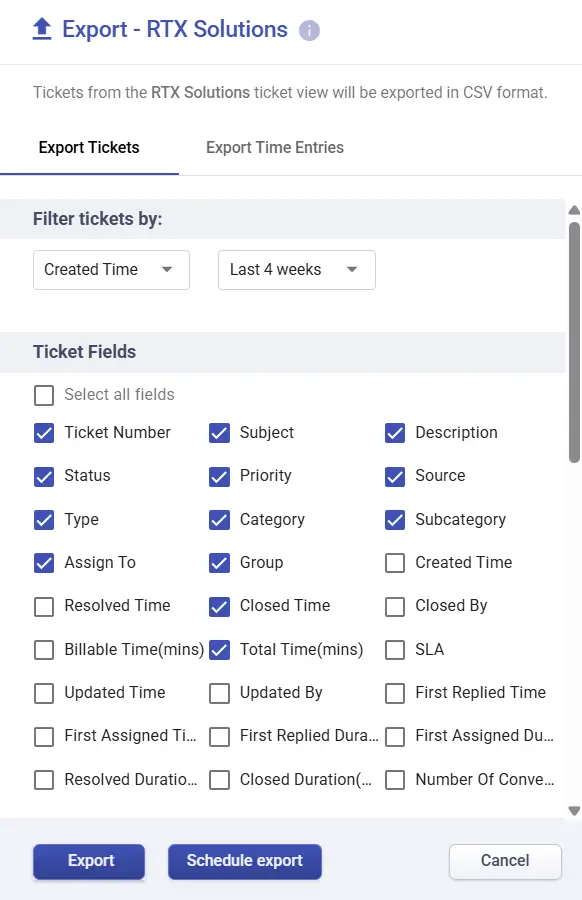
3. Click on the ‘Export’ button. Tickets from the ‘RTX Solutions’ ticket view will be exported in .csv format and you’ll receive it via email.
Similarly, you can also export time entries for a custom view if needed.
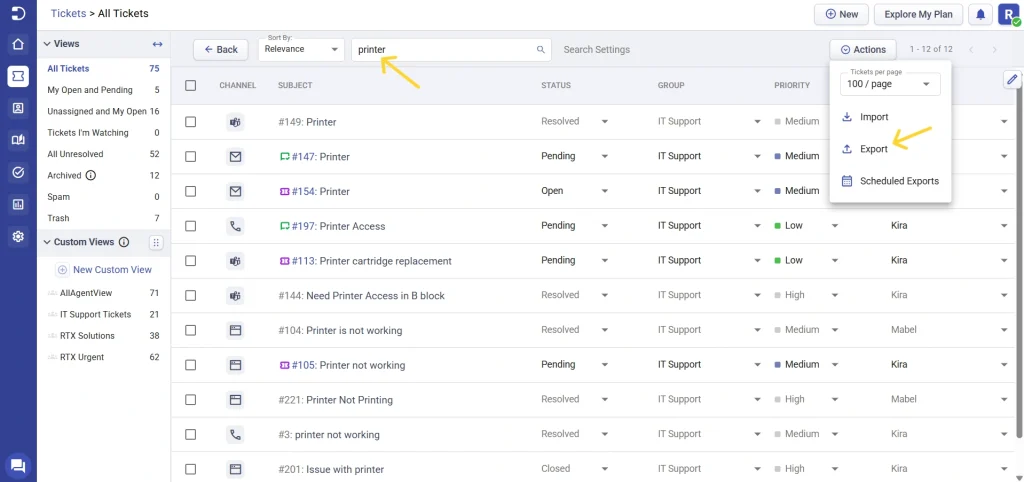
4. Export tickets - Search tickets
One more way to export tickets is using the ‘Search’ function.
You can search for a ticket by ‘Subject’, ‘Description’, and ‘Ticket Number’ and download the tickets related to them.
For this example, I want to export the tickets that are related to ‘Printers’.
2. ‘Export – Search Tickets’ dialog box appears. Choose the time period and the required ticket fields, custom fields, and contact fields that you want to export.
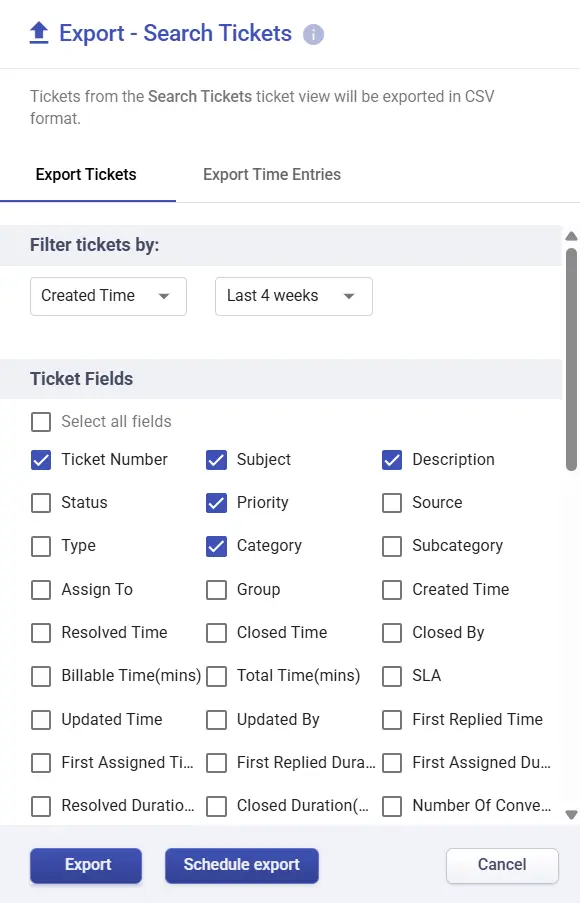
3. Select the ‘Export’ button and you’ll receive the ‘Printer’ related tickets that are in ‘Resolved’ status in a .csv file.
Please note that the following filters alone are not applicable while exporting:
– Status (If created time is chosen during export, filters will be applied. However, if ‘Resolved Time’ or ‘Closed Time’ is chosen, then only tickets in resolved or closed status will be exported)
– Created (Will be based on the created time chosen during export)
– Due By
– First Response
5. Export tickets - Time entries
Tracking time spent on tickets is critical for any helpdesk. It is especially useful when you bill clients for time spent on tickets.
Desk365 makes it easy to log time spent on tickets and to report on them. You can enter the exact time spent on a ticket or use a timer to keep track of it.
You can export tickets which have time entries recorded on it and download useful information such as ticket number, time spent on a ticket, billable information, and more.
Here are the steps you need to follow to export time entries in Desk365:
1. Click on the ‘Export’ button at the top in the Agent Portal.
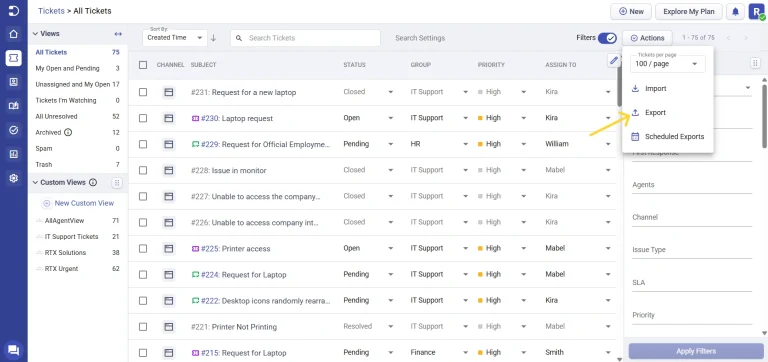
2. Choose the ‘Export Time Entries’ Tab in the ‘Export – All Tickets’ dialog box.
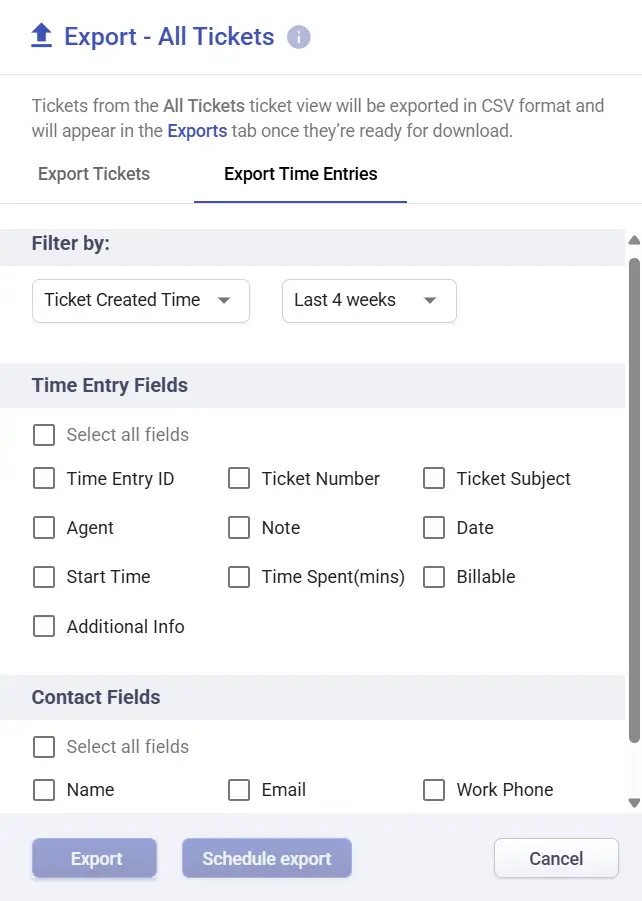
3. Choose how you’d like to filter tickets—by when they were created, resolved, closed, or when the time entry was started.
4. Select the time period for which you want to export the tickets and choose the required ‘Time Entry’ fields that you would like to collect in the report. You can also select Contact fields such as contact name, email address, phone number, company name, and other related details to get a more complete export.
5. Click on the ‘Export’ button. Once the export is completed, you’ll receive the exported file in your email inbox that will be in the .csv format.
Here is a sample screenshot of how it appears in an Excel sheet.

Exporting all of your tickets may be tempting, but it can be overwhelming and might not be useful if you are looking for a particular information.
You can make use of the filters to narrow down your ticket list based on different ticket fields, such as contact name, customer email, groups, channels, and more.
Using these filters can help you find the ideal tickets you want to export. This can help you identify opportunities to strengthen your customer service, such as by addressing common customer issues or offering additional resources and support.
Exports Tab – View your export history
The Exports tab in the Settings > Admin section lets you track and manage all export activity related to tickets, contacts, and companies across your helpdesk.
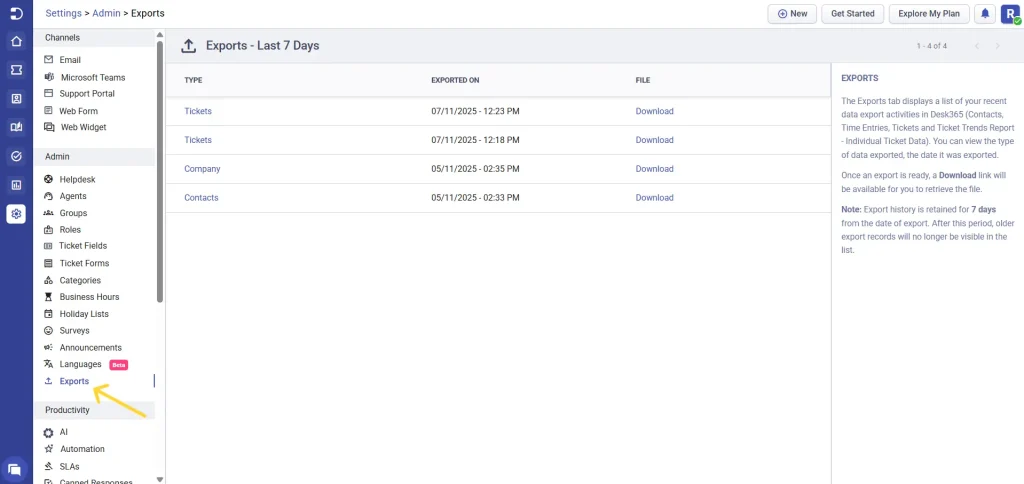
Here, you can:
- View all exports from the past seven days
- Sort the exports by type and
- Download the file
Additionally, within Settings > Admin > Roles > Settings and Reports, you can manage access to the Exports tab. Only roles that have this option checked will be able to access the Exports tab. This makes it easy to monitor export activity, ensure data security, and track what’s being shared across your helpdesk.
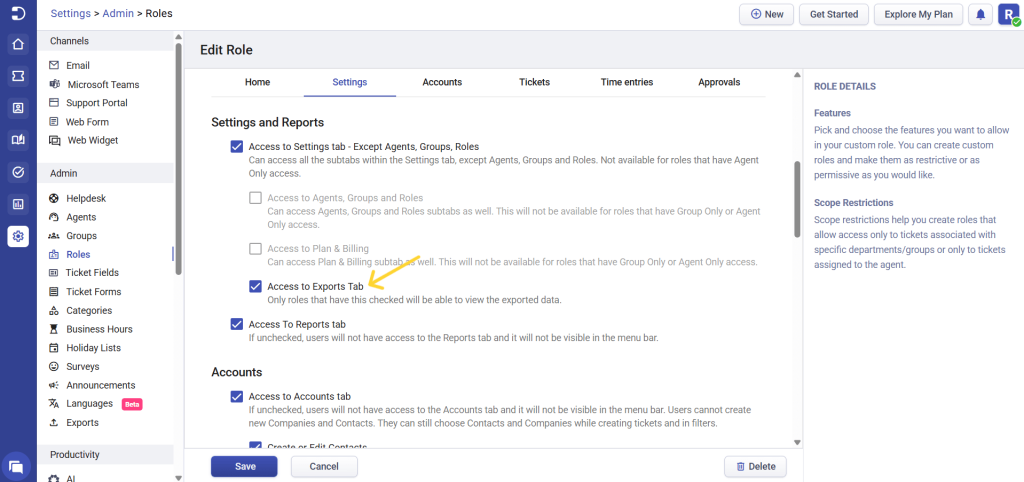
Learn more about setting up custom roles in Desk365.


