


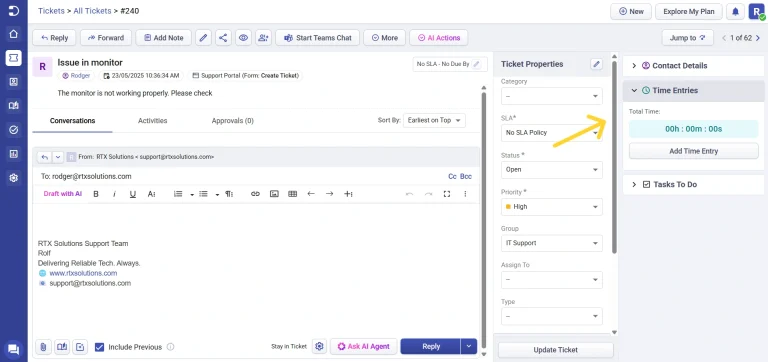
Tracking time spent on tickets is critical for any helpdesk. Desk365 makes it easy to log time spent on tickets and to report on them. To start tracking time spent on a ticket, look for the ‘Time Entries’ section in the Ticket Details page.
Add Time Entry:
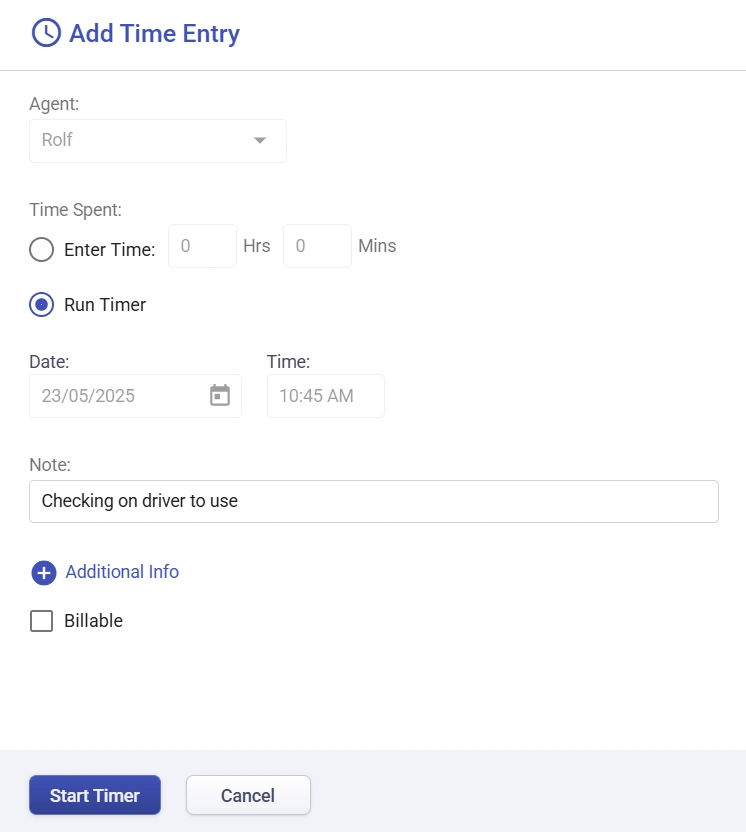
Click the ‘Add Time Entry’ button to pop up the window where you can enter the time spent on that ticket. You also have the option of starting a timer before you start a task to get the exact time spent on a particular task. For example, if you are trying to address an issue with a monitor and want to identify the right driver version to use, you could start a timer for it and then start researching on the driver.
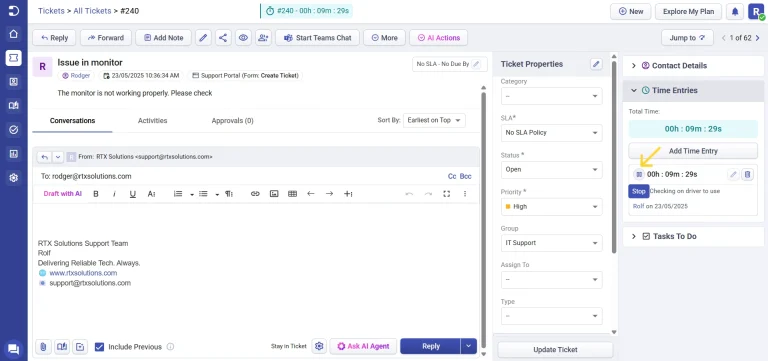
After the timer has started running, you’ll see it appear at the top of the Desk365 web app on all the pages. This is super useful to identify any timer that is running and help you stop your timers as soon as you are done with your task.
Clicking on the timer link will take you back to the ticket for which the timer is running. You can now click on the ‘Stop’ button to stop the timer and your time spent on working on this task is successfully logged as a time entry for this ticket.
Edit Time Entry:
Once a time entry is completed you have two options to modify the time. You can either go to the ‘Edit Time Entry’ window and update the time or you can continue running the timer.
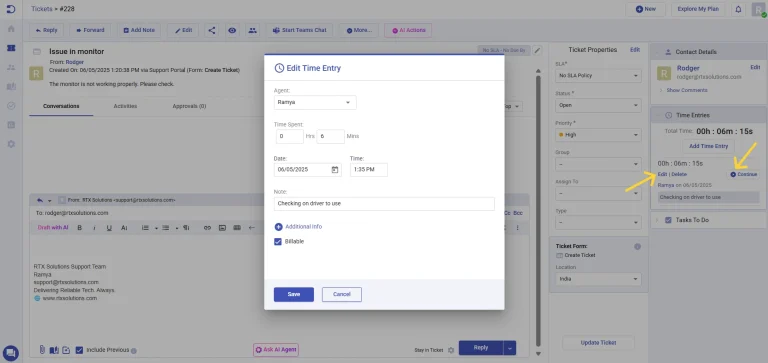
Other than the time, you can update other details including the agent who performed the task, the note related to it and also choose if it is billable or not.
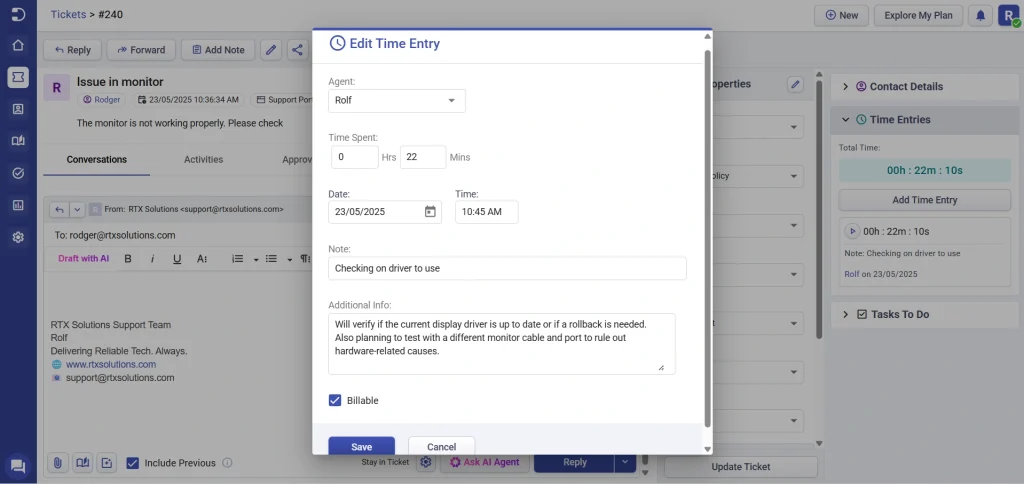
Additional info in Time Entry
‘Additional Info’ is used to add more detailed information about a time entry, making it easier to keep track of important information and details related to a particular ticket.
To add additional notes to a ticket, simply navigate to the time entry section of the ticket details page. From there, you can add any additional information they want to include, such as specific details about the issue, steps taken to resolve it, or any other relevant information.
To edit the notes or add more information later on, you can do so by going back to the Ticket Details page and selecting the particular ticket you want to edit. This makes it easy to keep track of all the relevant information related to a ticket in one place.
In addition to being able to add and edit notes, you can also export the additional information, making it easy to share information with other team members or stakeholders.
Desk365 makes it easy for you to keep track of time spent on your tickets. Once you’ve started adding time spent on your tickets, you’ll see it appear in your exported data as well as in your reports.


