


If you’re using Desk365, understanding its essential functions and actions within the tickets list page can significantly enhance your workflow efficiency.
In this help center article, we’ll explore the key features and actions you need to know to make the most of your Desk365 experience.
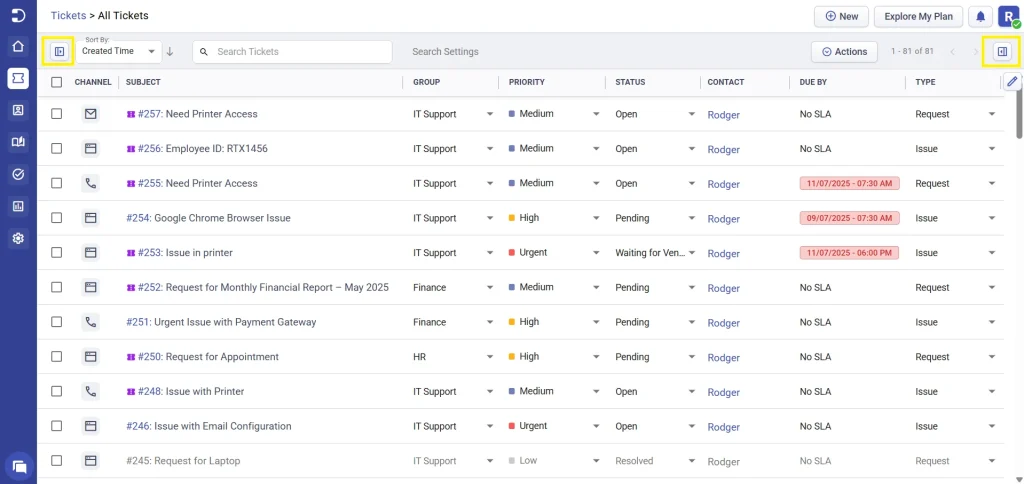
Expand and collapse views & filters
Support agents often need a clear and uncluttered workspace when managing a large number of tickets. Having the Views panel on the left and the Filters panel on the right always open can sometimes limit the screen space available.
Agents can now collapse these panels with a single click to get more room to focus on tickets and expand them again whenever they need to switch views or apply filters.
This provides a cleaner, more flexible interface, helping agents work more efficiently based on their preferences
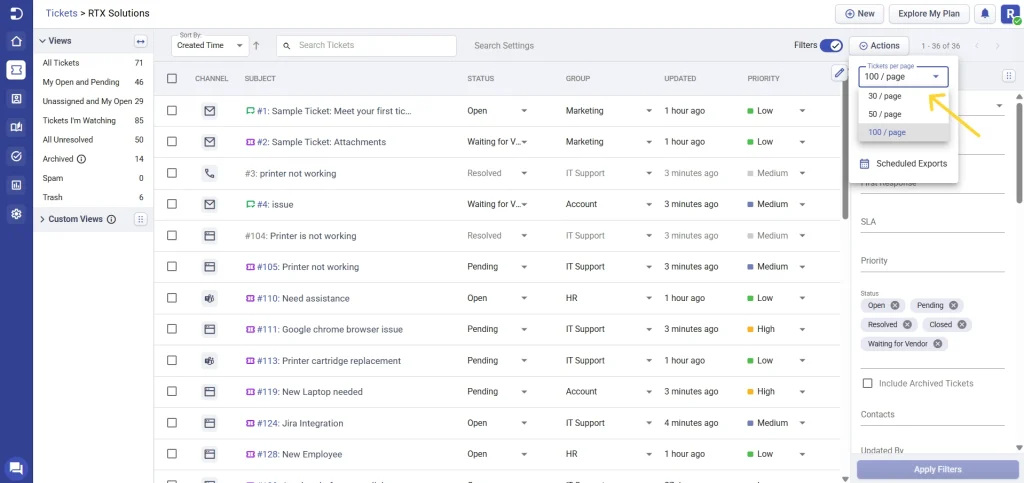
Adjust ticket display options to 30, 50, or 100
The support agents deal with a high volume of tickets on a daily basis. Clicking through multiple pages to access their open tickets can be time-consuming and inefficient.
Agents can simply click on the ‘Actions’ menu in the Tickets List page and you can choose from the ‘Tickets per page’ option to change the display from the default 30 tickets per page to 50, or 100 tickets at once.
This gives agents greater control over their workload, allowing them to prioritize their tasks more effectively.
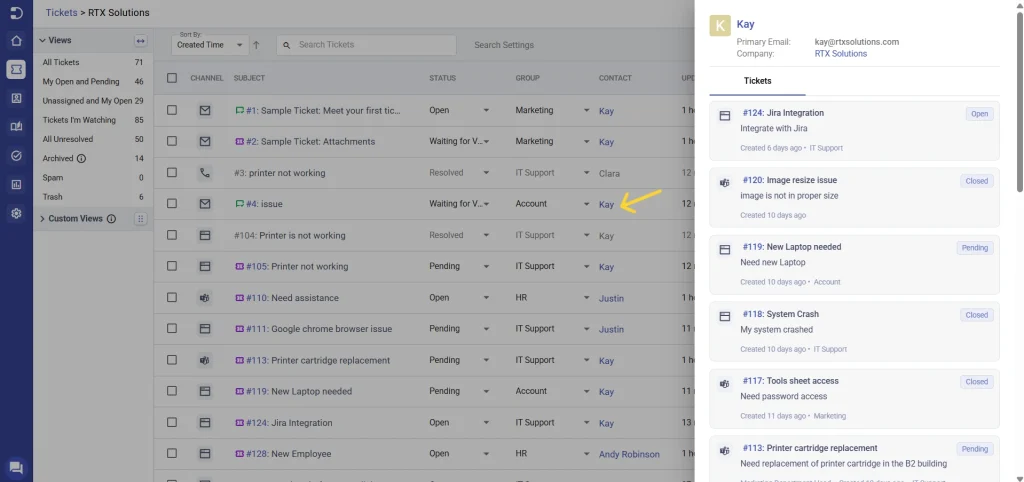
Convenient pop-up links for 'Assign To' and 'Contact'
Usually agents had to navigate to different sections of the Agent Portal to find details about contacts or agents associated with specific tickets. With Desk365 support agents can now access this information directly from the Tickets List page.
Contact pop-up: By clicking on the ‘Contact’ name field in the tickets list page, a small pop-up menu opens, displaying all the tickets created by the respective contact. This eliminates the need to navigate to the dedicated ‘Contacts’ tab in the Agent Portal, saving valuable time and effort.
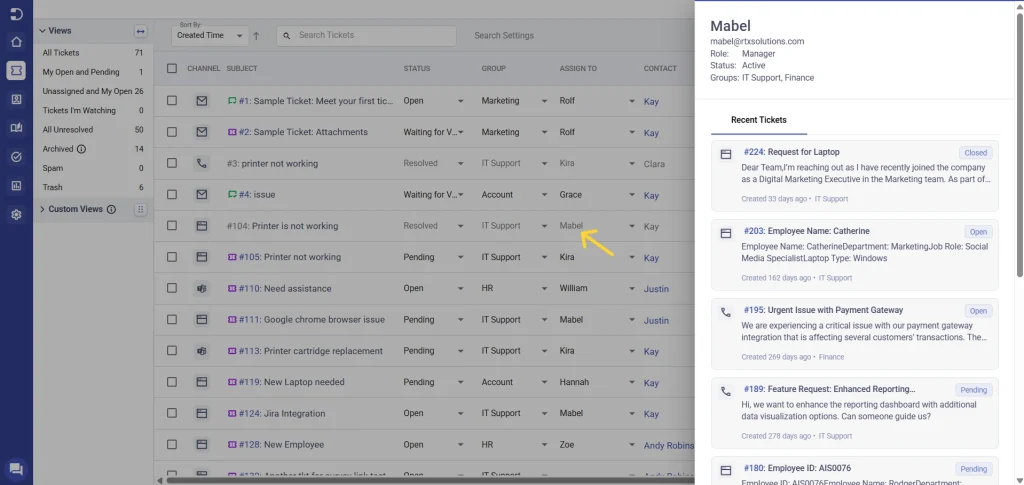
Assign To pop-up: Similarly, when agents click on the ‘Assign To’ field in the tickets list page, a convenient pop-up menu appears, presenting all the tickets assigned to the particular agent.
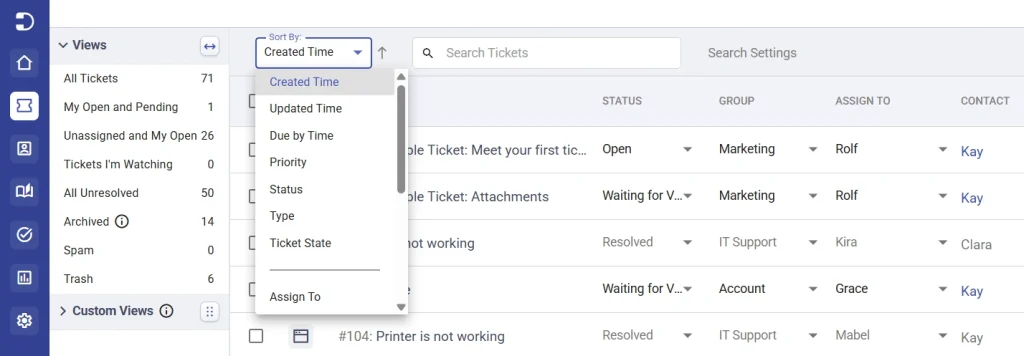
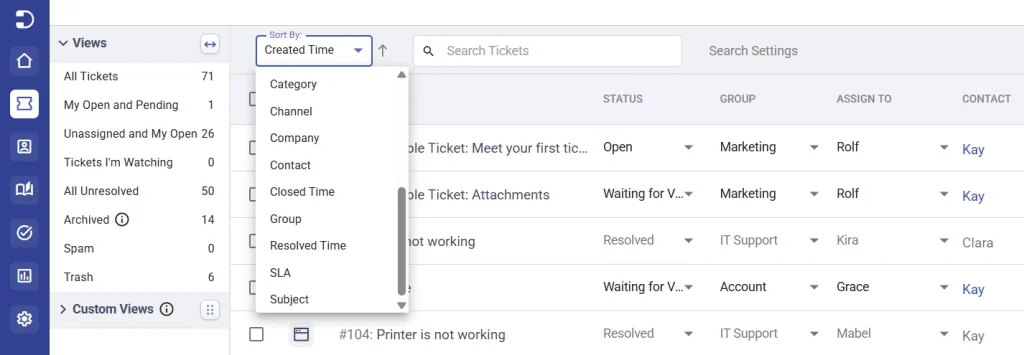
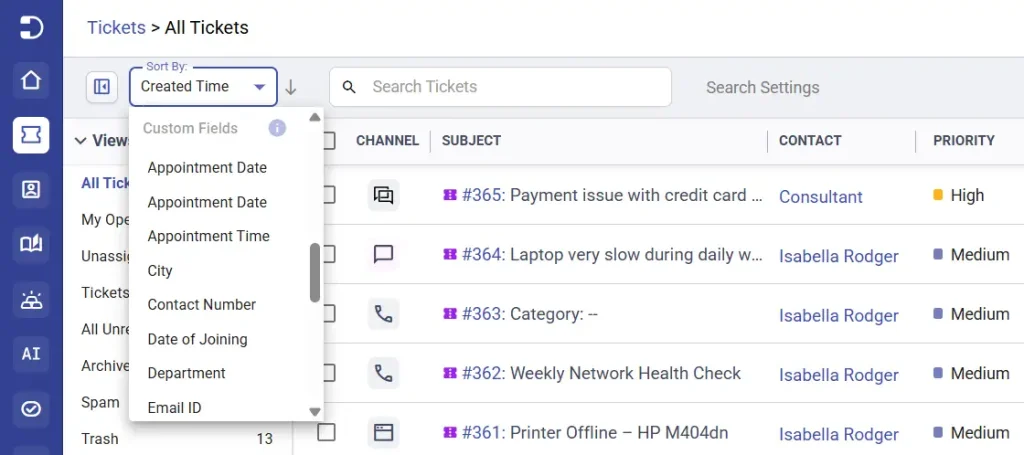
Sort tickets
Tickets can be sorted in the way that you want them to be displayed. You can sort tickets by created time, updated time, priority, status, and more.
1. Click on ‘Sort By’ at the top.
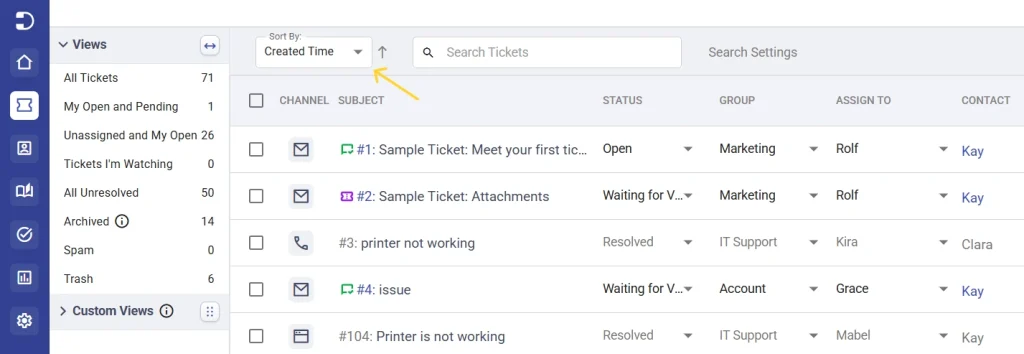
2. Choose a criteria by which you would like to organize the tickets as shown below.
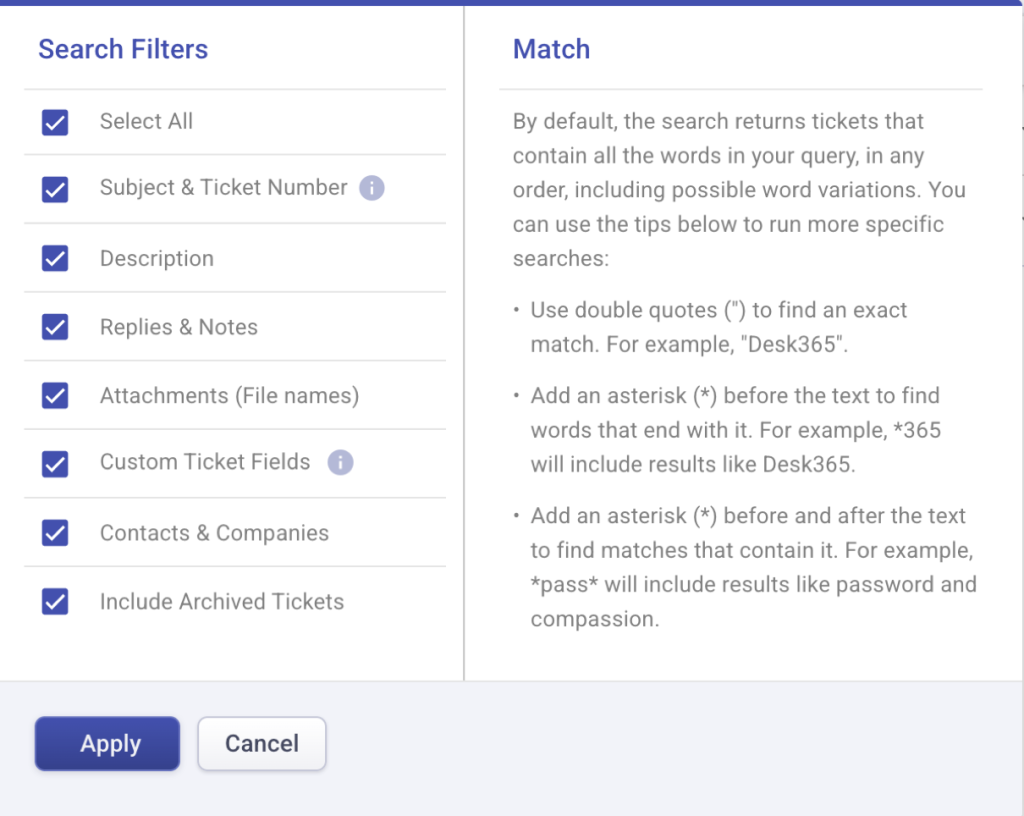
Search tickets
You can quickly search for specific tickets by using the search bar and searching using the ticket number, subject, description, or contact information.

You can also use filters in the Search settings to find tickets based on specific criteria of your choice.
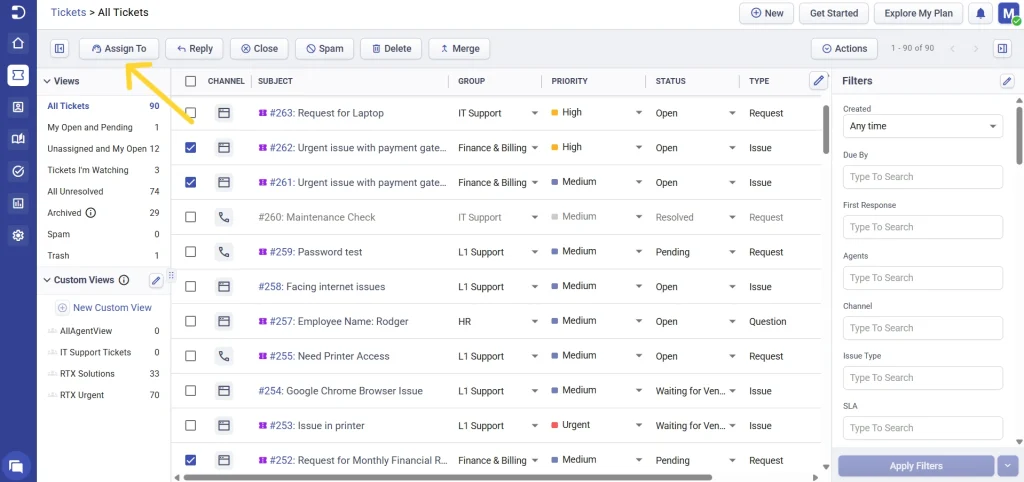
Assign to and bulk assignment
From the Tickets List page, agents can quickly assign tickets to individual team members directly using the Assign To dropdown.
This helps in instantly routing tickets to the right people without needing to open each ticket individually.
Bulk assignment behavior:
When working with multiple tickets, agents can perform a Bulk Assign To action to reassign several tickets in one go.
However, role permissions determine how bulk assignment works:
If a role doesn’t have permission to assign tickets to groups, then during bulk assignment, the agent can only select tickets from the same group.
If tickets from multiple groups are selected, the Bulk Assign To option will be disabled automatically.
This ensures that permissions are respected, and ticket ownership is managed securely within the helpdesk.
Bulk reply
Replying to multiple tickets is faster and more convenient. You can select several tickets at once and send a bulk reply in a single action.

If you’ve set up multiple custom emails, replies will, by default, be sent using the secondary email address configured for the ticket’s assigned group. If the group doesn’t have a secondary email set up, the primary custom support email will be used instead. For tickets that aren’t assigned to any group, replies will also be sent from the primary support email.
You also have the option to include CCs from the latest conversation by enabling the “Include CC” setting.
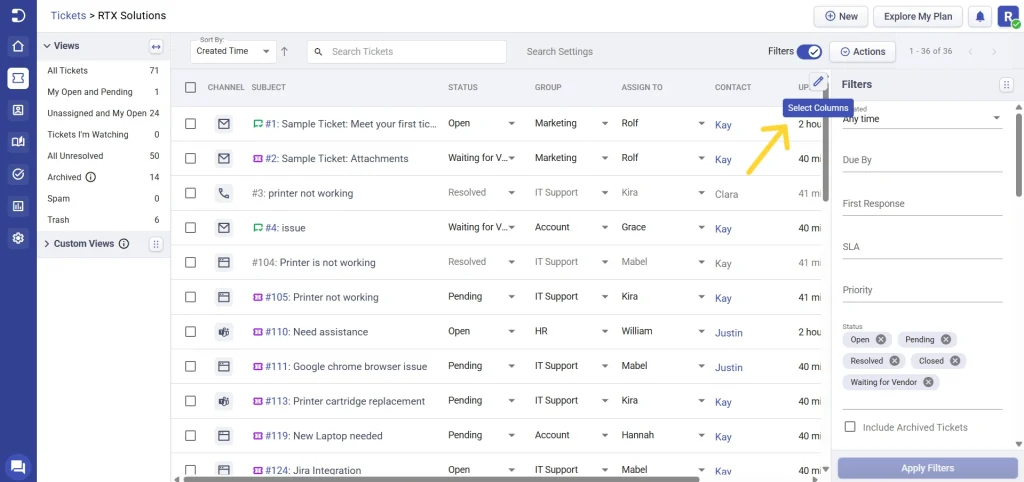
Select column choices
You have the flexibility to personalize the Tickets List Page’s appearance by choosing which columns you’d like to see in the ticket list view and arranging them to ensure that key ticket details are consistently visible.
1. Click on the ‘Select Columns’ icon located next to the Filters, as shown below.
2. Now choose the column you’d like to appear in the ticket list.
3. You have the ability to rearrange columns by dragging and dropping them.
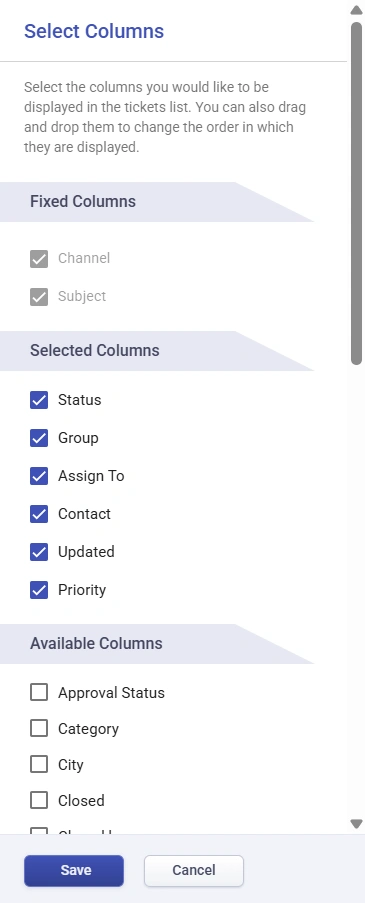
4. Click on ‘Save’. The columns will get displayed in the Tickets List page.
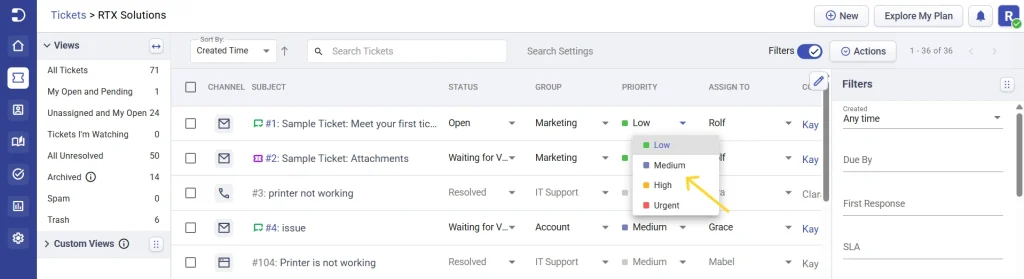
Update ticket fields instantly
On the Tickets List page, you can update ticket properties by clicking on the dropdown menus for the appropriate columns. This is convenient when you need to quickly update the status, priority, assigned agent, and more, without drilling into the ticket details page.
For example, if you need to change the priority of a ticket from low to high you can do it straightaway from the Tickets List Page as shown below.
By mastering these essential functions and actions, you can streamline your support operations and provide better service to your customers.
Desk365 offers a comprehensive suite of tools for efficient support ticket management. From sorting and searching to customizing views, creating tickets from the agent portal, enabling dark mode, and exporting tickets, we’ve got you covered.


