


When working in a helpdesk software, it’s important to have access to the right information at the right time.
Not all ticket fields should be visible to every group within an organization, as not all information is relevant to each team or agent.
For instance, when an IT Support agent was modifying ticket properties, they might come across additional fields such as Lead CRM ID or Lead Source. Typically, these fields are generated by the Marketing and Sales Team. This created a cluttered and confusing ticket properties menu, which could distract agents and hinder productivity.
However, with Desk365, support teams have greater control over the visibility of ticket fields.
We allow default roles like ‘Admins’ and ‘Managers’ to customize the visibility settings for ticket fields in the Ticket Properties menu and choose which ticket fields are visible to different groups within the organization.
This provides teams with greater control over the visibility of ticket fields. This not only helps to streamline the Ticket Properties menu but also ensures that agents only see the information that is relevant to their specific role and department.
Different teams can also easily edit and delete ticket fields, as well as reorder them as needed. These improvements help to make the Ticket Properties menu more intuitive and user-friendly.
In this help center article, we’ll discuss about how to configure ticket properties in more detail.
Customizing ticket fields visibility in Desk365
By default, ‘Administrators’ and ‘Managers’ have global access to the ticket scope, which enables them to modify the ticket properties menu. As an admin for your organization, you can select the visibility settings for specific ticket fields to appear in the Ticket Properties menu when you click on the ‘Edit’ button on the Ticket Properties menu within the ticket details page.
This means that you can decide whether you want to share the ticket fields with all the agents in your helpdesk, or you can share it with agents in a specific group or groups where you’re already part of.
As an admin, you can set up the initial configuration for the ticket properties menu. This allows you to customize the settings to meet the specific needs of your organization. Over time, other departments within the organization can modify the settings according to their specific requirements.
Let’s now see how this works in action. Suppose you are an administrator for your organization and you’re part of multiple groups in your organization. Now, you want to make some changes to the Ticket Properties menu in Desk365.
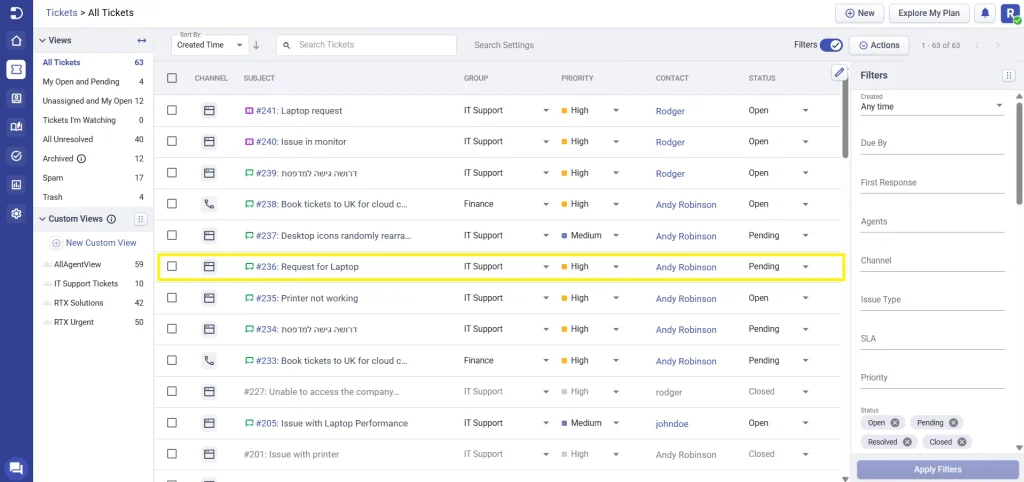
To make these changes, select a particular ticket in the ‘Tickets list’ page where you’re looking to edit the ‘Ticket Properties’ menu.
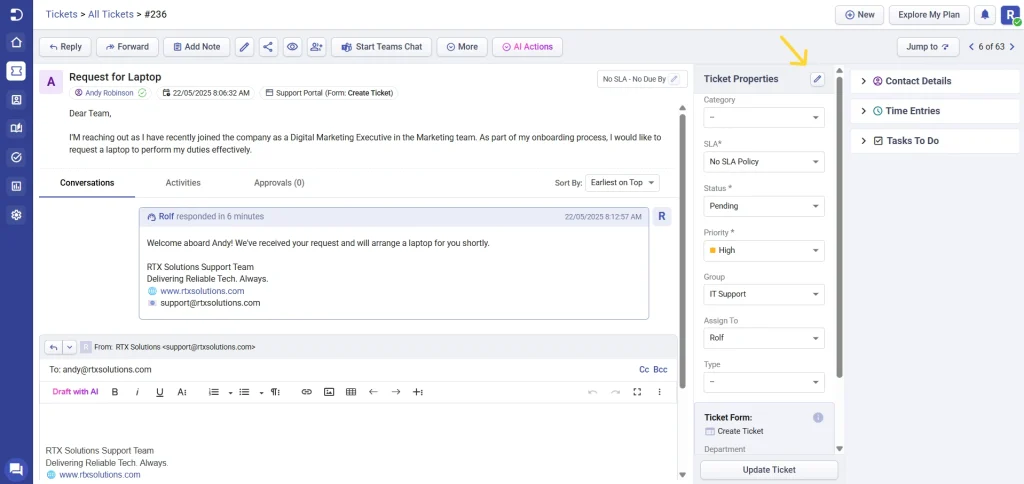
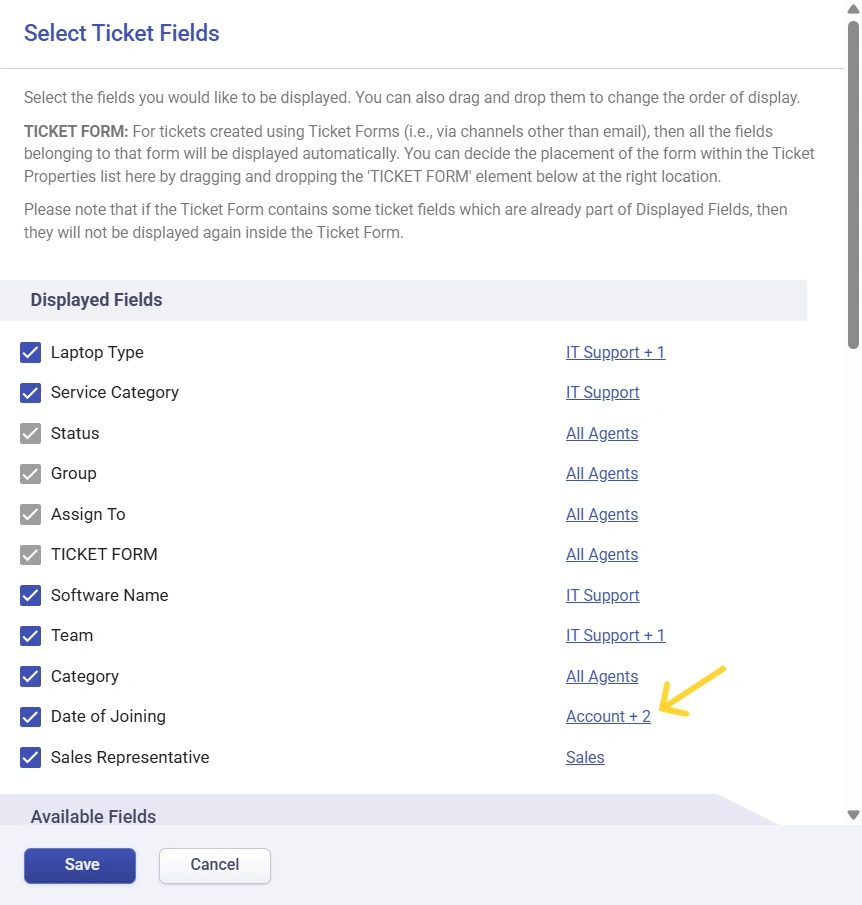
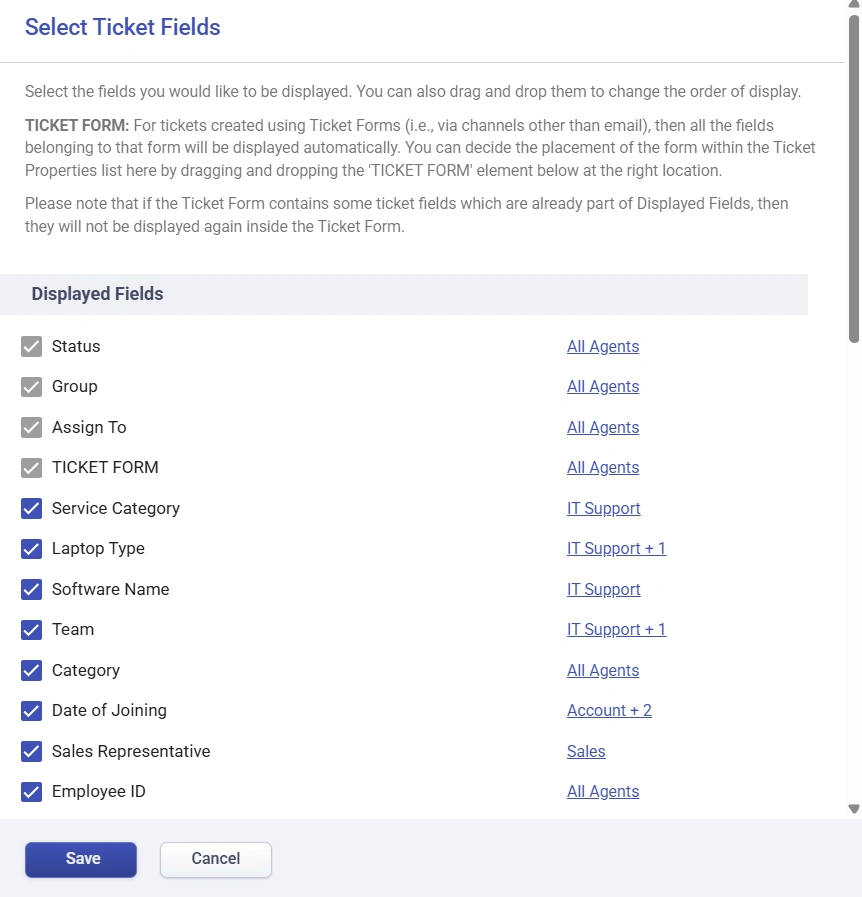
1. Navigate to the Ticket Details page and click on the ‘Edit’ button in the Ticket Properties menu. Within this menu, you will be able to view all of the ticket fields that have been created by different teams within the help desk.
2. For example, you might observe that certain groups have unnecessary fields while some groups are lacking essential fields that are useful to their particular team.
In such cases, you can choose the particular ticket field you wish to adjust the visibility settings for.
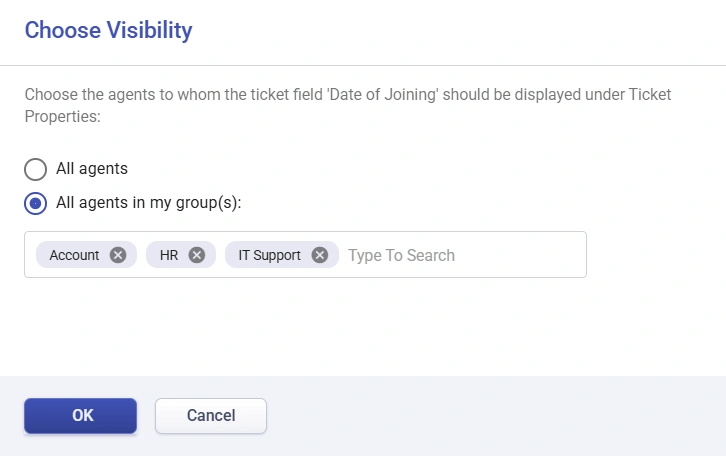
3. This action will prompt a menu with two options: ‘All Agents’ and ‘All Agents in the Group(s).’ But what do these options mean? Let’s take a closer look.
All Agents: If you choose the ‘All Agents’ option and click on the ‘Save’ button, this ticket field will be available for all agents in your helpdesk.
All Agents in the Group(s): If you choose the ‘All Agents in the Group(s)’ option, you can see all the groups which have access to this ticket field in the selected choices.
To remove the ‘Date of Joining’ field for the ‘IT Support’ and ‘Accounts’ groups, you can simply click on the ‘remove icon’ (X) beside their names and then click the ‘Save’ button. This will ensure that the field is not displayed for these groups if deemed unnecessary.
Similarly, you have the option to include a group if a particular ticket field would be beneficial for that team when editing tickets, but is currently unavailable.
Let’s say after quickly reviewing all the ticket fields in your helpdesk, you have made comparable modifications to the visibility of ticket fields that were created by different teams in your organization.
Imagine that your organization has been utilizing the helpdesk for a while, and numerous ticket fields have been established by various departments. Now, let’s consider a scenario where your IT support team is handling their IT-related tickets.
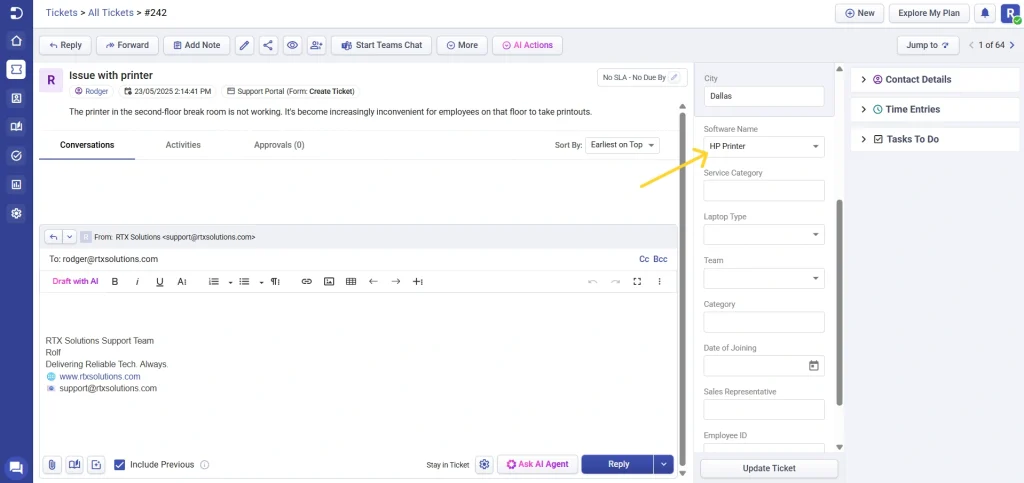
4. Suppose the ‘IT Support Team’ receives a ticket from an end-user reporting an issue with their printer.
As an ‘IT Manager’, you want to review the ticket properties menu to ensure that all the necessary IT-related ticket fields are accessible to IT agents, which will ultimately enhance productivity.
To ensure the ticket is routed to the appropriate ‘IT Support’ agent, certain information like ‘Software Name’ ticket field becomes important and you need to update that information in the ticket.
This field is intended for your team’s use in managing IT-related tickets that come in, and it contains valuable information for your team to be aware of, as you have specialized agents who can investigate, and address issues based on the software involved.
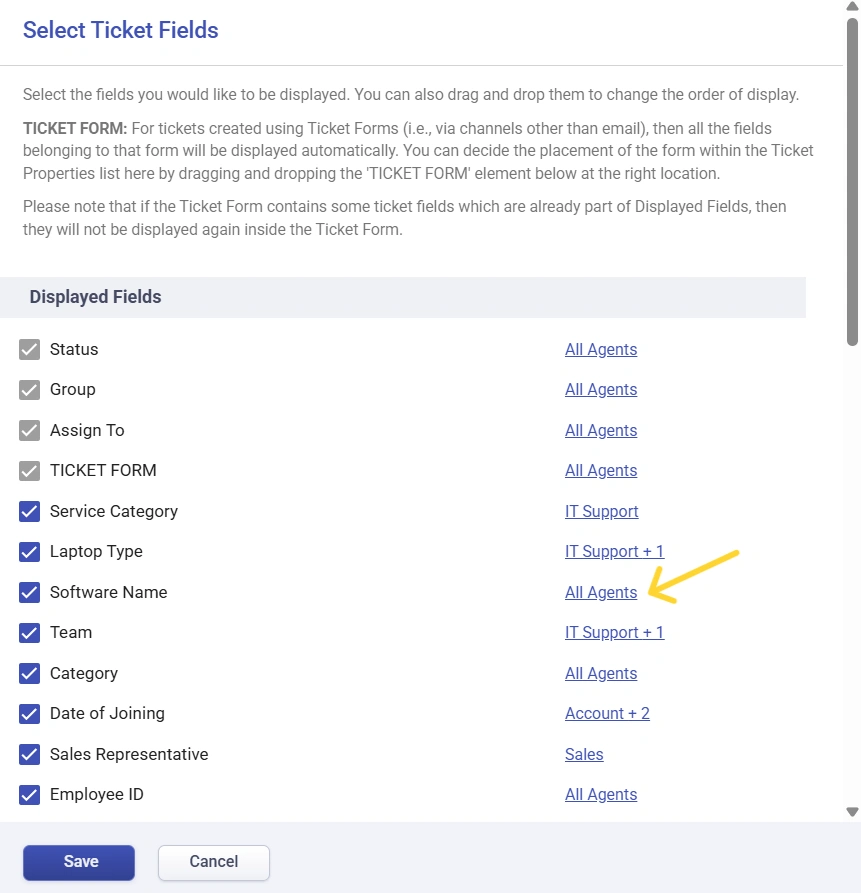
However, you notice that the ‘Software Name’ ticket field is currently accessible to all agents in the helpdesk.
To restrict access to this field and ensure it’s only visible to your ‘IT Support’ team, you can click on the ‘All Agents’ that opens the ‘Software Name’ ticket field menu.
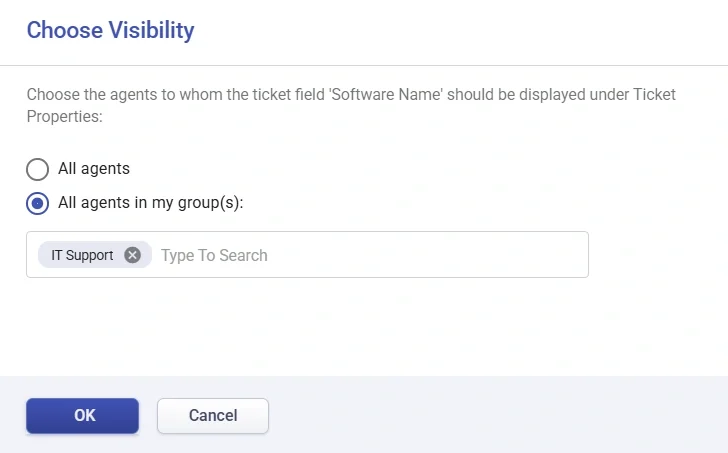
5. From here, you can adjust the visibility settings for this field by selecting the ‘All Agents in the group(s)’ option and choosing the ‘IT Support’ group from the available choices. Once you’ve made these changes, click on the ‘Save’ button.
In addition, you have the ability to rearrange the order of ticket fields by dragging and dropping them as needed.
6. To make it easier for your IT support team to update the ticket properties while working on the ticket, you may consider moving the ‘Software Name’ field higher up on the list as it is a critical field for your IT Support team, such that it appears at the top.
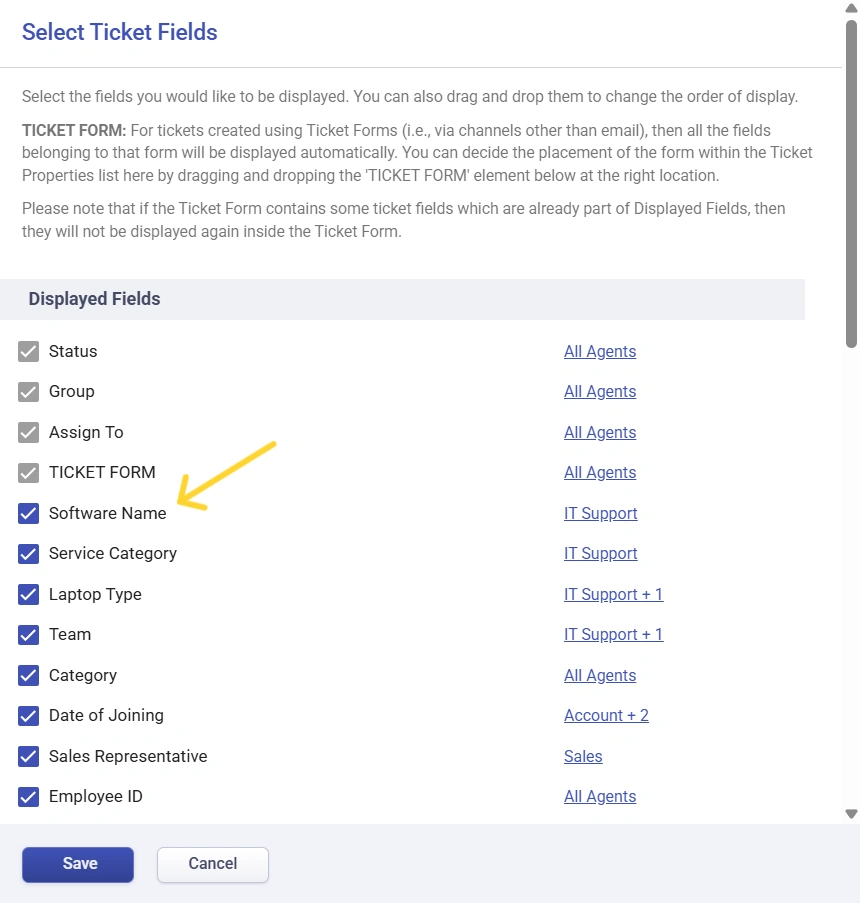
7. Finally, click on the ‘Save’ button to save these changes.
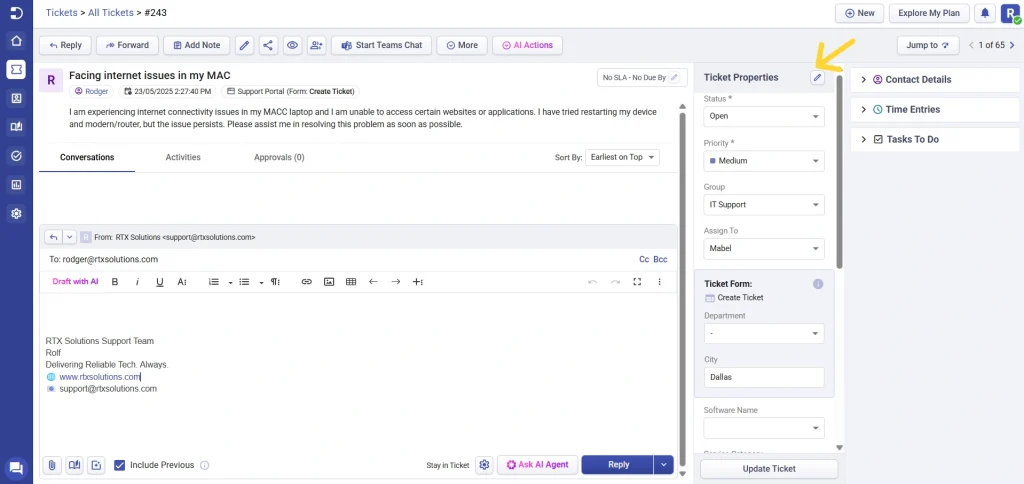
Next, let’s explore another scenario where your ‘IT Support Team’ receives a ticket from an end-user who has reported an issue with the internet in the office.
Furthermore, you observe from the ticket details that the end-user is using a MAC laptop.
In order to make sure that the ticket is directed to the right IT support agents and the issues are resolved promptly, it is crucial to include important information such as the ‘Laptop Type’ and ‘Service Category’ in the ticket. These details will provide valuable insights to the IT support team.
8. Click on the ‘Edit’ button in the Ticket Properties menu.
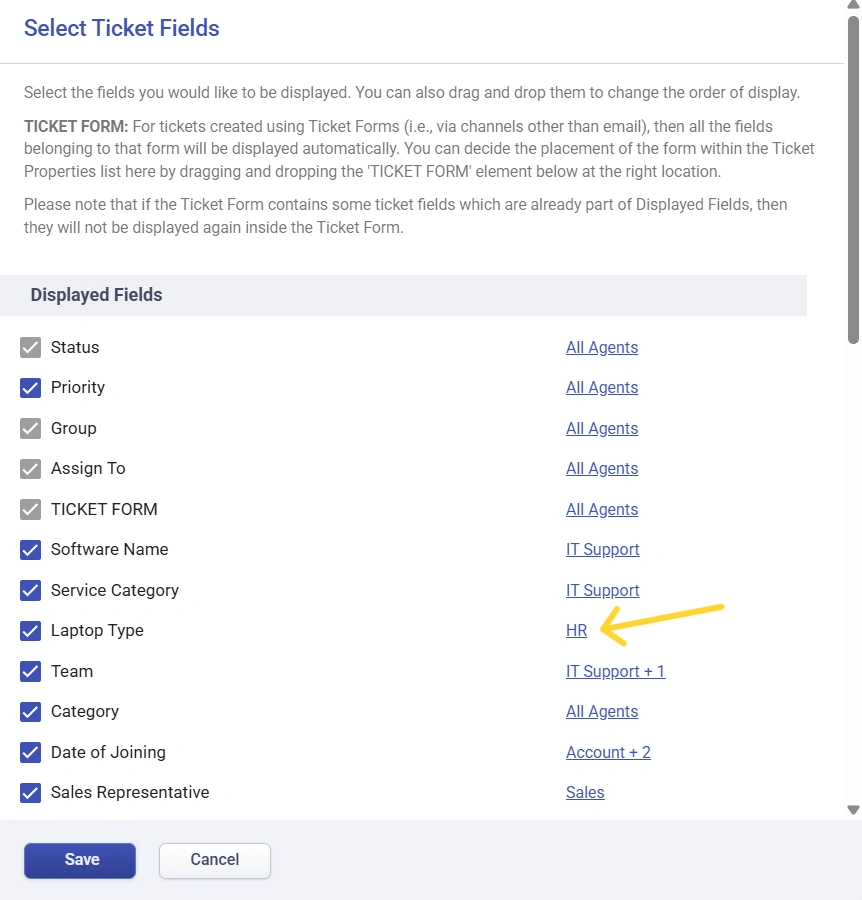
However, you may observe that only ‘HR Team’ has access to both ‘Laptop Type’ and ‘Service Category’ ticket fields within the helpdesk system.
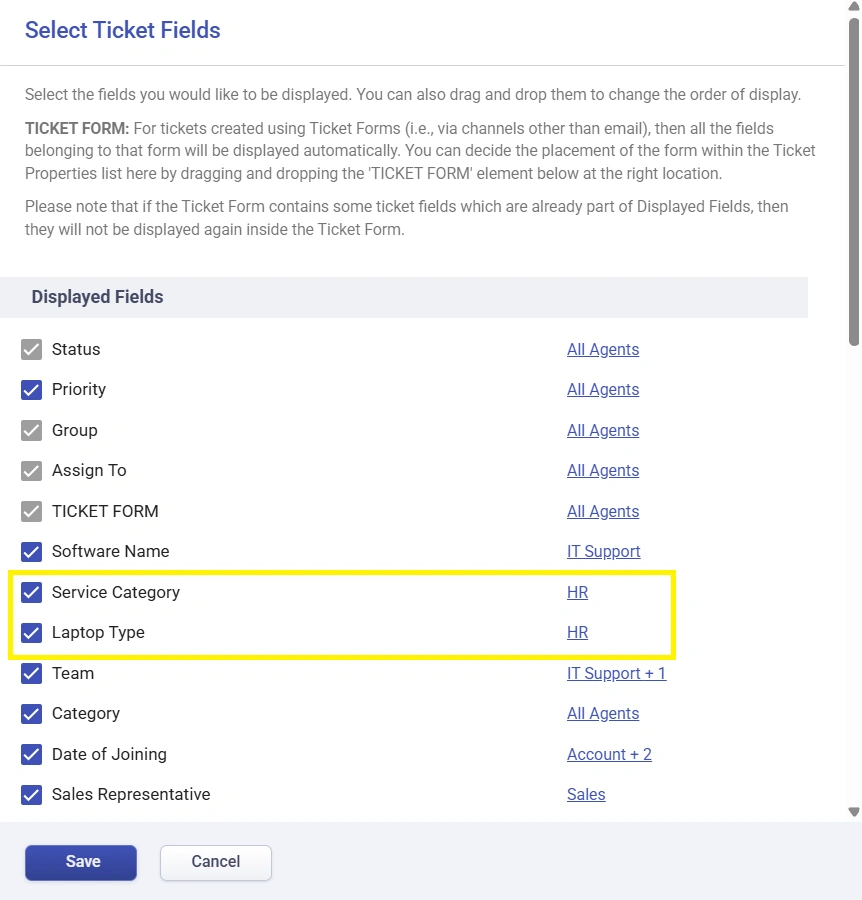
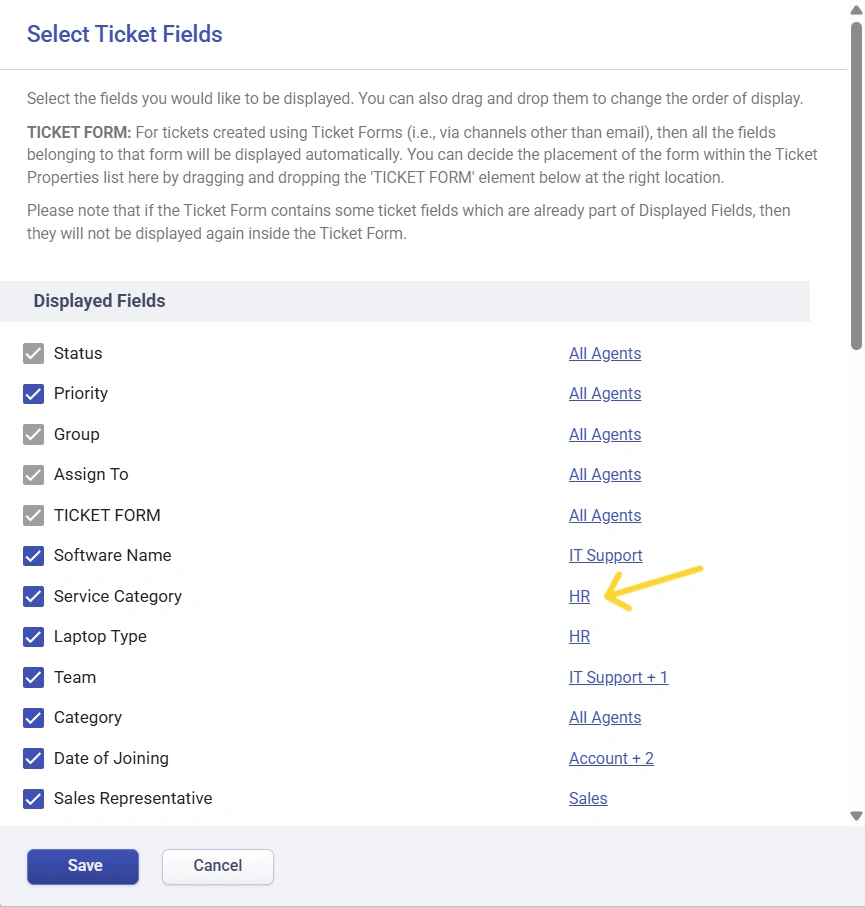
9. Since you know that these ticket fields are essential for your ‘IT Support Team’ to manage incoming service-related tickets, you can click on the ‘HR’ link to open the ‘Service Category’ ticket field menu.
10. Within this menu, you can choose the visibility settings for this ticket field. You can select the ‘All Agents in the group(s)’ option and choose the ‘IT Support’ group as the choice.
Furthermore, as you know that the IT team created this specific ticket field, and it is not applicable to the HR team, you might want to remove the HR team’s access to this field.
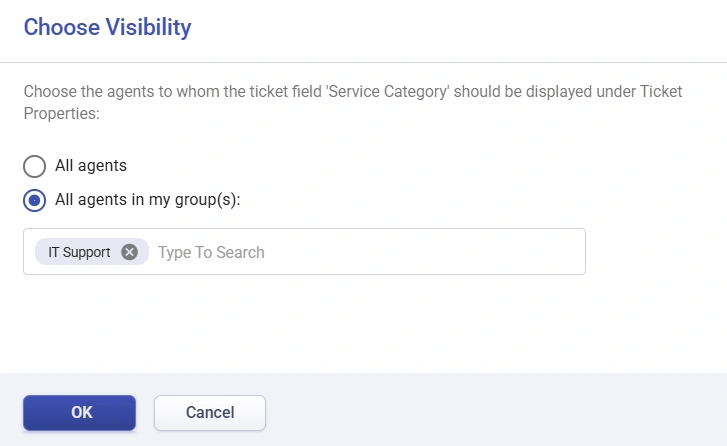
11. Finally, click on the ‘Save’ button to apply the changes. Now, the ‘Service Category’ ticket field will be available only for the ‘IT Support’ team.
12. Similarly, you can perform the same steps for the ‘Laptop Type’ field. To gain access to ‘Laptop Type’ ticket field, you can click on the ‘HR’ link in the ‘Laptop Type’ field.
This action will open the ‘Laptop Type’ ticket field menu, where you can choose the visibility settings for this field.
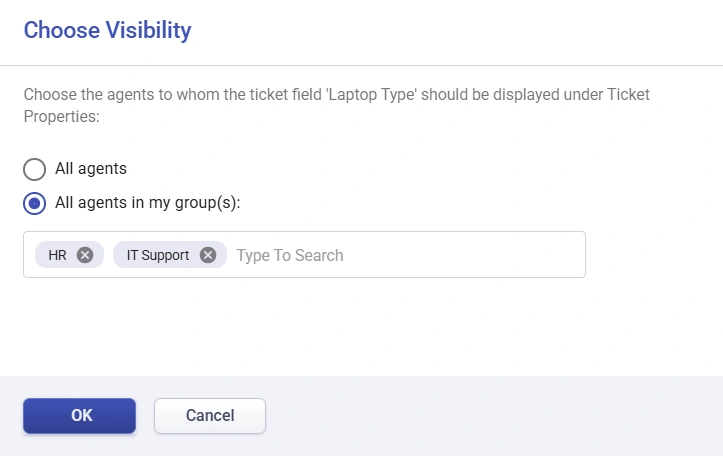
13. You can select the ‘All Agents in the group(s)’ option and choose both the ‘IT Support’ and ‘HR’ groups from the dropdown choices. Finally, click on the ‘Save’ button to apply the changes, and both ‘IT Support Team’ and ‘HR Team’ will now have access to the ‘Laptop Type’ ticket field.
The changes get reflected in the Ticket Properties menu as shown in the screenshot below.

Please note that when you click on the ‘Edit’ button in the Ticket Properties menu, there are fields namely ‘Status’, ‘Group’, ‘Assign To’ and ‘Ticket Form’ which are default fields that appears for ‘All Agents’ in the helpdesk for which visibility settings cannot be changed.
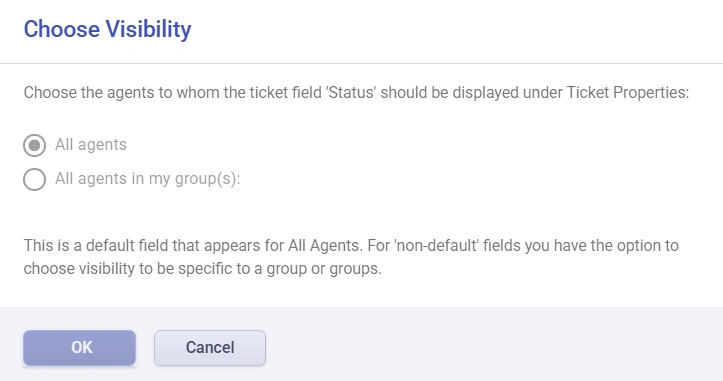
However, you can drag and drop the order in which you want them to appear while working on the ticket.
These are just some examples we covered. Similarly, this feature will be useful for different teams in your organization.
For example, if an HR manager notices that they have access to fields that are typically used by the IT department, they can uncheck those fields from the helpdesk so that they don’t appear in the HR team’s Ticket Properties menu.
Alternatively, if they notice a field that is only accessible to certain groups, such as the ‘Employee Number’ field, they can add the HR group to the selected group choices so that they can also access that field when editing tickets in Desk365.
Control access to editing Ticket Properties panel
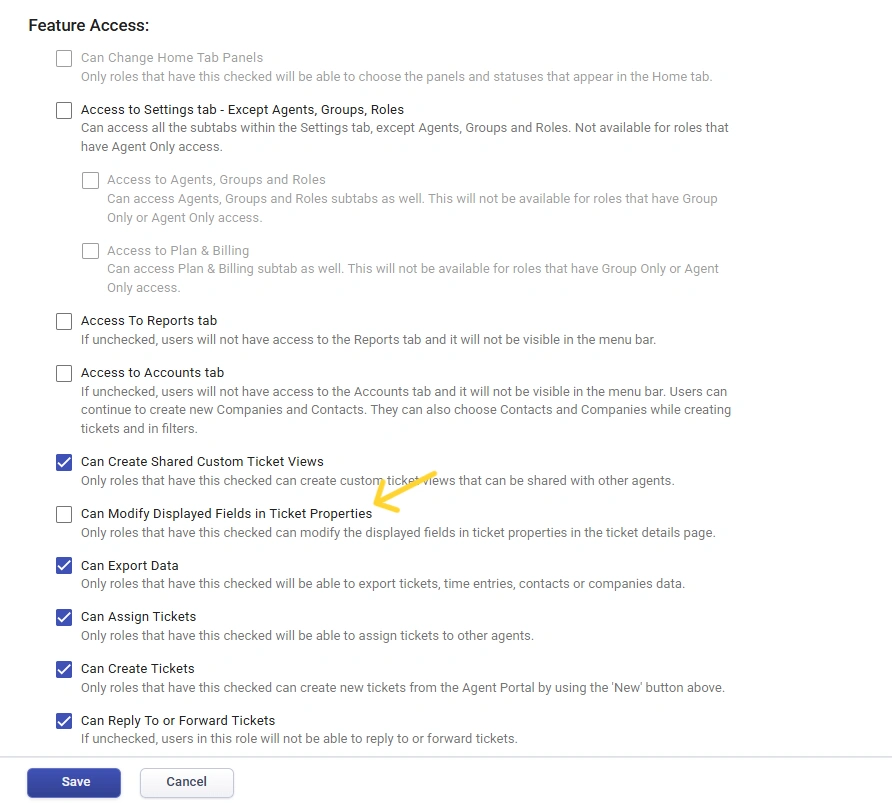
When you’re creating a custom role in your helpdesk, you can utilize a feature access named ‘Can Edit Ticket Properties’. If the feature has been enabled for a specific custom role, then the users assigned to that role will have the ability to edit the ticket properties field on the ticket details page.
Imagine that you have a new team member who has recently joined your ‘IT Support’ team. As their manager, you want to avoid granting them global access right away. Instead, you plan to restrict their access to specific groups and only provide global access after they have completed the initial training period and become more familiar with the support process.
To achieve this, you can create a Custom Role for the ‘IT Analyst’, providing them with Group-Only access.
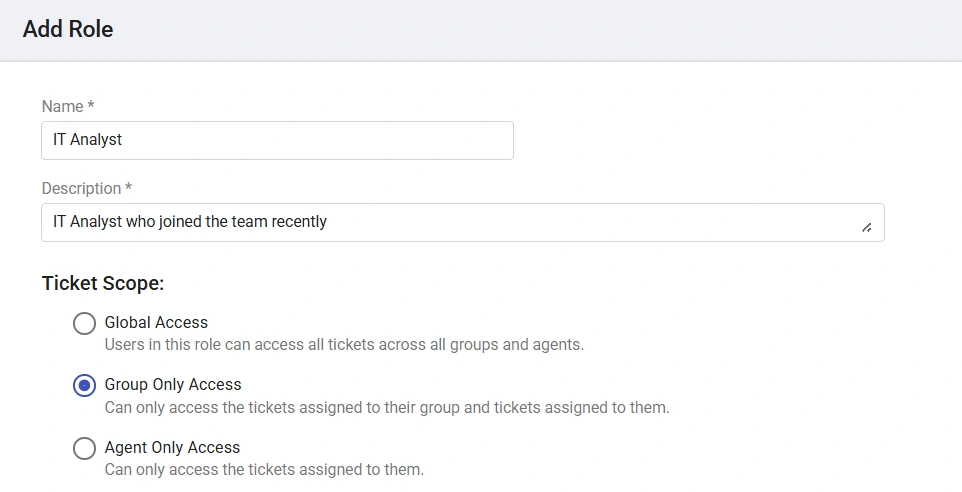
When creating a Custom Role in Desk365 with Group-Only access as the ticket scope, there are two options available to you regarding the ‘Ticket Properties’ configurations.
1. You can choose to provide the user with the ability to edit the Ticket Properties menu.
2. Alternatively, you can uncheck the option for the user to edit the Ticket Properties menu.
Group-Only access ensures that any edits they make to a ticket field will only be available to the group to which they belong.
Users have the ability to add any ticket field from the ‘Available Fields’ option, which will automatically be included exclusively for the team where they belong to.
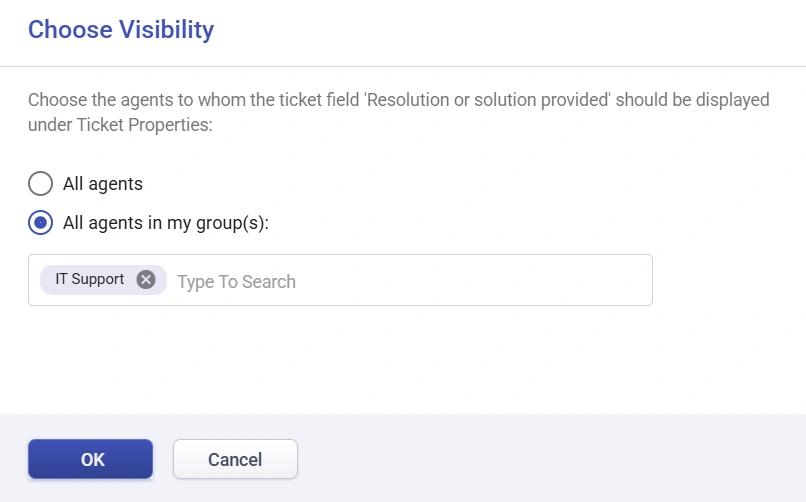
In this case, the field ‘Resolution or solution provided’ selected by the IT Analyst gets added to the ‘IT Support’ Team.
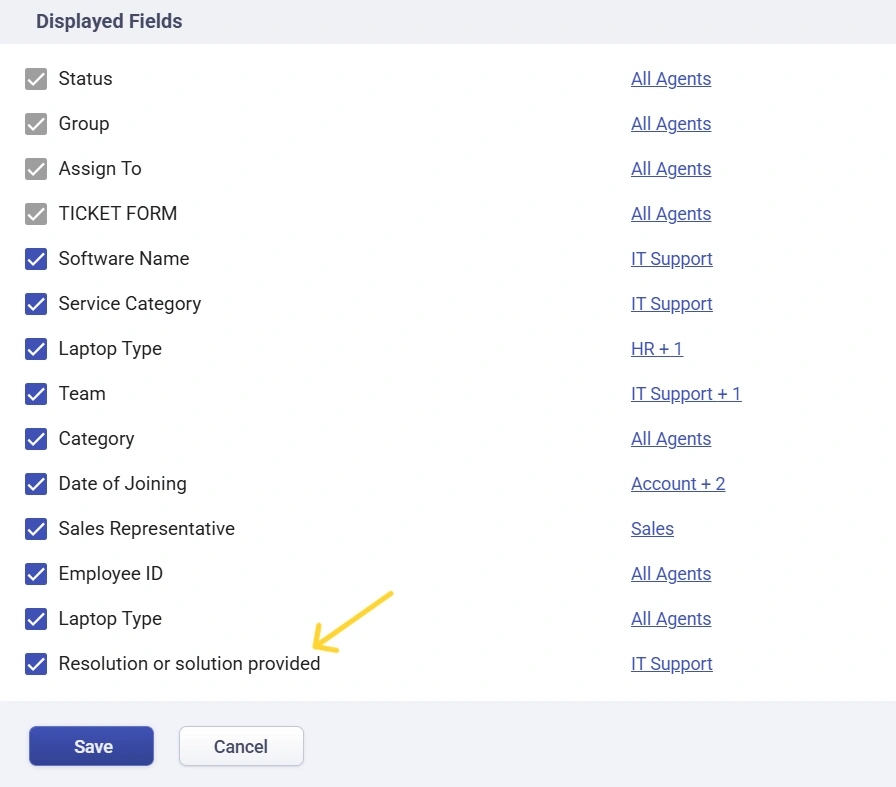
Additionally, the ‘All Agents’ options will be inactive, so they won’t accidentally provide access to the ticket field for all the agents in the organization. They also don’t have the option to change the order of ticket fields in the helpdesk.
In case, if you have unchecked the option for the user to edit the ‘Ticket Properties’ menu, then in that case, ‘The Edit’ button won’t be visible for the IT Analyst in the ‘Ticket Properties’ menu.
Tickets created from custom forms
For tickets created using Ticket Forms (i.e., via channels other than email or API), then all the fields belonging to that form will be displayed automatically. You can decide the placement of the form within the Ticket Properties list here by dragging and dropping the ‘Ticket Form’ element at the right location.
Note: If the Ticket Form contains some ticket fields which are already part of Displayed Fields, then they will not be displayed again inside the Ticket Form.
This is handy for the support agents to update ticket properties by understanding the context of a ticket better.
Let me explain this further with an example. Let’s create two custom forms: ‘Marketing Form’ and ‘New Employee Form’.
Go to Settings > Admin > Ticket Forms. Click on the ‘Add Ticket Form’ button at the top.
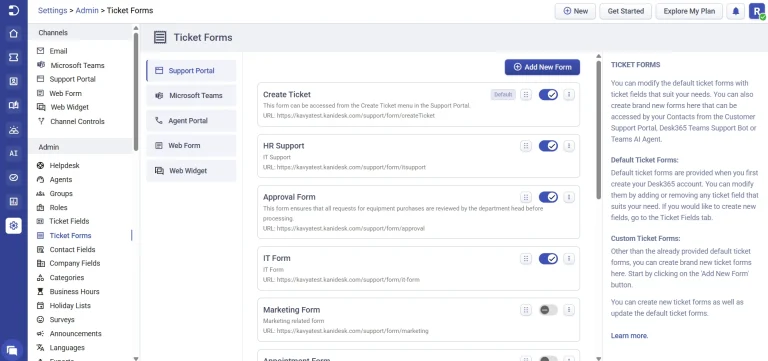
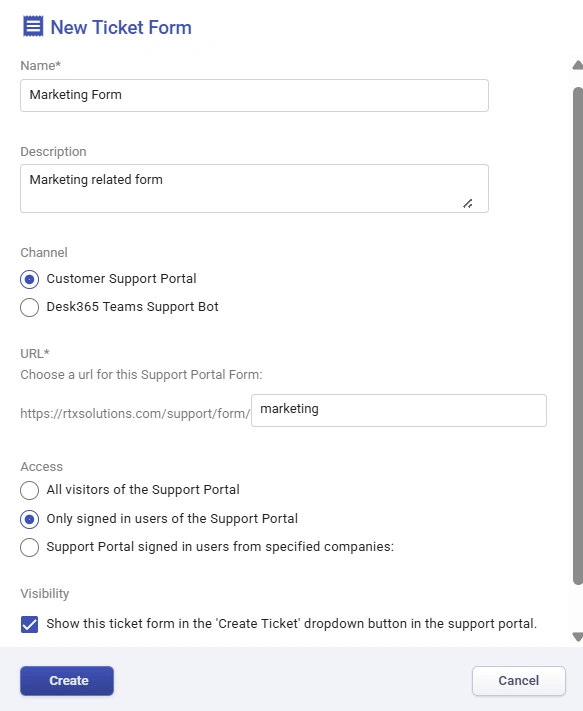
Choose the Channel as ‘Support Portal’ and click on the ‘Add New Form’ button to create the ‘Marketing Form’.
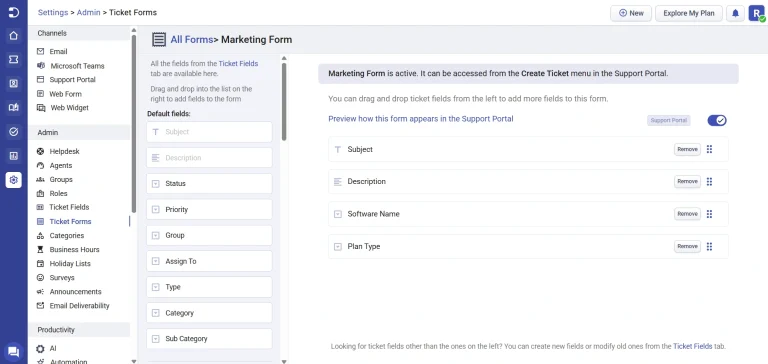
‘Marketing Form’ is now successfully created. Choose the fields that you want to have in the ‘Marketing Form’ by dragging ticket fields from the left and dropping them to this form on the right.
Similarly, we’re creating one more custom form called ‘Onboarding Form’ with unique fields suiting the form.
This article takes you through how to create custom forms in Desk365 to support different request types.
Let’s say your end-users/contacts/customers are creating a ticket from the Support Portal. Click on the ‘Create Ticket’ button at the top in the Support Portal.
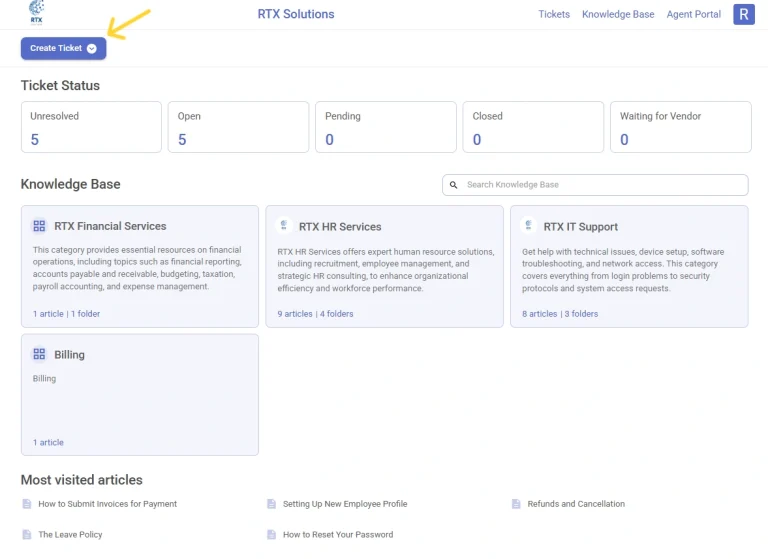
You’ll notice three forms appearing in the Support Portal.
‘Create Ticket’ which is the default form in the Support Portal and the ‘Marketing Form’ and ‘New Employee Form’ which are the custom forms that we created now.
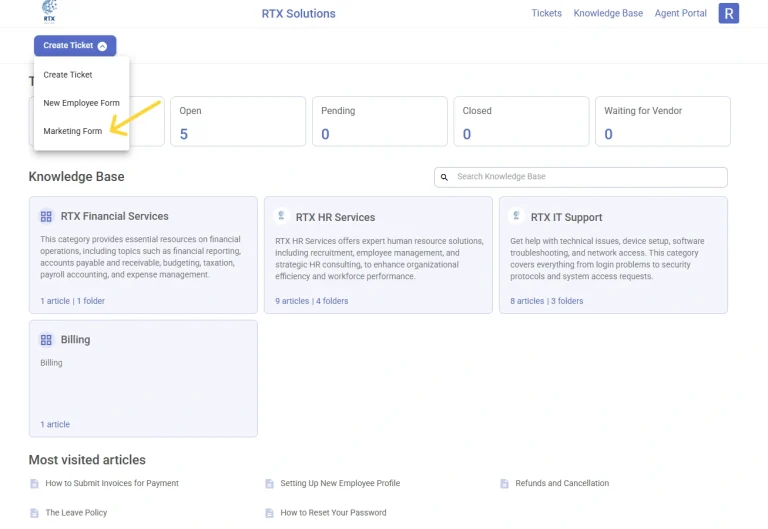
Choose the ‘Marketing Form’ option. The ‘Marketing Form’ appears now. Fill in the required information in the form and click on the ‘Create Ticket’ button. The ticket is now successfully created.

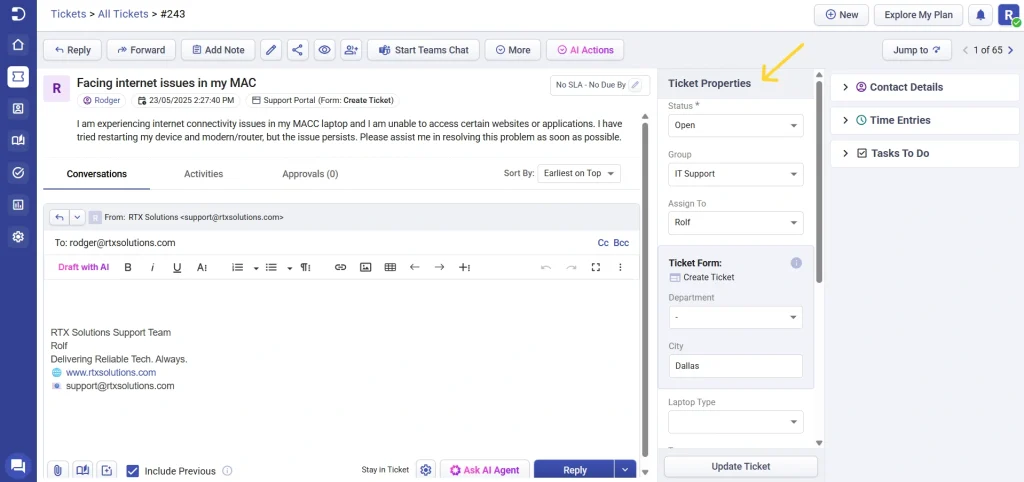
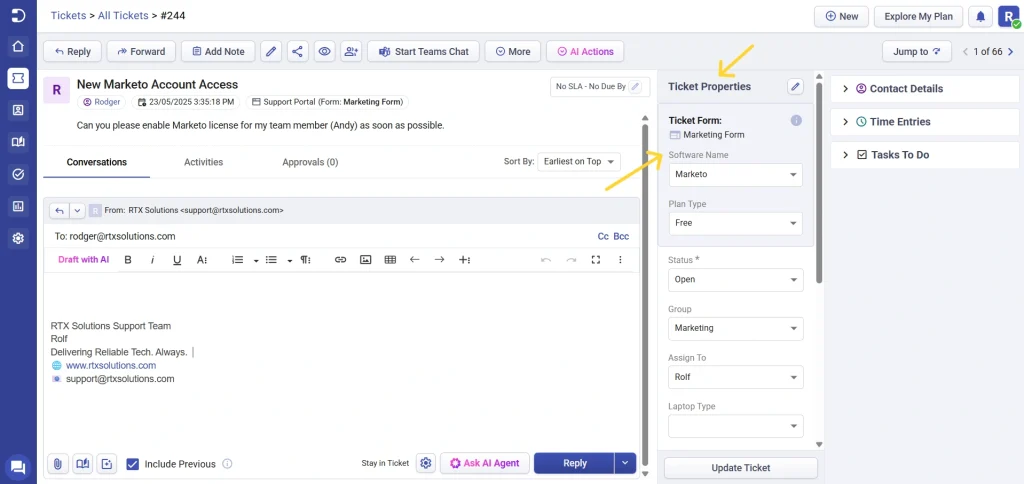
Let’s say as an agent, you noticed the ticket coming to your helpdesk and want to update some fields for the ticket in the Agent Portal.
Select the ticket for which you want to update the ‘Ticket Properties’.
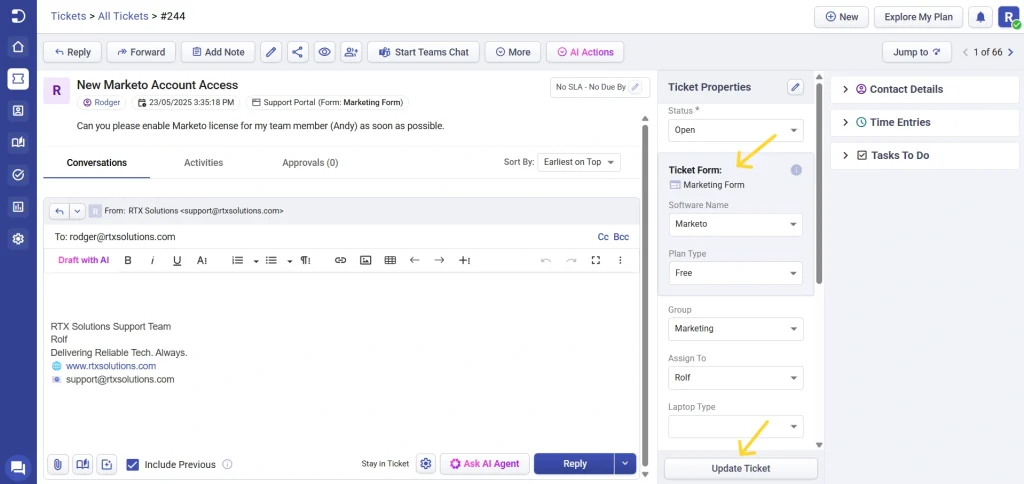
Now for this ticket, you will notice that ‘Ticket Form’ automatically displays as ‘Marketing Form’ as the ticket came from the marketing form.
All the fields belonging to this form will be displayed automatically. Please note that if the form contains some ticket fields which are already part of displayed fields, then they will not be displayed again inside the ticket form.
This helps the support agents easily update any fields based on the context of the ticket.
You can also drag and drop the fields to change the order of display.
Similarly, you can update ticket properties in Microsoft Teams Agent Bot. Let’s say you want to update the ticket properties of an unassigned ticket.
Go to Desk365 Teams Agent Bot. Click on the ‘Unassigned Tickets’ button in the welcome message.
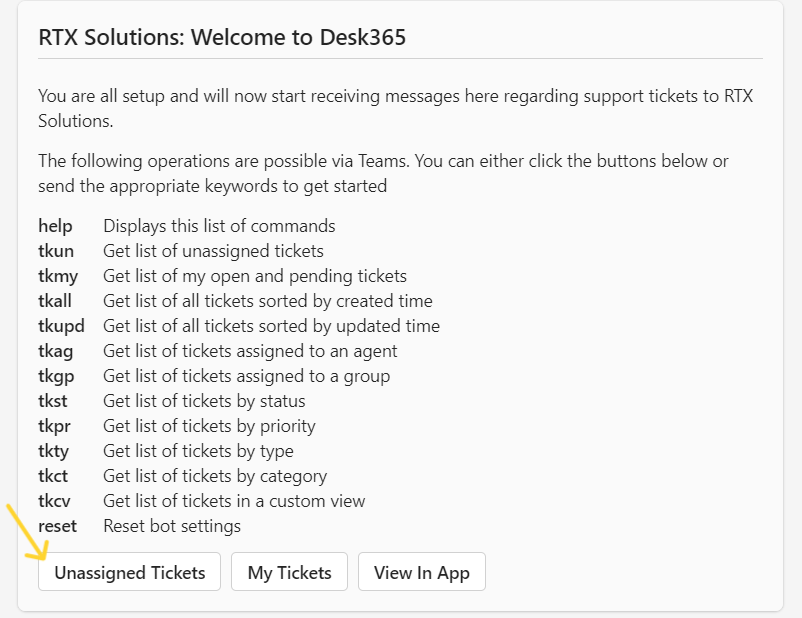
The list of unassigned tickets appear now. Click on one of the tickets and the ‘Ticket Details’ card appears. Click on the ‘Update Properties’ button here.
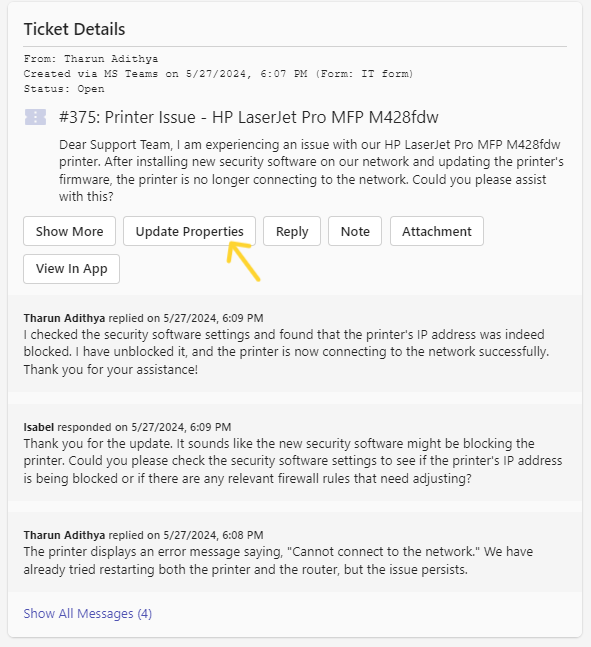
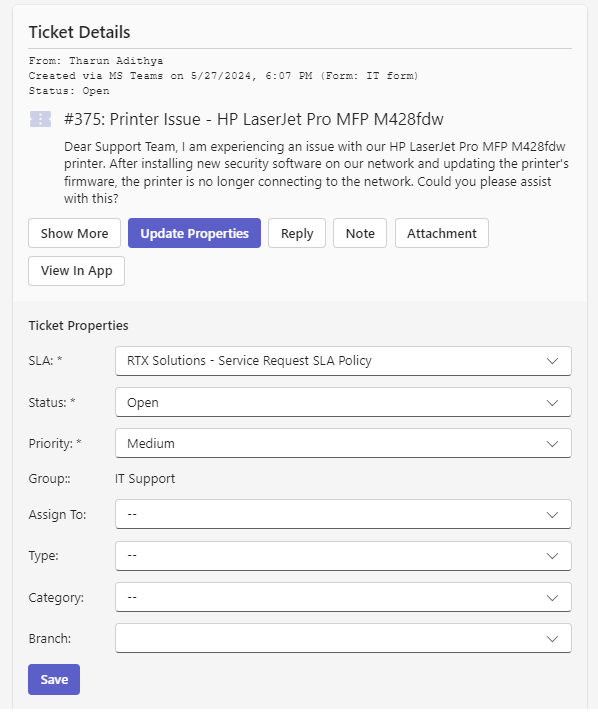
The ‘Update Properties’ dialog box opens in the Desk365 Teams Agent Bot, and support agents can update the ticket properties they wish to update.
This feature only helps improve productivity but also makes the helpdesk solution more efficient and effective for different groups in the organization.
By giving admins, managers, and agents control over ticket field visibility, Desk365 has made it much easier for organizations to customize their helpdesk solution to fit their unique needs.


