Custom Views help you to organize tickets better by grouping them into lists based on a defined set of criteria. For example, you can create a view for open tickets that are assigned to you, a view for tickets with specific SLAs applied to it, a view for tickets coming from a particular company, and more.
Using custom views can help your support team determine which tickets need immediate attention, help them stay focused, and plan accordingly on responding to the important customer queries first.
Desk365 provides you with these default ticket views: All Tickets, My Open and Pending Tickets, Unassigned and My Open Tickets, Unresolved Tickets, Spam, and Trash.
In addition to this, you can create your own custom view according to your needs, which we will discuss in detail below.
Creating a custom view
The Tickets tab lets you filter out and view a list of tickets that you want to get started with. You can filter tickets by created time, SLA, priority, status, groups, agents, channels, and more.
You can create filtered ticket views that suit your requirements, save them as ‘Custom Views’ and they’re available for you in the left side ticket navigation bar.
You can also get analytics and metrics based on custom views.
These are the steps you need to follow to create a custom view in Desk365:
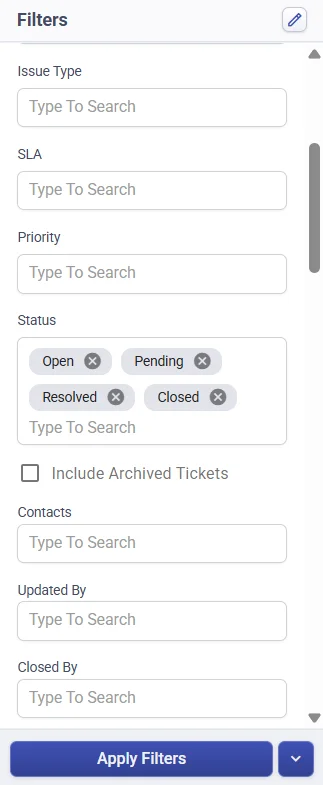
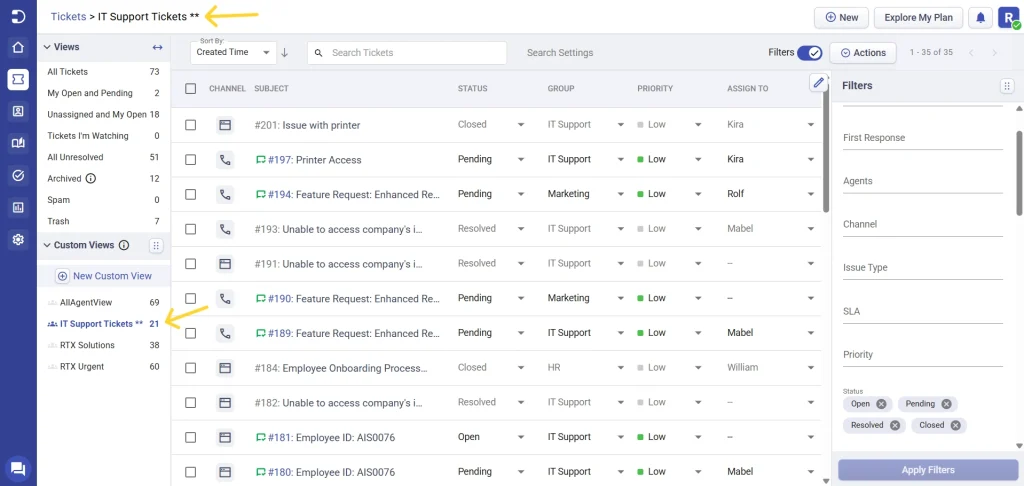
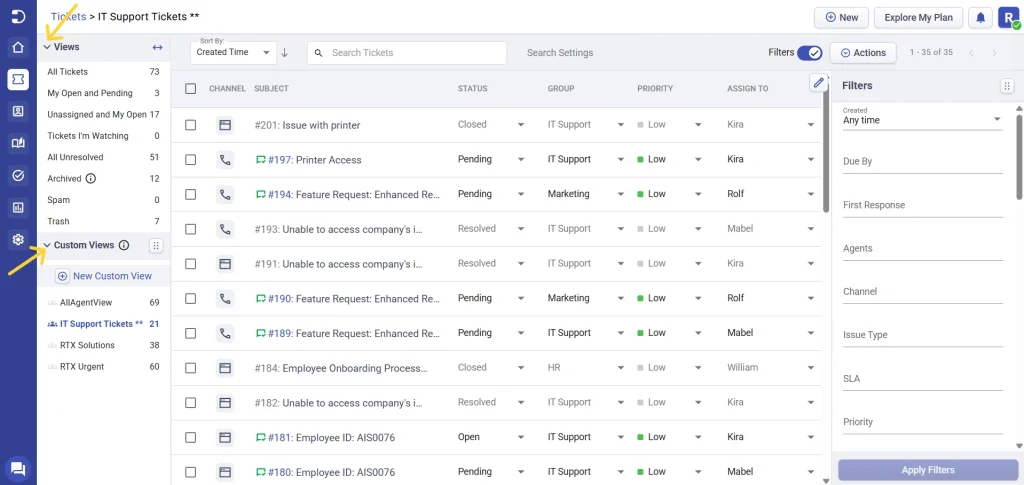
1. Select and apply filters:Start by choosing the filters you want for your ticket list—for example, tickets assigned to all agents with status Open, Pending, Resolved, or Closed. Once selected, click the ‘Apply Filters’ button to see only those tickets.
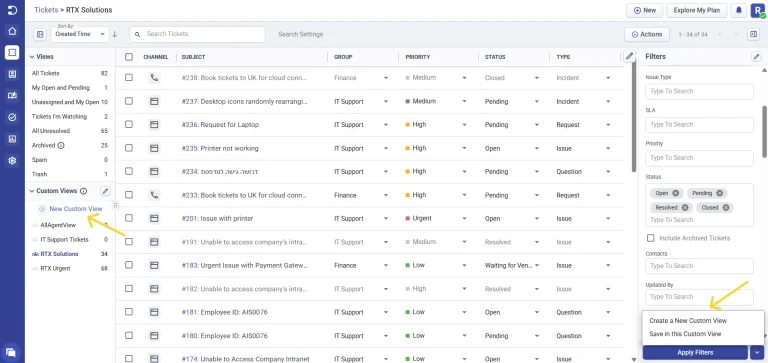
2. Save as a custom view: You can save this filtered list in two ways:
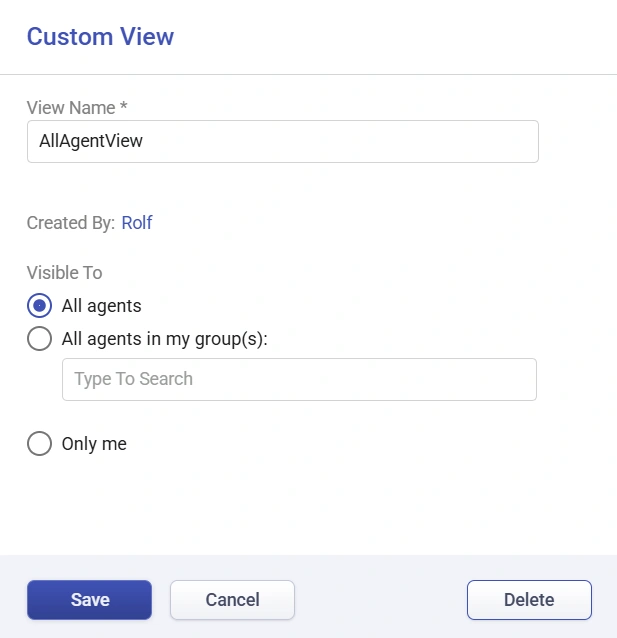
Click the “New Custom View” button on the left panel, give it a name (e.g., AllAgentView), and it will appear in your ticket navigation bar.
Or, use the drop-down icon next to the Apply Filters button to directly create and save the view from the filter panel itself.
For every custom view you create, Desk365 also shows the ticket count next to it, so you can easily track and analyze your tickets.
Custom view visibility settings
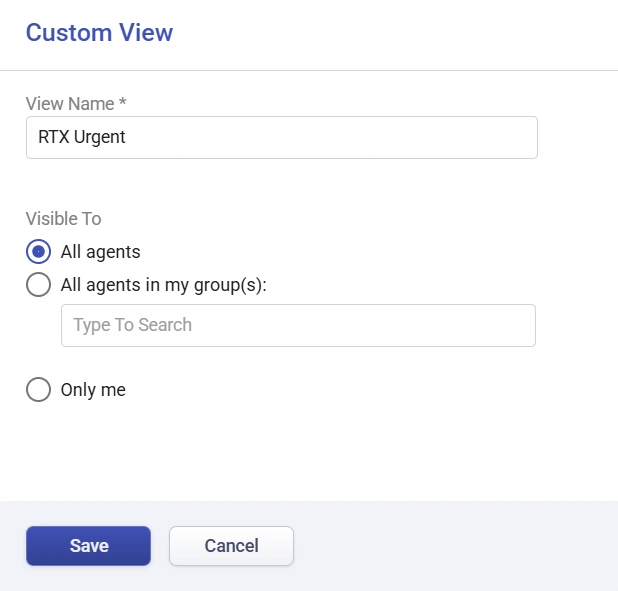
When you create a custom view, you have three choices that are available for you. You have the option to:
1. Share the custom view with all your agents.
2. Share the custom view with agents belonging to specific group(s).
3. Create a custom view just for you.
By default, admins have the choice to do all these functions and they can also view the custom view created by other group(s) or agents even when they are not part of that group(s).
You will also notice the icon differentiation for each custom view. A single person icon represents the custom view ‘Visible only to me’ whereas a two-person icon means custom view that is ‘Shared with all agents in a group(s)’. The three-person icon represents a custom view that is ‘Shared with all the agents’.
Reorder custom views
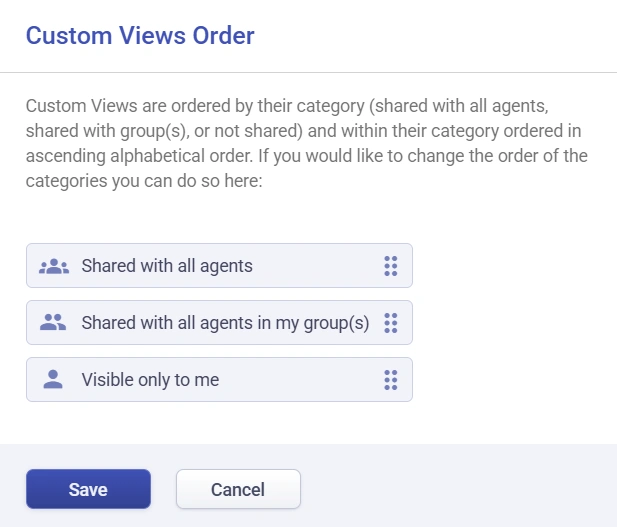
Custom views are ordered by their category (shared to all, shared to a group, or individual view) and within their category ordered in ascending alphabetical order. You can drag and drop the custom views in the order of your choice that you want to view.
Delete custom views
You can delete a custom ticket view that you think will no longer be useful for your support team or agents.
To delete it, click on the ‘Edit Custom View’ button that is available next to the custom view that you’ve created.
Now, the custom view pops-up where you can see the ‘Delete’ option.
Caching current ticket view
Desk365 now saves your last visited ticket view. This makes it super easy to get back to the exact list of tickets you’ve been viewing. For instance, if you are viewing a custom ticket view or even a list based on a specific set of filters, clicking on the Tickets tab (from any tab) will take you back to the same list of tickets.
Let’s take an example to see how this feature can be useful.
Suppose, you’re working on IT Support tickets.
After some point of time, you’re switching tabs to perform other functions in your helpdesk.
When you go back to the Tickets tab to work on the remaining tickets, the system will then remember your last seen ticket view and will take you back to the previously viewed tickets, thereby making the navigation easier for you.
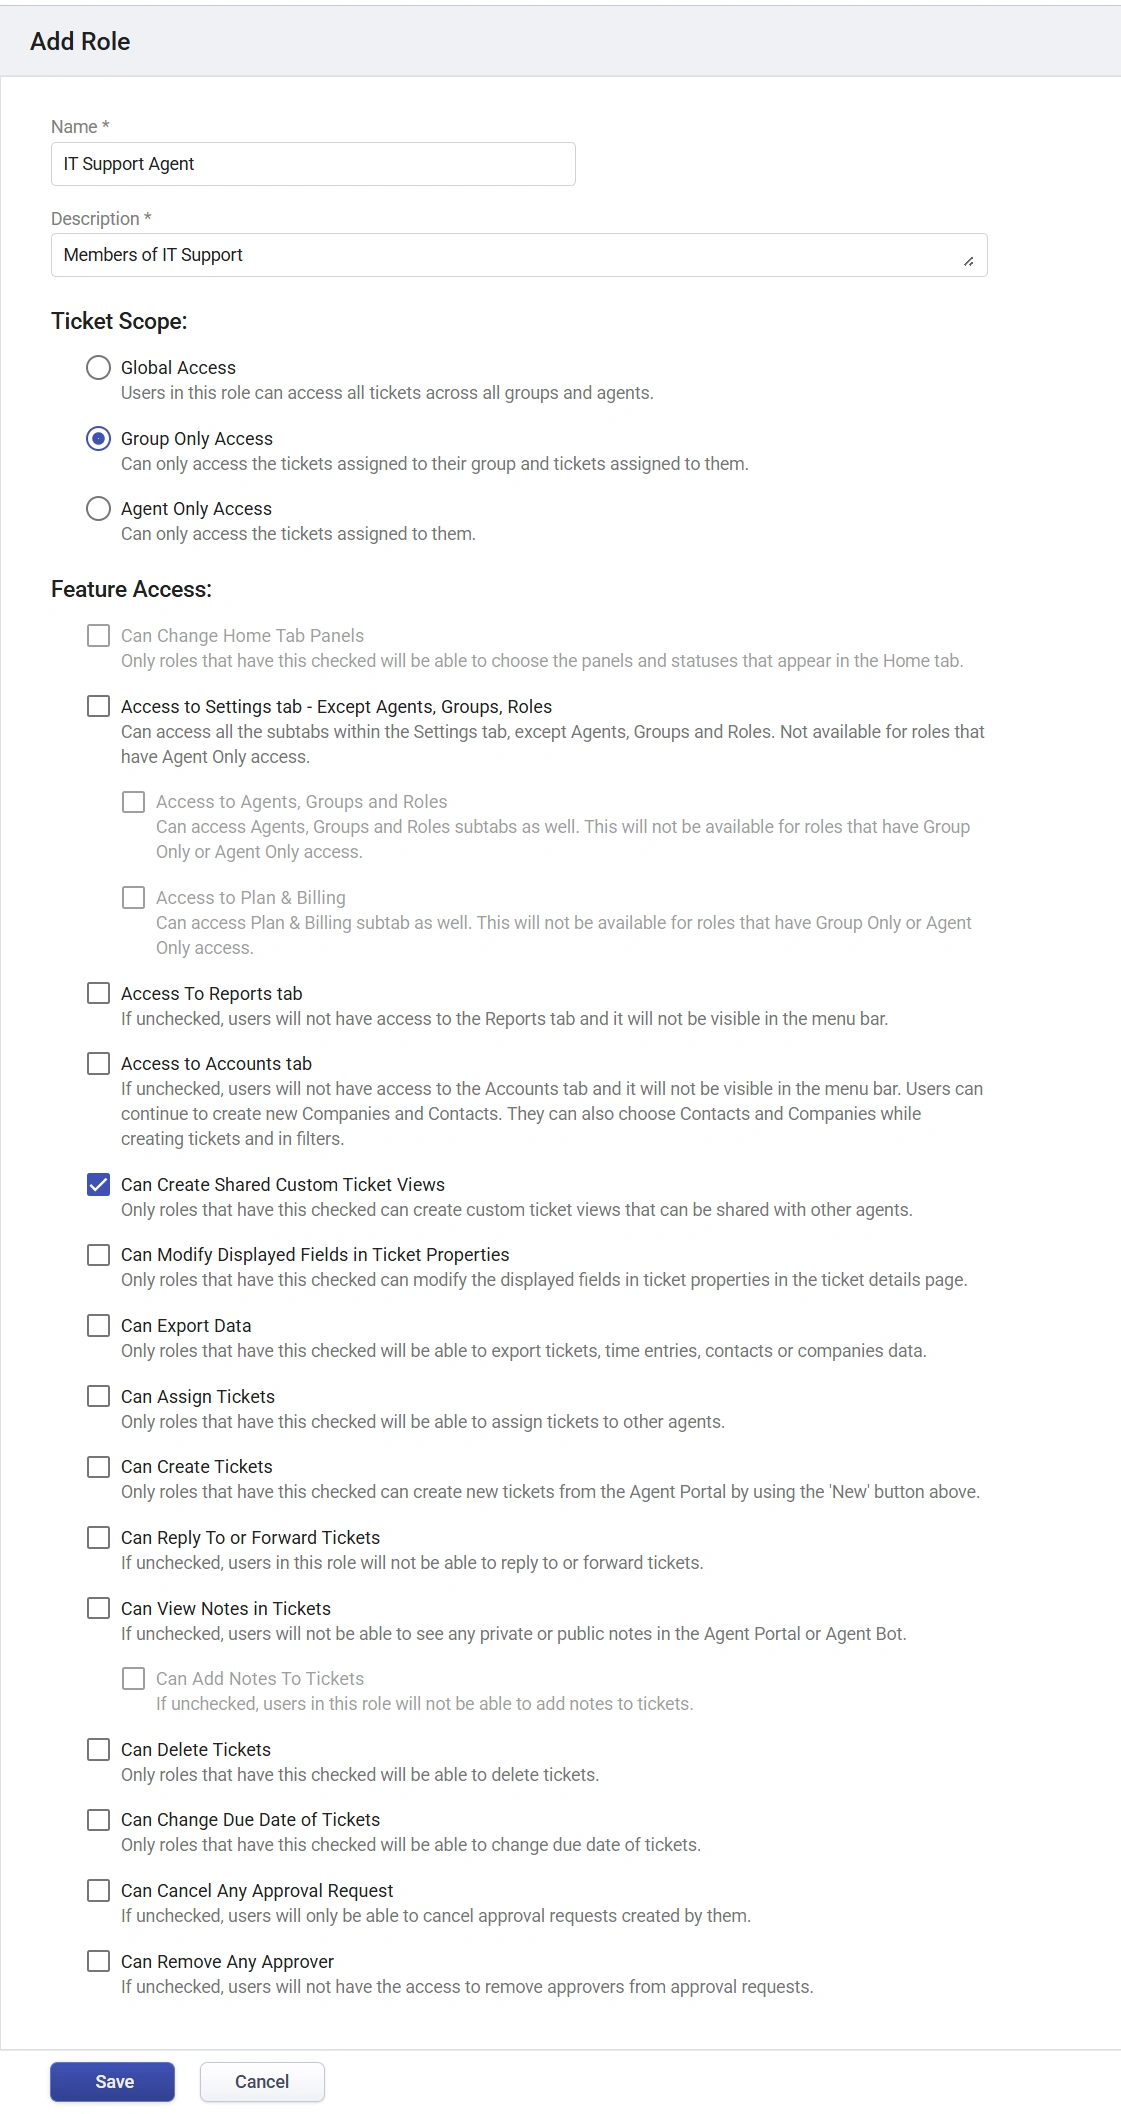
Custom roles
You can also create a new custom role and provide your support team members a group only access and also enable them the option to create shared custom ticket views.
Minimize & drag functionality in ticket views
Now, you can drag the ticket view to left or right however you wish to do so. You can also click on the dropdown button to minimize a view if you want to hide the ticket view or custom view.
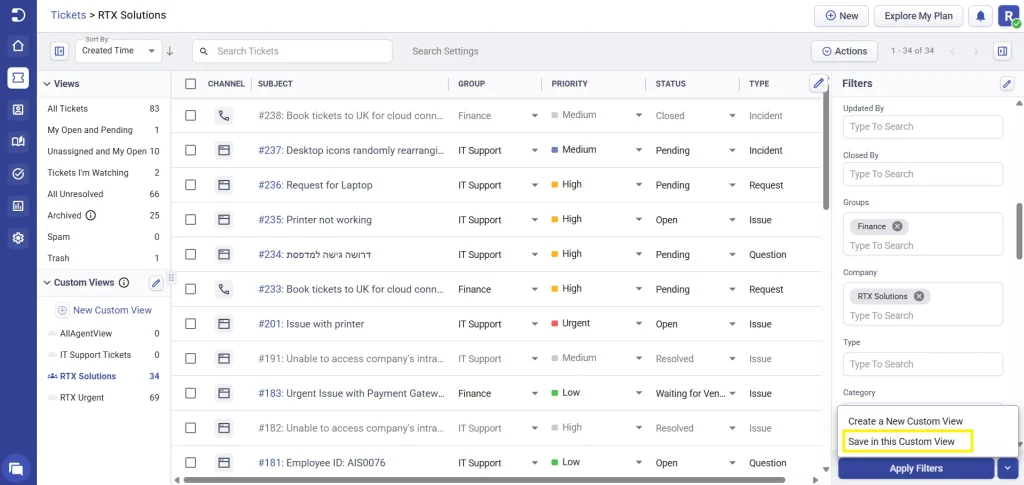
Updating an existing custom view
If you’re already inside a custom view and decide to change the filters, you don’t always need to create a new one. After applying the updated filters, you’ll see two options: Create a New Custom View and Save in this Custom View. Choosing the save option updates your current view with the latest filters applied.
This way, you can choose whether to expand your list of views or simply refine an existing one, keeping your workspace neat and uncluttered.
This way, you can choose whether to expand your list of views or simply refine an existing one, keeping your workspace neat and uncluttered.