


The Reply window in Desk365 is quite interesting and has a lot of features embedded in it.
In this article, you will get to know about Desk365’s powerful text editor, Reply button customizations, Right-to-left language support (RTL), and Canned responses.
Get to know about Desk365's powerful text editor
The text editor in Desk365 has powerful capabilities that makes it easy to use and customize, such as inline editing, adding tables, inserting links, and more. Let’s dive into the details below.
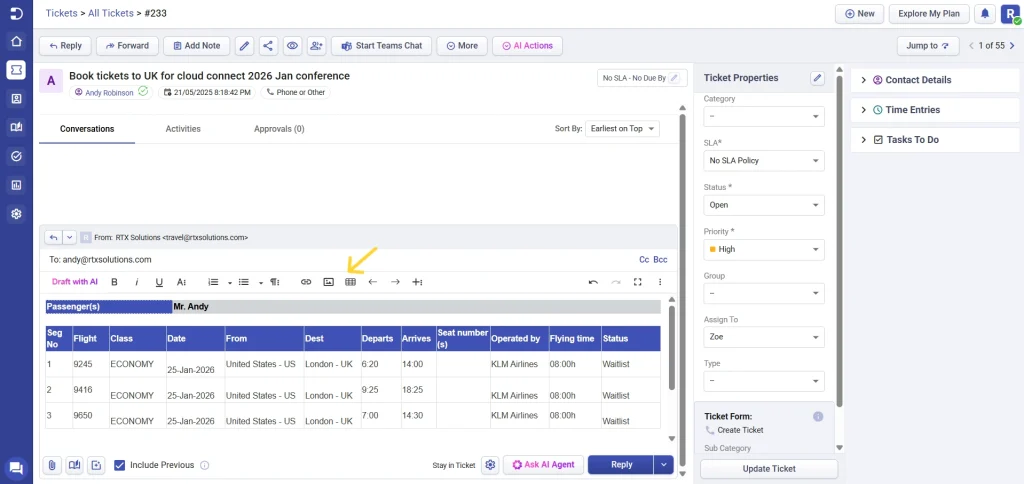
Adding tables
Create a table effortlessly by clicking on the ‘Insert Table’ icon. Choose the desired number of rows and columns for your table.
If you already have a table, simply copy and paste it into the editor and make any necessary adjustments.
Font formatting options
You have the flexibility to select your preferred font style. Likewise, you can adjust the text size as needed.
When it comes to critical information, you can amplify its importance by increasing the font size and applying a distinctive color to make it stand out.
Additionally, you have the option to customize the background color and choose different text colors. You can align text to the left, center, or right, and you can also indent or outdent text as necessary.
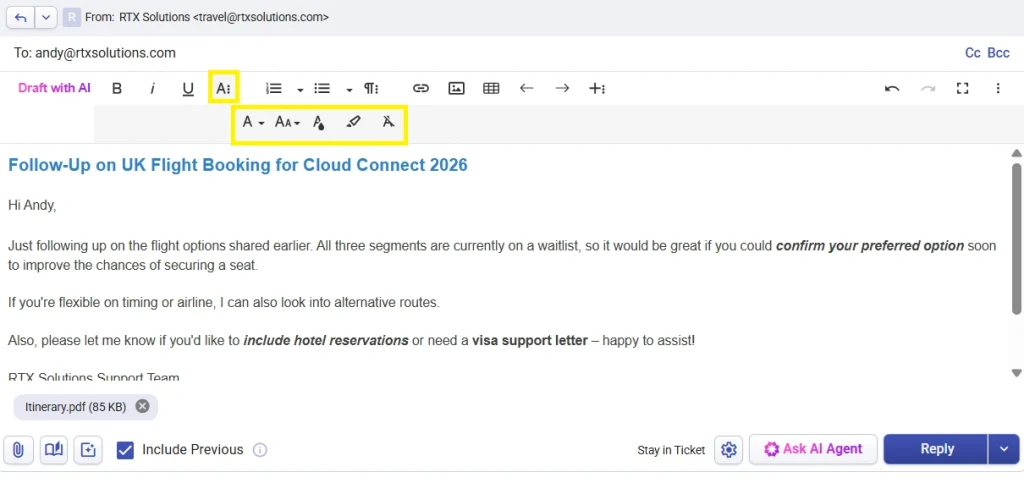
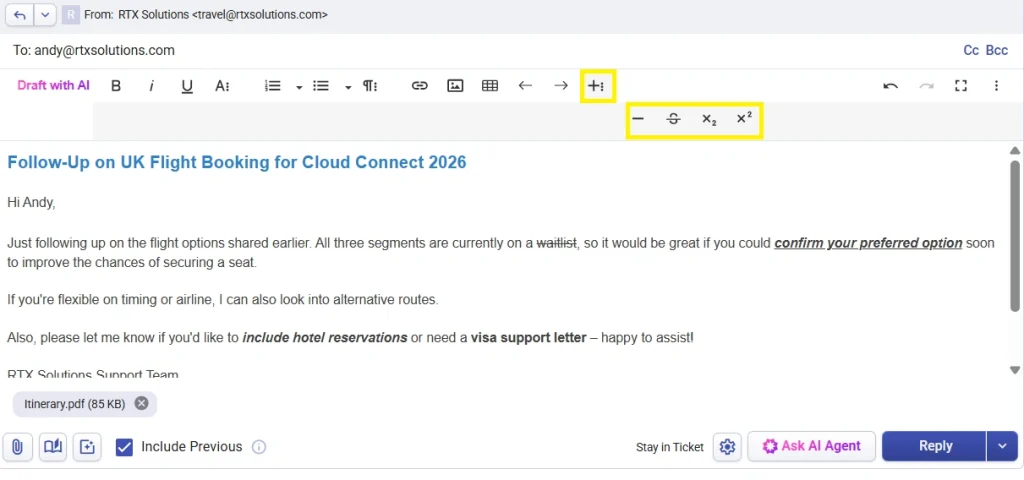
Superscript, subscript, underline, and strike formatting options
Make use of superscript and subscript functions to enhance written text with concise additional information and context. Additionally, consider using underline and strikethrough options for added versatility.
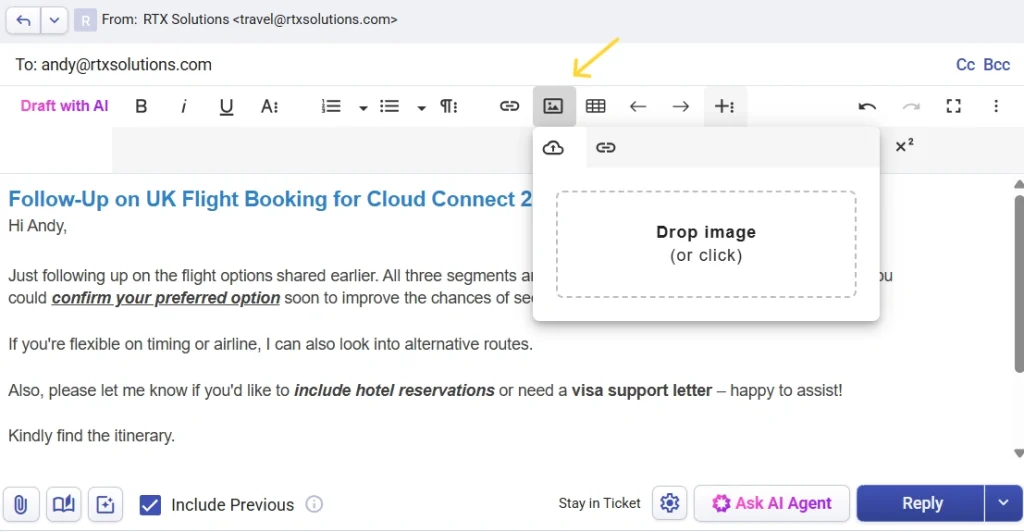
Inserting images
Elevate the visual appeal of your article by incorporating captivating images. We offer two user-friendly options to seamlessly insert images: uploading them directly or by simply inserting a URL.
You can also effortlessly embed images from external sources.
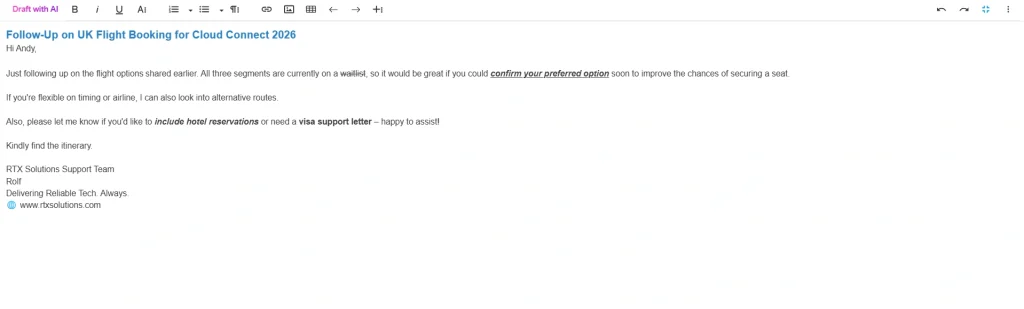
Enable fullscreen mode
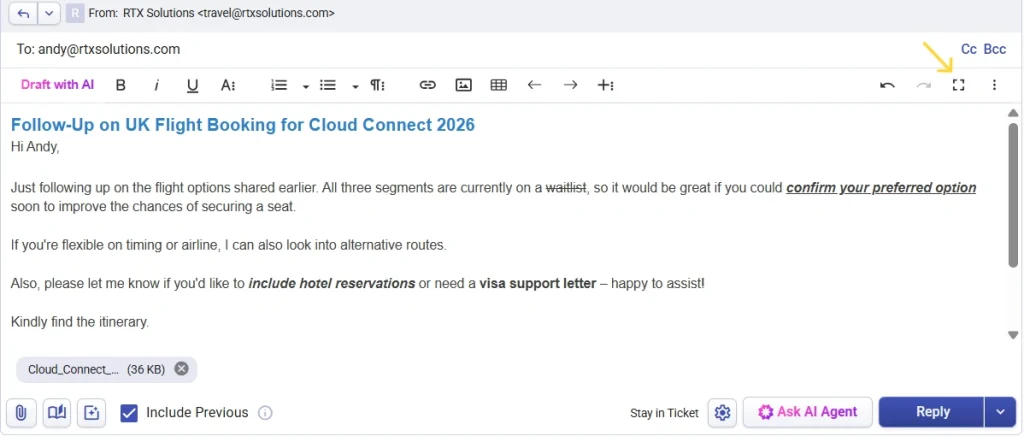
To activate Fullscreen mode, simply click on the ‘Fullscreen icon.’
In this mode, your team can respond to customers with enhanced focus, include detailed information, and easily insert images and tables. This feature will significantly boost your agent’s productivity, making responses a breeze.
To return to the standard view, just click on the Fullscreen option once more.
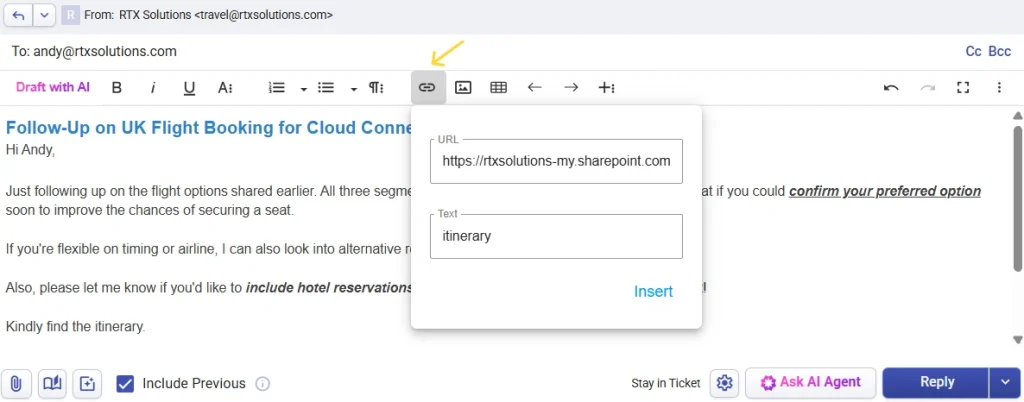
Adding links
Create or modify a hyperlink at your convenience and provide a link description.
You have the flexibility to hyperlink to a URL or select any article. Additionally, you can choose to have the link open in a new tab to prevent any potential distractions for the end-user.
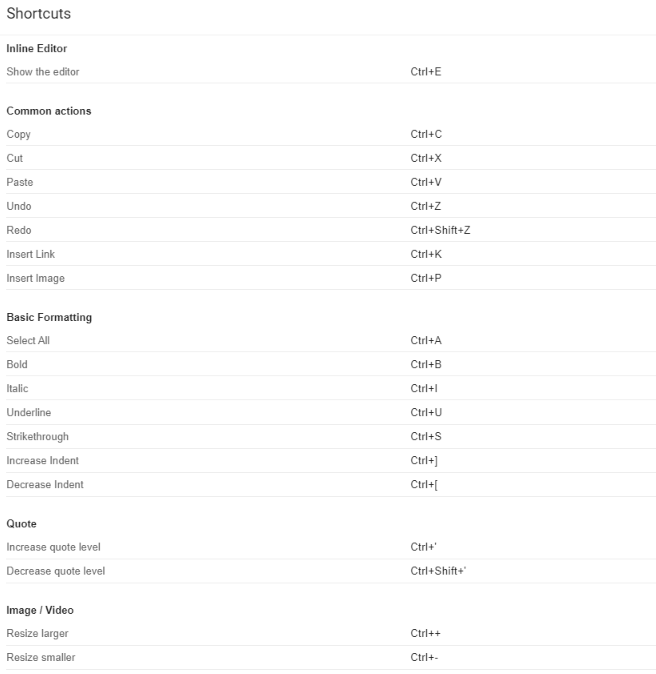
Help shortcuts
Below are a few helpful shortcuts. Familiarize yourself with all the essential shortcuts that will help you save time when responding to tickets or composing knowledge base articles.
These are some of the useful features that you can try in the text editor and make the most out of them for your business.
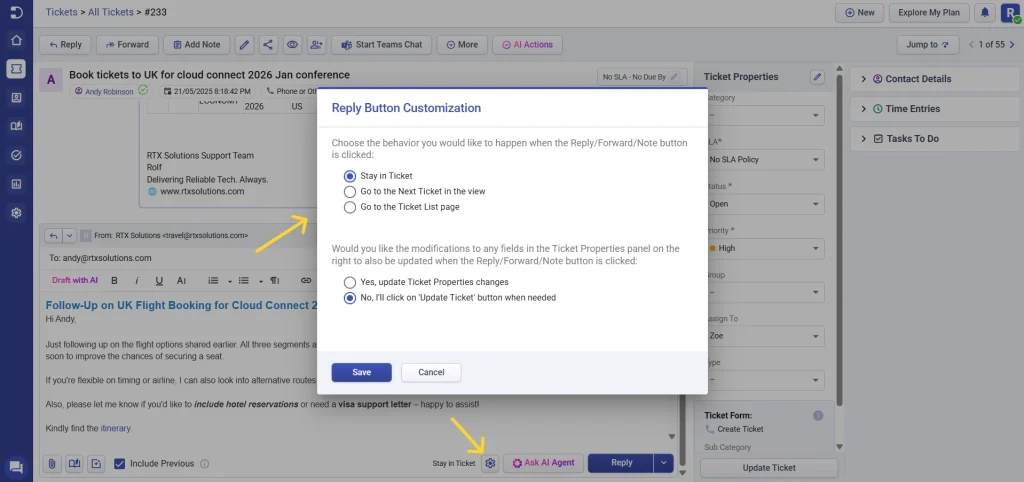
Reply button customization
The ‘Reply button customization’ feature empowers you, the customer support agent, to tailor your helpdesk experience according to your preferences. When replying to tickets, you now have three distinct options to choose from:
Stay in Ticket: The ‘Stay in Ticket’ option lets agents focus on one ticket at a time. After sending a reply, they remain on the same ticket details page, allowing them to review their response, check customer information, or take additional actions within the ticket context.
Go to the Next Ticket in the view: For support agents handling high ticket volumes, time management is crucial. The ‘Go to the Next Ticket in the view’ option enables automatic redirection to the next ticket after sending a reply, eliminating manual clicking through pages and enabling seamless movement between enquiries.
Go to the Ticket List page: This option is ideal for agents who require an overview of all incoming tickets in their helpdesk. After replying to a ticket, they are automatically redirected to the ticket list page, enabling them to get a quick view of all active enquiries for better prioritization and workload management.
By allowing you to customize the behavior of the reply button, we hope to make your job as a helpdesk agent easier and more efficient. You can now choose the option that best suits your workflow and preferences, and save time by reducing the number of clicks required to navigate through different pages.
To use this feature, simply go to the ticket details page in your helpdesk and select the settings option in the ‘Reply Button Customization’ menu.
From there, you can choose the behavior you want for the reply button and start using it immediately.
Update Ticket Properties: When an agent replies, forwards, or adds a note to a ticket, they can now make changes to any fields in the Ticket Properties panel to the right and choose the ‘update ticket properties changes’ option.
This will automatically update the changes made in the fields and save them when the user clicks on the ‘Reply’ button.
This enhancement will save our agents time and effort, as they will no longer have to go through the extra step of updating ticket properties separately. It also ensures that important data changes are saved and not missed, improving the overall ticket management process.
Right-To-Left (RTL) language support in Desk365 helpdesk
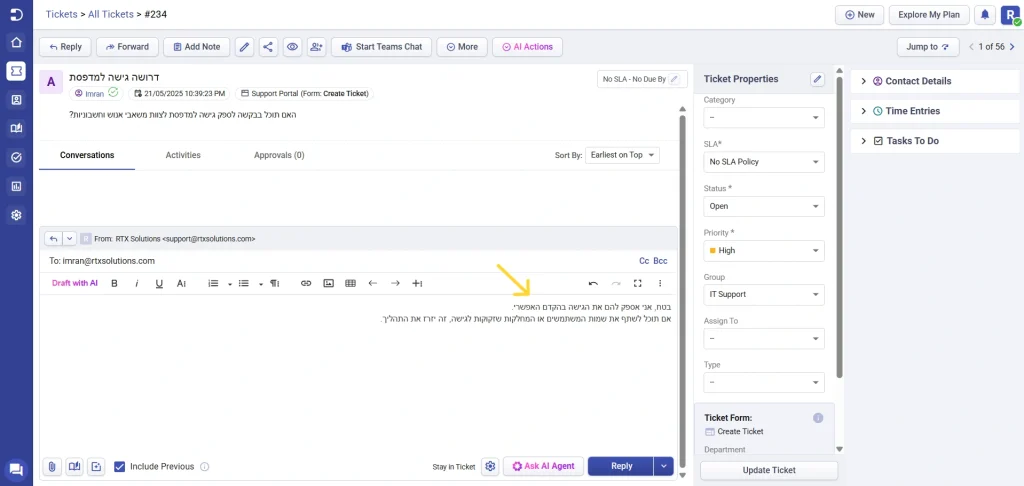
Desk365 offers Right-To-Left (RTL) language support, empowering support agents to provide enhanced assistance to end-users who primarily utilize RTL languages like Arabic, Hebrew, Urdu, Persian, and more.
When an agent responds to a ticket in languages such as Arabic, Hebrew, Urdu, and others, Desk365’s editor will seamlessly identify the language and adapt the text response accordingly.
In these instances, the editor automatically activates Right-To-Left (RTL) writing support, ensuring effective communication for the agent and simplifying the process of responding to end-users in their native language.
However, if you prefer typing your message from left to right, you can easily do so by clicking on the ‘LTR’ button in the editor. This will move your reply to the left side while keeping the original message intact. This feature lets agents personalize their message formatting according to their preference.
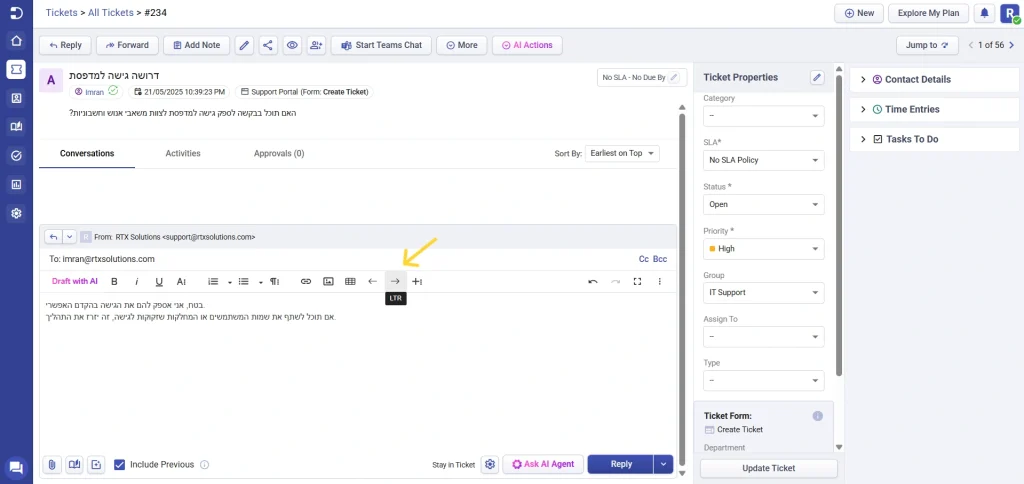
As agents continue to type and respond to a ticket, the text will stay positioned on the left-hand side of the editor, and it won’t shift to the right side unless the ‘RTL’ button in the editor is manually clicked.
This support center article provides a comprehensive explanation of Desk365’s functionality for RTL (Right-to-Left) language support.
Utilizing Canned Responses for ticket replies
You can quickly reply to your end-users with the help of canned response.
Follow the steps below:
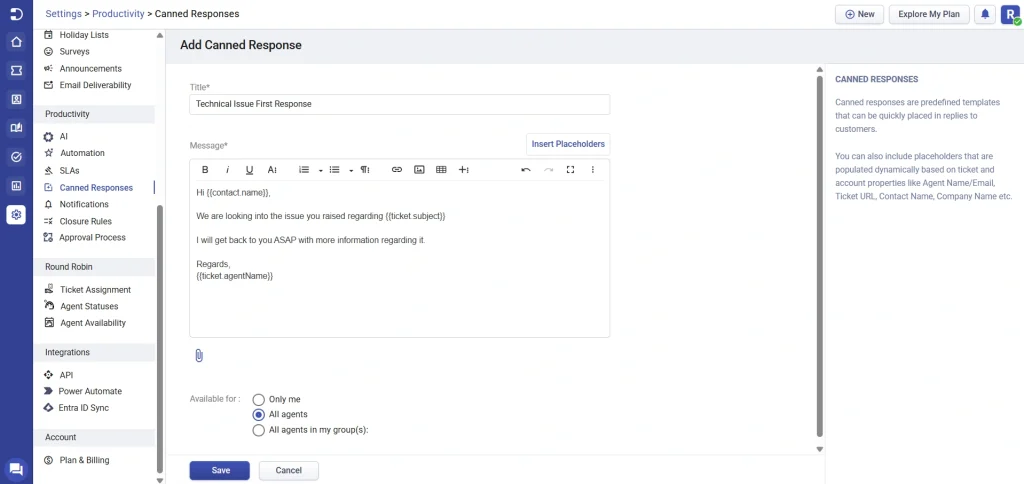
1. Navigate to Settings > Productivity > Canned Responses.
2. Click on ‘Add Canned Response’.
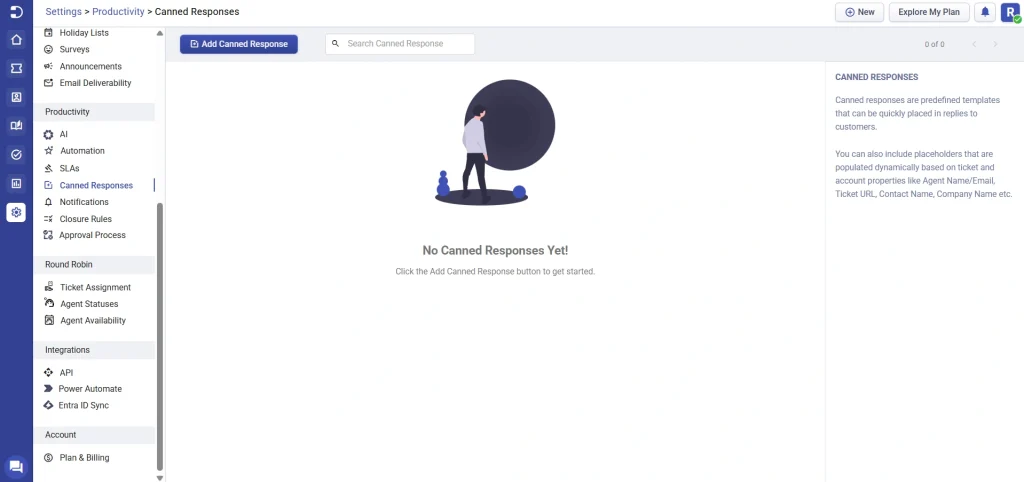
3. Now give your own canned response and click on ‘Save’.
(You can also include placeholders that are populated dynamically based on ticket and account properties like Agent Name/Email, Ticket URL, Contact Name, Company Name etc…)
4. Your canned response is ready to be included in the reply. Move to the Ticket Details page of the ticket for which you intend to add the canned response.
5. Click on the Canned Response icon and insert the canned response that you have created as shown below:
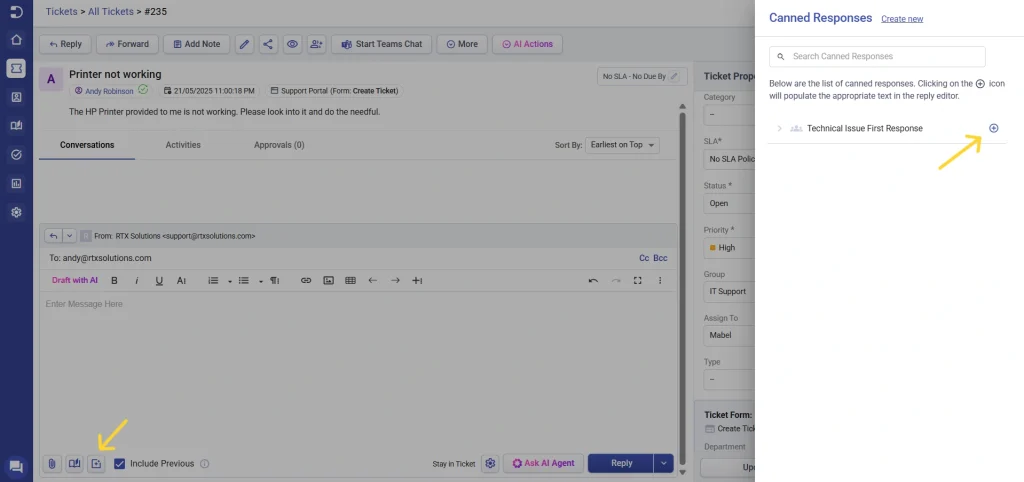
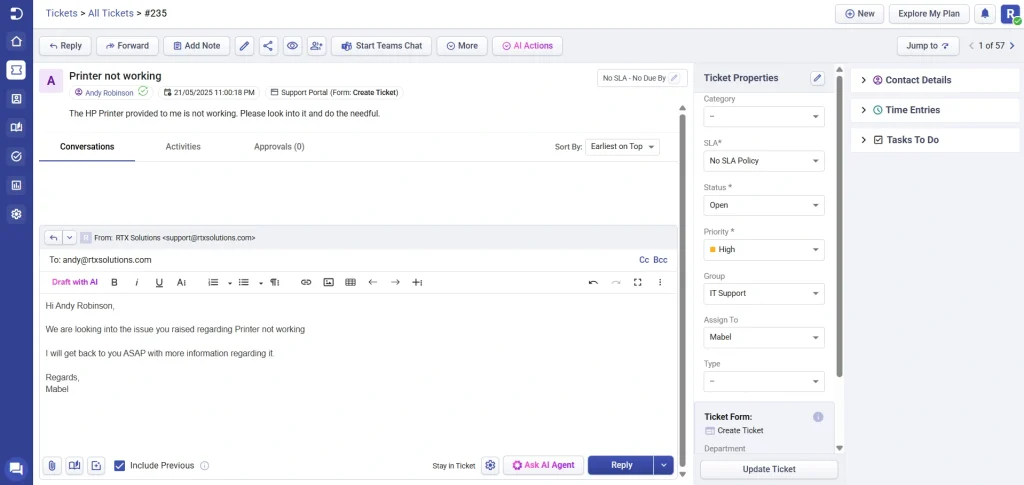
6. The canned response gets inserted and click on reply to send it to your user.
Send images and files as an attachment
If you need to send additional information related to a specific ticket, you can make use of the attachment option available in the ticket reply window.
Follow the below steps:
1. Navigate to the Ticket Details page.
2. Click on the Attachments icon and you can attach an image or document(<20mb) of your choice.
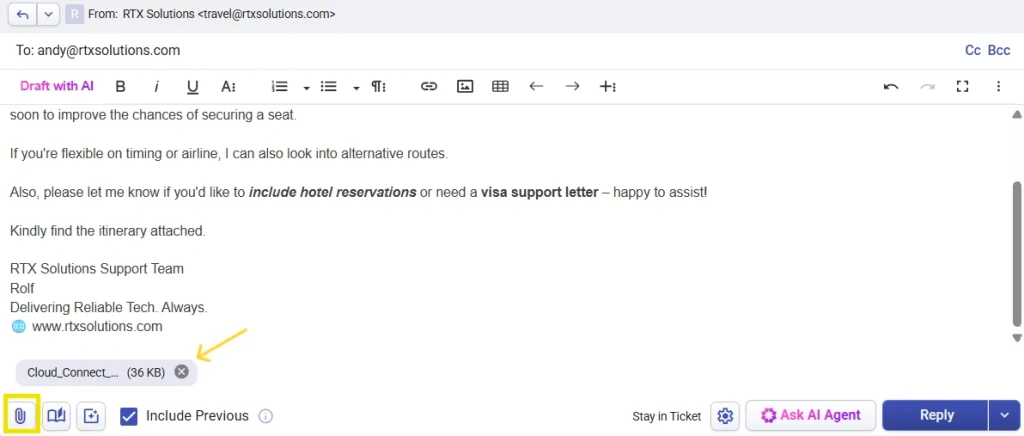
You can see your file has been attached to the reply. Click on ‘Reply’ to send it to your users.
Overall, these remarkable features enable you to respond to tickets with ease and exceptional intelligence. Moreover, they save you time, elevate the quality of your responses, and ensure readability for the end users.


