


Looking to make your helpdesk responses more professional and personalized? With Desk365’s brand signature, group signature and personal signature features, you can ensure every response from your support team leaves a great impression.
Whether you’re managing a team of agents or replying to tickets yourself, these signature tools help bring consistency, clarity, and personality to your customer communications. In this guide, we’ll break down what brand, group and personal signatures are, how they work, and how you can set them up in a few simple steps.
What is a brand signature?
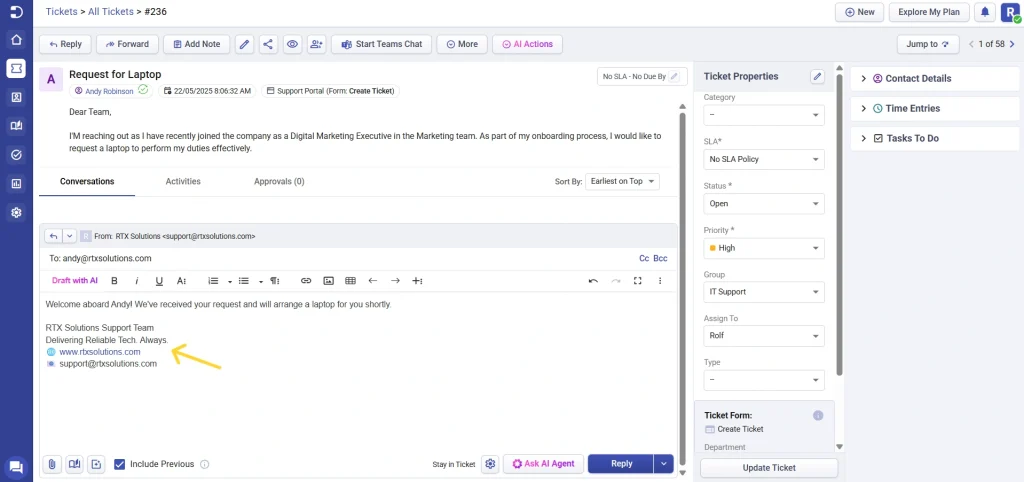
A brand signature is a standard signature usually set by your helpdesk admin but any agent with access to the Helpdesk Settings page (based on role permissions) can also create or update the brand signature. The brand signature automatically appears at the bottom of all outgoing responses from your support team. It’s designed to represent your company or brand uniformly across all agents.
What is a group signature?
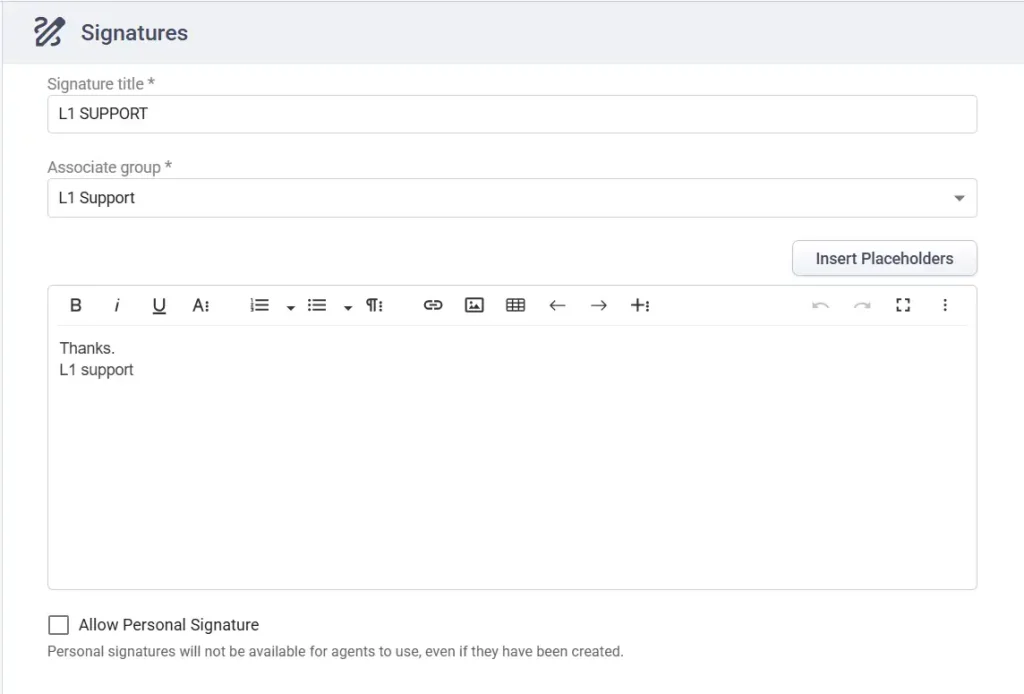
A group signature is a signature configured for a specific support group by a helpdesk admin. It is automatically applied to responses sent from tickets assigned to that group, replacing the brand signature when enabled.
It’s ideal for teams that need group-specific contact details or messaging while maintaining a consistent signature across the group. If personal signatures are allowed for the group and an agent has configured one, the personal signature overrides the group signature.
What is an personal signature?
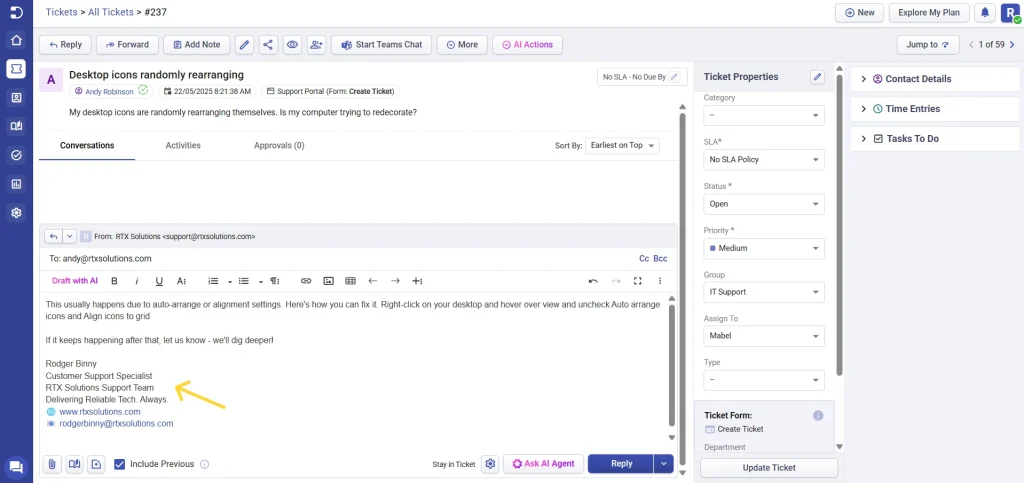
A personalized agent signature is created by an individual agent from their own profile settings. This signature is unique to them and overrides the brand signature when they respond to tickets.
It’s ideal for agents who want to add a personal touch, including their name, role, or contact details, to every customer reply.
Personal signatures will appear in the same locations as brand signatures but will replace the brand version when present.
How to set up and manage a brand signature
The brand signature is the default signature for your helpdesk and provides centralized controls for brand, group, and personal signatures. You can also choose whether the signature is applied to replies, forwards, private notes, and public notes.
To configure the brand signature:
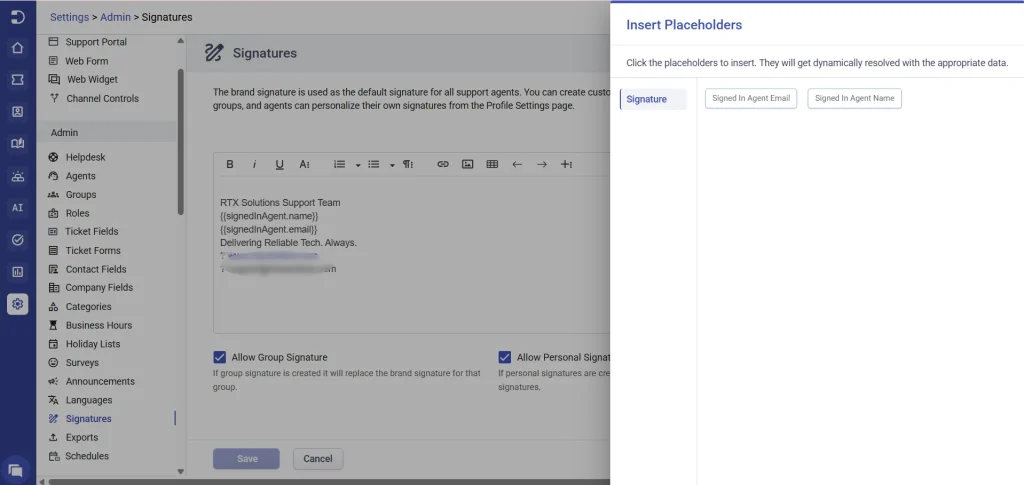
Go to Settings > Admin > Signatures > Brand Signature.
Enter your signature in the editor. You can format the content using text styling, links, and other formatting options.
To personalise the signature without requiring agents to create their own, insert the Signed In Agent Name and Signed In Agent Email placeholders. These automatically display the responding agent’s details in outgoing replies.
Configure the signature controls:
- Allow Group Signature (enabled by default) – Controls whether group signatures can be used in the helpdesk. When enabled, administrators can create and use group signatures for specific groups. For tickets assigned to those groups, the group signature replaces the brand signature. When disabled, group signatures cannot be used, even if they have already been created.
- Allow Personal Signature (enabled by default) – Controls whether agents can use their Personal Signatures. When enabled, agents who have configured a personal signature will use it in place of the group signature or brand signature. When disabled, personal signatures cannot be used anywhere in the helpdesk, even if they already exist.
5. Click Save.
How to set up and manage group signature
A group signature allows you to assign a dedicated signature to a support group, ensuring it is automatically used for tickets handled by that group.
Note: Group Signatures and their configuration options are available only on the Premium plan.
To configure a group signature:
- Go to Settings > Admin > Signatures > Group Signatures.
- Click Add Group Signature.
- Enter a Signature Title.
- Select the associate group that will use this signature.
- In the editor, enter your signature content. You can format the content using text styling, links, images, tables, and other formatting options.
- To personalise the signature without requiring agents to create their own, insert the signed in agent name and signed in agent email placeholders. These automatically display the responding agent’s details in outgoing responses.
- Configure the Allow personal signature option.
- Enabled – Agents in the selected group can use their personal signature. If an agent has configured one, it replaces the group signature for their responses.
- Disabled – All agents in the selected group will use the group signature, even if they have created a personal signature.
8. Click Save.
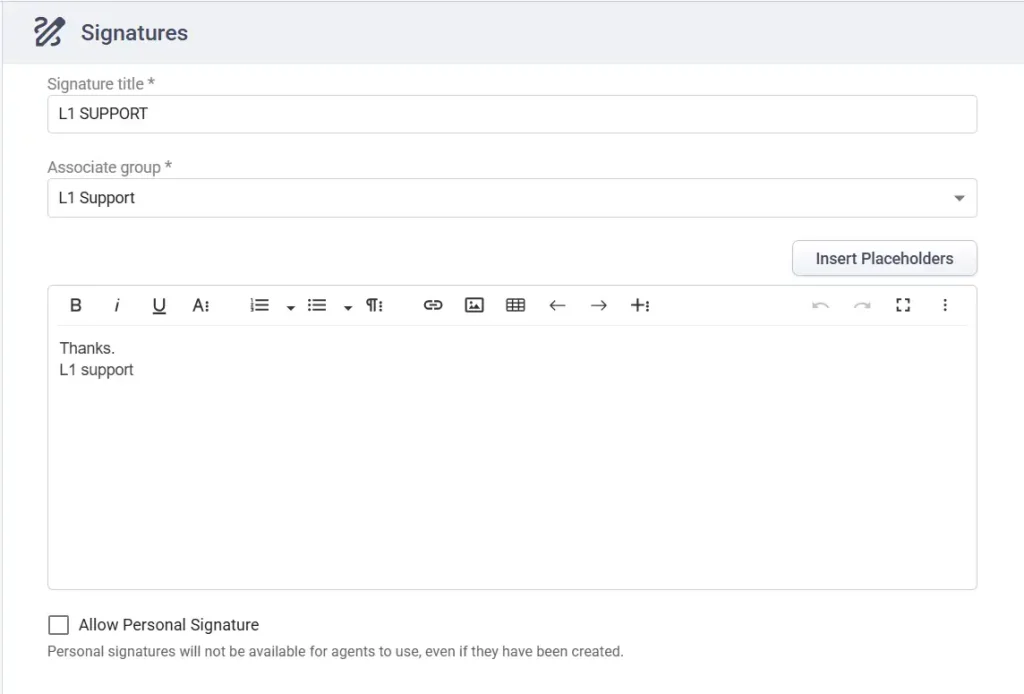
The group signature is now configured and will automatically be displayed for tickets assigned to those specific groups.
How to set up and manage a personalized agent signature
Agents can create and manage their personal signature, which is used in place of the brand or group signature based on the configurations set in the brand or group signature settings.
To configure a Personal Signature:
- Log in to the Agent Portal.
- Click your profile icon in the top-right corner.
- Scroll to the Signature section and click Personalise Signature.
- Enter your signature in the text editor. You can format the content using text styling, links, images, tables, and other formatting options.
- Click Save.
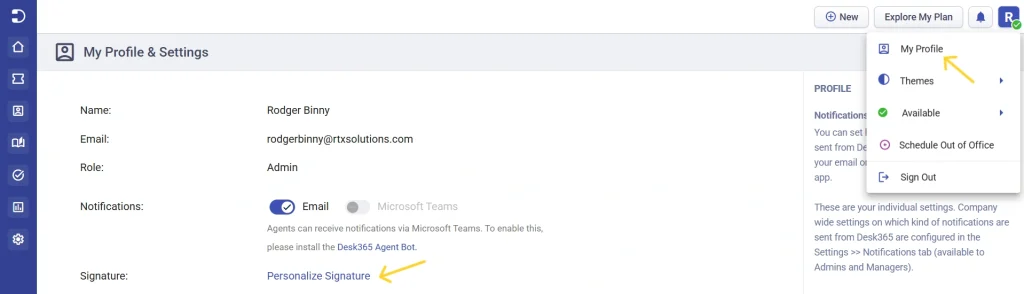
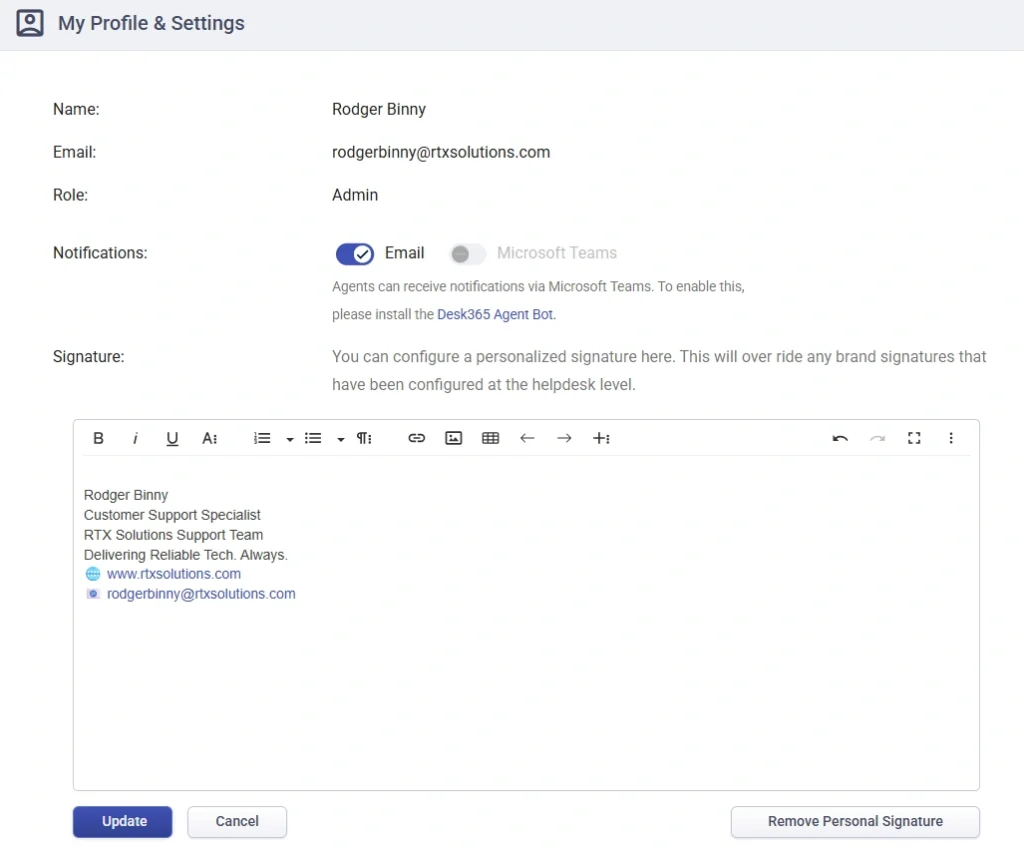
You can return to the same signature section at any time to update or remove your personal signature. Changes are applied to all future responses, provided personal signatures are enabled by your helpdesk administrator.
Note: Access to the signatures tab is enabled by default for Admin and Manager roles.
If required, you can also create a custom role from settings> roles. There you can configure who has access to the signatures tab.
When should you use brand vs. agent signatures?
Feature
Best for
Who sets it
Brand signature
Unified, professional messaging
Admins or custom roles with permission to access helpdesk settings
Group signature
Group-specific messaging
Admins or custom roles with permission to access helpdesk settings
Agent signature
Personal touch, agent identity
Individual agents (from their profile settings)
Best practices
- Keep it brief: Whether brand or agent, avoid long signatures. Focus on essentials.
- Be consistent: Use a common format or structure to keep communication clean.
- Update regularly: Don’t forget to update signatures if roles, contact info, or branding changes.
Empower your support agents to create a consistent and professional experience for your customers. Whether you’re scaling your support or just want your emails to look sharper, signatures are the small detail that makes a big difference.