


When it comes to managing customer enquiries and issues, a well-organized helpdesk system is crucial. One important aspect of managing a helpdesk is closure rules.
Closure rules are a set of guidelines that helpdesk agents follow when closing a ticket. These rules ensure that tickets are resolved in a timely and efficient manner, and that customers receive the support they need.
In this help center article, we’ll delve into the concept of closure rules, how to set them up within Desk365, and the advantages they can bring to your business.
What are closure rules?
The closure rules play a crucial role in guiding the agents by imposing specific conditions that must be met before a ticket is marked as resolved or closed. These rules help you to maintain the quality of customer support by ensuring that all necessary tasks have been completed prior to closing or resolving a ticket.
By adding closure rules, you have the ability to set up conditions that allow for the closure or resolution of a ticket solely when specific criteria are fulfilled. These criteria include:
- The addition of a Time Entry
- Completion of all Tasks-To-Do
- At least one reply is added
- At least one note is added
- At least one reply or note is added
- At least one reply and note is added
- No approval is pending
- Filling specific ticket fields
- Filling specific custom ticket fields
How to activate the default closure rule in the agent portal?
To activate the default closure rule, follow the steps below:
1. Navigate to Settings > Productivity > Closure Rules tab.
2. Initially, there will be a default closure rule. This rule applies to tickets in groups that do not have a specific closure rule or tickets that are not assigned to any group.

3. Choose the conditions required to close or resolve tickets. You can enable the checkboxes for the conditions that are required

4. You can also add additional conditions. Click on ‘Add another Condition’ and choose the condition you want to add.
For example, adding ‘Resolving Reason’ as a condition to be completed before closing a ticket.

5. Click on ‘Save’ to see the working of Closure Rules.
Closure rule for groups
You can also create additional closure rules in addition to the default one by clicking on the add new closure rule button.

Give the rule a name and description, select the associated group, and then choose the conditions required to close or resolve the ticket and click save.

Let’s look at how this rule functions in a real scenario.
A prospect submits a helpdesk ticket asking about product pricing. The ticket is automatically assigned to the Sales group based on the configured routing rules.
A sales representative opens the ticket and replies to the customer with detailed pricing information. This public reply ensures that the customer receives the necessary details.

Before adding an internal note, the agent tries to close the ticket manually. However, because the closure rule requires both a public reply and an internal note, the system prevents the ticket from being closed. A message or warning appears indicating that the conditions for closure have not yet been met.

Next, the rep adds an internal note, noting the prospect’s interest level or next steps for follow-up. This internal note provides context for the team and satisfies the rule condition.

Once both condition, a public reply and an internal note — are satisfied, the ticket can now be closed according to the rule’s settings.
Custom fields in closure rules
Desk365 offers additional conditions that can be added to the closure rules. In addition to configuring conditions using the default ticket fields, you also have the option to define conditions using custom fields that you have specifically designed to align with the unique requirements of your helpdesk.
To do that, you need to add the required condition as a Ticket Field, and also ensure it’s added to the list of Visible Ticket Properties panel of the Ticket Details page.
Adding custom fields in closure rules
For example, suppose you intend to include the custom field ‘Resolving Reason’ before a ticket is closed or resolved. This can be accomplished in the following way:
1. Go to Settings > Admin > Ticket Fields in the Agent Portal.
2. Add ‘Resolving Reason’ as a ticket field as shown in the screenshot below:

3. Click on ‘Save’ to save the Ticket Field.
4. Now navigate to Tickets > All Tickets and click on any of the tickets to access the Ticket Details Page. Click on the ‘Edit’ button in the Ticket Properties menu as shown in the screenshot below.

5. Under select ticket fields click on Available fields > Resolving Reason, it will get added under Displayed fields.
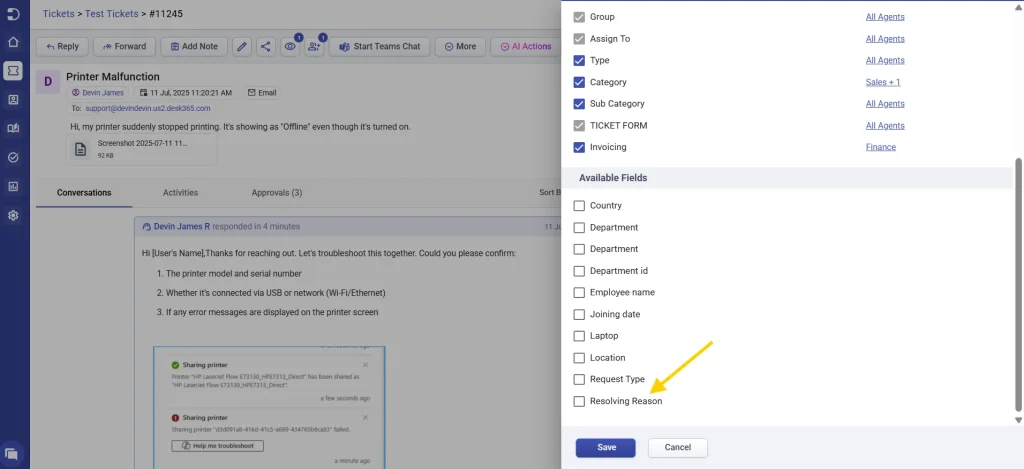
6. Click ‘Save’ to include the ‘Resolving Reason’ field in the Ticket Properties Panel.
Note: The closure rules will be followed only when the ticket fields are visible in the Ticket Properties panel of the Ticket Details page.
7. The ticket field ‘Resolving Reason’ will now be included in the Additional Conditions section within the Closure Rules.
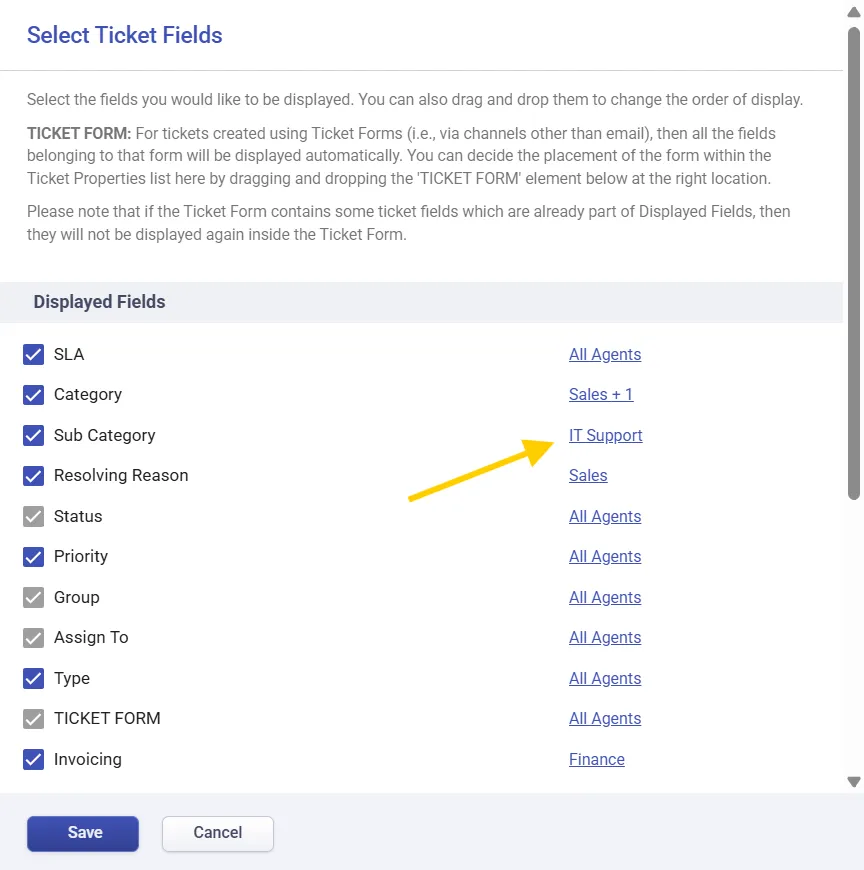
Configuring ticket field visibility for group based closure rules
To ensure that closure rules work correctly for specific groups, the related ticket fields must be visible to that group on the ticket details page. Closure rules only apply to the ticket properties that are visible for the respective group.
For instance, if you wish to have the IT Support team fill out the ticket’s category and subcategory, and the Sales team to complete a custom field you’ve created called ‘Resolving Reason’ before closing the ticket, you can achieve this through a few simple steps outlined below:
1. Begin by creating the necessary ticket fields.
2. Navigate to Tickets > All Tickets and select a ticket to access its Ticket Details Page.
3. Click on ‘Edit’ in the Ticket Properties Panel.
4. Configure the visibility of ticket properties for a specific group, as demonstrated below:
5. Save your changes.
6. You can now activate the closure rules by adding those ticket properties to be filled as a condition.

Since the closure rules are applicable exclusively to the visible ticket properties, they will only impact the group for which the ticket properties are enabled.
How closure rules work in Desk365?
In agent portal:
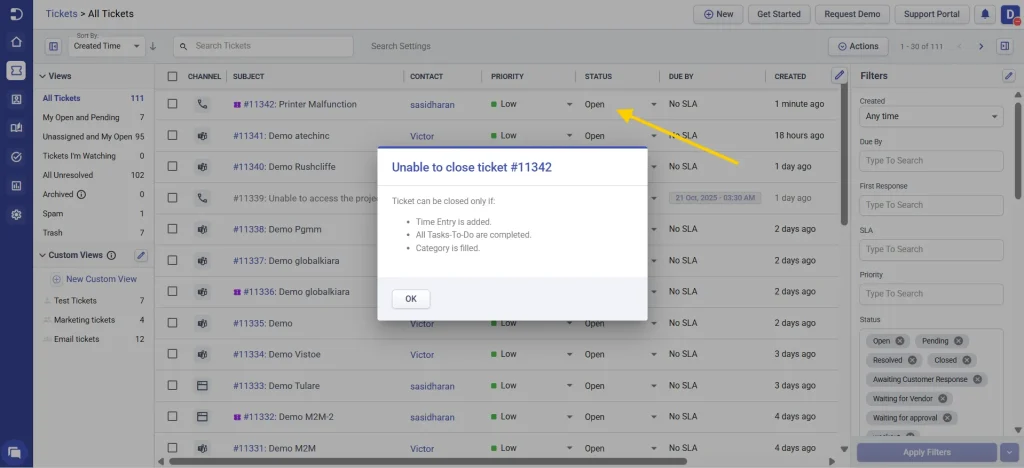
When you attempt to update the ticket status to ‘closed’ or ‘resolved’ in the Tickets List page without fulfilling all the required conditions, a popup will appear, as shown below:
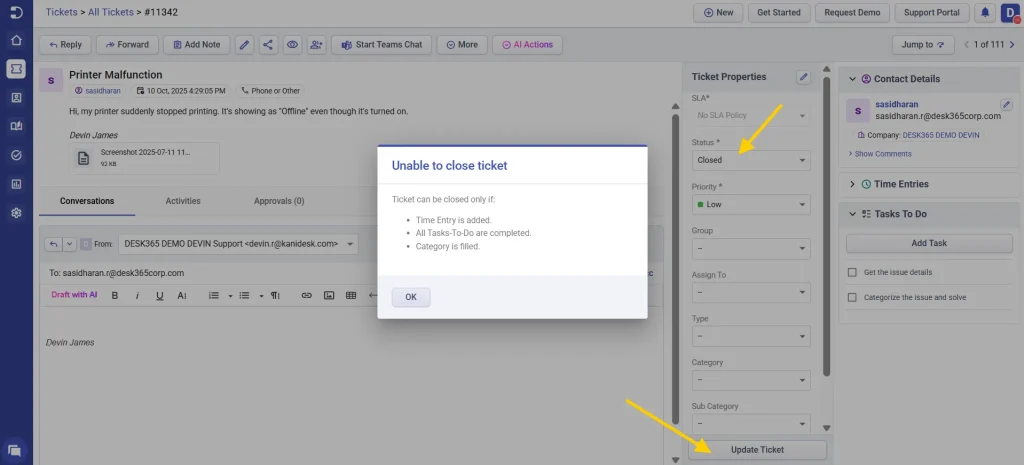
Likewise, if you attempt to change the ticket status to ‘Closed’ or ‘Resolved’ under the Ticket Properties section on the Ticket Details Page without fulfilling all the necessary conditions, a popup will emerge, as shown below:
In Desk365 Teams Agent Bot:
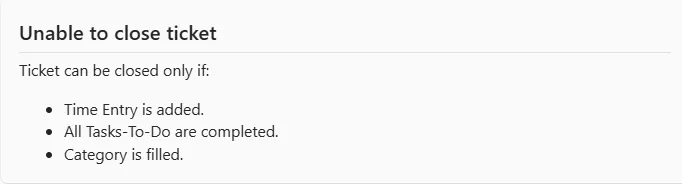
The closure rules also apply when you attempt to update the ticket status in the Ticket Properties within the Desk365 Teams Agent Bot on Microsoft Teams.
1. Navigate to the Agent Bot in Microsoft Teams.
2. Click on ‘My Tickets’ or ‘Unassigned Tickets’ button.
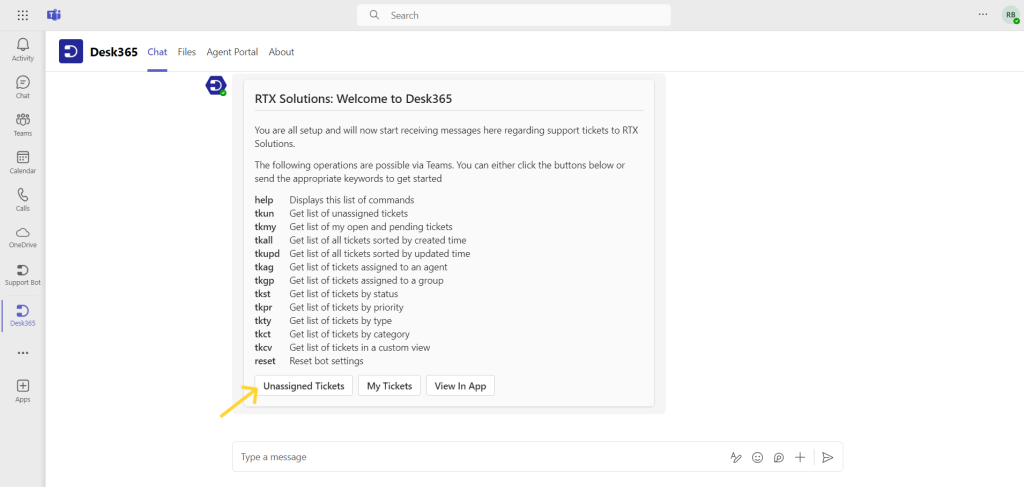
3. Choose any ticket to view the details card for that ticket.
4. Select ‘Update Properties’, then choose ‘Status’, and pick either ‘Closed’ or ‘Resolved’, finally, click ‘Save’.
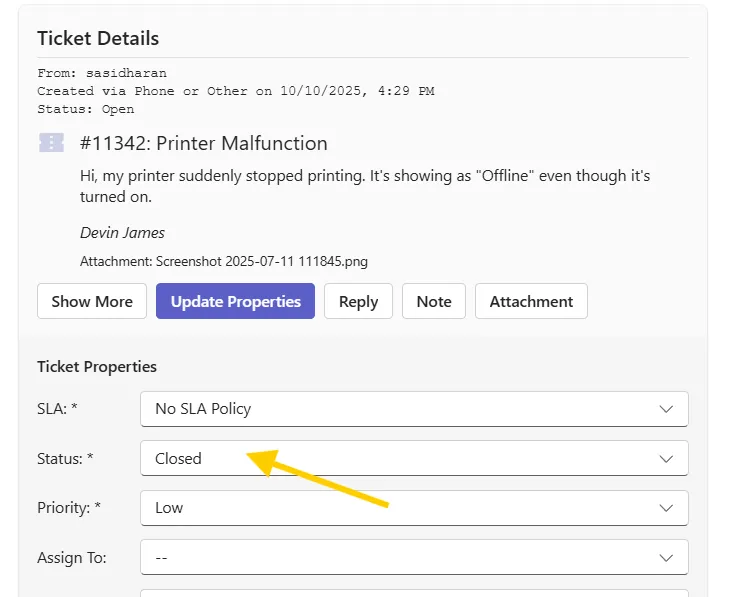
5. Now the card appears as shown below:
Similarly, we have incorporated closure rules for those utilizing the Desk365 API, as well as within the Desk365 Power Automate Connector.
Note
The closure rules won’t be effective in the situations outlined below:
- Whenever a ticket is merged with another ticket, the merged ticket will be marked as closed.
- When importing tickets that are already closed or resolved, the usual rules for closure will not be applied to those particular tickets.
- Automation rules that are designed to close or resolve tickets do not follow the regular closure rules.
Closure rules aid agents in enhancing their efficiency and ensuring the completion of all tasks prior to closing or resolving a ticket. This functionality enforces particular fields and simplifies the process of monitoring issue progress, thereby facilitating faster resolution of subsequent tickets sharing similar problems.


