


When a customer contacts an agent directly with a query or request, the agent can create a ticket on their behalf using the agent portal. The customer’s name is listed as the ticket requester. Additionally, agents can also raise tickets for themselves in the helpdesk by creating the ticket from the agent portal through the web interface or directly within Microsoft Teams, with their name as the ticket requester.
In this help center article, we’ll guide you through the steps of creating a new ticket from the agent portal, helping you streamline your customer support process.
What is agent portal?
The agent portal is a web-based interface that allows customer support agents to access and manage customer information, in one centralized location. This unified interface enables agents to respond to support requests faster and more efficiently, resulting in a better customer experience.
How to create a new ticket from the agent portal in Desk365?
The agent portal in Desk365 allows agents to manage customer support requests and provide efficient and effective customer service. Follow the steps below to create a new ticket from the agent portal.
Step 1: Log in to the agent portal
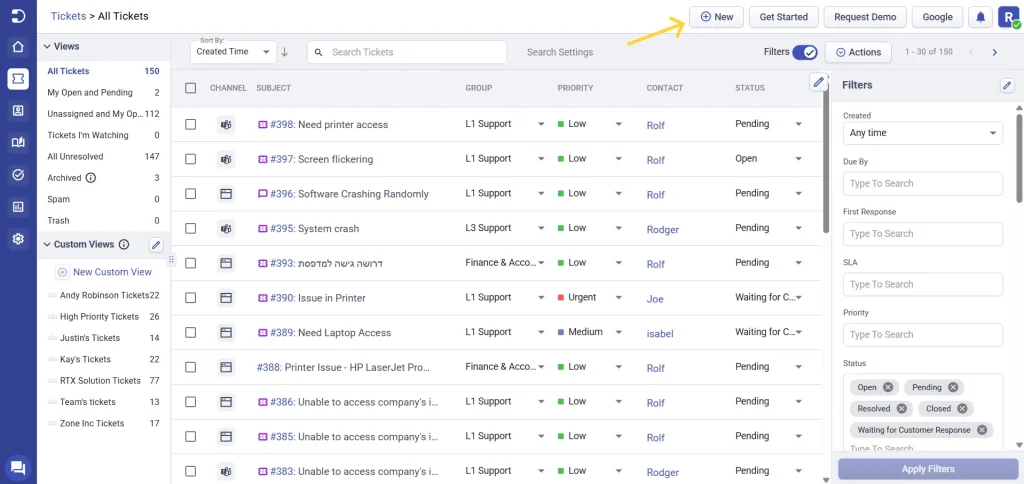
Log in to your Desk365 helpdesk using your correct credentials. Once you are logged in, navigate to the tickets tab in the agent portal.
Step 2: Click on ‘New Ticket’
Click on the ‘New’ button at the top.
Once you click on the ‘New’ button, you’re provided with three options: ‘New Ticket’, ‘New Contact’, and ‘New Company’
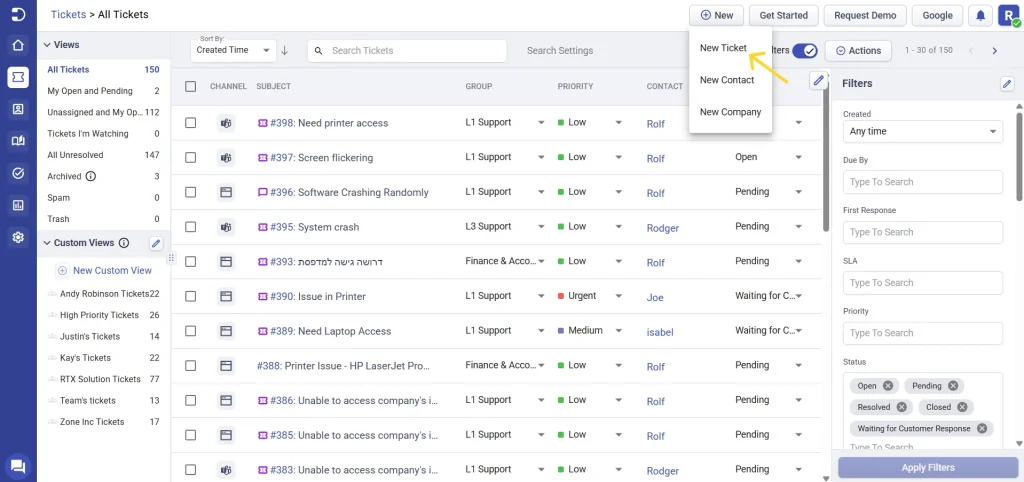
To create a new ticket, click on the ‘New Ticket’ option. This will open a new form where you can input the necessary details of the support request. You can also customize this form if needed to add more fields to the ticket form.
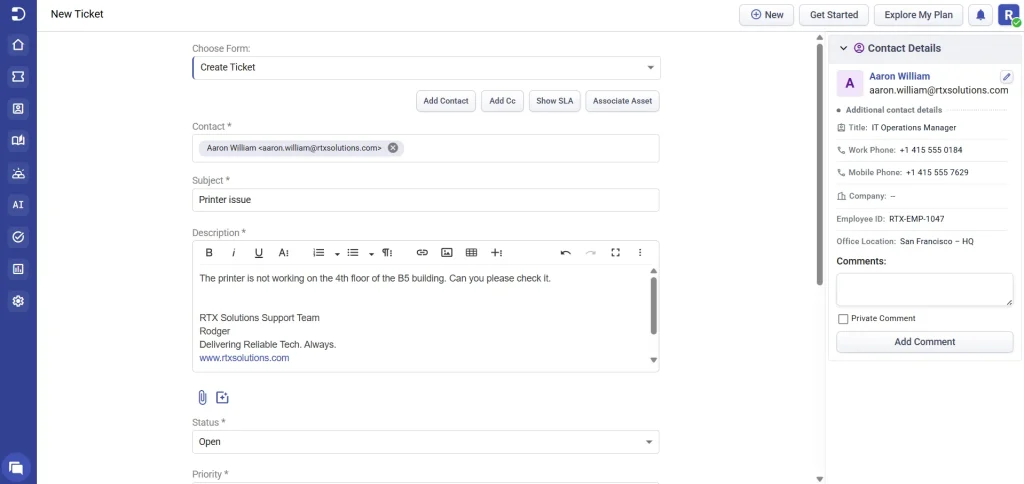
Step 3: Enter the ticket details
Fill out the form with the necessary information, such as the contact information, and details about the issue they are experiencing. This includes the subject of the request, a brief description of the issue, and any attachments or screenshots that may help in resolving the issue.
You can also associate an asset with the ticket while creating it. This allows you to link the issue to a specific device or item, giving better context to the support team.
Be sure to include as much information as possible to help the support team understand the issue better and provide an effective solution.
Step 4: Assign the ticket
Once you’ve inputted all the necessary details, you’ll need to assign the ticket to the appropriate agent or department. This can be done by selecting the agent or department from a dropdown menu or by inputting their name. This ensures that the support request is directed to the right person or team, resulting in a faster resolution.
After you’ve completed all the necessary steps, click on the ‘Create’ button to create the ticket. This will add the ticket to the support queue, where it will be visible to the assigned agent or department. The customer will also receive a confirmation email with the details of their support request.

Creating a new ticket from the agent portal is a simple and efficient way to streamline your customer support process. By following these simple steps, you can quickly and easily create a new ticket from the agent portal and ensure that customer support requests are handled in a timely and efficient manner. This ensures a faster resolution time, resulting in a better customer experience.


