As a business owner or finance manager, one of the most critical aspects of managing your operations is ensuring that your payment processes are efficient, secure, and cost-effective. For US Based businesses, the Automated Clearing House (ACH) payment system, integrated with Desk365, offers a secure and cost-effective solution for handling electronic funds transfers between bank accounts.
A comprehensive guide to ACH payments setup
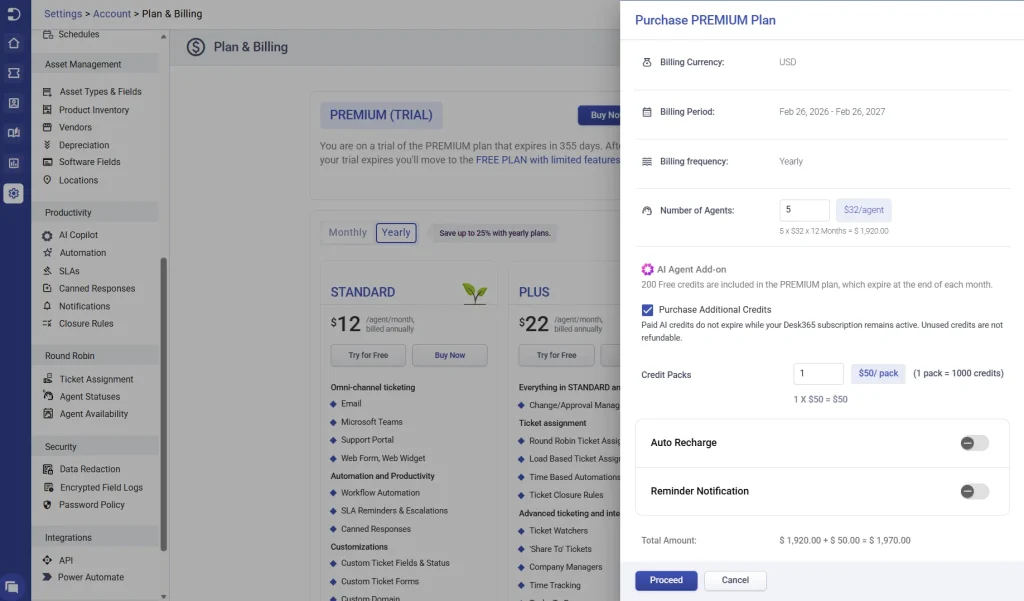
To configure ACH payment methods for your Desk365 account, go to the Agent Portal and click on the “Settings” icon in the left-hand menu. Next, under the “Account” section, choose “Plan & Billing.” Choose your plan, enter the number of agents you want to include in your plan and click the “Proceed” button to continue with your payment.
Steps to subscribe to Desk365 Premium Plan via bank account
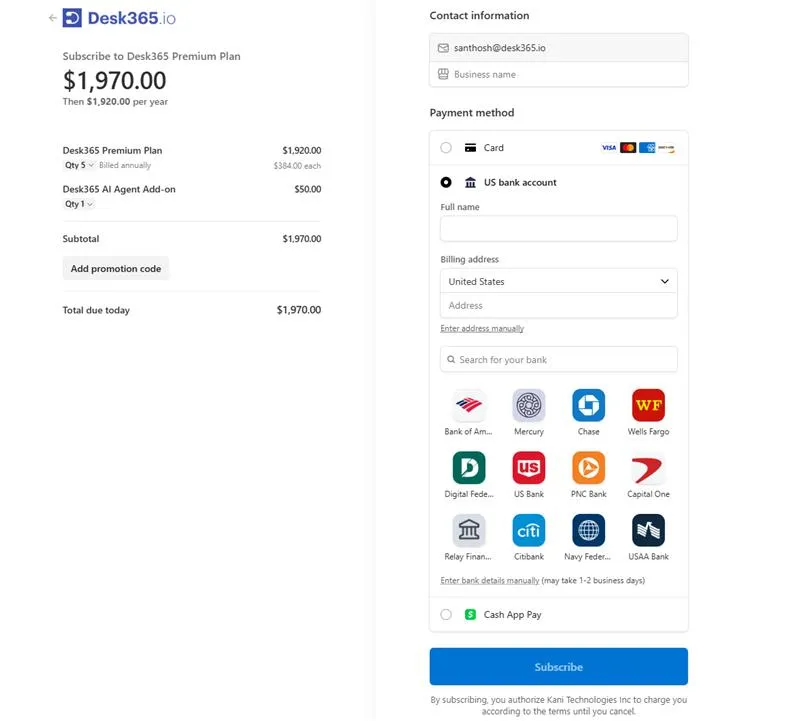
To subscribe to the Desk365 Premium Plan, start by selecting “US Bank Account” as your preferred payment method. Next, you’ll need to finalize your payment by filling in the required details, including your bank account information. You have the option to search for your bank from the list of available institutions or manually enter your bank details if your bank is not listed.
If you’ve chosen to manually enter your bank details for ACH payments, follow the steps below to set up your ACH payment method securely and efficiently.
Guide to manually entering and verifying ACH bank details
Initiating verification
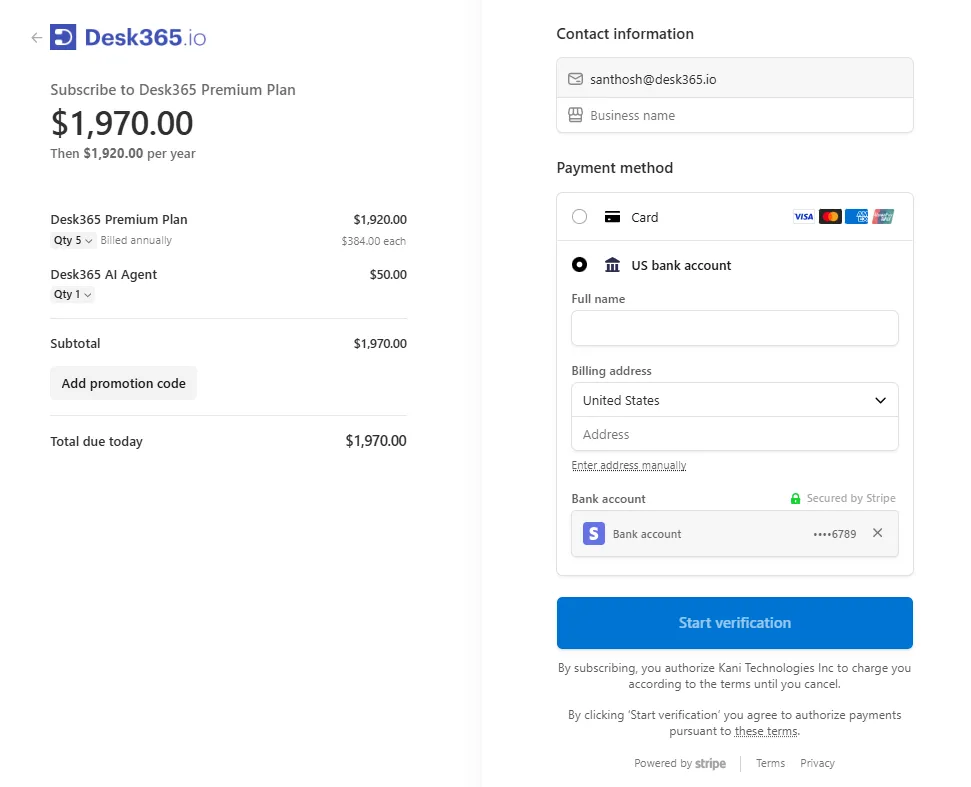
When initiating an ACH payment, the first step is to provide your bank account information. This includes entering your 9-digit routing number, which identifies your financial institution, and your unique account number, which ensures funds are withdrawn from the correct account. To prevent errors, you’ll be asked to confirm your account number by re-entering it, adding an extra layer of security to the process.
After entering your bank details, click on “Start Verification” to initiate the verification process. This will involve a micro-deposit of $0.01 being sent to your account, which should arrive within 1-2 business days. Once you confirm the deposit, your payment information will be verified.
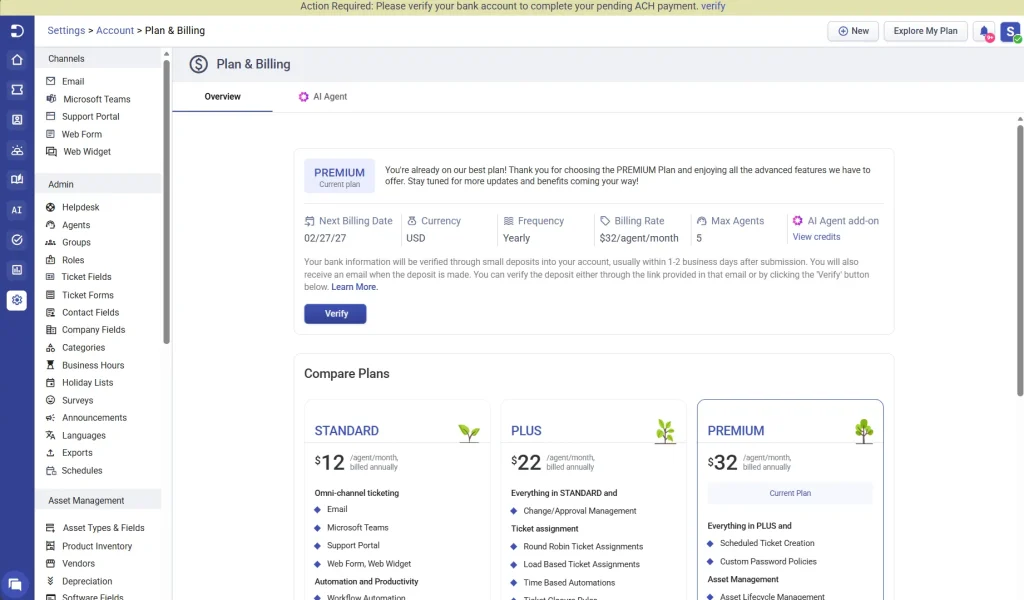
Verifying the deposits on the payment platform
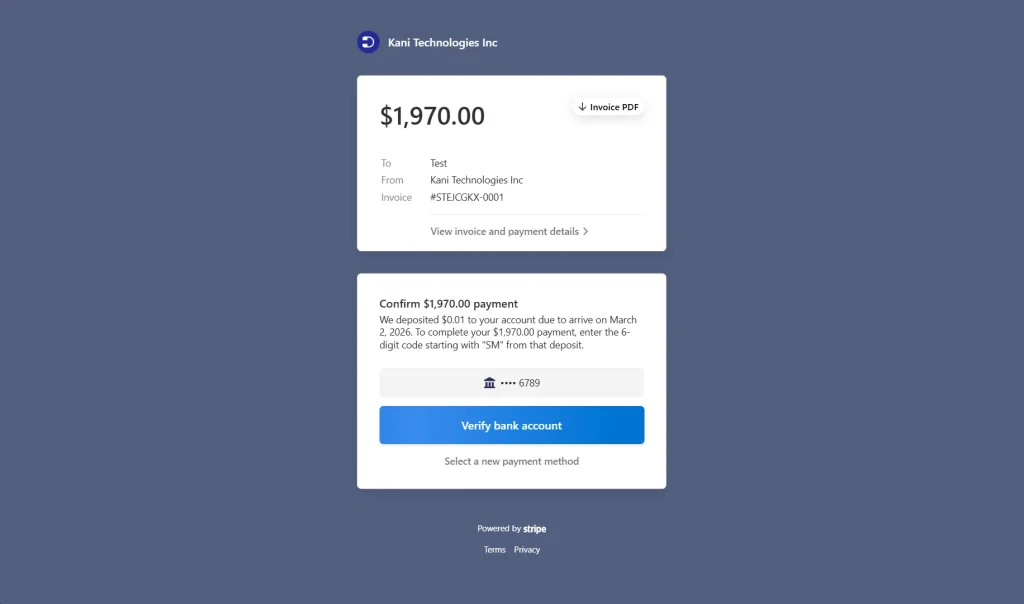
Once the micro-deposit appears in your account, you can verify the deposit by clicking the “Verify” button shown below.
After you click on the Verify button, you can securely proceed with the payment by clicking the “Verify Bank Account” button.
Completing the payment
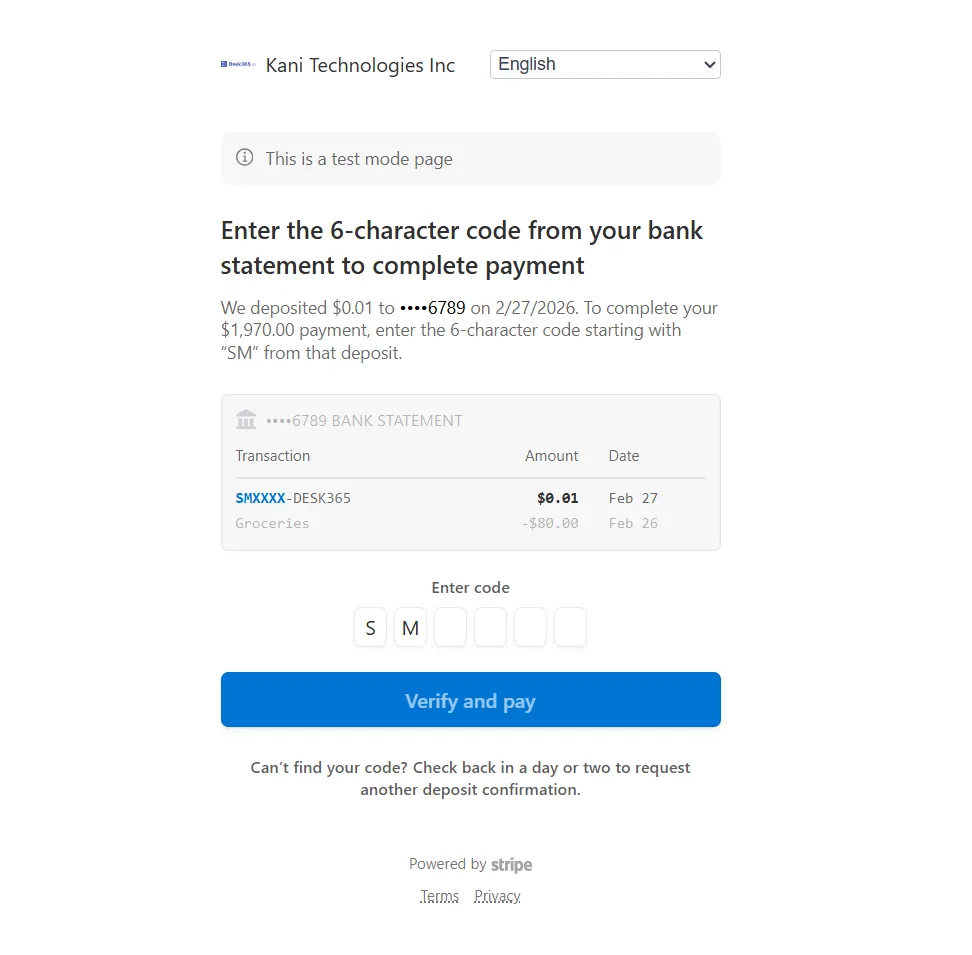
To complete your payment, enter the 6-digit code starting with “SM”, from the micro-deposit. Then click “Verify and Pay” to complete the transaction. This step will securely initiate the transfer of funds from your bank account to the merchant. Now you are all set, and your payment setup is completed.
Once the verification process is completed, the payment will be processed within 4-5 business days, with the amount automatically debited from your account.
By completing this one-time process of entering and verifying your bank details for ACH payments, all your future transactions will be automated, ensuring a smooth and secure payment experience.