Support agents are the backbone of any helpdesk solution, and adding new agents to your team can help you improve your customer service and increase your productivity.
Every support team member who interacts with customers, contacts, or end-users through Desk365 is considered an agent. In Desk365, you can easily add, modify, and deactivate agents at any time.
To add an agent in Desk365, follow these steps:
1. Log in to your Desk365 account.
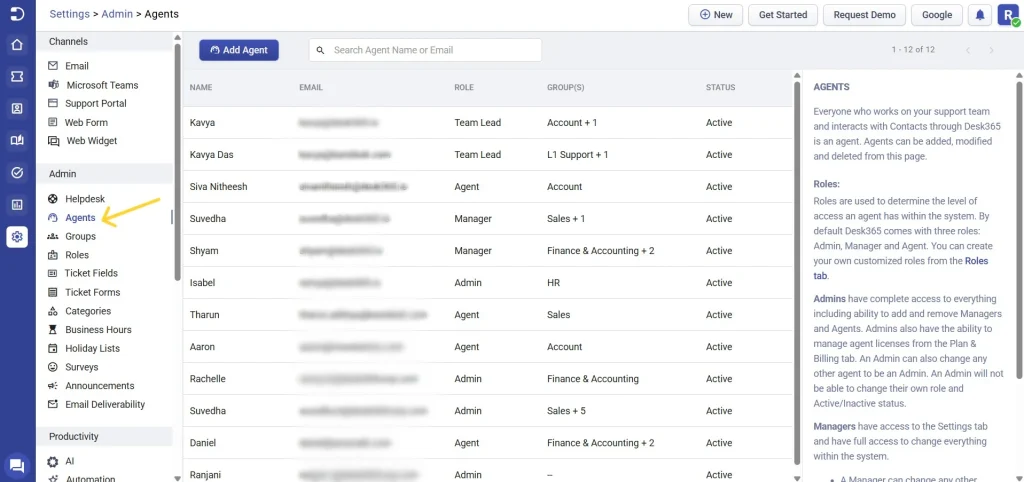
2. Go to Settings -> Admin -> Agents.
2. From there, you can click on the ‘Add Agent’ button to start the process of adding a new support agent to your team.
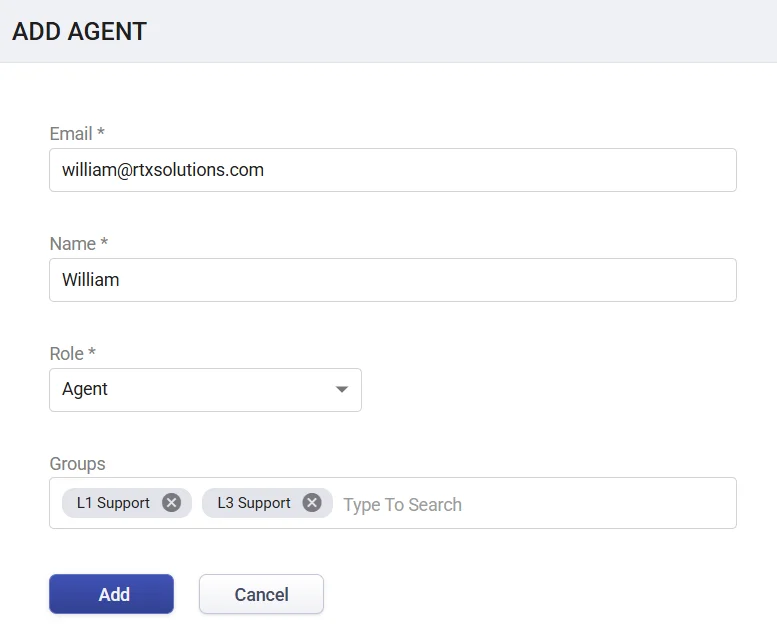
3. When adding a new support agent, you will need to provide some basic information about the agent. This includes fields such as Email, and Name for the agent. You can also assign the agent to a specific team, and assign them specific roles and permissions within Desk365.
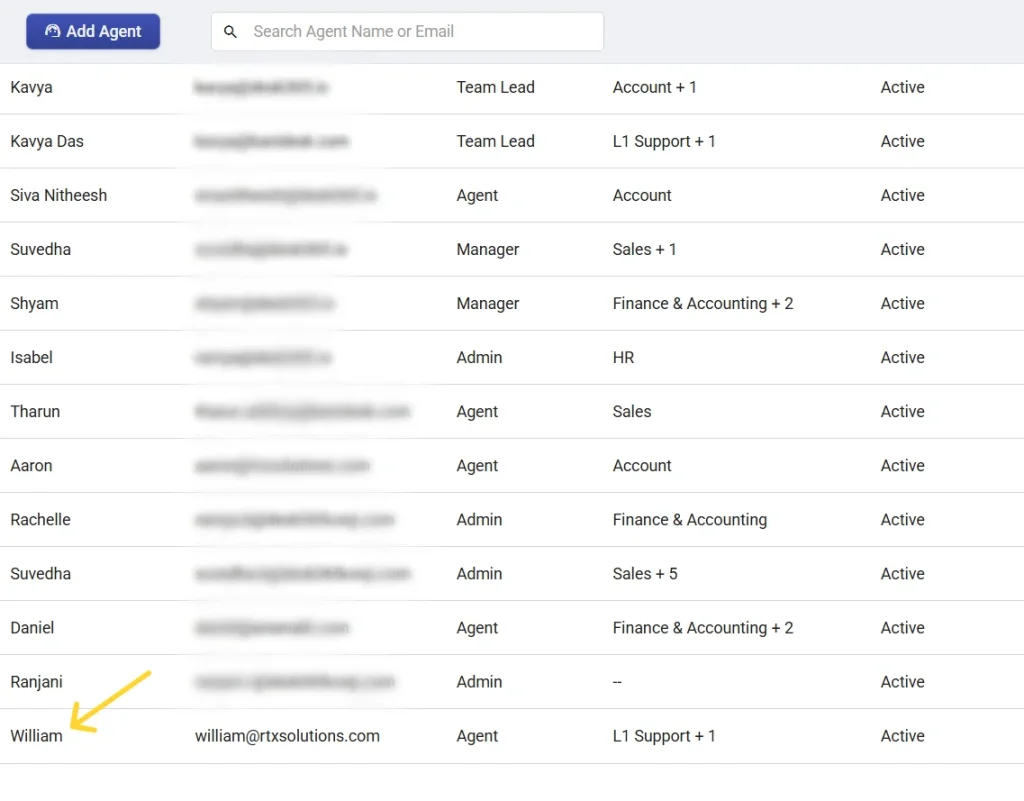
4. Click on ‘Add’, an agent named ‘William’ will be created in your helpdesk.
Once you have added a new support agent to your team, you can start to assign them support tickets. Desk365 allows you to assign tickets to specific agents or teams, so you can ensure that customer issues are being addressed by the right people.
You can also set up automated workflows to ensure that support tickets are being assigned and resolved in a timely manner.