


Business owners aiming to establish trust with their customers and fortify them against cyber-attacks, such as email spoofing, can utilize Email Domain Verification using SPF (Sender Policy Framework). This guide will walk you through what SPF is, how it works, and how to set it up within Desk365 to ensure secure and trusted email communication.
What is SPF?
SPF, or Sender Policy Framework, is an email validation standard designed to combat email spoofing. It enables domain owners to specify which servers are authorized to send emails on behalf of their domain. By publishing SPF records in the DNS (Domain Name System), organizations can prevent their outgoing messages from being flagged as spam by recipient servers.
How does SPF work?
Sender Policy Framework (SPF) is a crucial mechanism in email authentication, designed to prevent email spoofing and unauthorized use of domain names. Let’s delve into a detailed explanation of how SPF operates:
1. Publishing SPF record
Domain owners initiate the SPF process by publishing an SPF record in the Domain Name System (DNS) configuration for their domain. This SPF record serves as instructions for email receivers, specifying which “Custom Mail from Domain” provided by Amazon SES are authorized to send emails via your custom support email.
The Amazon SES maintains a list of IP addresses from which your email can be sent, essentially creating a whitelist of authorized IP addresses. The process to get the IP addresses for Amazon SES is explained in this article.
2. Verification process
When an email is sent, the recipient’s mail server performs a series of checks to determine its legitimacy. One of these checks involves querying the SPF record for the custom support email which was set up in Amazon SES.
The receiving mail server retrieves the SPF record from the DNS, seeking authorization information regarding the IP addresses permitted to send emails on behalf of the sender’s custom support email.
3. Matching process
Upon retrieving the SPF record, the receiving mail server compares the IP address of the sender with the list of authorized senders specified in the SPF record.
- Successful match (SPF authentication passes): If the sender’s IP address matches one of the authorized IP addresses listed in the SPF record, SPF authentication is successful. This establishes a legitimate link between the sender’s custom support email and the domain, indicating that the email is likely genuine and not spoofed.
- No match (SPF authentication fails): If there is no match between the sender’s IP address and the authorized IP addresses listed in the Amazon SES, SPF authentication fails. In such cases, the receiving server may view the email with suspicion or even reject it outright, considering it potentially fraudulent or spam.
Implementing email domain verification using SPF in Desk365
Follow these steps to set up SPF records within Desk365:
- Navigate to the Settings menu and select Email.
- Add your custom support email address and complete the verification process.
- We recommend you complete the DKIM verification before initiating the SPF verification.
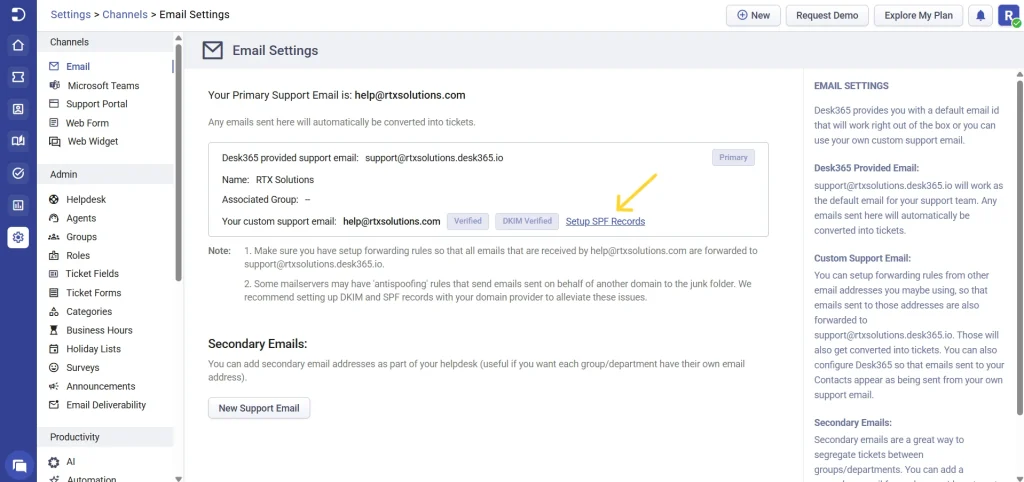
- Once you have added the custom support email and completed the DKIM verification you will find the option to set up SPF records, as shown below.
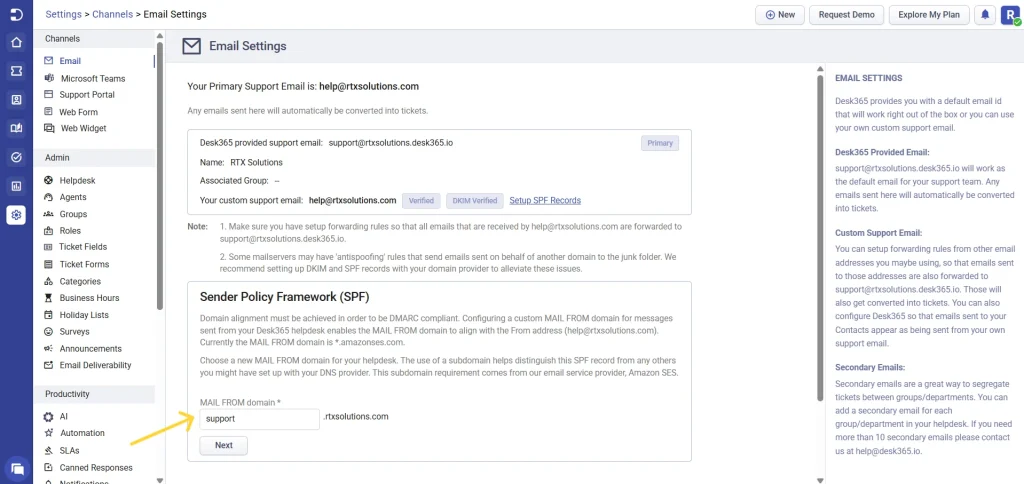
- Once you click on the SPF verification a dialog box opens. Customize your MAIL FROM domain here and hit Next.
- Now the MX and TXT records automatically populate. You can then click ‘Download records as .csv’ to obtain your SPF records in CSV format or you can simply copy from the table and publish these to your domain’s DNS provider.
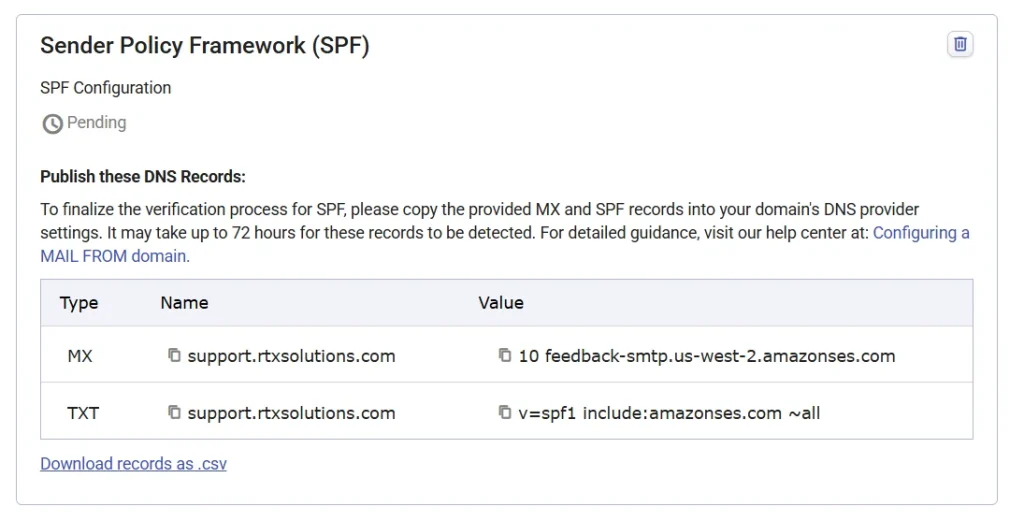
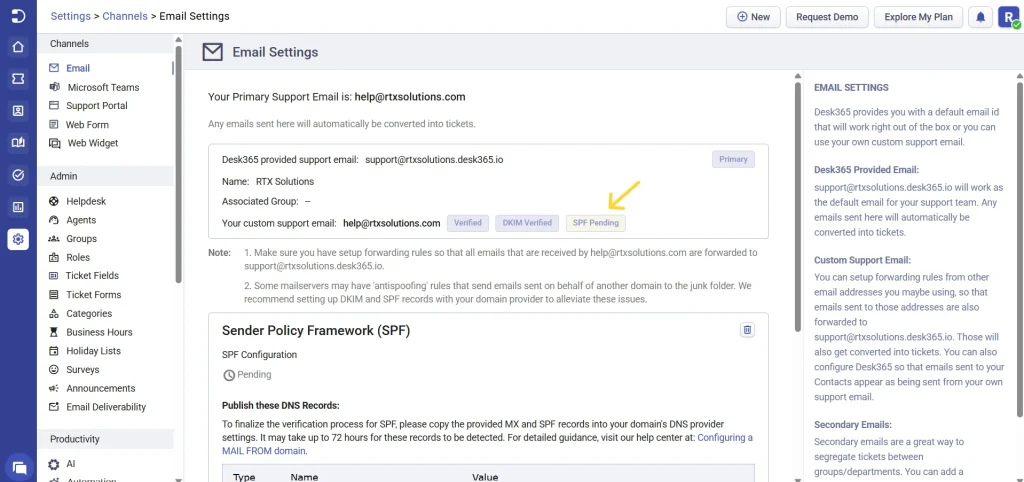
- Your SPF verification status will remain pending until you complete the authentication process.
How to add an MX and TXT record?
Here’s a step-by-step guide on how to add an MX and TXT record to your domain:
- Log in to your domain registrar’s control panel using the credentials you used to register your domain name.
- Navigate to the DNS settings to access your DNS records. Look for the option to add a new record and select MX as the record type.
- Provide the details for your new MX record, including the name, priority, value, and TTL (Time To Live). Ensure accuracy and click “save” to confirm.
- Within the DNS settings, select the option to add another new record, this time choosing TXT as the record type.
- Enter the required information for your new TXT record, including the name, priority, value, and TTL. Once entered correctly, save the record.

- After adding both records, double-check your Agent Portal or DNS settings to ensure that the records are properly configured and ready to use.
By following these steps, you can successfully add an MX and TXT record to your domain, ensuring smooth email delivery and authentication processes. You can now check in your Agent Portal and confirm if everything is good to go.

Note: It may take around 72 hours (about 3 days) for your changes to propagate to all servers.
By implementing SPF within Desk365, you can ensure that your outgoing support emails are authenticated, trusted, and less likely to end up in recipients’ junk or spam folders.
Email Domain Verification using SPF is crucial for establishing trust with customers and safeguarding against email spoofing. With Desk365’s support for SPF authentication, you can fortify your email communication channels, ensuring that your messages reach recipients securely and reliably.
In addition, if you encounter any difficulties during the SPF verification process we encourage you to visit our troubleshooting guide which covers a range of common issues and provides step-by-step solutions to help you resolve the SPF validation error.


