


Managing customer contacts is an essential part of any helpdesk system. A helpdesk usually has multiple channels for customers to reach out to, such as Email, Phone, Microsoft Teams, Support Portal, Web Forms, and more.
For instance, in your organization, it is possible that some users have an email address that differs from their user principal name in the Microsoft Entra ID, formerly Azure AD.
For example, the user principal name might be andy@rtxsolutions.onmicrosoft.com whereas their Outlook email address may be andy@rtxsolutions.com.
Let’s suppose a user creates tickets using both of these two email addresses. If the user checks the status of their tickets in the Support Portal, they may observe that only the tickets created with the email address andy@rtxsoluutions.onmicrosoft.com are visible, while the tickets created with the email address andy@rtxsolutions.com are missing from the portal, even though they belong to the same user.
Whatever the cause, having multiple contact records can make it difficult to keep track of important information and can lead to confusion and inefficiencies.
To avoid this issue, helpdesk software’s like Desk365 offers the ability to merge multiple contacts into a single record.
This can help streamline your customer management processes and ensure that all relevant information is easily accessible in one place. By consolidating duplicate records, you can avoid sending redundant communications, prevent data inconsistencies, and gain a more holistic view of your customer interactions.
In this help center article, you will find a comprehensive guide on how to include secondary email addresses and merge contacts within Desk365.
Adding secondary email addresses
As a support agent, if you want to add multiple secondary email addresses for a contact in Desk365, these are the steps to do so.
1. Navigate to Accounts > Contacts > All Contacts tab.
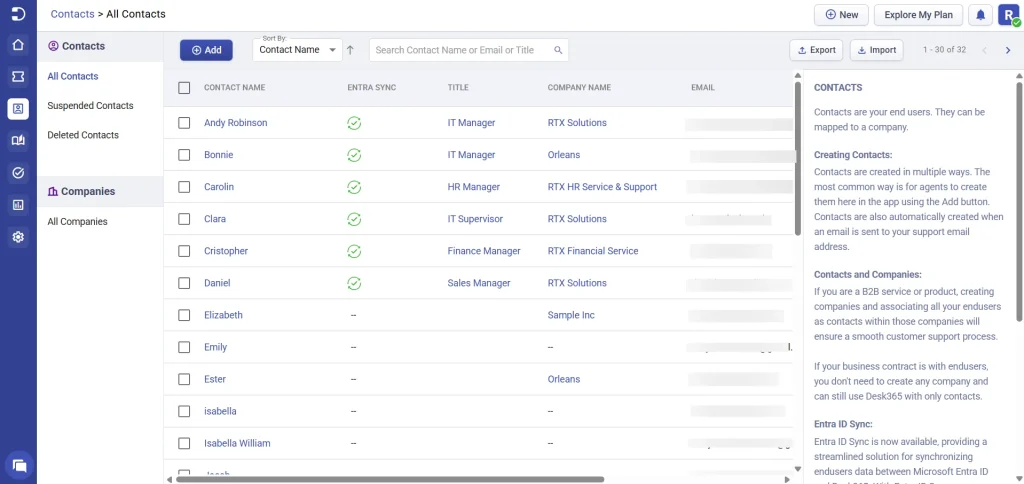
2. Select the contact you wish to modify and click on the ‘Edit’ button.
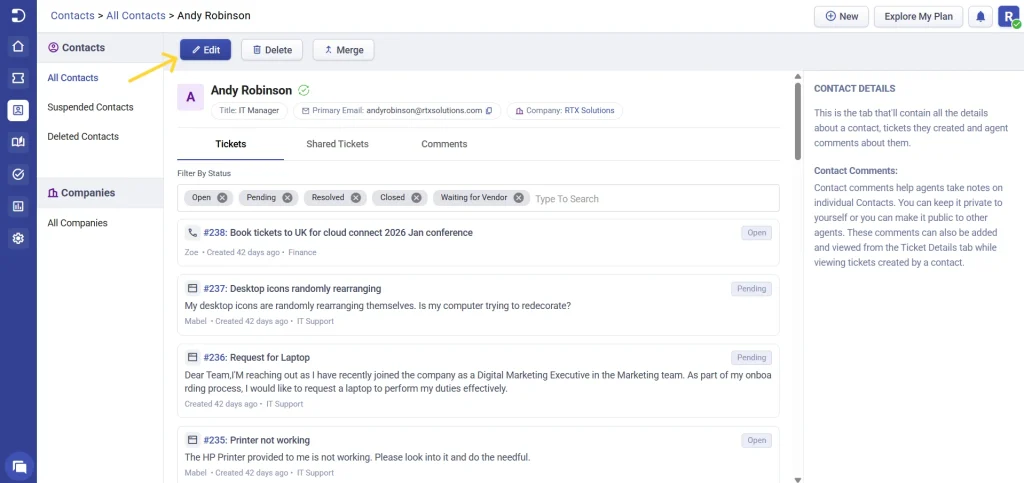
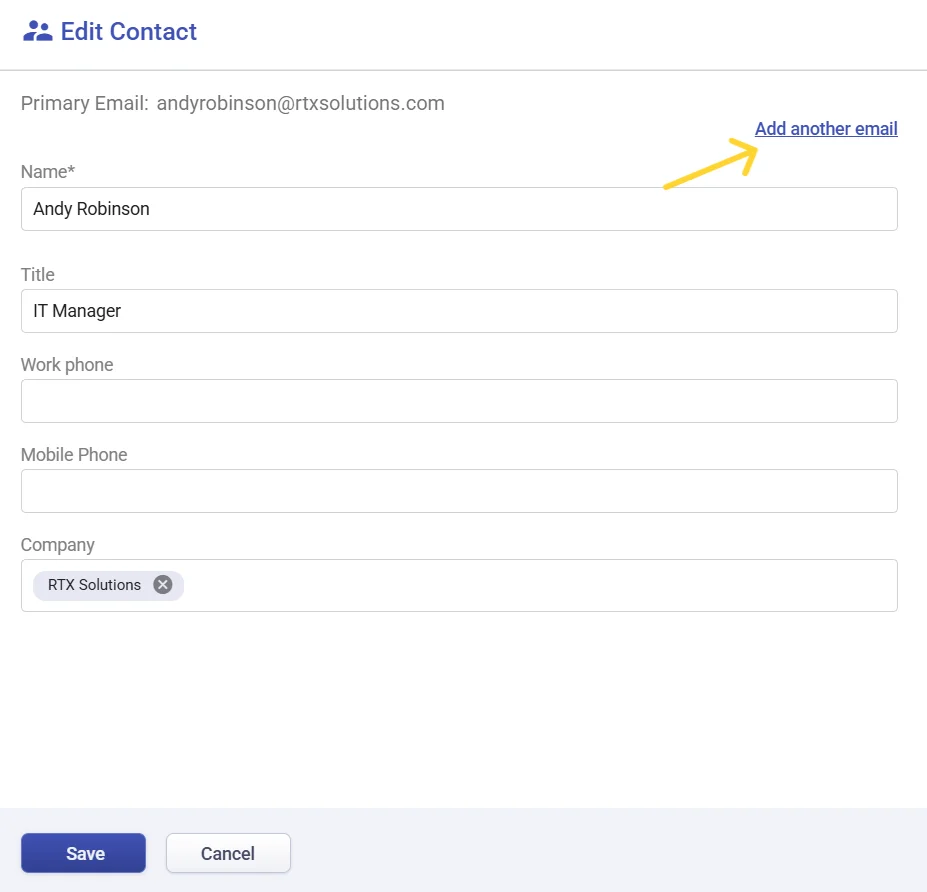
The ‘Edit Contact’ screen appears.
3. Click on the ‘Add another email’ button.
4. Here, you can add multiple secondary email addresses associated with the contact.
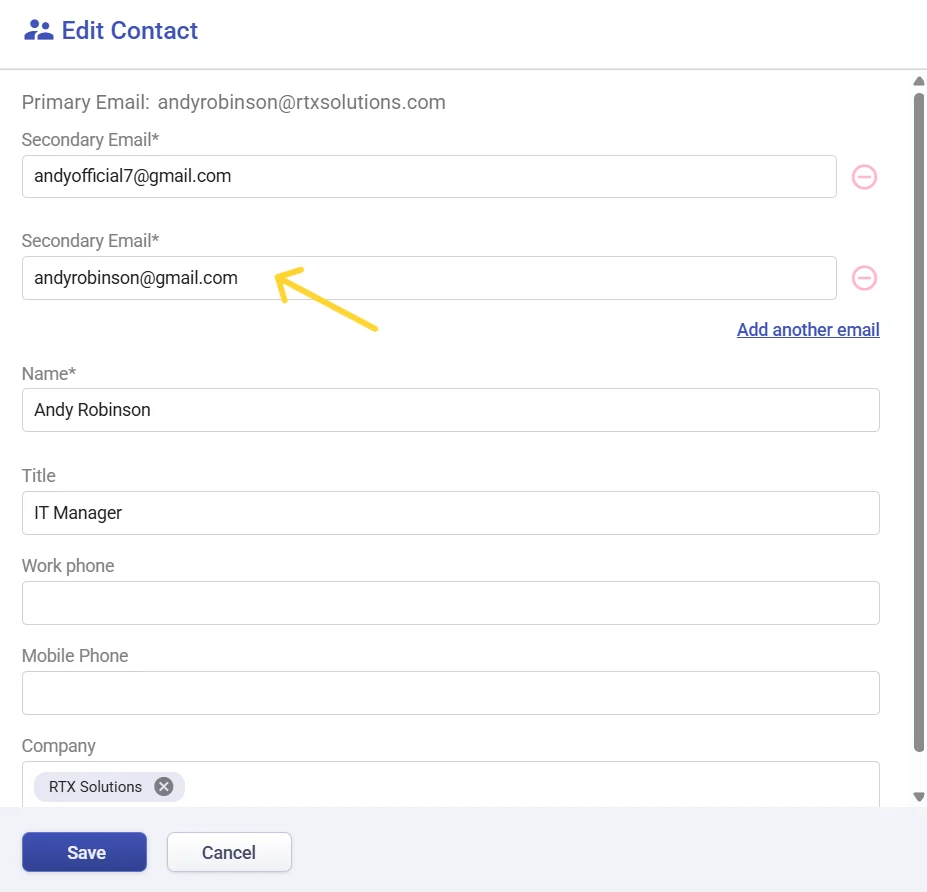
You also have the option to add up to 10 secondary email addresses, in addition to the primary email address, for a specific contact.
5. Finally, click on the ‘Save’ button.
You will notice that multiple secondary email addresses have been added to the contact, and you can find them by going to the ‘Contacts’ tab in Desk365.
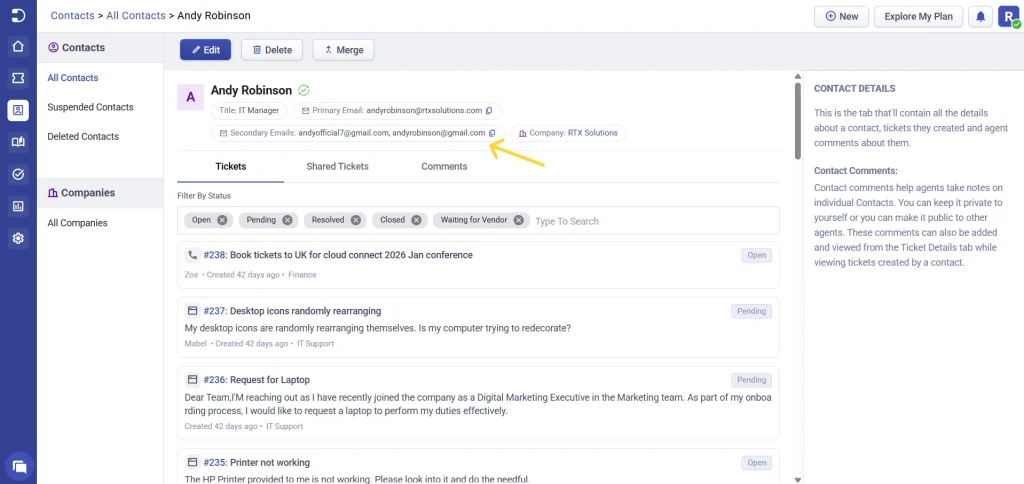
Now, when a contact uses secondary email addresses (andyrobinson@gmail.com and andyofficial7@gmail.com) to create tickets, the tickets will be created and associated with the contact name ‘Andy’.
Note: If you remove a secondary email address that is linked to a contact in Desk365, all of the associated contact details and tickets will be transferred to the primary email address. This ensures that any conversations are not lost.
However, if the contact had previously signed in to the Support Portal using their secondary email address, they will no longer be able to access it.
Viewing tickets in the support portal
Suppose that a contact named ‘Andy’ has submitted two tickets through two different secondary email addresses: ‘andyrobinson@gmail.com’ and ‘andyofficial7@gmail.com’.
Now, ‘Andy’ wishes to keep track of the ticket status in the support portal.
When ‘Andy’ logs in to the support portal using his email address ‘andyrobinson@gmail.com’, he will be able to view all the tickets that were created using the email addresses ‘andyrobinson@gmail.com’, ‘andyofficial7@gmail.com’, and ‘andy@rtxsolutions.com’.
The reason for this is because ‘andyrobinson@gmail.com’ and ‘andyofficial7@gmail.com’ are both secondary email addresses linked to the contact ‘andy@rtxsolutions.com’.
Replying to the tickets from the agent portal
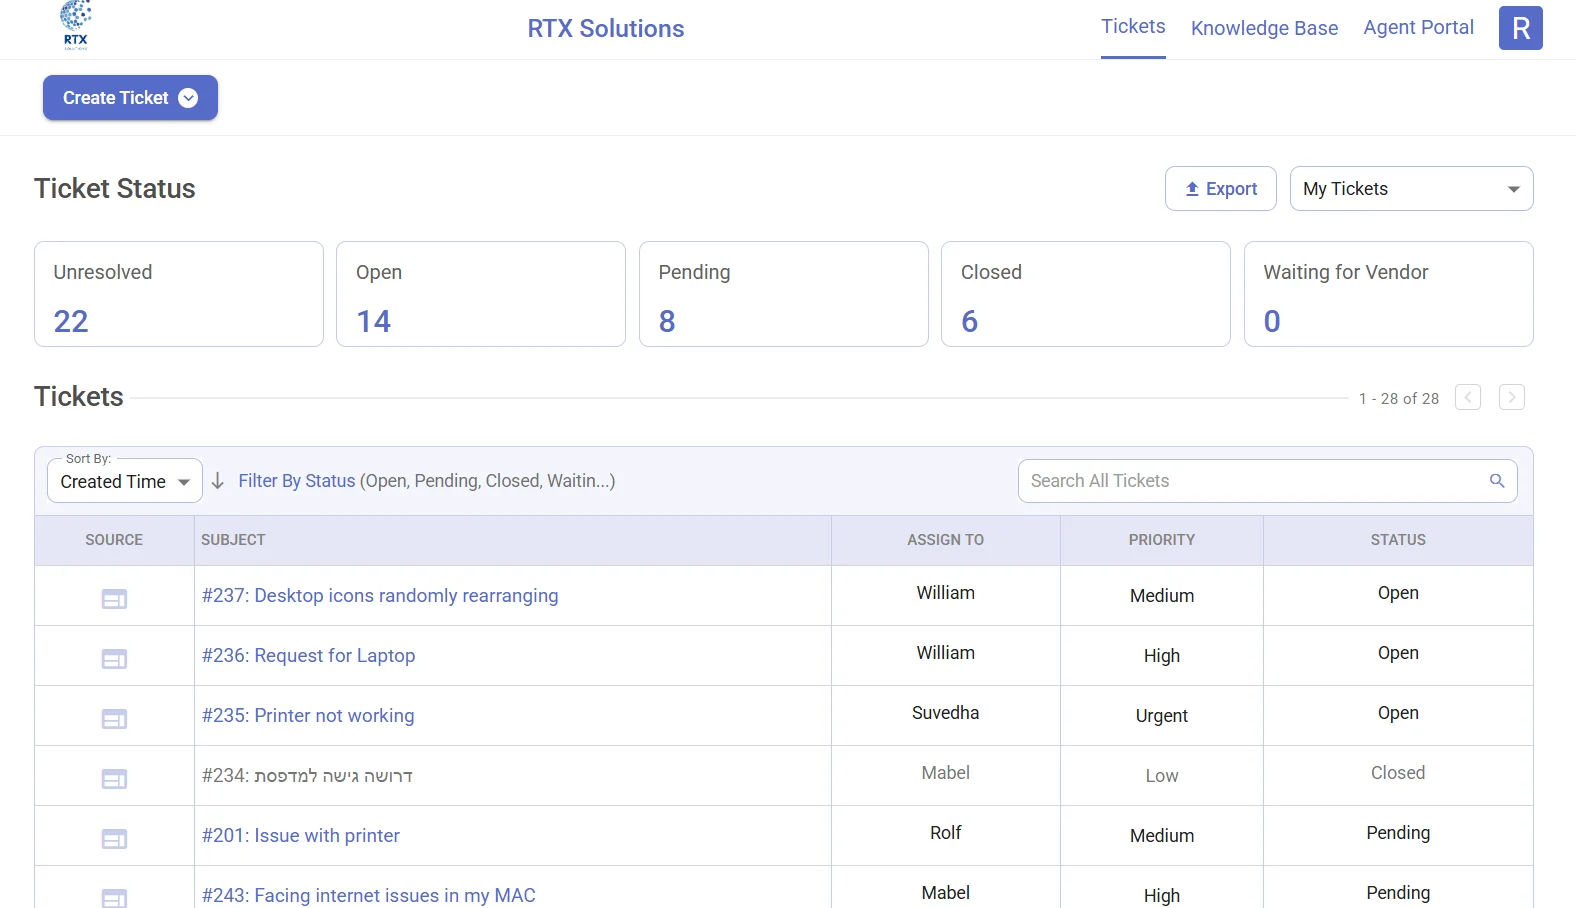
Likewise, if a ticket was created using the email address ‘andyrobinson@gmail.com’, when you respond to the ticket through the agent portal, you will observe that the ‘To’ field for the recipients displays the email address ‘andyrobinson@gmail.com’, which is the email used to create the ticket.
How to merge multiple contacts in Desk365
As a customer support agent, one of the most important aspects of your job is to provide timely and efficient assistance to your customers. However, dealing with multiple contacts from the same customer can be time-consuming and confusing. This is where merging multiple contacts can help.
Merging multiple contacts refers to combining all the notes and contact information with the same customer into a single record. This not only saves time but also ensures that all customer communication is in one place, making it easier for you to provide personalized and efficient support.
Merging multiple contacts in Desk365 involves a few simple steps. Here’s how to do it:
1. Identify duplicate contacts
The first step is to identify duplicate contacts. This can be done by searching for the customer’s name or email address in your helpdesk.
To do this, navigate to Accounts > Contacts > All Contacts tab. If there are multiple records for the same customer, you can proceed to merge them.
Suppose you discovered that a contact has two email addresses in your helpdesk that are quite similar – andy@rtxsolutions1.onmicrosoft.com and andy@rtxsolutions.com. Ideally, both email addresses should belong to the same contact, named ‘Andy’. Therefore, you want to merge them into a single contact.

2. Select contacts to merge
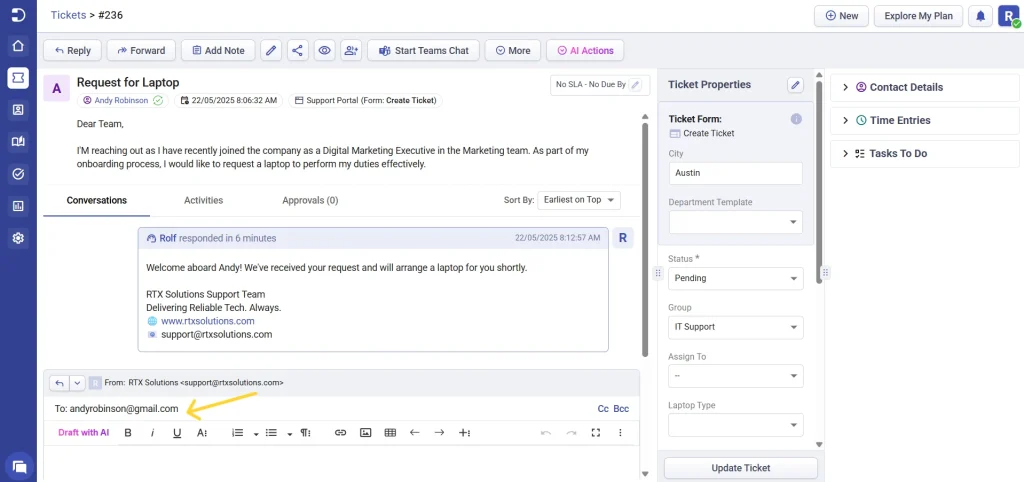
Once you have identified the duplicate contacts, select the ones you want to merge.
To make a specific contact the primary contact, simply select the ‘Contact’ you want to modify and then click on the ‘Merge’ button.
3. Merge the contacts
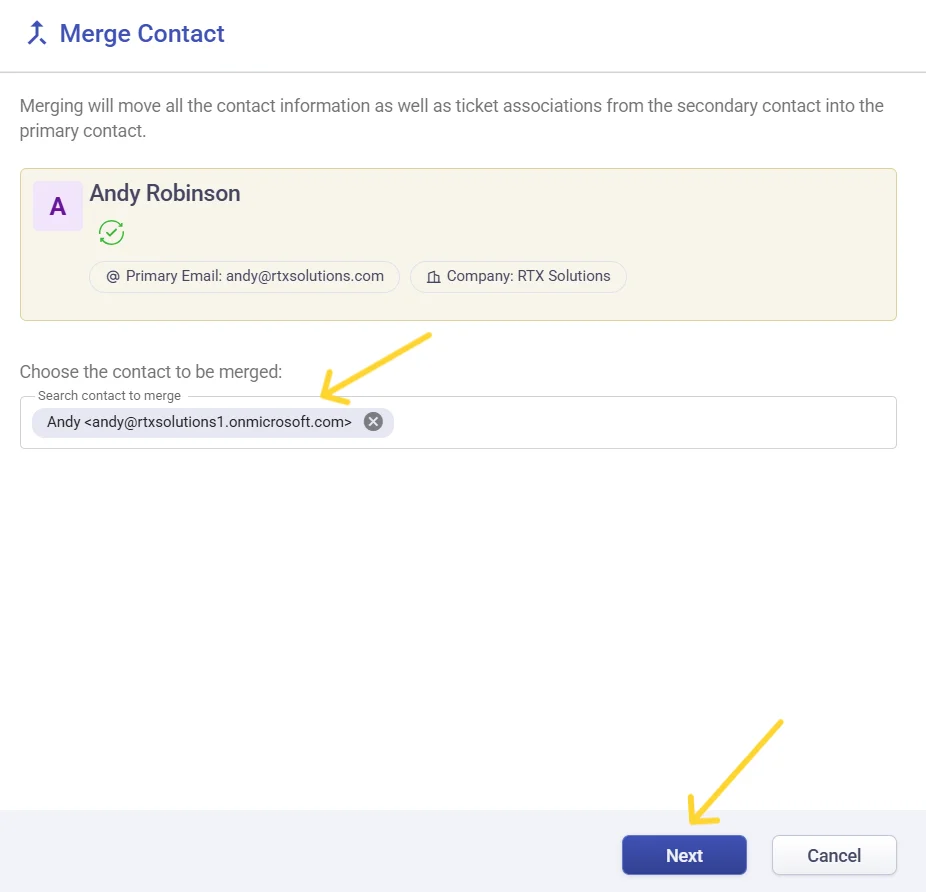
‘Merge Contact’ dialog box appears. You’ll notice that the email address ‘andy@rtxsolutions.com’ is listed as the primary email here.
Now, you can choose ‘andy@rtxsolutions1.onmicrosoft.com’ in the contact search box as you want to merge these two accounts into a single one. Click on the ‘Next’ button.
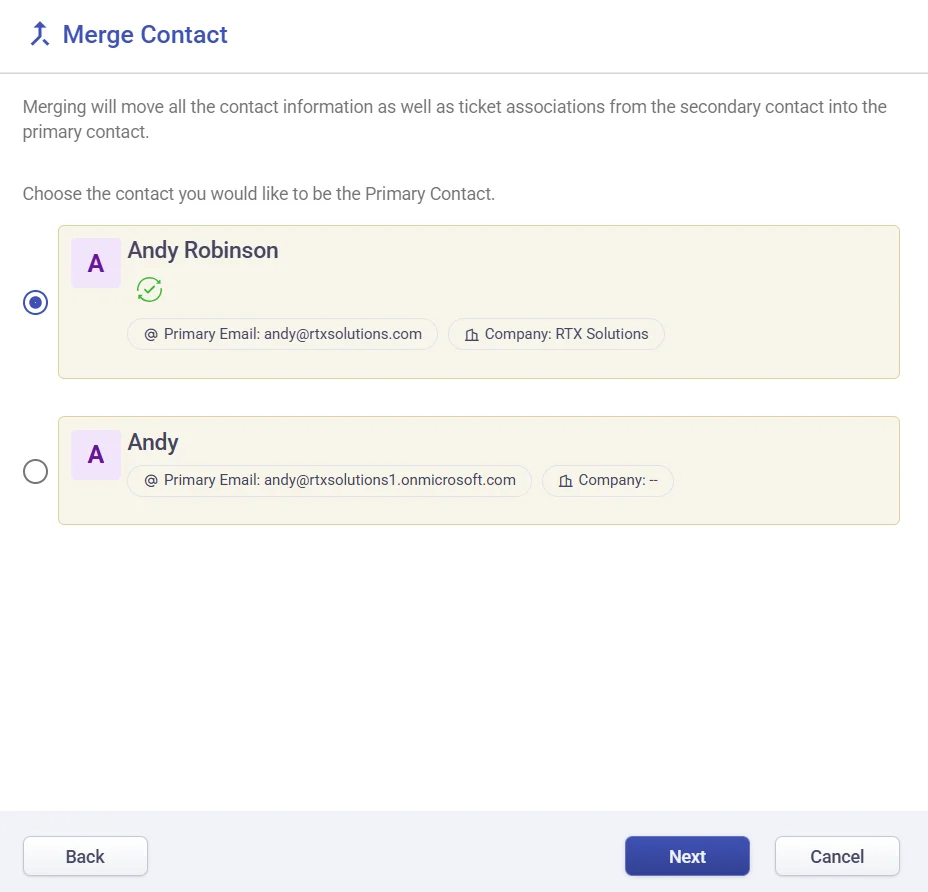
In the next screen, choose the contact you would like to be the Primary Contact. After choosing the contact you would like as a primary contact for the helpdesk, click on the ‘Next’ button again.
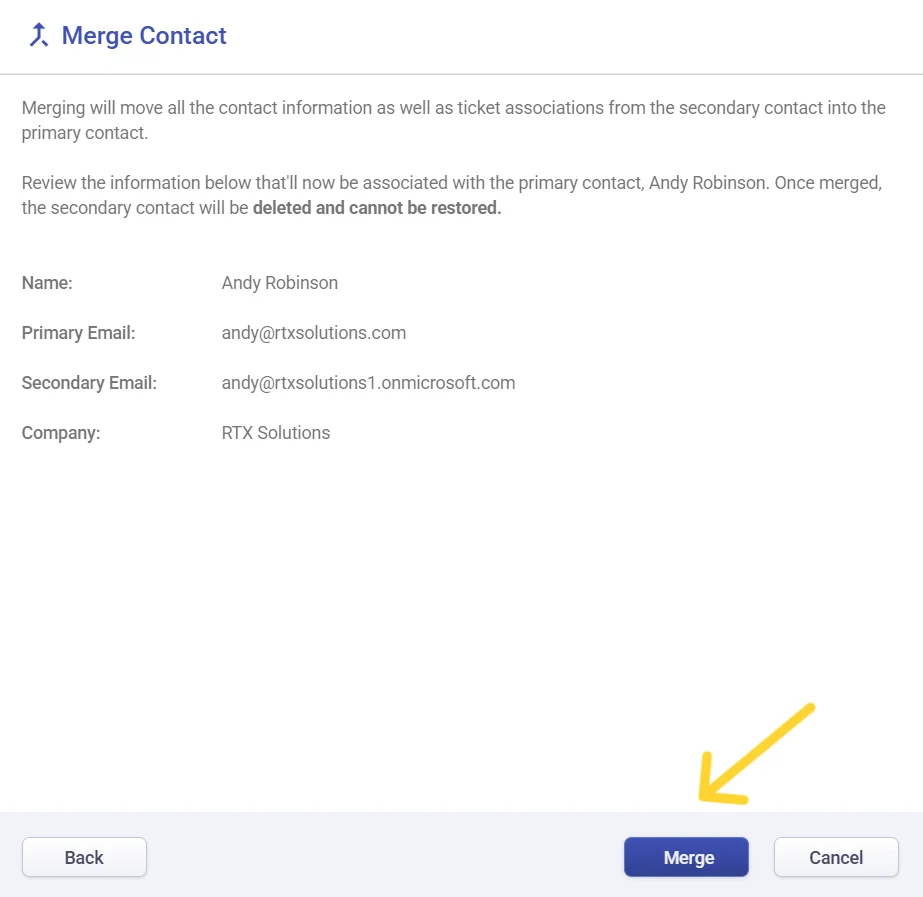
Now you’ll notice that ‘andy@rtxsolutions.com’ displays as ‘Primary Email’ and ‘andy@rtxsolutions1.onmicrosoft.com’ appears as ‘Secondary Email’ on the screen.
Click on the ‘Next’ button to merge these two contacts into a single one.
Merging will move all tickets, notes and contact information from the secondary contact into Andy. The secondary contact will be deleted and cannot be restored.
4. Verify the merged contacts
After merging the contacts, verify that all the communication related to the customer is now in one place. You should also ensure that there are no duplicate tickets or emails.
If you sign in to the Support Portal with the email address ‘andy@rtxsolutions1.onmicrosoft.com’, you will see all the tickets that were created using both ‘andy@rtxsolutions1.onmicrosoft.com’ and ‘andy@rtxsolutions.com’. This is because we have merged these contacts into a single one.
Benefits of merging multiple contacts in helpdesk
Merging multiple contacts in Desk365 comes with several benefits that can improve your customer support process. Some of these benefits include:
Improved efficiency: Merging multiple contacts means that all communication related to a particular customer is in one place. This makes it easier for customer support agents to view the entire communication history with the customer and respond to their queries and concerns more efficiently. It also eliminates the need to switch between different tickets, emails, and chats, saving time and effort.
Better customer experience: Merging multiple contacts can improve the customer experience by providing personalized and efficient support. By having all customer communication in one place, customer support agents can easily identify recurring issues and provide targeted solutions. This can also help build customer loyalty and improve customer satisfaction.
Reduced duplicate tickets: Multiple contacts from the same customer can result in duplicate tickets, leading to confusion and inefficiency. Merging multiple contacts helps avoid this problem by consolidating all communication related to a particular customer in one place. This eliminates the need to create duplicate tickets and ensures that all communication is tracked and managed properly.
Merging multiple contacts has several benefits for both the customer and the support team. For the customer, it ensures that their data is accurate and up-to-date, regardless of the channel used to contact the helpdesk. For the support team, it helps to streamline their workflow, reducing the risk of errors and duplication.
By following the steps outlined above, helpdesk teams can effectively manage customer contacts and provide excellent customer service.


