Support agents who have established personal relationships with customers often receive a high volume of support-related emails and feedback in their personal inboxes. As a support agent, it is crucial to monitor support-related emails that are sent to your personal inbox to ensure that you do not miss any important enquiries.
To ensure prompt and efficient resolution of customer enquiries, you can forward support-related emails received in your personal inbox to the designated support email address linked to your helpdesk and create a separate ticket for each one.
With this feature enhancement, when forwarding support-related emails from your personal inbox, the customer’s name will be automatically designated as the ticket requester, instead of the name of the forwarding agent.
In this help center article, we will guide you through the steps to forward support-related emails and set the contact’s name as the ticket requester in both Outlook and Gmail.
Note: This feature is limited to Agent Forwarding, meaning that tickets are created only when ‘Agents’ forward emails received from customers. We only support attachments of type message/rfc822, also known as Mime type for EML files for this process.
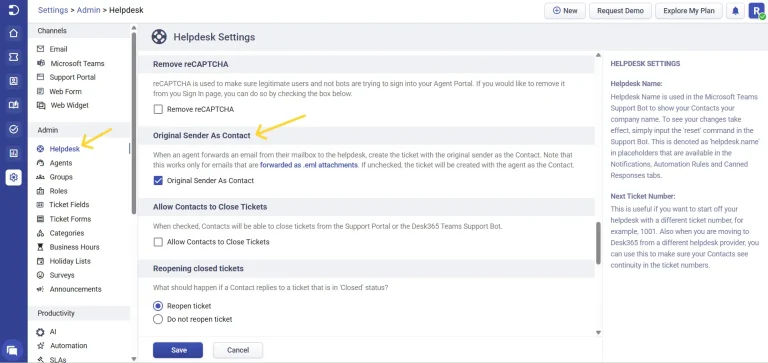
How to locate this setting in Desk365
To locate the setting, navigate to the Helpdesk Settings under Settings > Admin in your helpdesk.
In the ‘Original Sender As Contact’ section, you have the option to either check or uncheck the box based on your needs.
When checked, the original sender will be recognized as the contact for the ticket whenever an agent forwards an email. If unchecked, the ticket will be created with the agent as the Contact.
Setting the sender's name as the ticket requester in forwarded emails in Outlook (Browser)
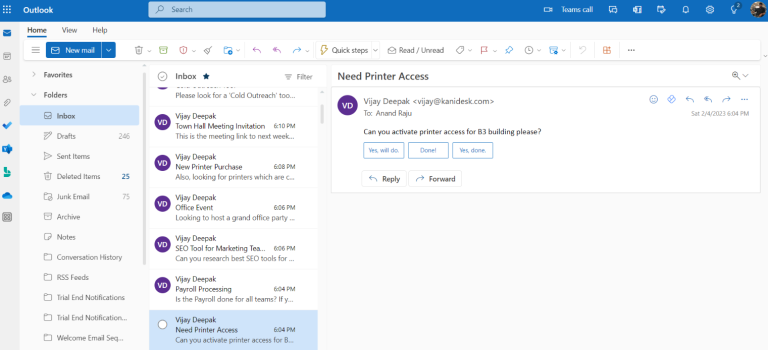
Consider a scenario where there is a contact named ‘Vijay’ who has a good personal relationship with agent ‘Anand’. Instead of sending enquiries to the group support email address, Vijay prefers to communicate directly with Anand.
With the release of this feature, Anand can easily forward Vijay’s emails to the helpdesk-linked support email address and create a ticket with Vijay as the designated contact. This can be done from within Outlook (browser) by following the steps outlined in detail below.
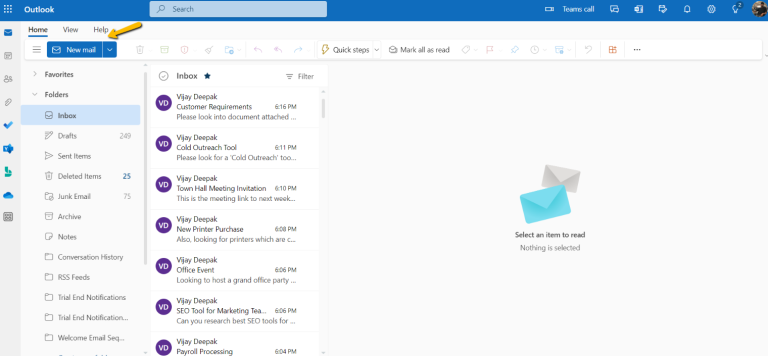
1. Select the email that the customer sent to your personal inbox.
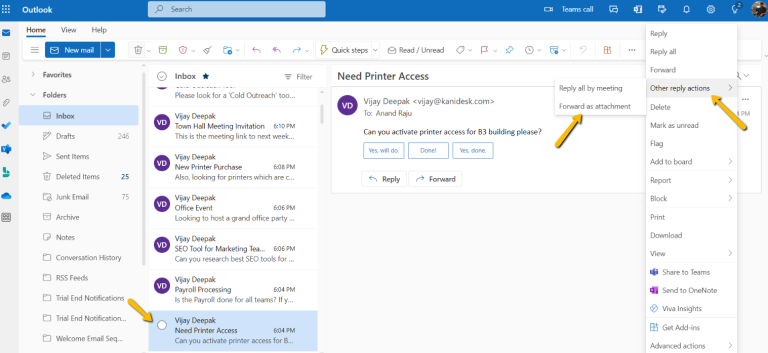
2. Click on the ‘More actions’ (represented by three dots) icon located in the right corner of the email.
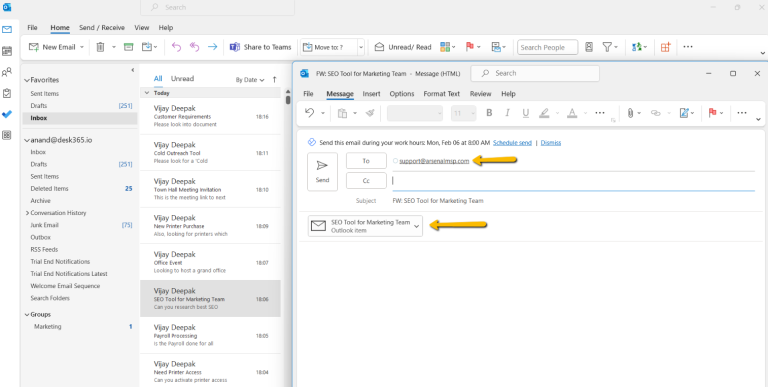
3. From the ‘Other reply actions’ menu, select the ‘Forward as attachment’ option.
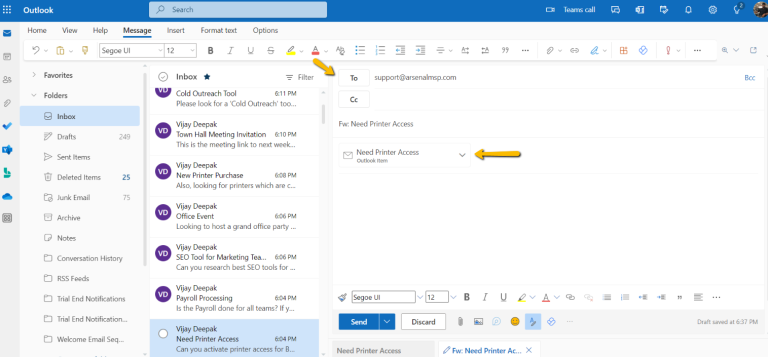
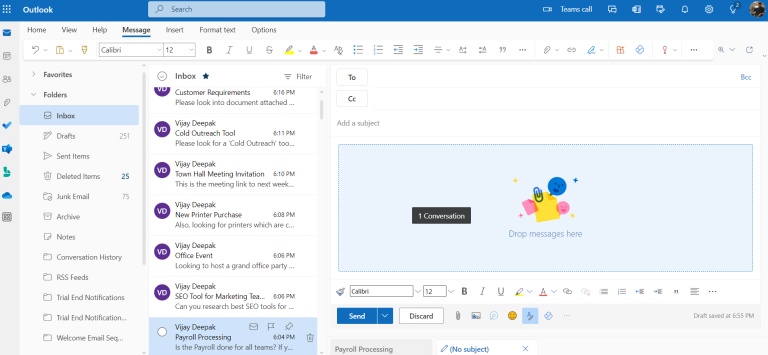
4. The ‘New Email’ screen will appear. In the ‘To’ field, enter the email address of your support email linked to your helpdesk and press the ‘Send’ button.
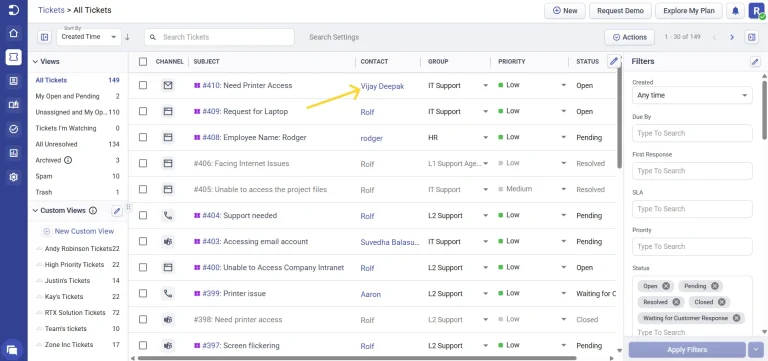
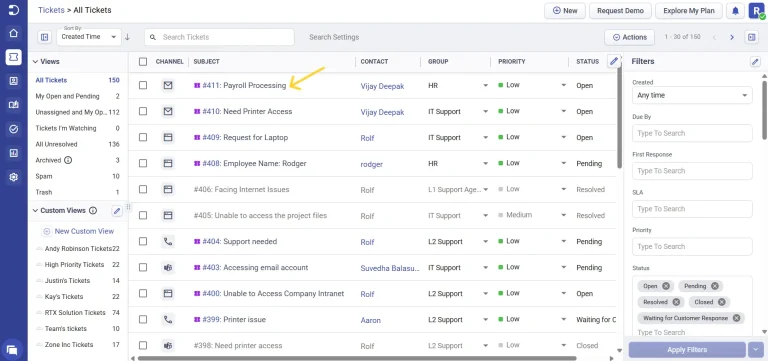
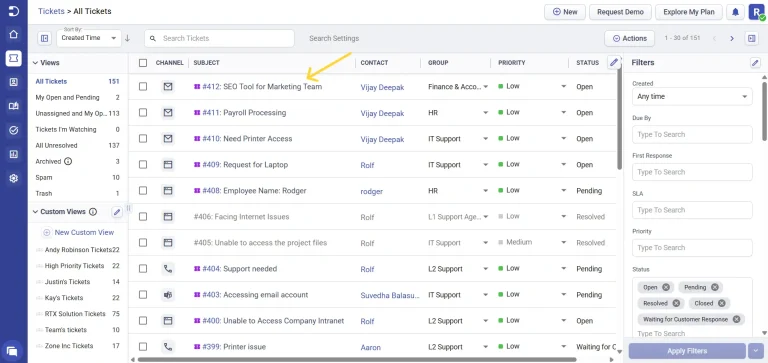
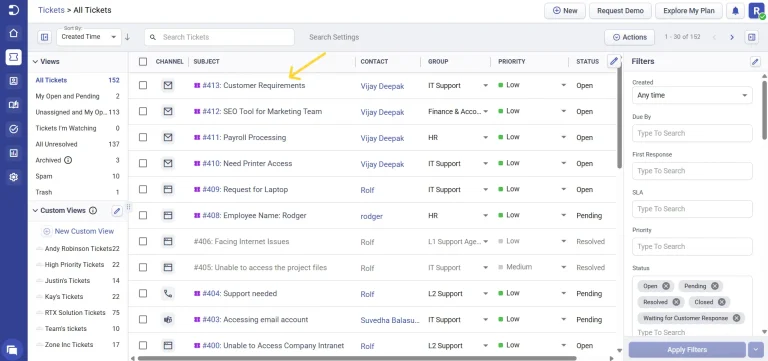
5. By forwarding the email to your helpdesk-linked support email address, a ticket will get created in your helpdesk system. Log in to your helpdesk and navigate to Tickets > All Tickets.
You will observe that the ticket has been created in your helpdesk, and the customer’s name is accurately displayed as the ‘Contact’ for this ticket.
6. Another method to do this in Outlook is by clicking on the ‘New mail’ button located at the top of the Home tab in Outlook.
7. The New Email screen appears. Now, you can drag and drop the customer’s email from the left-side to the right-side of this screen.
8. Forward the email to your helpdesk linked support email and a ticket gets created in your helpdesk with the customer’s name as the requester in the ‘Contact’ field.
Setting the sender's name as the ticket requester in forwarded emails in Outlook (App)
These are the steps to follow to make this function work in the Outlook App.
1. Select the email which the customer sent to your personal inbox.
2. Click on the ‘three dots’ icon located in the right-side corner of the email and select the ‘Forward as Attachment’ option.
3. In the ‘To’ field, enter the email address of your helpdesk-linked support email and press the ‘Send’ button.
4. A ticket is created in your helpdesk, and you will see the customer’s name correctly displayed as the ‘Contact’ for the ticket.
5. You can also achieve this in Outlook app using two additional methods.
Click on the ‘New Email’ button located at the top in the Outlook app. The ‘New Email’ screen will appear, and you can drag and drop the customer’s email from the left side to the right screen, just as we did in the Outlook web browser.
6. Another option is to select multiple emails to forward to your helpdesk by holding down the ‘Ctrl’ key while making your selections.
7. Now, either press ‘Ctrl +F’ or click the ‘Forward’ button found at the top (Ctrl + F).
8. Forward the email to the support email linked to your helpdesk and a ticket will be created, with the customer’s name as the requester in the ‘Contact’ field.
Setting the sender's name as the ticket requester in forwarded emails in Gmail
Here’s how to set up this feature in Gmail.
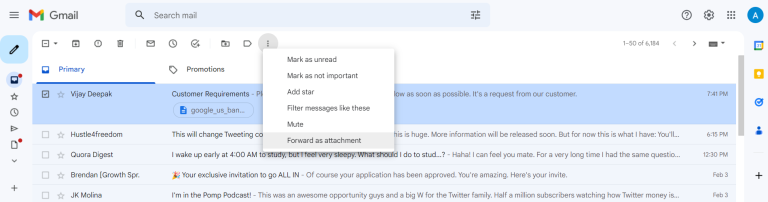
1. Select the email you want to send to your helpdesk and convert into a ticket. Click on the three dots icon located at the top labeled ‘More’.
2. Choose the ‘Forward as attachment’ option.
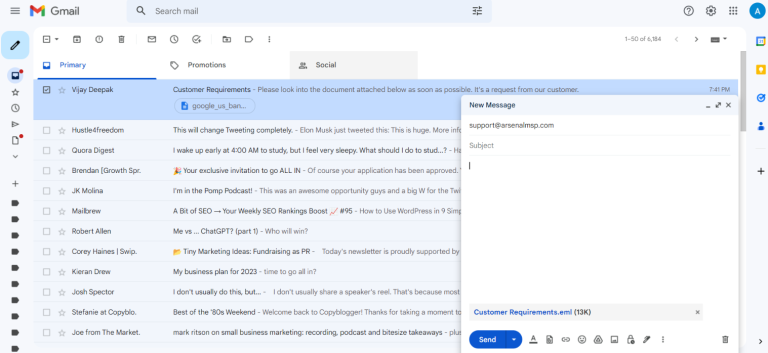
3. In the ‘To’ recipient box, enter the email address of your helpdesk’s support email and press the ‘Send’ button.
4. By forwarding the selected email to the helpdesk’s support email address and hitting the ‘Send’ button, a ticket will be created in your helpdesk with the customer’s name as the ‘Contact’ for the ticket.
Just like in Outlook, you can also click on the ‘Compose’ button at the top in Gmail and drag and drop multiple customer emails and forward them to your helpdesk linked support email thereby creating them as tickets.
Note: This works only for emails that are forwarded as .eml attachments.
Using the sender’s name as the ticket requester in forwarded emails can provide several benefits for customer service and support teams. By automatically populating the requester information, teams can save time and improve efficiency in their workflow. This information also provides valuable context and helps to ensure that customer enquiries are accurately tracked and resolved in a timely manner.