


When you create a Desk365 account we provide you with a default email ID, support@yourdomain.desk365.io. This will work as a default support email for your support team. Any email sent here will automatically be converted into tickets.
If you would rather use your own custom support email, like support@yourdomain.com, you can use that as well with Desk365. For that to work, you’ll need to setup forwarding rules and grant Desk365 permissions to send emails on your behalf. Below we’ll review the steps to take to configure your custom support email.
Enter custom support email
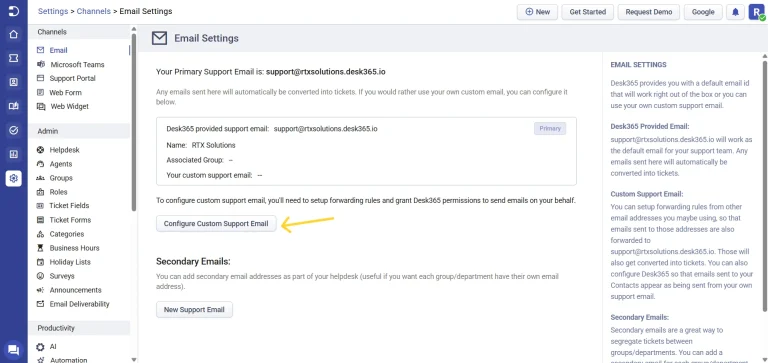
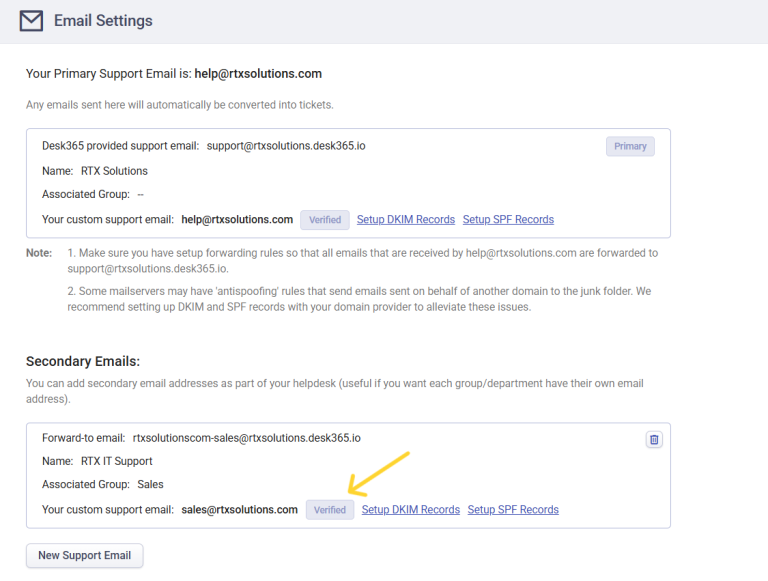
In the Settings > Channels > Email tab you’ll find the Desk365 provided email support@yourdomain.desk365.io. Here, click on the ‘Configure Custom Support Email’ button. This will open up the Edit Support Email page.
Forward emails
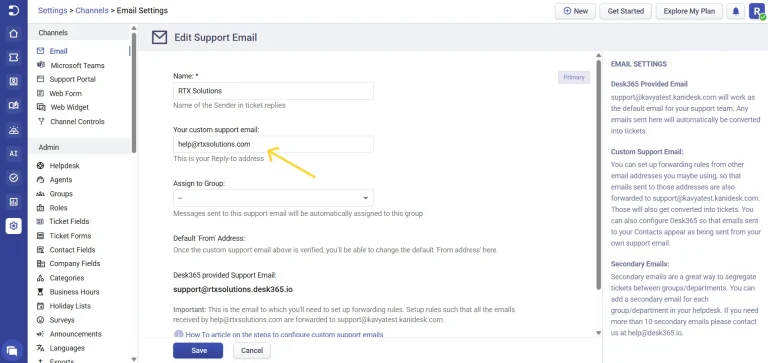
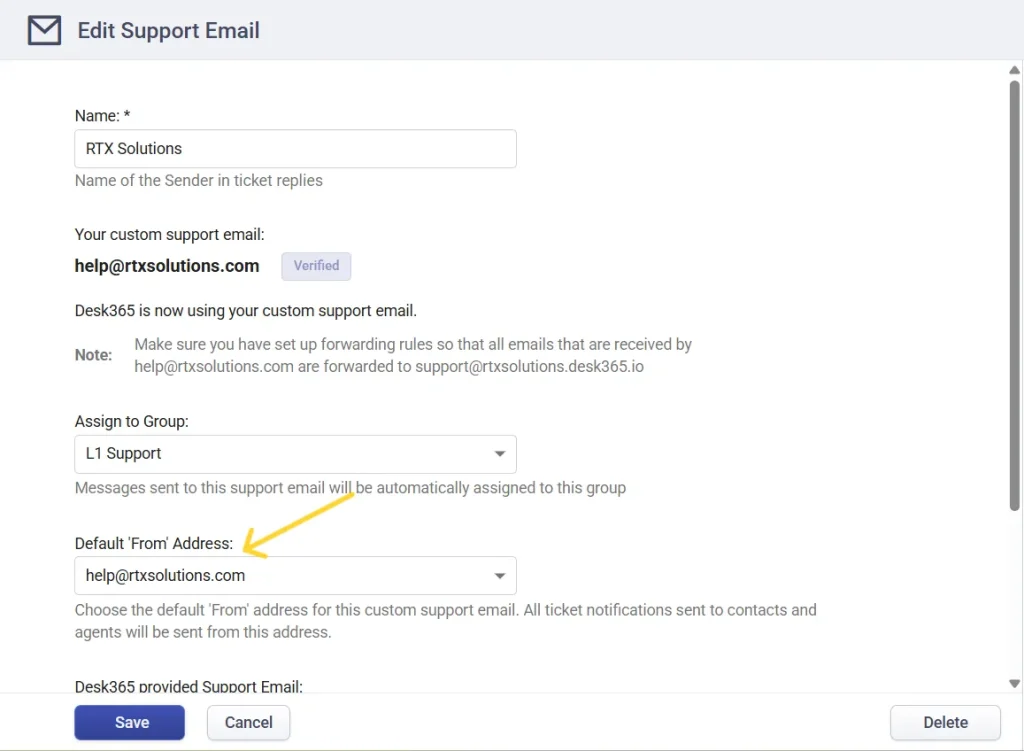
In the ‘Edit Support Email’ page you can enter your custom support email. You can also choose a group, if you would like all the tickets that are created via this email to be assigned to a particular group in your helpdesk.
Important: Before you click Save, make sure you set up forwarding rules from your custom support email (in this example, support@yourdomain.com) to your Desk365 provided email (support@yourdomain.desk365.io).
Only when these emails are forwarded will Desk365 be able to receive the emails and convert them to tickets. Learn how to set up forwarding rules in Office365 as mentioned in our previous article.
Verify custom support email
Once you click the Save button in the ‘Edit Support Email’ page you’ll see a popup window that explains the two step process to be done before everything is set.

First, you’ll receive an email from Amazon Web Services, our email provider. This email will contain a link that you’ll need to click. This step is to make sure you’re indeed the owner of your custom support email.
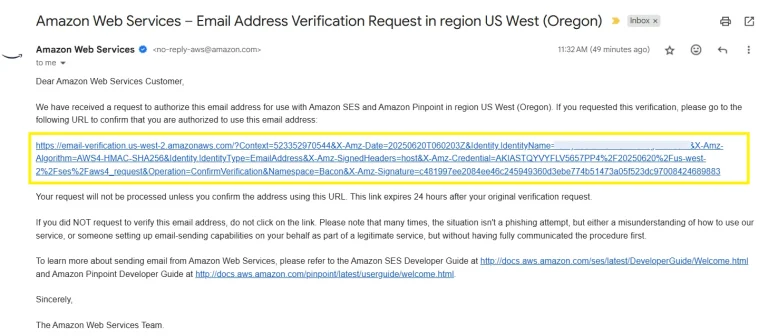
Once you click on the email, you’ll see a message from Amazon Web Services stating your email has been successfully verified.
Now, you’ll need to go back to the Desk365 application to let us know that you’ve successfully verified it, by clicking on the ‘Verify’ button in the ‘Edit Support Email’ page. At this point, Desk365 will verify with Amazon Web Services and once everything is successful it will display a ‘Verified’ label.
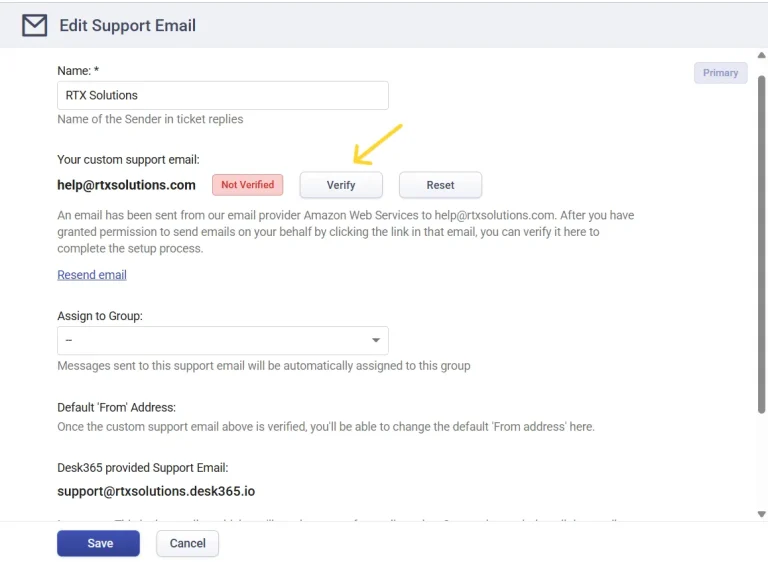
At this point, Desk365 will verify with Amazon Web Services and once everything is successful the ‘Not Verified’ label will change to a ‘Verified’ label.
After verification, the configured email can be used as the default From address for replies, based on how it is associated with groups.
When multiple emails are configured and associated with different groups, you can control which email address appears as the default From address for each group. For example, a group can have its own email while also allowing another group’s email to be set as the default. In the ticket view, the default email will be pre-selected based on this configuration, but agents can change it if needed while replying.
Now, you’re all set with your custom support email. You can try sending an email to your newly configured custom support email and check if a ticket is created for each email that is sent to it.
Secondary emails
We just saw how to set up your custom support email with Desk365. Now, you may want to use multiple emails with your helpdesk. For example, your sales team might use sales-support@yourdomain.com, while your IT support team might be using it-support@yourdomain.com.
With Desk365’s email ticketing system, you can now add these also as support emails and set it up such that emails sent to each of those secondary emails are assigned to their respective groups within Desk365. All you need to do is create separate secondary emails and choose the appropriate group while configuring it.
DKIM records
Sometimes the receiver of your email might have set their mail server to detect ‘antispoofing’. This might move emails that are sent on behalf of some other email address into the junk folder. If you notice this happening to the emails sent from Desk365 after you set up your custom support email you should set up DKIM records with your domain name provider. Once this is done, emails will not be sent to the junk folder.
Setting up DKIM records is an easy and one time process. Let us know your desire for setting up DKIM records and we’ll generate the CNAME records you’ll need to add to the records at your domain name provider. Once you add these records, emails sent by Desk365 on behalf of your custom support email, will be treated just like emails sent directly from your custom support email.
In this help center article, you will discover the steps required to set up the DKIM method in Desk365.


