Desk365 streamlines conversational ticketing for Microsoft Teams, making it effortless for support agents to create tickets from incoming messages using the Desk365 Teams Support Bot.
When an agent creates a ticket from an individual chat or from any message from any channel in Teams using the Desk365 Teams Support Bot, the contact can be designated as the ticket requester, instead of the agent.
In this help center article, we will take you through the steps on how to use this feature in Desk365.
Contact as ticket requester
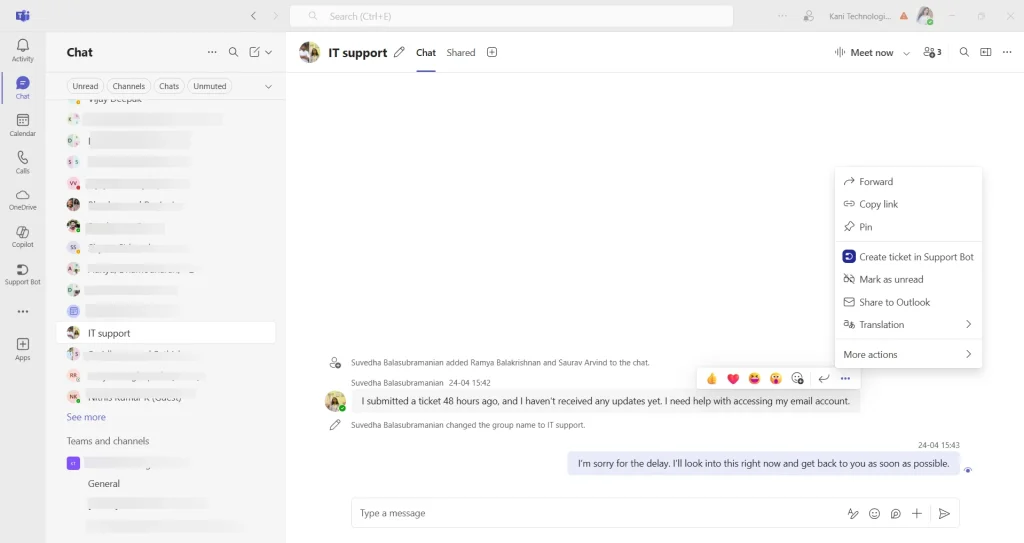
Let’s imagine that ‘Suvedha’ sends a message to the ‘IT Support,’ regarding an issue accessing her email account. With the ‘Create Ticket in Support Bot’ option, ‘IT Support’ can quickly turn this Teams Chat into a ticket, providing an efficient and seamless help desk experience within Microsoft Teams.

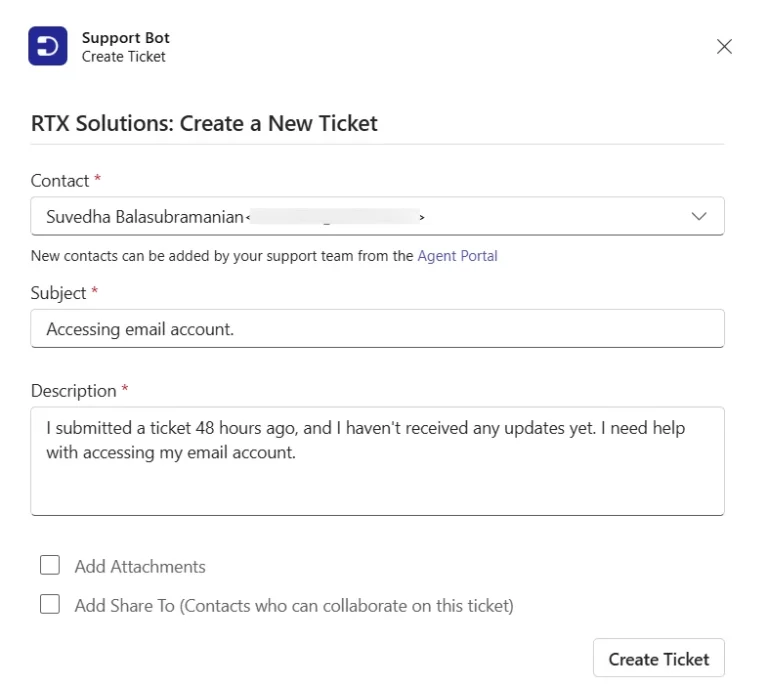
As ‘Suvedha’ is already a ‘Contact’ in the helpdesk, the support agents can easily select her name in the ‘Contact’ field while creating the ticket. This can be done by typing and selecting the correct contact as shown in the screenshot below.

Note: The ‘Contact’ field will be visible only for agents. It will not be visible when end-users try to create tickets this way.
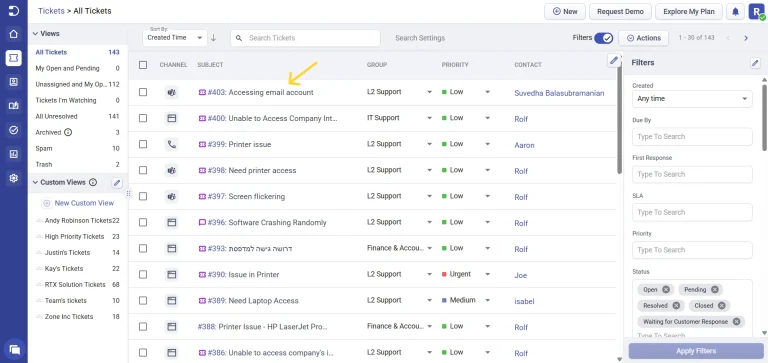
Upon creation of the ticket, you will notice that the designated contact’s name is accurately displayed as the contact for the ticket.

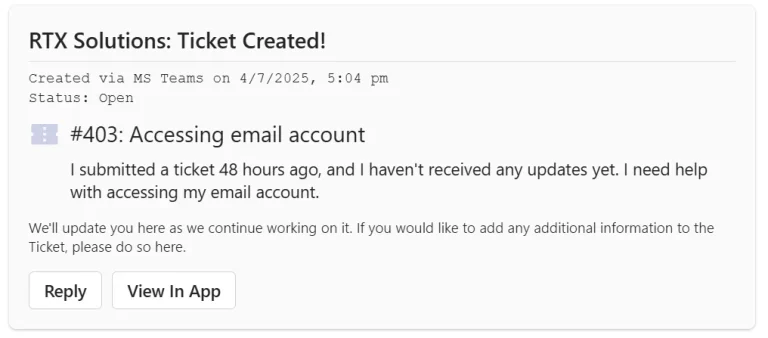
The contact will receive a notification through their Desk365 Teams Support Bot indicating the creation of the ticket.

Note: The Contacts list that you see here is populated in multiple ways. They are automatically created when they submit a ticket through any of the channels such as Email, Microsoft Teams, Support Portal, or Web forms.
If the contact is not yet a part of your helpdesk, new contacts can be added to the system by your support team through the Agent Portal.
Sign up for a 21-day free trial of Microsoft Teams ticketing system beginning today.


