If you’re a business owner, you know how important it is to keep track of your customer interactions. That’s why helpdesk software like Desk365 is so useful.
It allows you to create and manage customer tickets, track customer interactions, and store customer information. However, before you can start managing your customer interactions in Desk365, you need to create contacts and companies.
In this help center article, we’ll discuss about creating companies and contacts in Desk365.
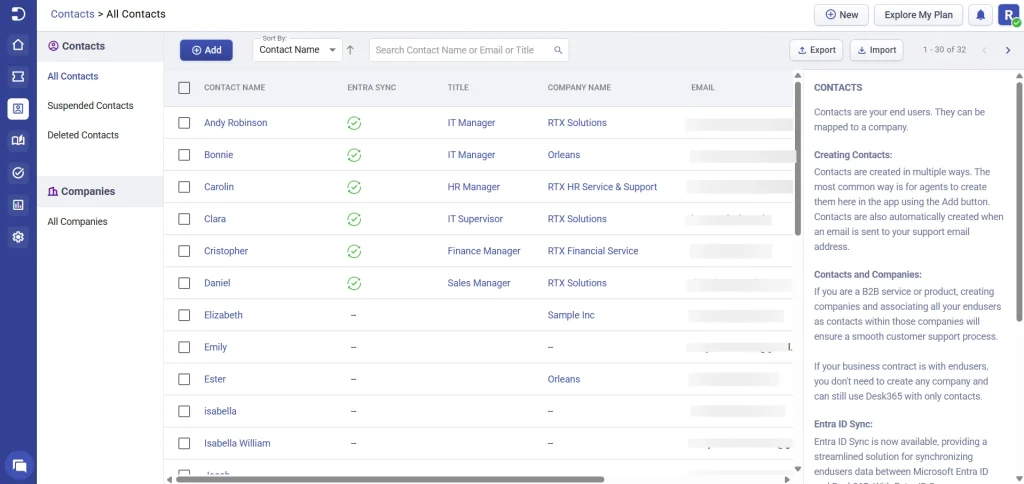
Contacts
Contacts are your end-users. They can be mapped to a company. Contacts are created in multiple ways. The most common way is for agents to create them in the Agent Web Portal using the ‘Add’ button. Contacts are also automatically created when an email is sent to your support email address.
Companies
Companies in Desk365 serve several important functions. When you add a Company here, you’ll also be adding all the email domains that the Company is associated with. The email domains are used to associate appropriate SLAs when tickets are generated.
If you are a B2B service or product, creating companies and associating all your end-users as contacts within those companies will ensure a smooth customer support process.
If your business contract is with end-users, you don’t need to create any company and can still use Desk365 with only contacts.
Desk365 for internal users:
If you’re using Desk365 for internal users, you can add your company and it’s associated email domains by creating a Company.
Desk365 for external users:
If you’re using Desk365 for external users, you can add all your customers’ companies and their associated email domains here.
Adding contacts and companies
Creating contacts and companies in Desk365 is important for several reasons. First, it allows you to keep track of your customer interactions. By creating contacts, you can store customer information, such as their name, email address, and phone number. This information can be used to personalize your customer interactions and provide better support.
Second, creating companies in Desk365 is very useful. The Companies tab typically showcases essential details for each company, such as the company name, address, phone number, and website.
How to create a contact in Desk365
To create a new contact in Desk365, follow these steps:
1) Log in to your Desk365 account.
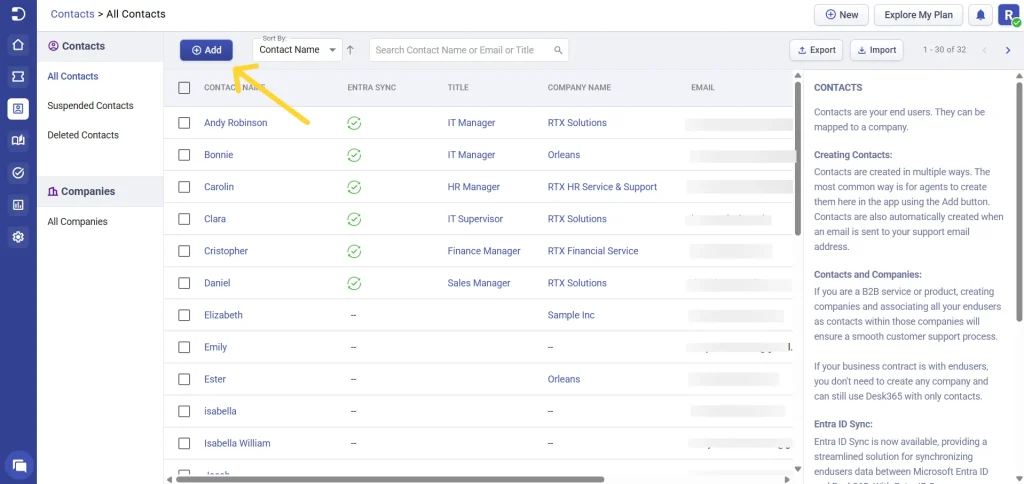
2) Navigate to Accounts > Contacts > All Contacts tab.
3) Click on the ‘Add’ button at the top.
4) Enter the contact’s name, email address, title, phone number, and select the company the contact is associated with.
5) Finally, click on the ‘Save’ button to create this contact.
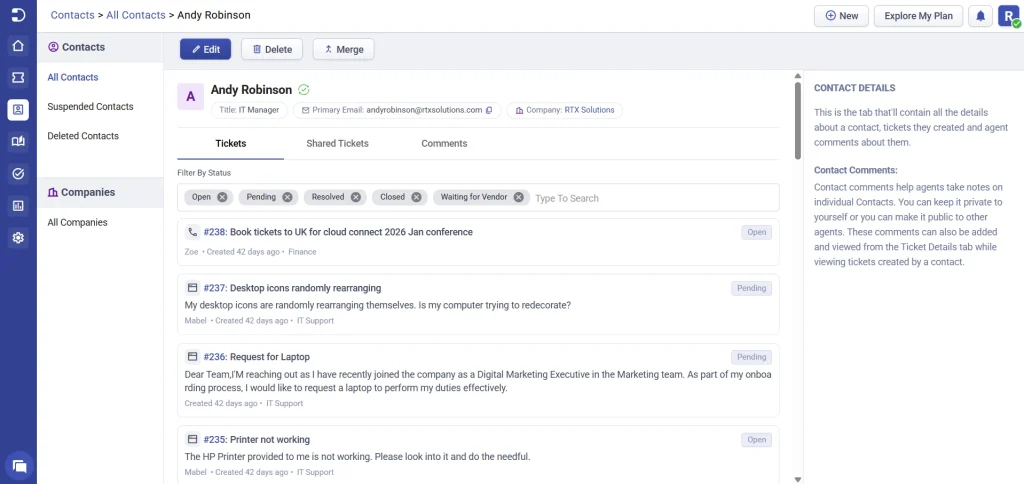
Once you’ve created a new contact, you can view their profile and access all previous interactions with them.
How to create a company in Desk365
To create a new company in Desk365, follow these steps:
1) Log in to your Desk365 account.
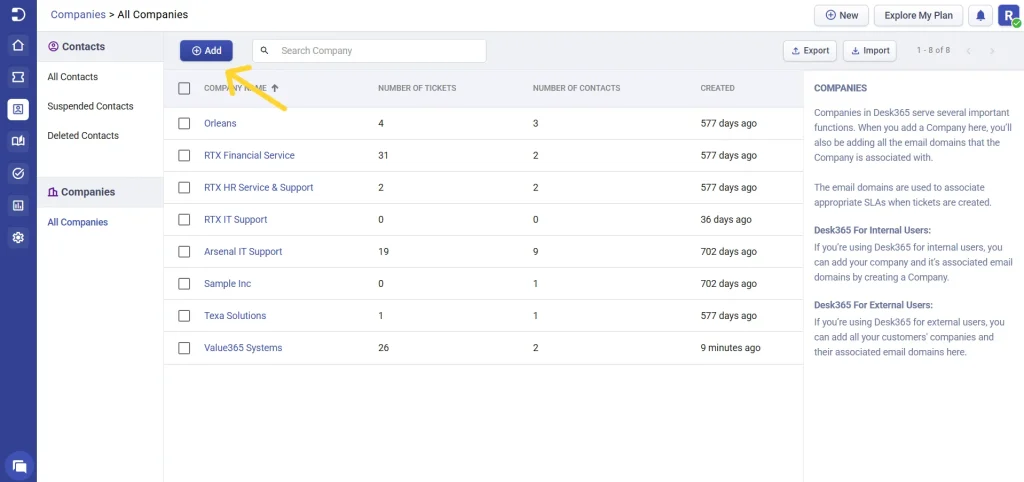
2) Navigate to Accounts > Companies > All Companies
3) Click on the ‘Add’ button at the top.
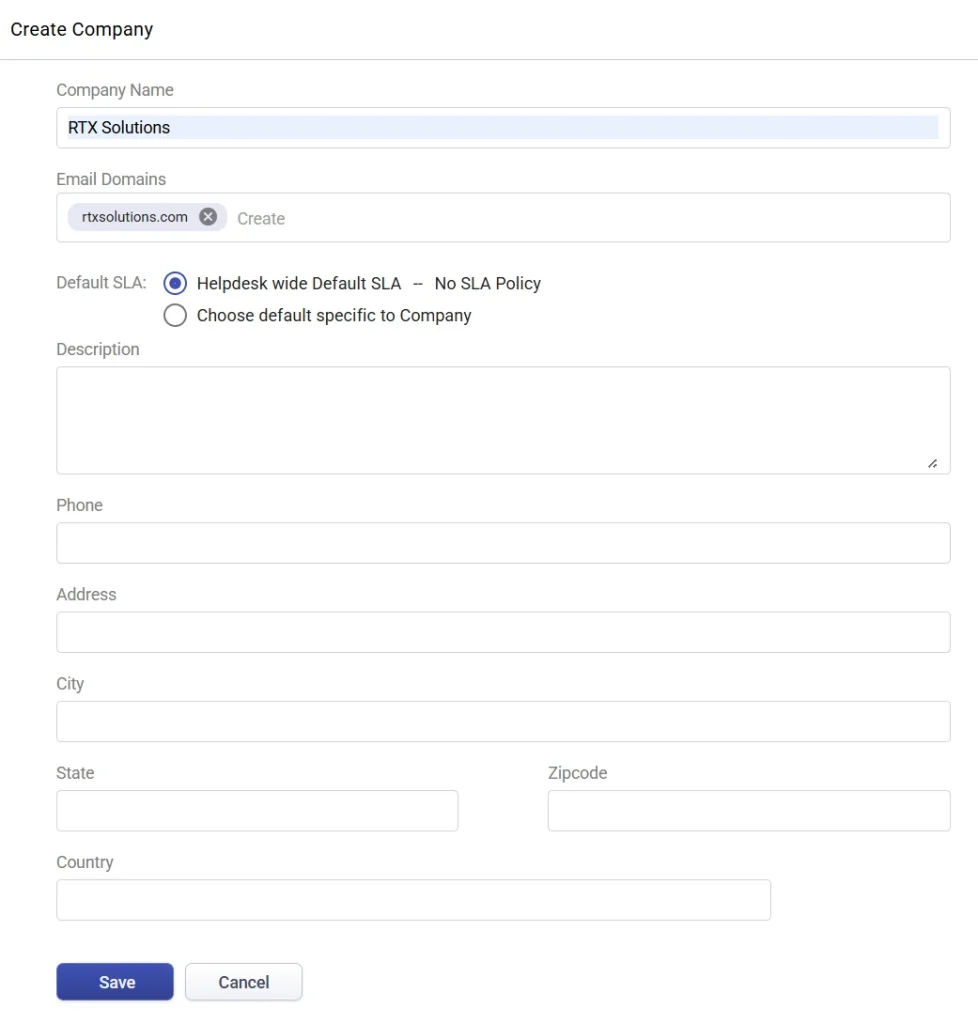
4) Enter the company name, domain, phone number, address, and other relevant information.
5) Finally, click on the ‘Save’ button to create this company.

Once you’ve created the new company, you can view its profile and access all previous interactions with any of its associated contacts.
Creating contacts and companies is an essential part of managing your customer interactions. By creating contacts and companies, you can keep track of your customer information, personalize your customer interactions, and provide better support. For example, if a customer contacts you with a support request, you can quickly pull up their account and see their previous interactions, including any previous support tickets they may have opened. This allows you to provide more informed and efficient support.


