Managing customer information efficiently is just as important as managing support tickets. With the contact fields and company fields in Desk365, you can store richer context about the contacts and companies you support and use that data everywhere, from tickets and automation to notifications and exports.
This guide explains how contact fields and company fields work, how to set them up, and how to use them effectively across departments and real-world support scenarios.
Understanding contact fields and company fields
Before setting anything up, it’s important to understand the difference.
Contact fields, store information about an individual contact, such as their role, phone number, job title, or any custom data you want to track per user.
Company fields store information about an organization, such as company phone numbers, email domains, departments, internal reference URLs, etc.
Managing contact and company fields in Desk365
All contact and company customization starts from the admin settings.
Navigate to, Settings > Admin > Contact Fields or Settings > Admin > Company Fields
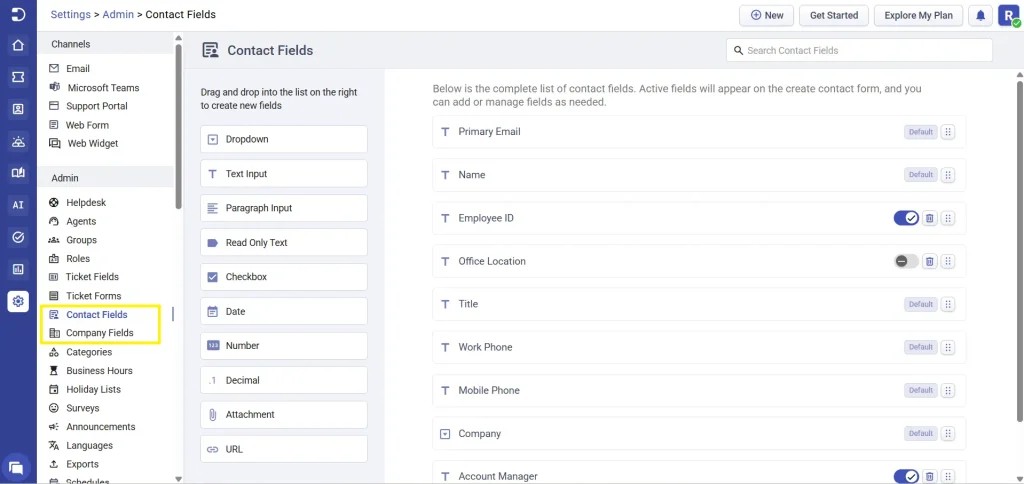
Here, you’ll see:
- A list of available field types on the left
- All existing fields (default and custom) listed on the right
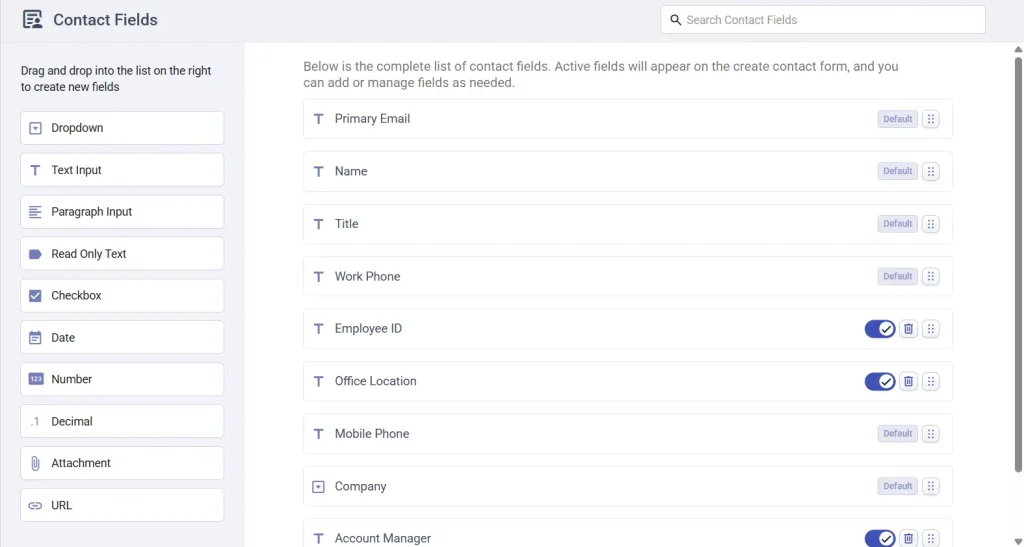

Only active fields appear on new contact or company forms and contact details, meaning agents will collect this information when creating or editing contacts and companies, and will see it directly within contact profiles, ticket details, accounts > contacts and companies tab making this page the central place to control what information is captured and displayed.
In this example, the name, title, employee ID, and office location fields are the required default or custom contact fields. When an agent creates or edits a contact, they are prompted to fill in these details, ensuring that every contact record has consistent and complete information.
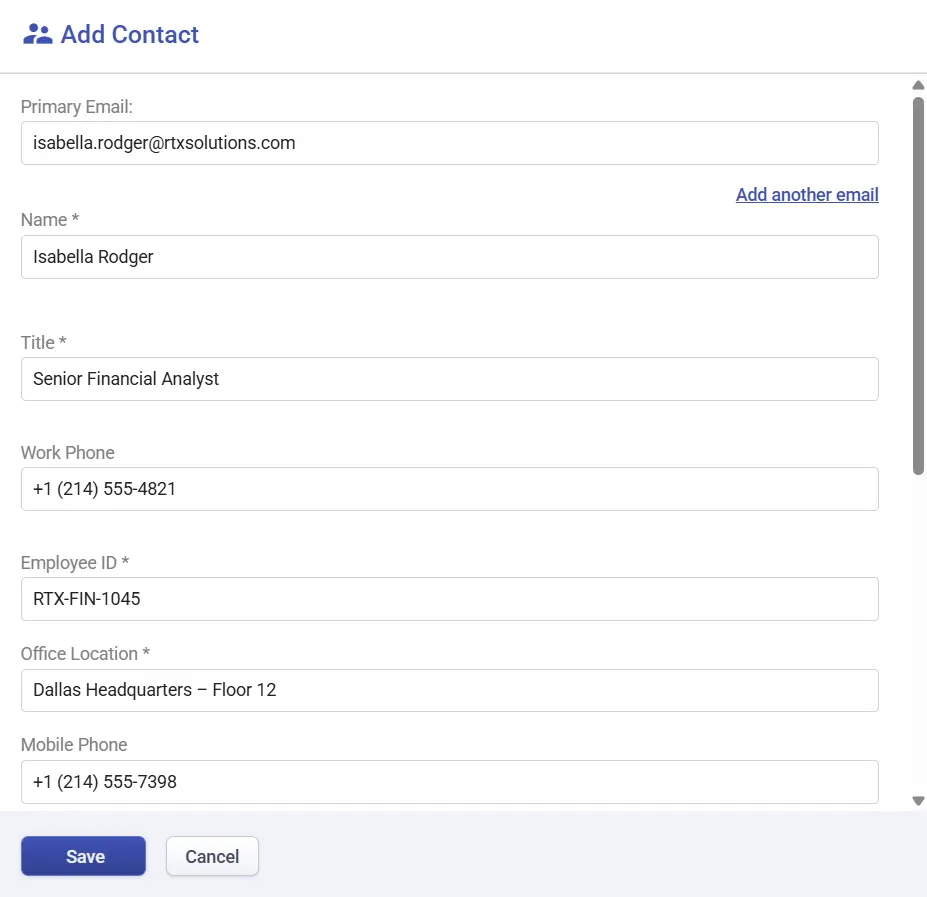
Once saved, these values become visible in the agent portal within the contact profile and ticket details.
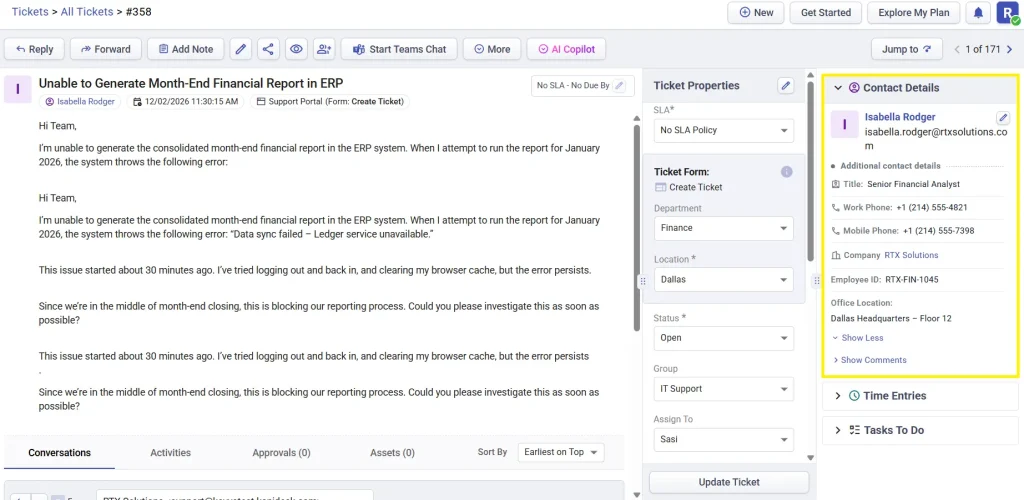
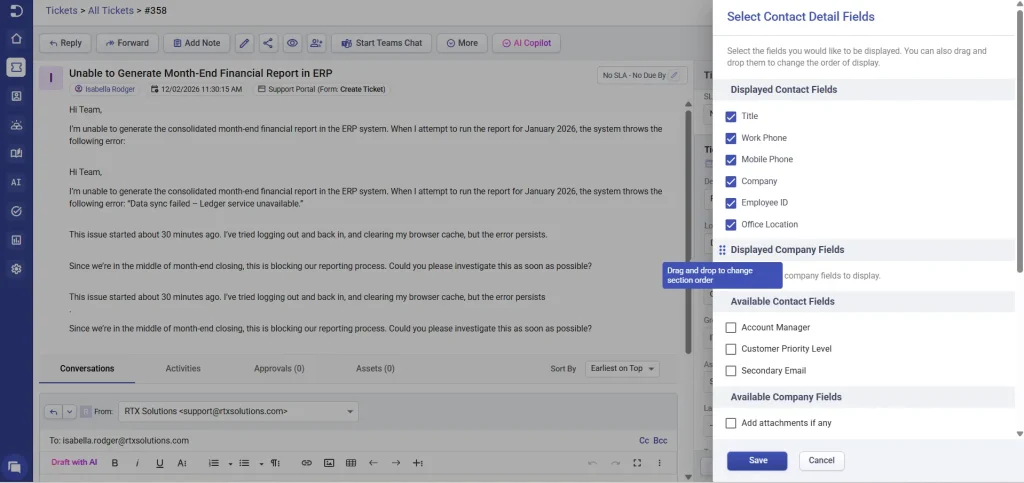
Note: In the ticket details view, agents can customize the Contact Details panel by hovering over the contact details and clicking ‘Edit Contact Details Tab’. This opens the ‘Select Contact Detail Fields’ panel, where you can choose which contact fields and company fields are displayed along with the available contact and company fields. Fields are organized into separate sections and can be reordered using drag and drop, allowing you to move individual fields or entire sections to control how information appears in the ticket view. This makes it easy to surface the most relevant contact and company information at the top for faster access.
Contact fields are shown in the support portal only if the “Display to customer” option is enabled for that field, allowing you to control which information customers can view or update when accessing their profile or submitting requests. In addition, the Label for API is used to reference and update the field through APIs and Microsoft Entra ID sync, and once set, this label cannot be edited.
Creating contact fields
When creating a contact field, you choose the field type that best matches the data you want to capture, such as text, dropdown, checkbox, date, URL, or attachment.
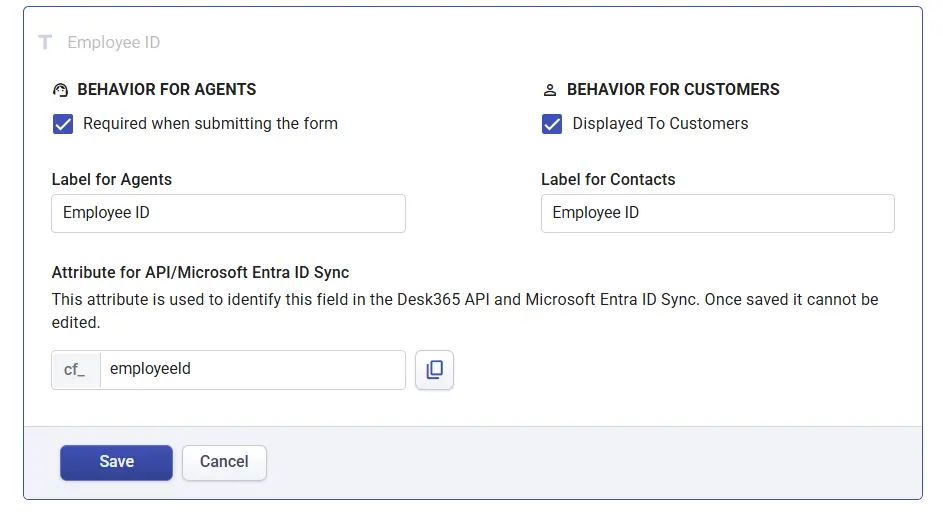
Once added, each field can be configured with:
- A label for agents
- A label for contacts (if visible to customers)
- A label for API, used to reference and update the field through APIs and Microsoft Entra ID sync. Once saved, this label is permanent and cannot be modified.
- Required or optional status
- Visibility rules that let you activate or deactivate a field. When a field is deactivated, it is no longer visible in contact forms, contact details, contact’s profile in the support portal, or as a column in the Accounts > Contacts/Companies tables. In addition, inactive fields cannot be referenced or updated through the API, ensuring that disabled data points are fully excluded from use across Desk365.
For example, a “Customer Priority Level” field may be agent-only and must be required, while “Phone Number” may be visible to customers.
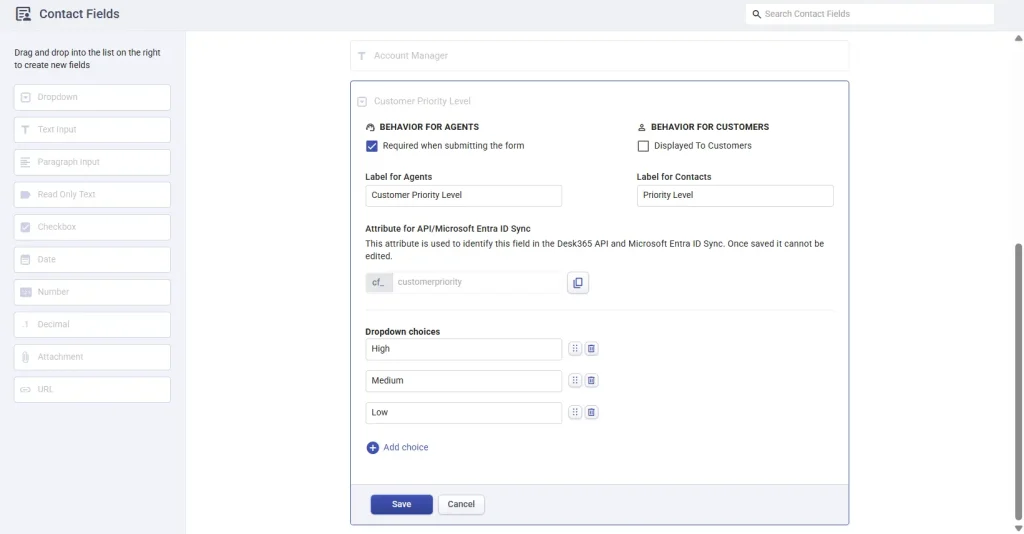
This allows you to collect sensitive or internal information without exposing it to the contacts.
Creating company fields and their unique behavior
Company fields follow a similar setup process, but they are always agent-facing.
Similar to contact fields, you can:
- Mark company fields as required
- Label them for agents
- A label for API, used to reference and update the field through APIs and Microsoft Entra ID sync. Once saved, this label is permanent and cannot be modified.

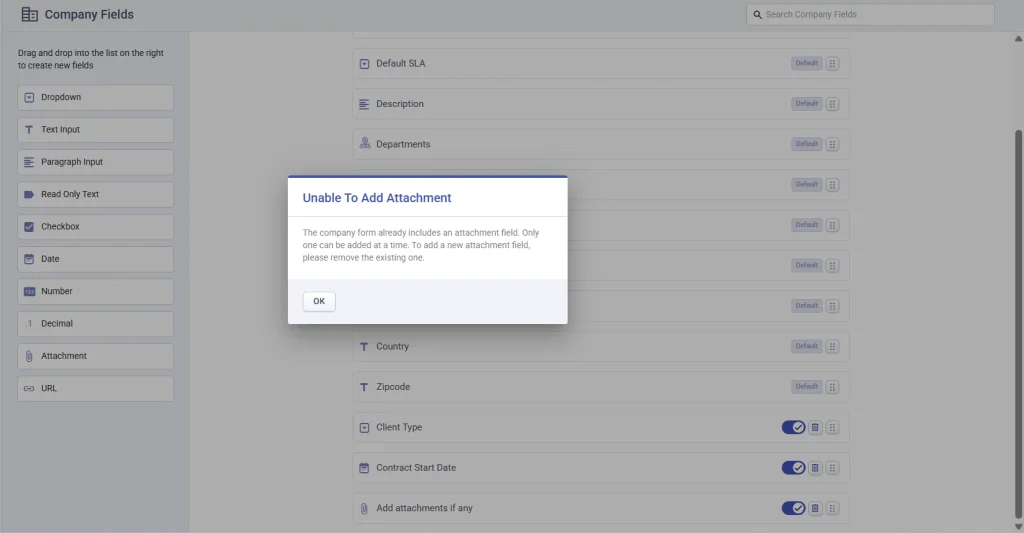
Important note: You can add only one attachment field to contact fields and company fields. This ensures clarity and avoids confusion when uploading files.
If an attachment field already exists, Desk365 will prevent adding another and display a clear warning message.
Where contact and company fields appear across Desk365
Once fields are active, they automatically appear across multiple areas of Desk365.
Agents can access and use them when:
- Creating a new contact
- Creating a new company
- Adding a contact while creating a new ticket
- Adding a contact from an existing ticket via ‘Share To’
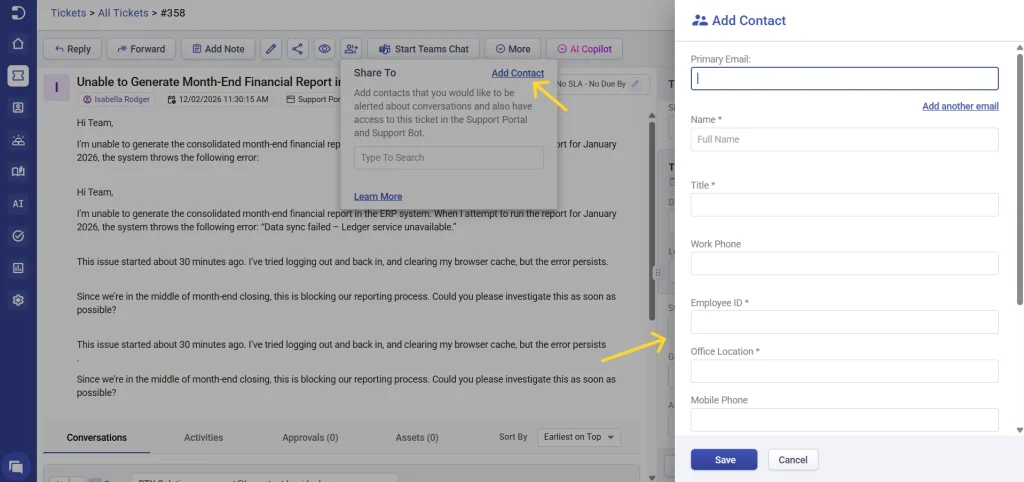
Inside the ticket details view, agents see a combined panel showing both contact and company fields, giving full context without leaving the ticket.
Editing contact and company information in real time
Contact and company information doesn’t need to be perfect at creation; it can be updated anytime.
Editing contacts
Agents can edit contact values from:
- Accounts > Contacts
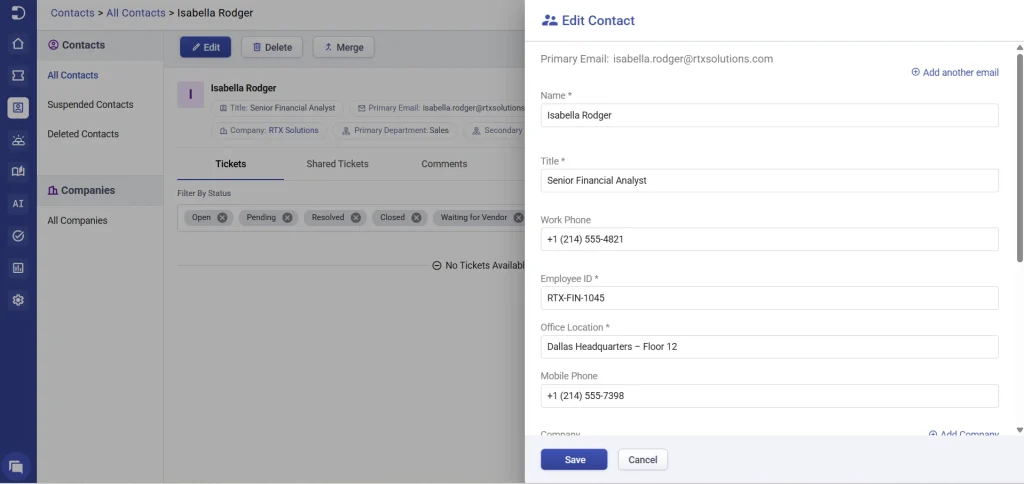
- Ticket Details > Contact Details > Edit Contact.

Editing companies
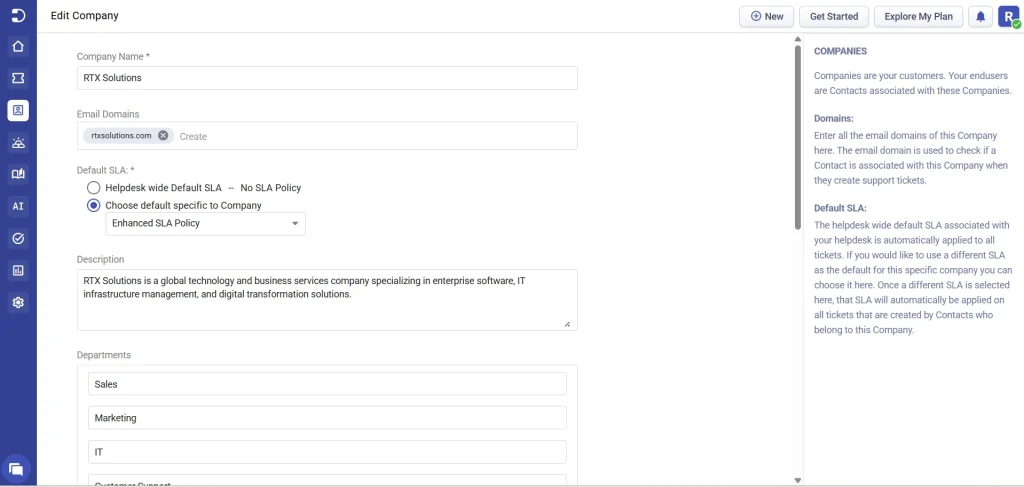
Company information can be edited from Accounts > Companies. This includes both default company details and any custom company fields you’ve created.
Desk365 respects department-level access, which means agents will only see and edit company fields that belong to departments they have access to. This prevents sensitive or irrelevant data from being exposed across teams.
Imagine a company called RTX Solutions that is supported by multiple internal departments such as IT, Finance, and HR. Each department manages different types of company information; IT tracks details like network type and managed devices, Finance handles billing-related fields such as billing cycle and invoice contacts, and HR maintains sensitive information like compliance documents and employee headcount.
When an agent opens Accounts > Companies to edit RTX Solutions, Desk365 only displays the company fields that belong to the departments the agent has access to, along with common company fields shared across teams.
This means an IT agent will not see or edit Finance or HR-related fields, and vice versa. By limiting visibility in this way, Desk365 ensures sensitive information stays protected, reduces clutter for agents, and allows multiple teams to work on the same company without overlapping or interfering with each other’s data.
Customizing contact and company lists
Desk365 allows you to customize how contact and company lists are displayed.
From, Accounts > Contacts or Accounts > Companies you can choose which columns are visible, and re-order columns for better readability
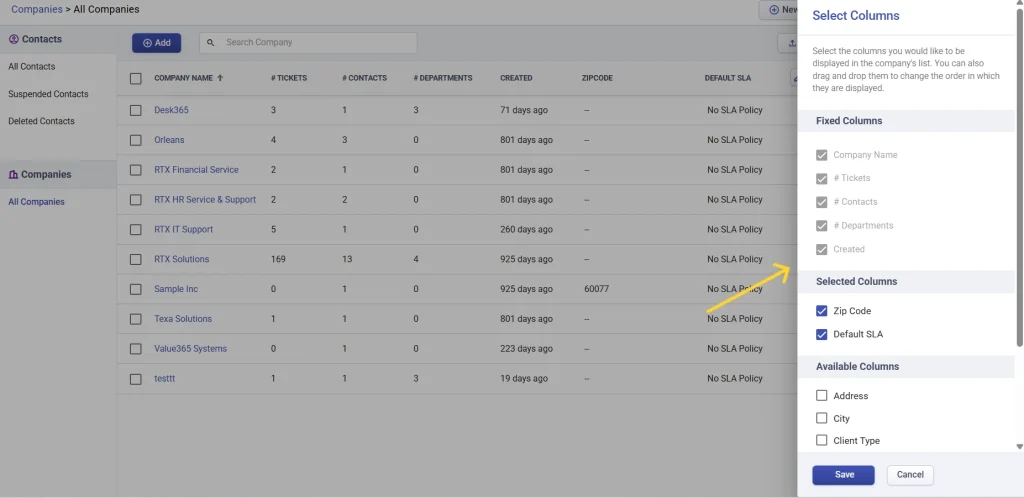
These settings apply consistently across all contacts, all companies, suspended contacts and deleted contacts view.
This helps admins and managers tailor views for audits, reviews, or daily operations.
Using contact and company fields in automation rules
Custom fields become even more powerful when used in automation.
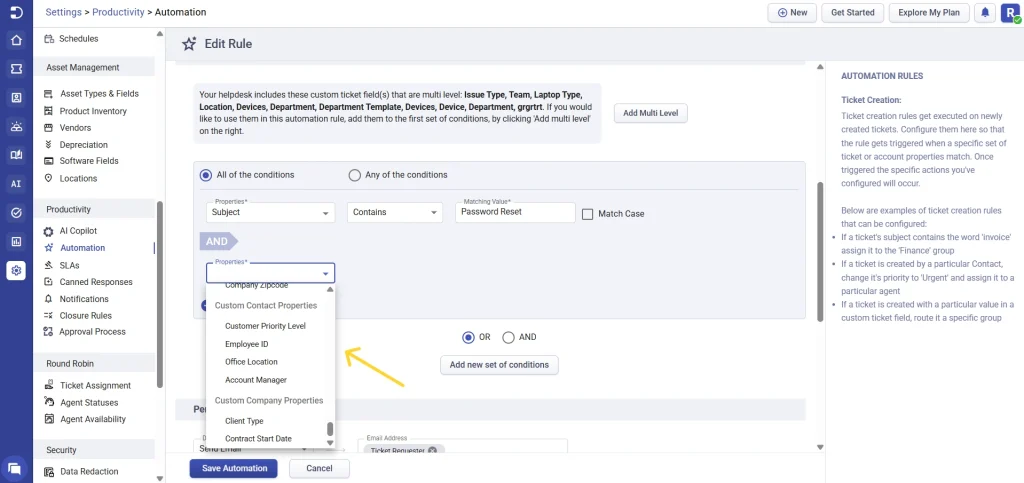
Under > Settings > Productivity > Automation Rules > Conditions, you can use custom contact fields and custom company fields.
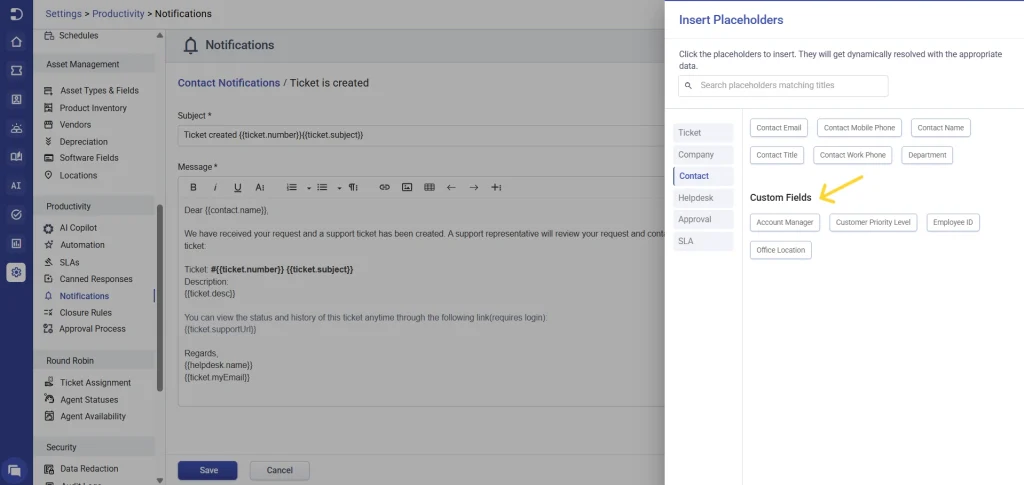
Personalizing notifications with contact and company data
All default and custom contact and company fields are available as placeholders in contact and agent notifications.
This allows you to:
- Personalize email responses
- Include company-specific details
- Reference custom data dynamically
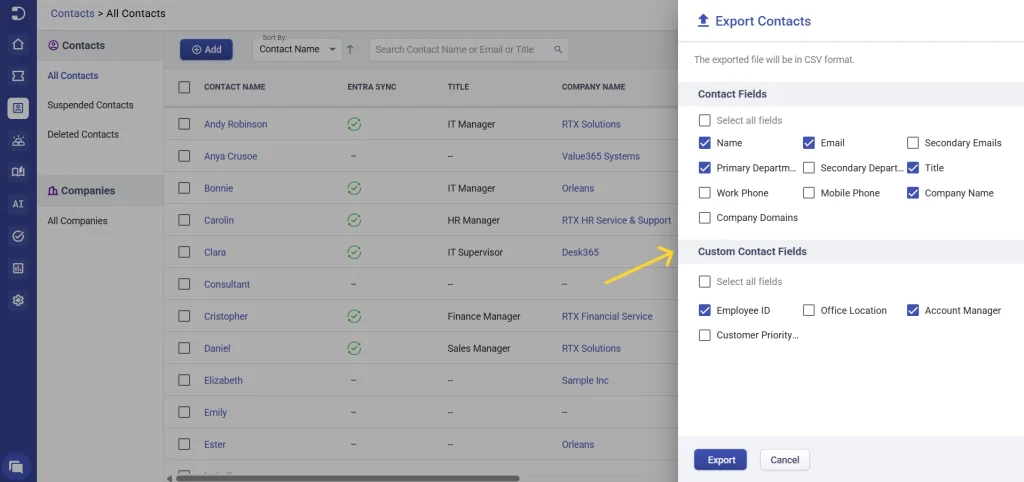
Exporting contact and company data
Desk365 allows you to export custom contact and company information for reporting and analysis. Any custom contact or company fields you’ve created can be included when exporting data, so no additional configuration is required.

Contact fields and company fields in Desk365 help you move beyond basic ticket data. They give your agents the context they need, reduce back-and-forth, and enable smarter automation and communication.
When set up thoughtfully, these fields become the foundation for scalable, organized, and efficient support operations.