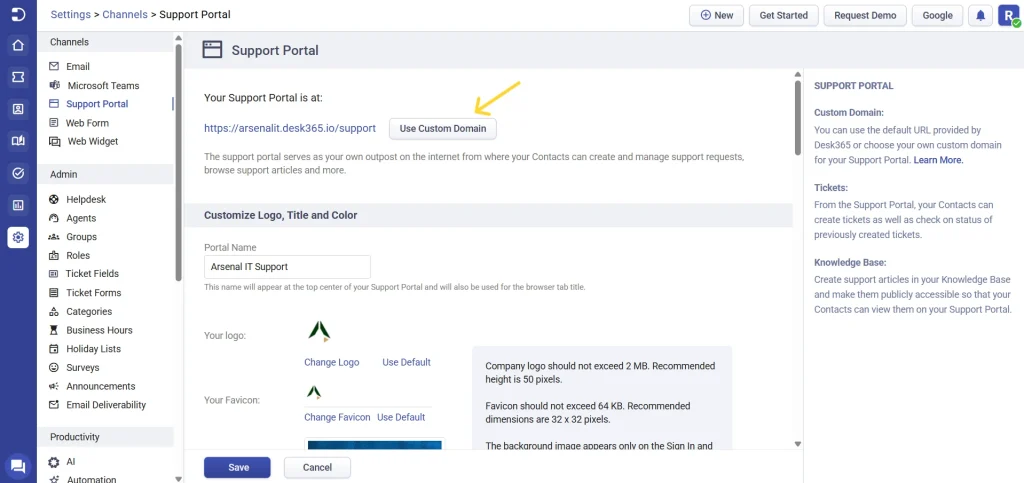
By default, your Desk365 support portal URL will look something like this:
“https://arsenalit.desk365.io/support“
While this URL works well, you can change it and have a custom domain URL to offer a more professional appearance that aligns better with your brand that looks something like the below:
“https://support.arsenalit.com/support“
This guide will walk you through the steps to set up a custom domain for your support portal.
Step-by-step guide to setting up a custom domain
- To begin, log in to your Desk365 agent portal. Navigate to Settings > Channels > Support Portal
- Click on “Use Custom Domain”. This option will allow you to enter the custom domain that you want to use for your support portal
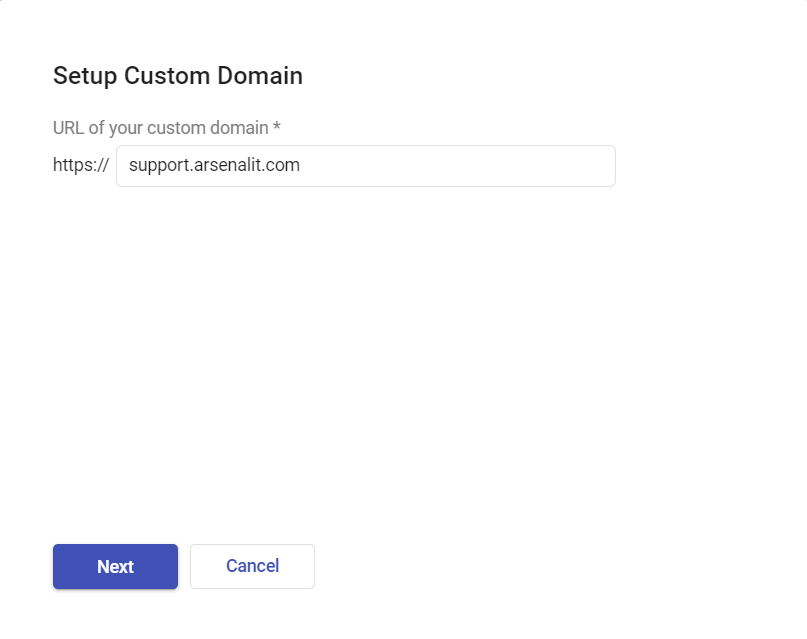
- In the provided field, type in your desired custom domain. This is the URL that your customers will use to access your support portal and click Next.
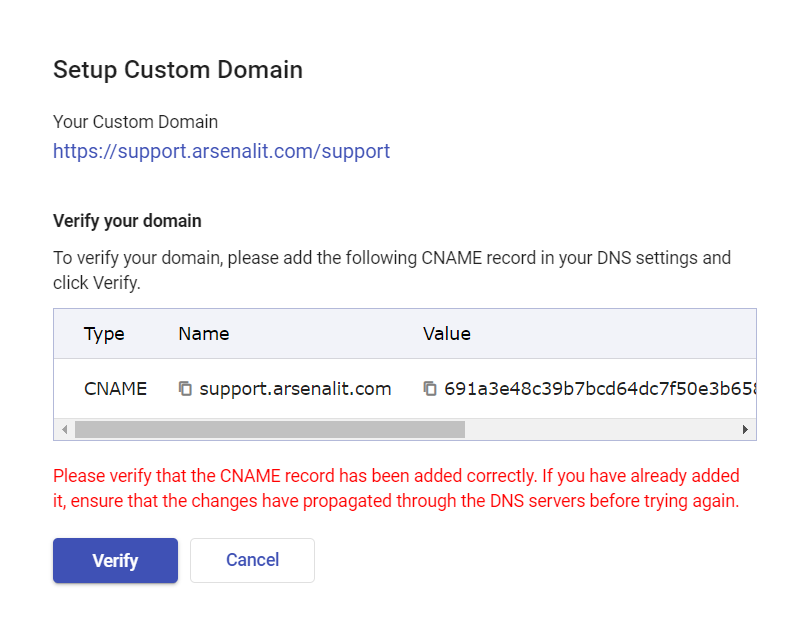
- You will now find the CNAME record to add in your DNS settings
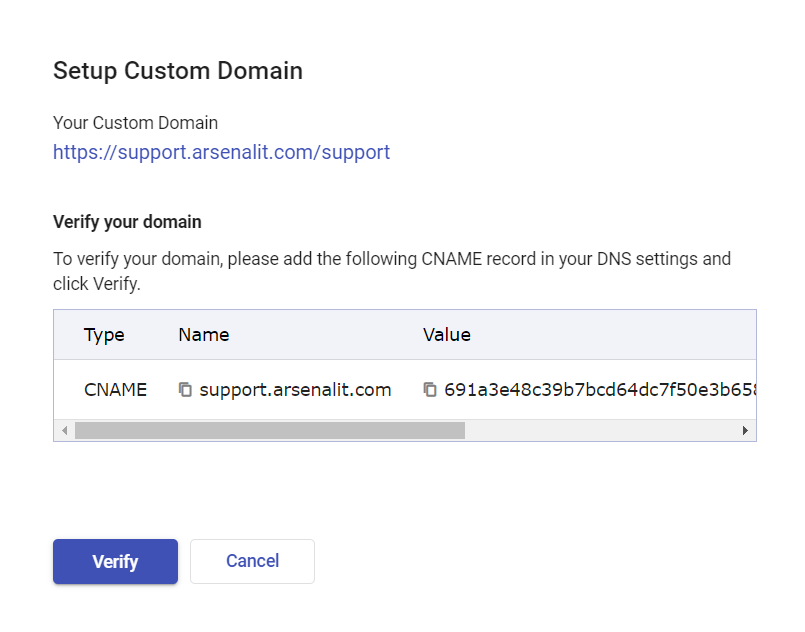
Configure your DNS settings
- Log in to the account where your domain is registered.
- Navigate to the DNS setup section where you can view and manage your DNS records.
- Add the CNAME record to your DNS setting by copying and entering the Name and the CNAME value from the Desk365 agent portal.
- Head back to the Desk365 agent portal and click verify.
Wait for DNS propagation
DNS changes can take some time to propagate. The time it takes for the DNS settings to update varies depending on your hosting provider. This can range from a few minutes to up to 48 hours (about 2 days).
Verify and Troubleshoot
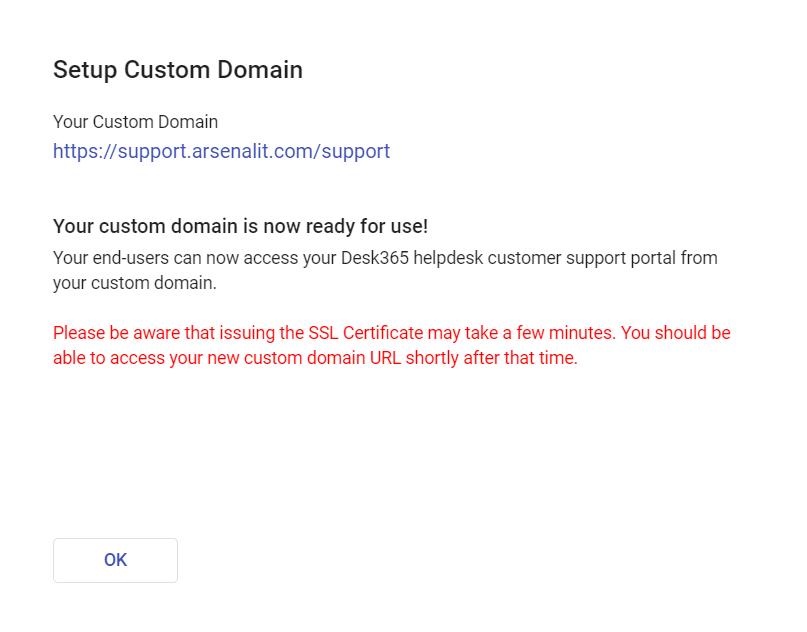
Once verified, your custom domain will be ready to use. Your customers can now access your Desk365 support portal through your custom domain.
Note: It may take a few minutes to issue the SSL Certificate. You should be able to access your new custom domain URL shortly after that.
If the setup is unsuccessful, double-check to make sure the CNAME record is correct. If you have already added the record correctly make sure the changes have propagated through the DNS servers and then click on the Verify button in the Desk365 portal.
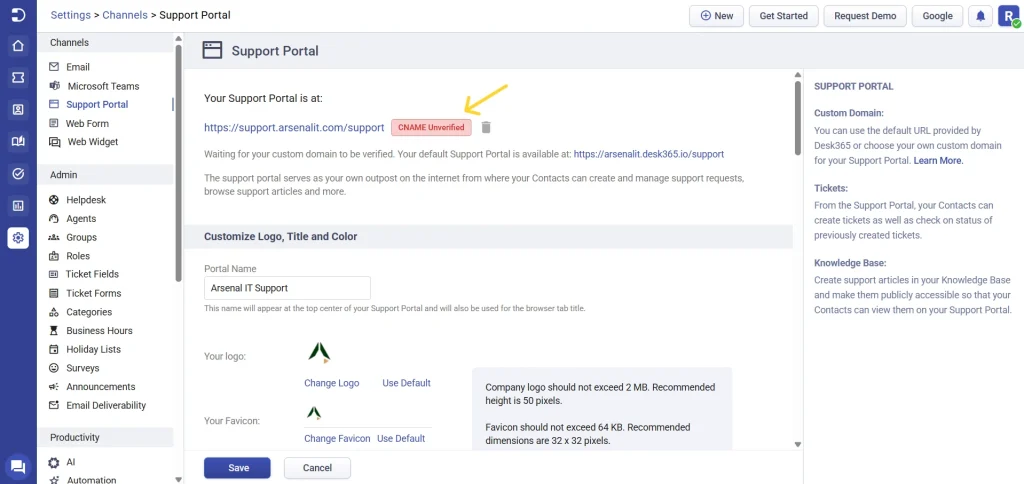
You will also notice the “CNAME Unverified” label until the custom domain is verified. However, your default support portal URL will still be available during this time.
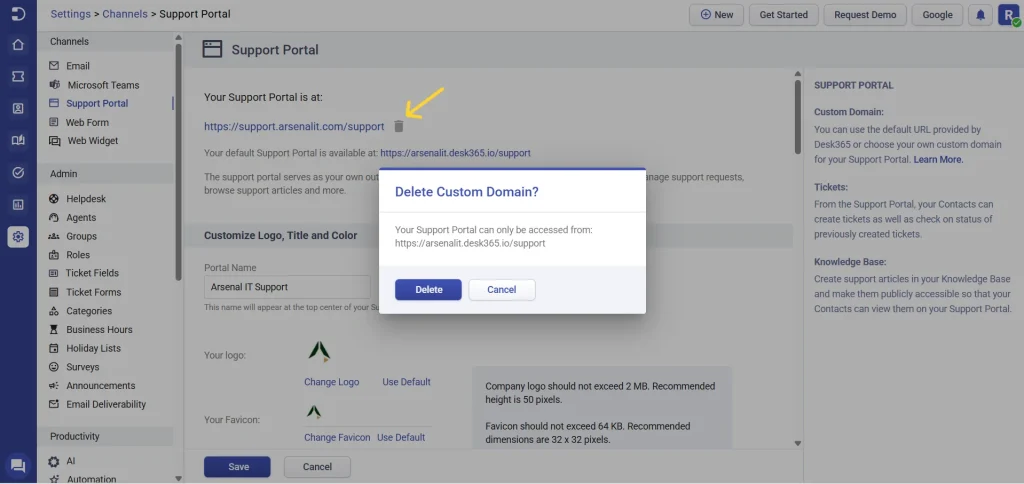
If needed, you can delete the custom domain by simply clicking on the delete icon next to it.
By following these steps, you can successfully set up a custom domain for your Desk365 support portal, giving your customers a seamless and branded support experience.